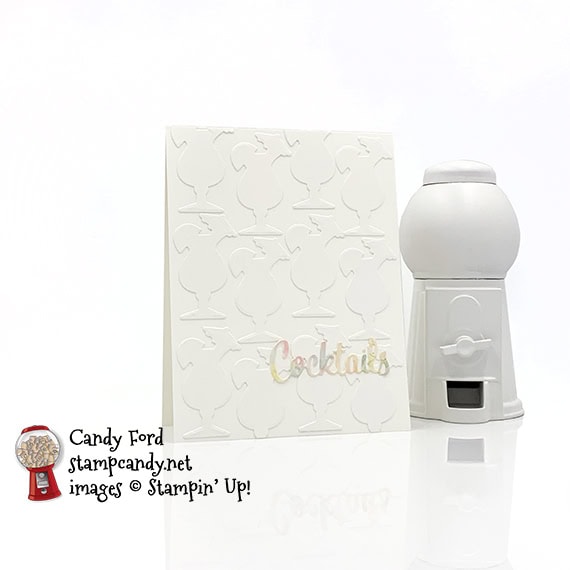
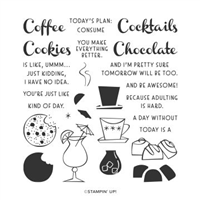
Have you seen the Nothing’s Better Than Bundle yet? It’s the Nothing’s Better Than stamp set and Love You More Than Dies, and you save 10% if you buy them together in a bundle. And of course, you want both anyway, right? I admit I’m not a coffee or cocktail drinker, but I can consume massive amounts of chocolate and cookies!
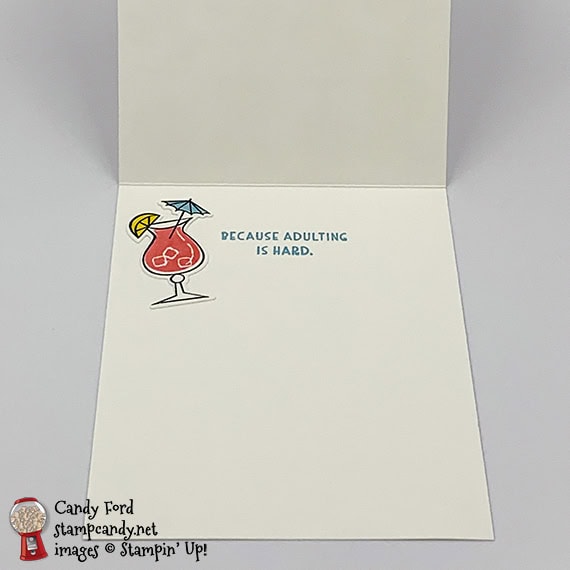
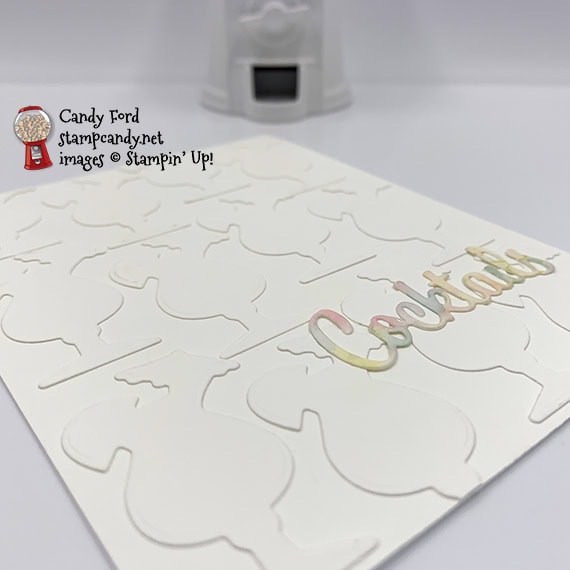
Today’s card looks like it has been embossed with an embossing folder, but it’s faux embossing. I actually die cut the pieces from the same color card stock as the base, and glued them on. Pretty cool, eh? I did stamp one of the cocktails and intended to glue it onto the front in place of one of the white ones, but it came out much bolder than the colors on the die cut sentiment, so I glued in onto the inside of the card.
If you are reading this in email, some photos may appear blurry, or may not appear at all. Please click here to see the post on my blog.
S nothing’s better nothing’s better nothing’s better nothing’s better
Here’s the bundle:
S
Here’s what I made:
S
Here’s what I did:
Cut and scored with my paper trimmer:
Whisper White Thick card stock (CS) cut to 4-1/4″ x 11″, then scored in half at 5-1/2″
Stamped with the Nothing Better Than stamp set:
sentiment in Balmy Blue ink onto the inside of the card base
cocktail in Tuxedo Black Memento ink onto a scrap of Whisper White CS
drink in Flirty Flamingo ink
lemon in Daffodil Delight ink
umbrella in Balmy Blue ink
Colored using a Water Painter filled with water:
a scrap of Shimmery White CS using Flirty Flamingo, Balmy Blue, and Daffodil Delights inks
allow to dry completely before die cutting
Cut using the Love You More Than Dies:
about a dozen cocktails from a scrap of Whisper White Thick CS
the stamped cocktail
front sentiment from the watercolored piece
Assembled the card:
burnished the fold in the card base with a Bone Folder
Whisper White Thick CS cocktails glued onto the front of the card base
die cut sentiment glued over the Whisper White Thick CS cocktails
stamped cocktail glued onto the inside of the card base
S
Here are today’s colors:
You can click on each one to see all the products that come in that color!
Click on these images for more details and to purchase. If you are reading this post in email, the product images may not show up. Please click hereto see the post on my blog.
Gift Certificates are available in any U.S. dollar amount from me. Contact mefor details.
Have you shopped from me within the past year? Join my private VIP Facebook groupfor exclusive project tutorials and more!
Join my team and enjoy a 20% discount (or more) on all your purchases! You choose $125 in products and pay only $99, and get free shipping! No obligation! No selling required!
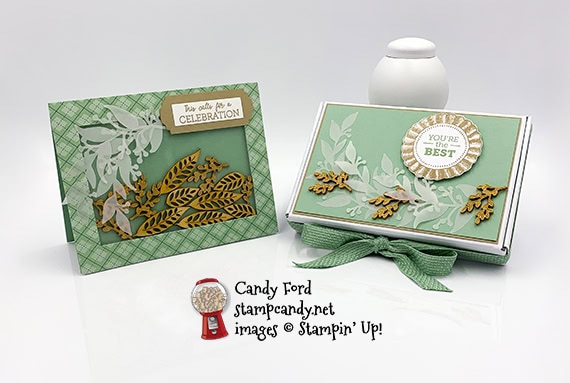
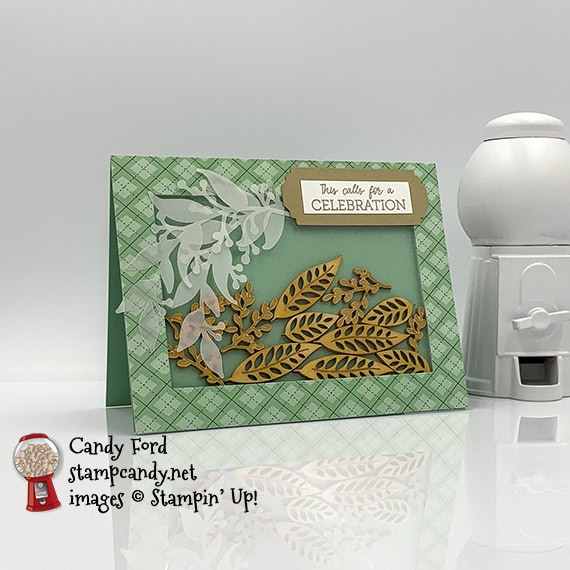
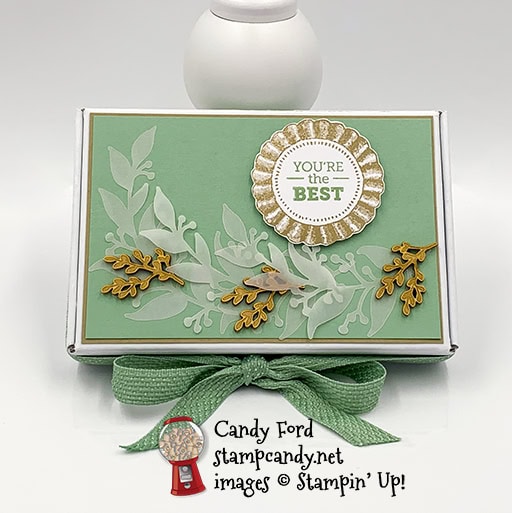
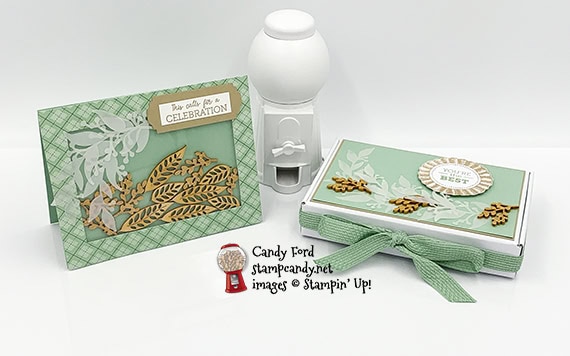
Welcome to the August 2020 APPT Blog Hop! This month we’re sharing alternate projects to make with the World’s Greatest kit. I used a Mini Paper Pumpkin Box, Mint Macaron ribbon, and In Good Taste Elements along with the kit to create a shaker card and gift box. The box is the perfect size for note cards. The colors in the kit are pretty bold and bright, and I wanted to make something calmer, so I used the Mint Macaron and white from the kit and added Crumb Cake. And I used glue and Stampin’ Seal+ in addition to the glue dots and dimensionals from the kit, but you don’t have to.
Be sure to hop around to all the stops to see all the great alternate projects shared by this talented group of stampers!
If you are reading this in email, some photos may appear blurry, or may not appear at all. Please click here to see the post on my blog.
S August 2020 APPT August 2020 APPT August 2020 APPT August 2020 APPT
Here’s what I made:
S
Here’s what I did:
Cut and scored with my paper trimmer:
Mint Macaron card stock (CS) cut to 5-1/2″ x 8-1/2″, then scored in half at 4-1/4″, to create the card base
Crumb Cake CS layer cut to 5-3/8″ x 3-5/8″
Mint Macaron CS layer cut to 5-1/4″ x 3-1/2″
Crumb Cake CS strip cut to 1″ x 3″
Whisper White CS cut to 5-1/4″ x 4″ for the inside of the card base
Stamped with the World’s Greatest stamp set:
card sentiment in Crumb Cake ink onto a scrap of Whisper White CS, then trimmed it down using my paper trimmer (It’s about 2″ x 9/16″.)
round ribbon in Crumb Cake ink onto one of the larger white die cut circles from the kit
box sentiment in Mint Macaron ink in the center of the Crumb Cake round ribbon
Cut using the Lovely Labels Pick a Punch:
both ends of the Crumb Cake CS strip
Cut using Paper Snips:
fussy cut around the Crumb Cake round ribbon
trimmed the ends of the ribbon after tying the bow on the box
Assembled the card:
burnished the fold in the card base with a Bone Folder
a clear piece from the kit adhered onto one side of a foam rectangle, also from the kit
a plaid frame from the kit adhered over the clear piece
assorted pieces from the In Good Taste Elements laid onto the front of the card base, in one layer but clustered in the center
stuck the other side of the foam rectangle onto the card front
sentiment glued onto the punched Crumb Cake CS piece
Crumb Cake piece adhered onto the card front using Stampin’ Seal+
2 vellum pieces from the kit adhered onto the card front using glue dots and glue
Note: I used only a couple of glue dots where they wouldn’t show. I applied a small amount of glue to a few of the leaves and spread it with my finger, so it wouldn’t show through.
Whisper White CS glued onto the inside of the card base (I had not done this yet when I took the photos.)
Assembled the box:
burnished the folds in the box with a Bone Folder and folded to assemble
Crumb Cake CS layer glued onto the top of the box
Mint Macaron CS layer glued onto the Crumb Cake CS layer
3 vellum pieces glued onto the Mint Macaron CS layer, using small amounts of glue spread onto just a few of leaves
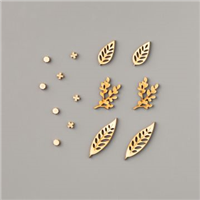
3 wooden elements tucked into the vellum pieces and adhered using glue dots
round ribbon/sentiment adhered onto the Mint Macaron CS layer using Stampin’ Dimensionals
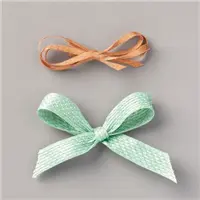
Mint Macaron ribbon (about a yard or so) adhered onto the back and two sides of the box using Stampin’ Seal + (centering it on the back) then tied in a bow in the front
Note: Untie the bow to open the box. The ribbon will stay attached to the box around 3 sides.
S
Here’s the August 2020 APPT Blog Hop:
S
Here are today’s colors:
You can click on each one to see all the products that come in that color!
Click on these images for more details and to purchase. If you are reading this post in email, the product images may not show up. Please click hereto see the post on my blog.
Gift Certificates are available in any U.S. dollar amount from me. Contact mefor details.
Have you shopped from me within the past year? Join my private VIP Facebook groupfor exclusive project tutorials and more!
Join my team and enjoy a 20% discount (or more) on all your purchases! You choose $125 in products and pay only $99, and get free shipping! No obligation! No selling required!
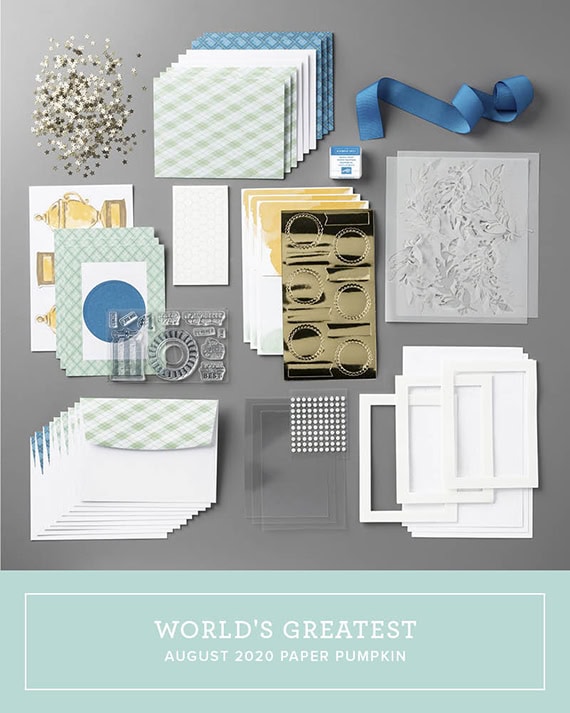
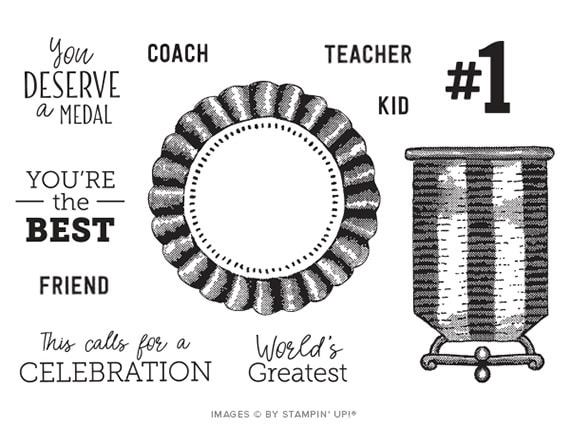
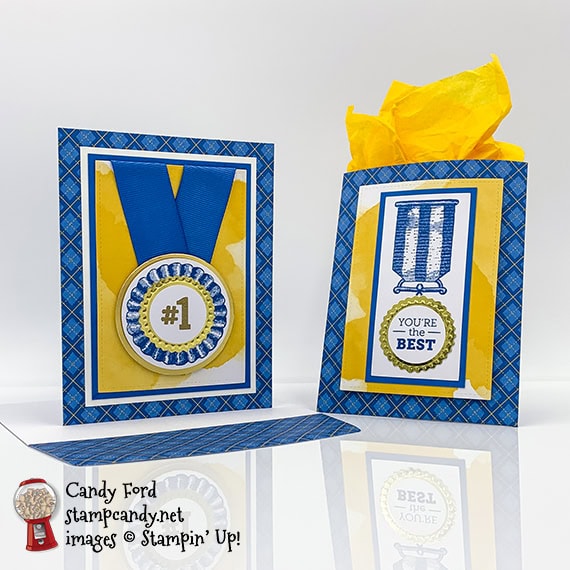
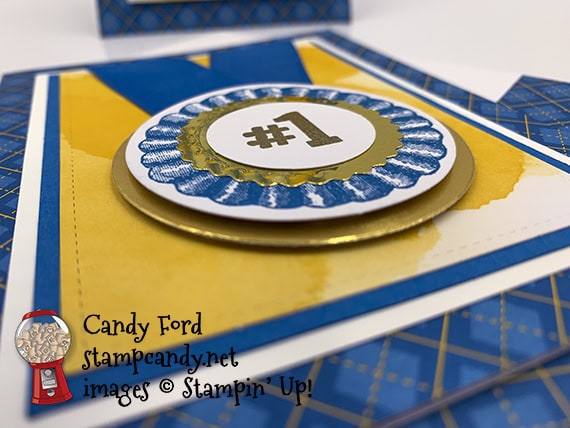
Welcome to the August 2020 PPP Blog Hop! This month’s kit is called World’s Greatest, and it’s all about celebrating the heroes in our lives. You can celebrate a teacher, friend, coach, kid, or anyone else you think is the greatest. For my projects, I used the kit along with some extra card stock to create a card and gift bag. I used the ribbon on the card to make it look more like a race medal than a blue ribbon prize. My husband used to be a runner and triathlete, so there’s quite a collection of these medals in our house. I used glue and Stampin’ Seal for my projects, but you can absolutely use the glue dots that come with the kit. You could also use Stampin’ Seal+ or Tear & Tape.
Be sure to hop all the way around to all the stops so you can see all the great alternative projects made with this fun kit by this talented group.
If you are reading this in email, some photos may appear blurry, or may not appear at all. Please click here to see the post on my blog.
S August 2020 PPP August 2020 PPP August 2020 PPP August 2020 PPP
Here’s what I made:
S
Here’s what I did:
Cut and scored with my paper trimmer:
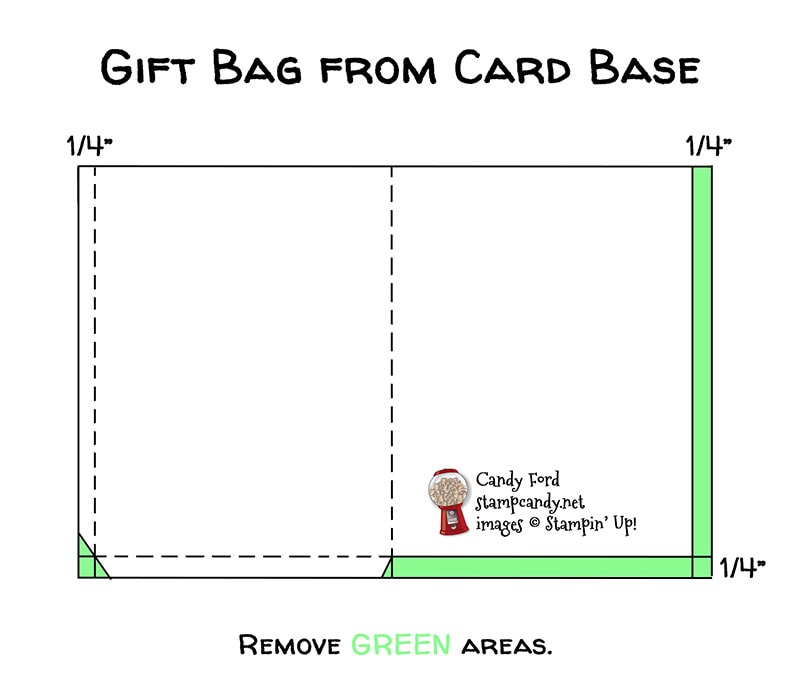
blue card from the kit scored 1/4″ from one end and cut 1/4″ from the other end
same blue card scored 1/4″ from the bottom, then trimmed according to the diagram below
Whisper White CS layer cut to 3-1/2″ x 4-7/8″
Pacific Point CS layer cut to 3-1/4″ x 4-5/8″
Pacific Point CS layer cut to 2″ x 4″
Stamped with the World’s Greatest stamp set:
round ribbon in Pacific Point ink onto one of the larger white die cut circles
long ribbon in Pacific Point ink onto one of the larger white die cut rectangles
“You’re the BEST” in Pacific Point ink onto one of the smaller white die cut circles
“#1” in Versamark ink onto one of the smaller white die cut circles, then heat embossed in gold
Cut using the Layering Circle Dies:
a scrap of Gold Foil Sheet
OR you could ink the edges of one of the large blue round die cuts from the kit in Versamark ink and heat emboss in gold
Assembled the card:
burnished the fold in the card base with a Bone Folder
Whisper White CS layer glued onto the front of the card base
larger Pacific Point CS layer glued onto the Whisper White CS layer
piece of ribbon folded in half and adhered onto a yellow die cut layer, folding the ends over the top of the layer, using Stampin’ Seal
heat embossed small circle adhered onto a gold circle using Stampin’ Seal
gold circle adhered onto the large round white die cut, centered on the stamped ribbon, using Stampin’ Seal
large round white die cut adhered onto the gold die cut circle using Stampin’ Dimensionals
gold circle adhered onto the yellow die cut layer, over the fold in the ribbon, using Stampin’ Dimensionals
Assembled the bag:
burnished the folds in the card base with a Bone Folder
1/4″ tabs folded in and glued onto the inside of the opposite side of the card base, to form the bag
small stamped circle adhered onto a gold circle using Stampin’ Seal
gold circle adhered onto the large white rectangle, just under the stamped ribbon, using Stampin’ Seal
white rectangle glued onto the smaller Pacific Point CS layer
Pacific Point CS layer glued onto a yellow die cut layer
yellow die cut layer adhered onto the front of the bag using Stampin’ Dimensionals
The yellow tissue paper I used is from the June 2020 Paper Pumpkin kit, called Box of Sunshine.
S
Here’s the August 2020 PPP Blog Hop:
Click the Next button below to hop to the next stop, Sharon Hashimoto Burkert of As The Ink Dries:
S
Here are today’s colors:
You can click on each one to see all the products that come in that color!
Here’s what I used, other than what came in the kit:
Click on these images for more details and to purchase. If you are reading this post in email, the product images may not show up. Please click hereto see the post on my blog.
Gift Certificates are available in any U.S. dollar amount from me. Contact mefor details.
Have you shopped from me within the past year? Join my private VIP Facebook groupfor exclusive project tutorials and more!
Join my team and enjoy a 20% discount (or more) on all your purchases! You choose $125 in products and pay only $99, and get free shipping! No obligation! No selling required!
Today I’m sharing a card I designed as one of the Make & Takes for our August Candy Hearts team meeting. I used the Poinsettia Place Suite Collection to create this double gate-fold card. At 3″ wide, it’s skinnier than the usual 4-1/4″, but that leaves room for the sprigs to hang off the edge. It will still fit into the standard medium envelope. The poinsettia was die cut from the Poinsettia Place Designer Series Paper, and glued onto a piece of card stock that was cut with the same die. That’s to make it sturdier, since half of it hangs off the layer.
If you are reading this in email, some photos may appear blurry, or may not appear at all. Please click here to see the post on my blog.
S Poinsettia Place Poinsettia Place Poinsettia Place Poinsettia Place
Here’s what I made:
S
Here’s what I did:
Cut and scored with my paper trimmer:
Old Olive card stock (CS) cut to 5-1/2″ x 9″, then scored at 1-1/2″ 3″, 6″, and 7-1/2″”
Soft Suede CS layers cut to 1-3/8″ x 5-3/8″ (2 pieces)
Old Olive card stock layers cut to 1-1/4″ x 5-1/4″ (2 pieces)
Very Vanilla CS cut to 2-3/4″ x 5-1/4″ for the inside of the card base
Stamped with the Poinsettia Petals stamp set:
sentiment in Soft Suede ink onto the Very Vanilla CS
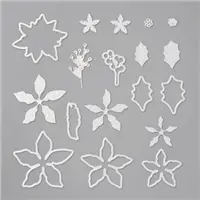
Cut using the Poinsettia Dies:
flower from a piece of Poinsettia Place Designer Series Paper (DSP)
scrap of Old Olive CS using the same poinsettia die
3 sprigs from a scrap of Soft Suede CS
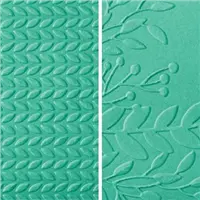
Embossed using the Greenery Embossing Folder:
both Old Olive CS layers
Assembled the card:
burnished the folds in the card base with a Bone Folder
Soft Suede CS layers glued onto the two outer most sections of the card base
Old Olive CS layers glued onto the Soft Suede CS layers
Soft Suede CS sprigs glued onto the Old Olive CS layer on the left
DSP poinsettia glued onto the Old Olive CS die cut in the same shape
only the left part of the Old Olive poinsettia glued onto the Old Olive CS layer on the left, covering the bases of the sprigs
Very Vanilla CS glued onto the center section of the card base
S
Here are today’s colors:
You can click on each one to see all the products that come in that color!
Click on these images for more details and to purchase. If you are reading this post in email, the product images may not show up. Please click hereto see the post on my blog.
Gift Certificates are available in any U.S. dollar amount from me. Contact mefor details.
Have you shopped from me within the past year? Join my private VIP Facebook groupfor exclusive project tutorials and more!
Join my team and enjoy a 20% discount (or more) on all your purchases! You choose $125 in products and pay only $99, and get free shipping! No obligation! No selling required!
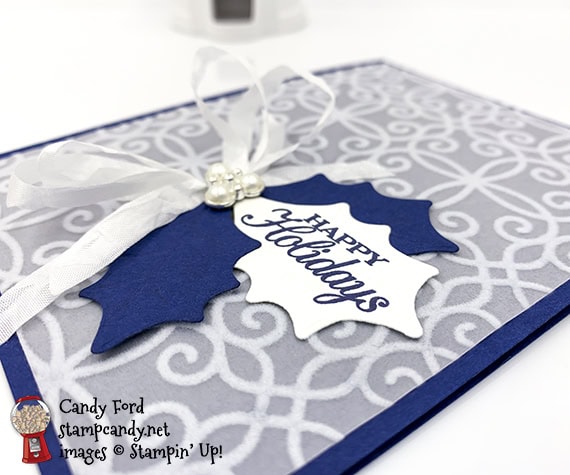
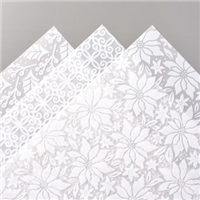
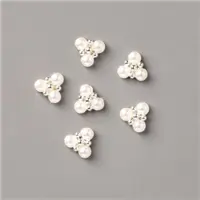
The elegant new Plush Poinsettia Specialty Paper has three flocked patterns on vellum. The flocked bits provide perfect cover for glue so you can’t see how it’s adhered onto the layer underneath. I cut three leaves using the Poinsettia Dies, and embossed two of them and stamped the sentiment onto the third one. I added a double bow and Beaded Pearl embellishment to create a cluster on the bottom right of the card front. x
If you are reading this in email, some photos may appear blurry, or may not appear at all. Please click here to see the post on my blog.
S Plush Poinsettia Plush Poinsettia Plush Poinsettia Plush Poinsettia
Here’s what I made:
S
Here’s what I did:
Cut and scored with my paper trimmer:
Night of Navy card stock (CS) cut to 4-1/4″ x 11″, then scored in half at 5-1/2″
Plush Poinsettia Specialty Paper (SP) layer cut to4″ x 5-1/4″
Whisper White CS cut to 4″ x 5-1/4″ for the inside of the card base
Stamped with the Poinsettia Petals stamp set:
sentiment in Night of Navy ink onto a scrap of Whisper White Thick CS
holly leaves and berries in Night of Navy ink onto the Whisper White CS for the inside of the card base
Cut using the Poinsettia Dies:
sentiment using the larger leaf diex
cut and embossed 2 holly leaves from a scrap of Night of Navy CS
Assembled the card:
burnished the fold in the card base with a Bone Folder
SP layer glued onto the front of the card base
NOTE: I put glue only under the flocked areas around the edges
3 leaves glued together
Beaded Pearl embellishment adhered onto the leaves using Mini Glue Dots
ribbon tied into a double bow and adhered onto the SP layer using a Mini Glue Dot
leaves adhered onto the SP layer using Stampin’ Dimensionals, over the knot in the ribbon
Whisper White CS glued onto the inside of the card base
S
Here are today’s colors:
You can click on each one to see all the products that come in that color!
Click on these images for more details and to purchase. If you are reading this post in email, the product images may not show up. Please click hereto see the post on my blog.
Gift Certificates are available in any U.S. dollar amount from me. Contact mefor details.
Have you shopped from me within the past year? Join my private VIP Facebook groupfor exclusive project tutorials and more!
Join my team and enjoy a 20% discount (or more) on all your purchases! You choose $125 in products and pay only $99, and get free shipping! No obligation! No selling required!
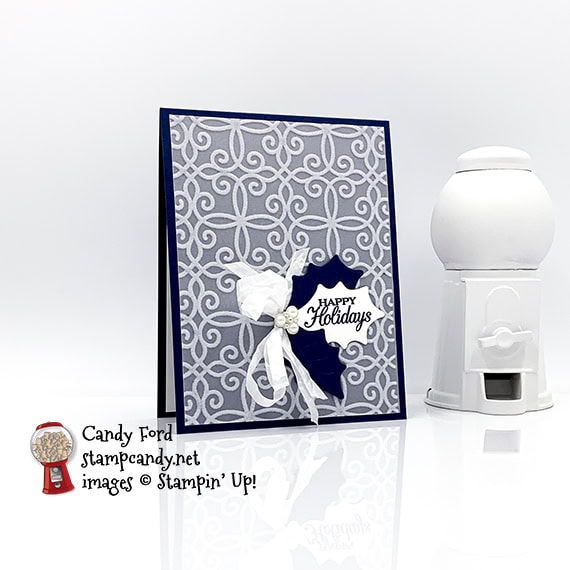
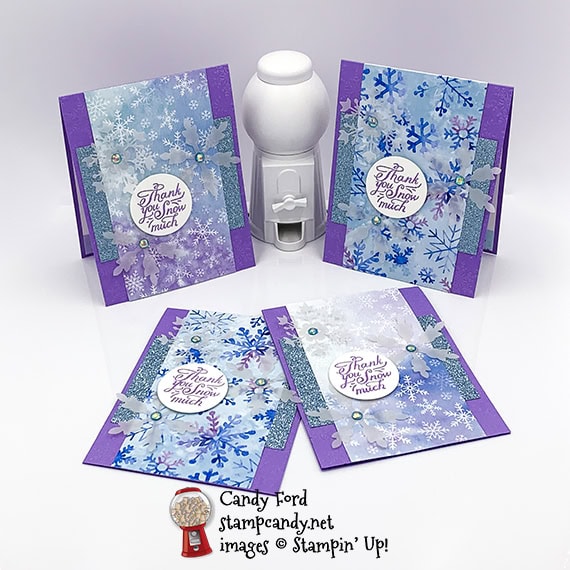
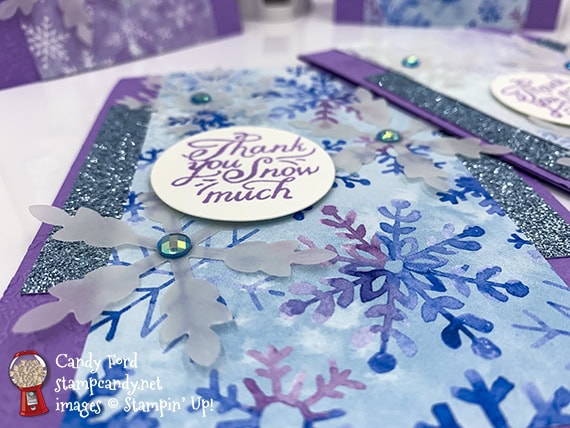
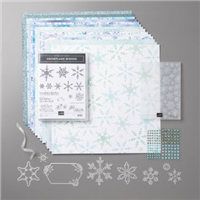
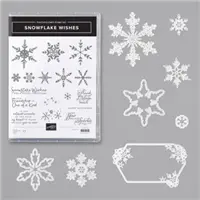
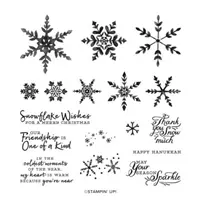
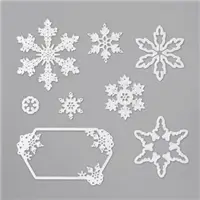
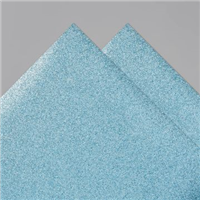
Today I’m sharing the cards I made for our Candy Hearts August 2020 Team Meeting swap. I used products from the Snowflake Splendor Suite Collection: Snowflake Wishes Bundle (Snowflake Wishes stamp set and So Many Snowflakes Dies,) Winter Snow Embossing Folder, Snowflake Splendor Designer Series Paper (DSP,) Balmy Blue Glimmer Paper, and Blue Adhesive-Backed Gems – basically everything in the suite except the ribbon!
There were some pieces of the DSP left from another project, which dictated the size of the pieces on today’s cards. I used two different patterns on the card fronts, because didn’t have enough of the same pattern for all the cards, and I used a third pattern for the strip on the inside.
If you are reading this in email, some photos may appear blurry, or may not appear at all. Please click here to see the post on my blog.
S Snowflake Wishes Snowflake Wishes Snowflake Wishes Snowflake Wishes
Here’s what I made:
S
Here’s what I did:
Cut and scored with my paper trimmer:
Highland Heather card stock (CS) cut to 4-1/4″ x 11″, then scored in half at 5-1/2″
Balmy Blue Glimmer Paper cut to 4″ x 3″
Snowflake Splendor Designer Series Paper (DSP) layer cut to 3″ x 5-1/2″
DSP cut to 4″ x 3/4″
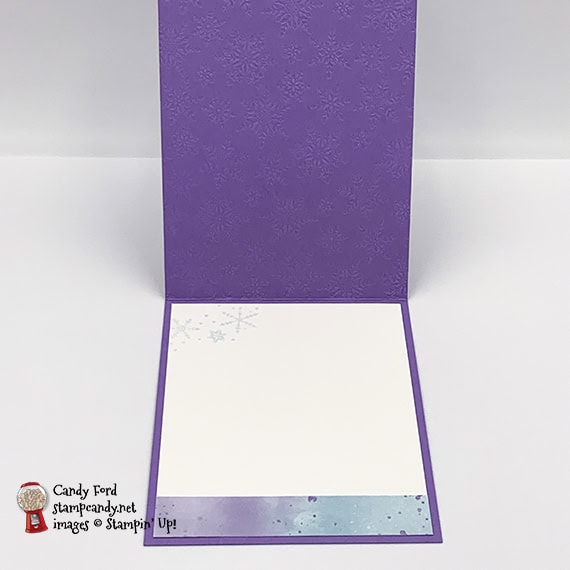
Whisper White CS cut to 4″ x 5-1/4″ for the inside of the card base
Stamped with the Snowflake Wishes stamp set:
sentiment in Highland Heather ink onto a scrap of Whisper White Thick CS
snowflakes in Balmy Blue ink, stamped off once, onto the upper left of the Whisper White CS for the inside of the card
Embossed using the Winter Snow Embossing Folder:
front of the card base
Cut using the So Many Snowflakes Dies:
3 snowflakes from a scrap of Vellum CS
Cut using the Layering Circles Dies:
sentiment
Assembled the card:
burnished the fold in the card base with a Bone Folder
Balmy Blue Glimmer Paper layer adhered onto the front of the card base using Stampin’ Seal
DSP layer glued onto the front of the card base, over the Glimmer Paper layer
vellum snowflakes adhered onto the DSP layer using Mini Glue Dots
a blue gem applied onto the center of each snowflake using the pointy end of my Take Your Pick tool
sentiment adhered onto the DSP layer, over the snowflakes, using Stampin’ Dimensionals
DSP strip glued onto the bottom of the Whisper White CS for the inside
Whisper White CS glued onto the inside of the card base
S
Here are today’s colors:
You can click on each one to see all the products that come in that color!
Click on these images for more details and to purchase. If you are reading this post in email, the product images may not show up. Please click hereto see the post on my blog.
Gift Certificates are available in any U.S. dollar amount from me. Contact mefor details.
Have you shopped from me within the past year? Join my private VIP Facebook groupfor exclusive project tutorials and more!
Join my team and enjoy a 20% discount (or more) on all your purchases! You choose $125 in products and pay only $99, and get free shipping! No obligation! No selling required!