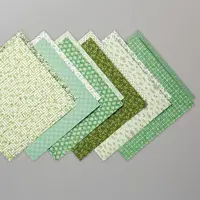
It’s time for the Inking Royalty Blog Hop for September! This month’s theme in Autumn. And what could be more Autumnal than beautifully colored leaves? For my project, I used products from the Come to Gather Suite to decorate a gift bag from last month’s Paper Pumpkin kit. (You can see another project I made using these bags here.) From the suite, I used the Gather Together bundle (Gather Together stamp set and Gathered Leaves Dies) and Come to Gather Designer Series Paper.
I was going to use the Come To Gather Ribbon Combo Pack as well, but I got so carried away with the leaves, I didn’t think it needed it. I used each embossed leaf die (3 in the set) to cut two each of four colors – and I used 18 of the 24 leaves I cut! Guess I just couldn’t stop until I had a big leaf pile! Doesn’t it make you want to jump in and scatter them?
Be sure to hop all the way around to all the stops. You don’t want to miss any of the great projects from this talented group!
S
Here’s what I made:
S
Here’s what I did:
Cut and scored with my paper trimmer:
Come To Gather Designer Series Paper (DSP) cut to 2″ x 5-1/4″
DSP cut to 1-1/2″ x 5″
Copper Foil Sheet cut to 1-1/2″ x 4-3/4″
Stamped with the Gather Together stamp set:
large leaf in Pretty Peacock ink onto a scrap of Pretty Peacock CS
sentiment in Versamark ink on the leaf, then heat embossed in copper
Cut using the Gathered Leaves Dies:
stamped leaf
assortment of embossed leaves from scraps of Merry Merlot, Cajun Craze, and Pretty Peacock CS and Copper Foil Sheet
Cut using the Banner Triple Punch:
one end of each of the 3 paper strips
Assembled the project:
adhered the 3 tags together using Snail
adhered the assorted leaves onto the tags and each other using Snail
large stamped leaf adhered onto the leaf “pile” using Black Stampin’ Dimensionals
tag assembly glued onto the front of the bag
3 Pretty Peacock Faceted Dots applied onto the bag, at bottom right
S
Here’s the hop:
Thank you for hopping along with us. If you get stuck during the Blog Hop, please use this line-up as a guide:
Click on these images for more details and to purchase.
<– Click here for a clickable and printable list!
S
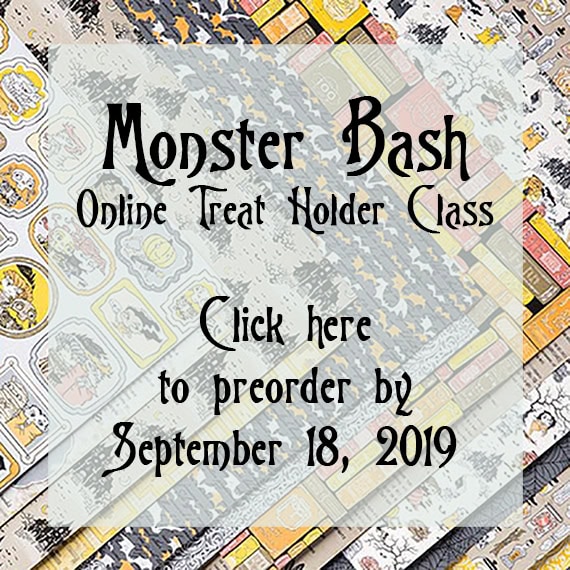
Preorder the Monster Bash Online Treat Holder Class:
Extended for one more week! Order by September 25!
Make 6 adorable treat holders in the comfort of your own home!
2 each of 3 designs
Features the Monster Bash Suite on pages 52-54 of the 2019 Holiday Catalog
I’ve done the trimming and scoring for you!
You’ll receive the stamp set, dies, pre-cut kits, and Black Stampin’ Dimensionals.
Full detailed instructions
Limited spots available
Click on the image below for details and class options, or copy and paste this link into your browser: https://stampcandy.net/online-classes/monster-bash-treat-holder-class-preorder/
Gift Certificates are available in any U.S. dollar amount from me. Contact mefor details.
Have you shopped from me within the past year? Join my private VIP Facebook groupfor exclusive project tutorials and more!
Join my team and enjoy a 20% discount (or more) on all your purchases! You choose $125 in products and pay only $99, and get free shipping! No obligation! No selling required!
For today’s project, I used the Everything Festive and Boo to You stamp sets to decorate a Coffin Box. The Everything Festive stamp set has sentiments for several different holidays and occasions, and the Boo to You stamp set has three adorable little monsters. I used Stampin’ Blends Markers to color the little zombie guy, and I used a couple of the Assorted Googly Eyes to really make him pop!
S
Here are the stamp sets:
S
Here’s what I made:
S
Here’s what I did:
Cut and scored with my paper trimmer:
bottom of coffin box traced onto Granny Apple Green card stock (CS), then cut just inside the lines
Stamped with the Boo to You stamp set:
zombie in Tuxedo Black Memento ink onto a scrap of Whisper White Thick CS
small sentiment in Tuxedo Black Memento ink next to the zombie
Stamped with the Everything Festive stamp set:
large sentiment in Tuxedo Black Memento ink onto the coffin shaped Granny Apple Green CS
Cut using the Layering Ovals Dies:
zombie/sentiment
Colored using Stampin’ Blends Markers:
zombie in Basic Black, Smoky Slate, Granny Apple Green, Real Red, and Bronze
Assembled the project:
burnished the folds in the box and lid with a Bone Folder
glued the outside of the flaps onto the inside of the adjacent sides to create the box and lid shapes
Granny Apple Green CS glued onto the inside of the box
put lid on the box and wrapped ribbon around it, enough to overlap about 1″ or so on the lid
NOTE: Be sure the ribbon is snug enough to stay on, and loose enough to be able to slide it off.
adhered the ribbon ends together using Tear & Tape, being careful not to stick it to the lid
googly eyes glued onto the zombie (I used a purple eye and an orange eye.)
adhered the zombie oval onto the ribbon using Tear & Tape
S
Here are today’s colors:
You can click on each one to see all the products that come in that color!
Click on these images for more details and to purchase.
<– Click here for a clickable and printable list!
S
Preorder the Monster Bash Online Treat Holder Class by September 18:
Make 6 adorable treat holders in the comfort of your own home!
2 each of 3 designs
Features the Monster Bash Suite on pages 52-54 of the 2019 Holiday Catalog
I’ve done the trimming and scoring for you!
You’ll receive the stamp set, dies, pre-cut kits, and Black Stampin’ Dimensionals.
Full detailed instructions
Limited spots available
Click on the image below for details and class options, or copy and paste this link into your browser: https://stampcandy.net/online-classes/monster-bash-treat-holder-class-preorder/
Gift Certificates are available in any U.S. dollar amount from me. Contact mefor details.
Have you shopped from me within the past year? Join my private VIP Facebook groupfor exclusive project tutorials and more!
Join my team and enjoy a 20% discount (or more) on all your purchases! You choose $125 in products and pay only $99, and get free shipping! No obligation! No selling required!
Today’s project is a fun little treat box shaped like a coffin. Stampin’ Up!’s new Coffin Boxes come pre-cut and scored, so you only have to glue the corners to assemble them. There’s a window in the coffin lid so you can see its occupant, a vampire from the Monster Bash Designer Series Paper (DSP.) The coffin is lined with more of the DSP, and the spiders on top are cut from a Black Foil Sheet using the Wicked Dies.
S
Here’s what I made:
S
Here’s what I did:
Cut and scored with my paper trimmer:
first traced around a coffin box onto two pieces of Monster Bash Designer Series Paper (DSP), then…
cut both pieces along the traced lines
Stamped with the Spooktacular Bash stamp set:
sentiment in Whisper White Craft Ink onto a scrap of Basic Gray card stock (CS)
heat set the ink using a Heat Tool
Cut using the Ornate Frames Dies:
sentiment
ornate frame from a scrap of Basic Gray CS
Cut using the Wicked Dies:
3 spiders from a scrap of Black Foil Sheet
Cut using the Layering Circles Dies:
hole in the die cut ornate frame, and in the top of the coffin box, using the same small die
vampire from the Monster Bash DSP, and a scrap of clear Window Sheet, using the same larger die
Assembled the box:
burnished the folds in the box and lid with a Bone Folder
clear circle adhered onto the inside of the lid, lining the hole, using Tear & Tape
vampire adhered onto the clear circle using Tear & Tape, so he shows through the window in the lid
box and lid folded and glued into shape
one piece of DSP glued onto the inside of the box (bats)
the other piece of DSP glued onto the inside of the lid (cobwebs)
ornate frame glued onto the top of the lid, around the window
sentiment glued onto the top of the lid
3 spiders adhered onto the top of the lid using Mini Glue Dots
2 Red Rhinestones applied onto each spider, to resemble a Black Widow’s hourglass pattern (Yes, I know it’s actually on the bottom of a real spider and not up on its back, but I took a little artistic license.)
S
Here are today’s colors:
You can click on each one to see all the products that come in that color!
Click on these images for more details and to purchase.
<– Click here for a clickable and printable list!
S
Preorder the Monster Bash Online Treat Holder Class by September 18:
Make 6 adorable treat holders in the comfort of your own home!
2 each of 3 designs
Features the Monster Bash Suite on pages 52-54 of the 2019 Holiday Catalog
I’ve done the trimming and scoring for you!
You’ll receive the stamp set, dies, pre-cut kits, and Black Stampin’ Dimensionals.
Full detailed instructions
Limited spots available
Click on the image below for details and class options, or copy and paste this link into your browser: https://stampcandy.net/online-classes/monster-bash-treat-holder-class-preorder/
Gift Certificates are available in any U.S. dollar amount from me. Contact mefor details.
Have you shopped from me within the past year? Join my private VIP Facebook groupfor exclusive project tutorials and more!
Join my team and enjoy a 20% discount (or more) on all your purchases! You choose $125 in products and pay only $99, and get free shipping! No obligation! No selling required!
Today I’m sharing another 2019 Holiday Catalog sneak peek, and another Make & Take project I made for our August Candy Hearts team meeting. Not too long ago we had the Curvy Keepsakes Box Dies, which made a larger version of this box. Now we have this adorable mini version. We used the Mini Curvy Keepsakes Box Dies and Mercury Glass Designer Acetate to make this adorable box. It’s perfect for a battery operated tea light, small treats and gifts.
S
Here’s what I made:
S
Here’s what I did:
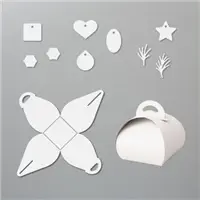
Cut using the Mini Curvy Keepsake Box Dies:
box from a Mercury Glass Acetate Sheet
3 sprigs from a scrap of Shaded Spruce cardstock (CS)
Assembled the box:
burnished the score lines using a Bone Folder, then closed the box
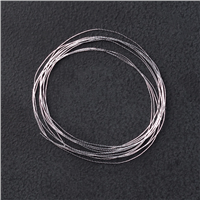
3 sprigs glued together in a spray, then silver thread wrapped around the stems and tied in a knot
3 Red Rhinestones applied onto the spray
spray adhered onto the outermost flap of the box using Mini Glue Dots
NOTE: Putting the spray on the outermost flap means you can still open and close the box easily
S
Here are today’s colors:
You can click on each one to see all the products that come in that color!
Supply List <– Click here for a clickable and printable list!
S
Preorder the Pretty Petals Online Class by September 5:
Make 6 cards at home in your PJs!
2 each of 3 designs
Features the Pretty Petals Suite on pages 72-74 of the 2019-2020 Annual Catalog
I’ve done the trimming and scoring for you!
You’ll receive the stamp set, dies, embossing folder, pre-cut card kits, and 6 Very Vanilla envelopes.
Full detailed instructions
Limited spots available
Click on the image below for details and class options, or copy and paste this link into your browser: https://stampcandy.net/online-classes/pretty-petals-class-preorder/
Gift Certificates are available in any U.S. dollar amount from me. Contact mefor details.
Have you shopped from me within the past year? Join my private VIP Facebook groupfor exclusive project tutorials and more!
Join my team and enjoy a 20% discount (or more) on all your purchases! You choose $125 in products and pay only $99, and get free shipping! No obligation! No selling required!
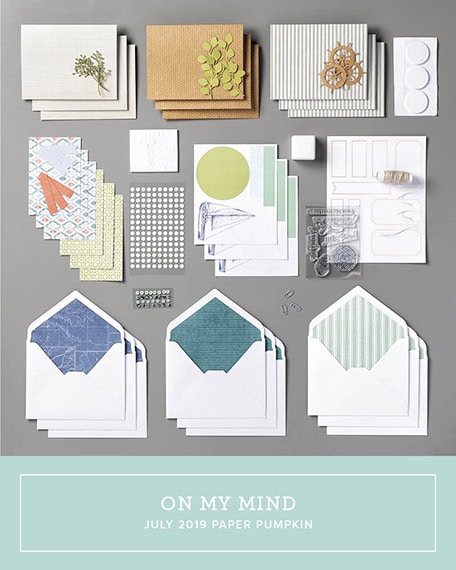
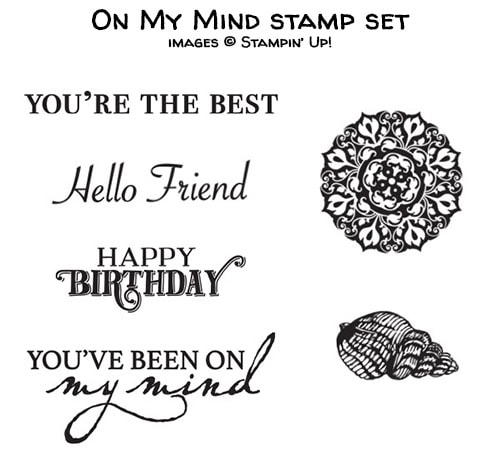
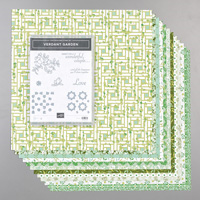
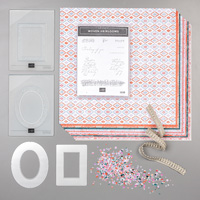
It’s time for the PPP July 2019 Blog Hop! This month’s kit is called On My Mind and it coordinates with three suites in the annual catalog. Three! There’s no end to the project possibilities with this kit.
S
Be sure to hop around to all the stops to see the great alternate projects this group has made using this month’s Paper Pumpkin kit!
S
Here’s what comes in the kit:
S
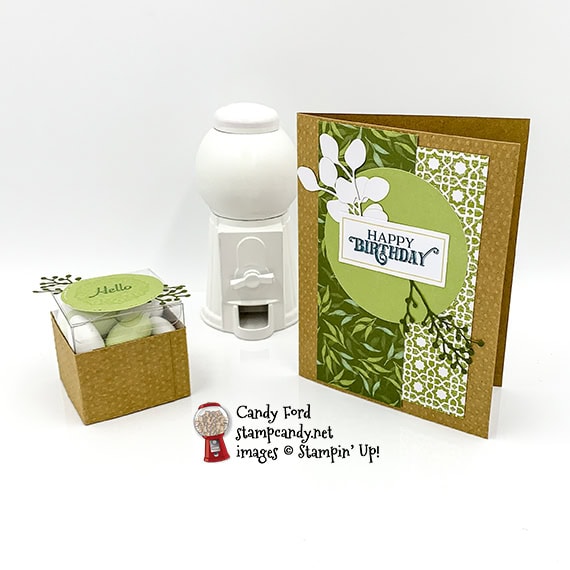
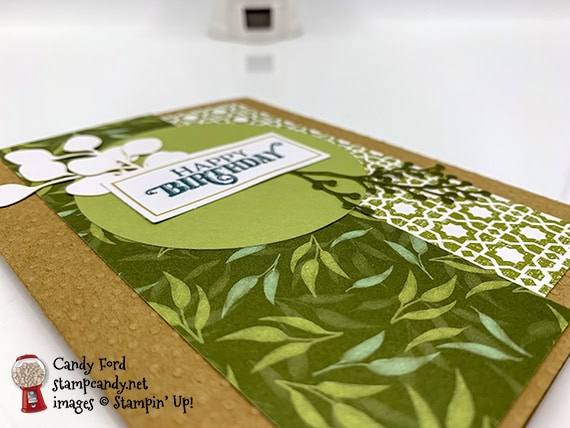
Here’s what I made:
S
S
Here’s what I did:
Cut and scored with my paper trimmer:
Garden Lane Designer Series Paper (DSP) layer to 2″ x 5-3/8″
front of a dotted card base cut to 1-1/2″ x 5-1/2″ (two of these)
Cut using the Stitched Shapes Dies:
a precut stitched circle down to a smaller stitched circle
Stamped with the On My Mind stamp set:
card sentiment in Pretty Peacock ink onto a rectangular die cut label
medallion in Soft Sea Foam ink onto the smaller die cut circle
Hello in Pretty Peacock ink onto the smaller die cut circle
Assembled the card:
burnished the fold in the card base with a Bone Folder
lattice design precut paper glued onto the front a a dotted card base, centered top to bottom, about 1/2″ from the right
DSP layer glued over the lattice design paper, centered top to bottom, about 1/2″ from the left
precut stitched circle glued over the layers
2 leaves and a sprig glued over the circle
sentiment glued over the leaves and sprig
Assembled the box:
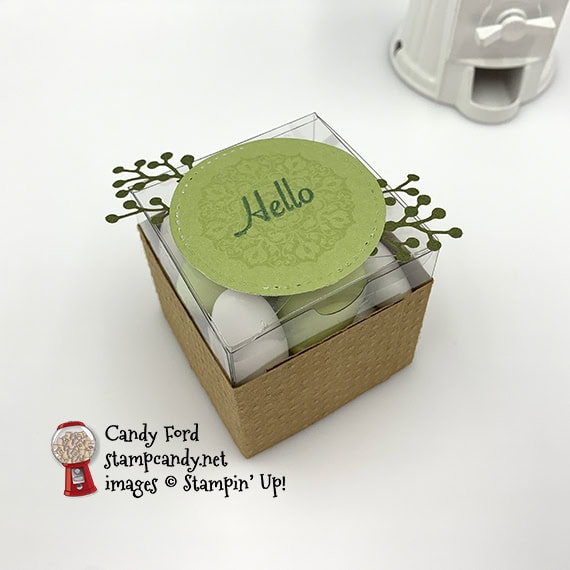
folded and assembled a Clear Tiny Treat Box
2 pieces of dotted card base wrapped around a treat box and adhered using Tear & Tape
2 twigs adhered onto the back of the small die cut circle using Tear & Tape
circle adhered onto the top of the box using Tear & Tape
S
Here’s the PPP July 2019 blog hop:
Click on the pumpkin to hop to the next blog, Charmane Hopkins of Renee’s Paper Treasures.
S
Here’s the video for this month’s kit:
S
CLICK HERE to download the stamp case insert for this month’s kit.
S
Here are today’s colors:
You can click on each one to see all the products that come in that color!
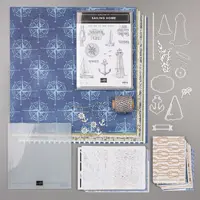
It’s time for the June 2019 A Paper Pumpkin Thing Blog Hop! This month’s kit is called A Little Smile. It’s beach themed kit that makes 16 gift cards and envelopes with a box to hold them. I used the kit to create a full sized card and a little treat holder.
Be sure to hop around to all the stops to see all the alternative projects this talented group of stampers has made using the A Little Smile kit!
S
Here’s what I made:
No, those aren’t smudge marks on the flap. They’re actually part of the weathered wood pattern of the envelope.
S
Here’s what I did:
Cut and scored with my paper trimmer:
Coastal Cabana card stock (CS) cut to 4-1/4″ x 11″, then scored in half at 5-1/2″
Crumb Cake CS layer cut to 3-3/4″ x 5″
Whisper White CS layer cut to 3-3-8″ x 4-5/8″
two card fronts from the kit cut to 3-1/4″ x 2-1/4″
Whisper White CS cut to 4″ x 5-1/4″ for the inside of the card base
Coastal Cabana envelope from the kit scored 1/2″ from the bottom and from both sides
Stamped with the A Little Smile stamp set:
sentiment in Coastal Cabana ink onto a die cut label from the kit, near one end
Cut using Paper Snips:
shortened the stamped label, using another label as a template, to match the curve
envelope flap trimmed along the score lines
Assembled the card:
burnished the fold in the card base with a Bone Folder
two trimmed card fronts glued onto the Whisper White CS layer
Whisper White CS layer glued onto the Crumb Cake CS layer
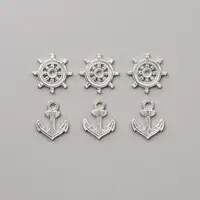
anchor trinket strung onto the twine from the kit, then the twine wrapped around the layers, with the ends secured onto the back using Tear & Tape
anchor secured in place using a Mini Glue Dot
3 glitter starfish die cuts tucked into the twine and secured using Mini Glue Dots
stamped label tucked into the twine and secured using Mini Glue Dots
Crumb Cake CS layer adhered onto the front of the card base using Tear & Tape
Whisper White CS glued onto the inside of the card base
Assembled the treat holder:
burnished the folds in the envelope with a Bone Folder
inverted the sides and bottom to form a box
put treats (I used small chocolates) in the holder and closed the flap
twine tied around the treat holder and tied in a bow
S
Here’s the APPT A Little Smile Blog Hop:
Here are today’s colors:
You can click on each one to see all the products that come in that color!
Supply List <– Click here for a clickable and printable list!
S
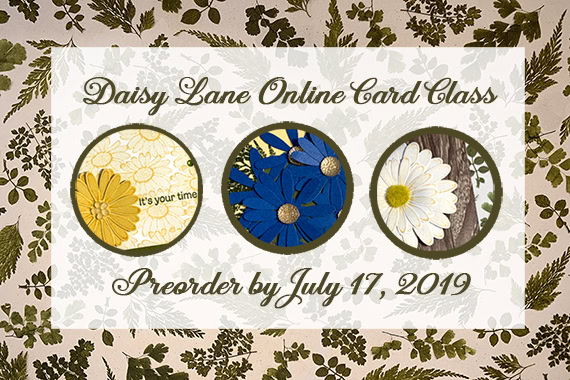
Preorder the Daisy Lane Online Class by July 17:
Make 6 cards at home in your PJs!
2 each of 3 designs
Features the Daisy Lane Bundle on page 23 of the 2019-2020 Annual Catalog
I’ve done the trimming and scoring for you!
You’ll receive all you need to make the cards, including the stamp set, punches, pre-cut/pre-scored/pre-embossed card kits, and 6 envelopes.
Full detailed instructions
Limited spots available
Click on the image below for details and class options, or copy and paste this link into your browser: https://stampcandy.net/online-classes/daisy-lane-card-class-preorder/