Mar 30, 2018 | Cards, Gallery, Guest Stamper |
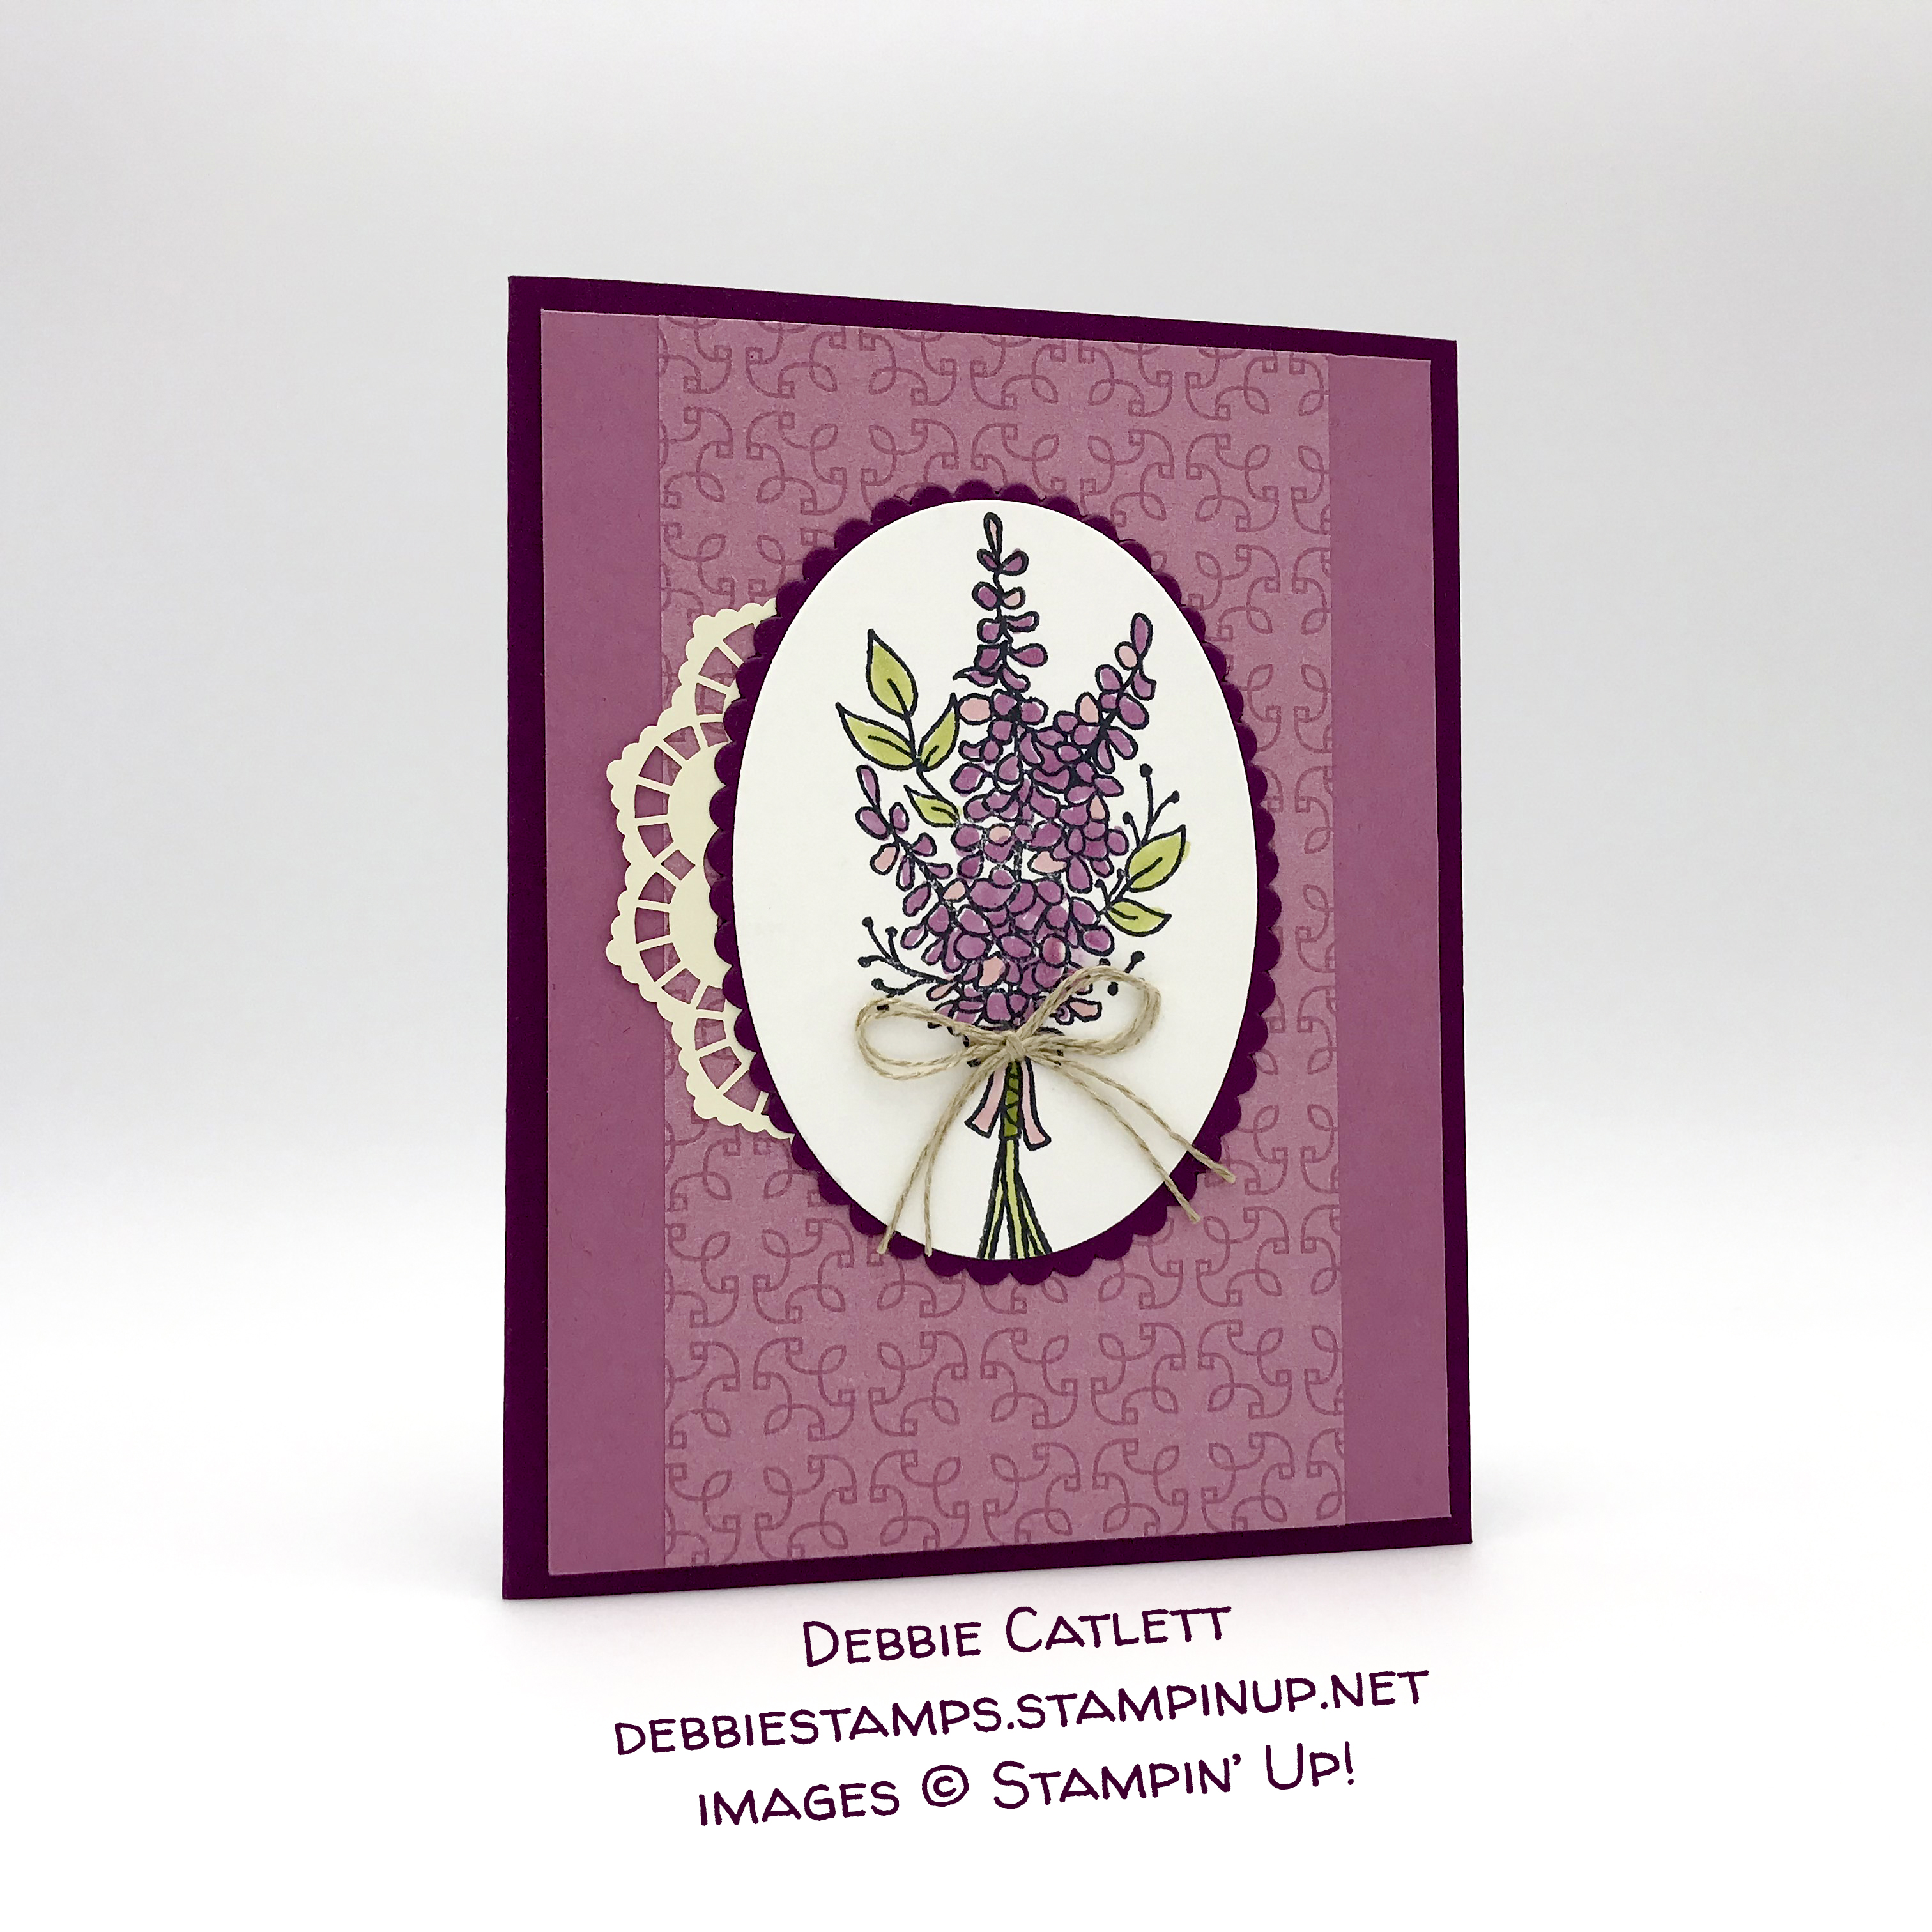
Today’s card was made by the lovely and very talented Debbie Catlett, of Chattanooga, TN. Debbie is a member of my Candy Hearts team. This was a card she made for this month’s Creative Challenge at our March team gathering. She used the Lot of Lavender stamp set (available free with a $50 order only through Saturday!) and a piece of Petal Garden Designer Series Paper to create this beautiful card. Debbie always adds a little something to the inside of the card as well.
Here’s what she made:
Debbie always decorates the inside of her cards: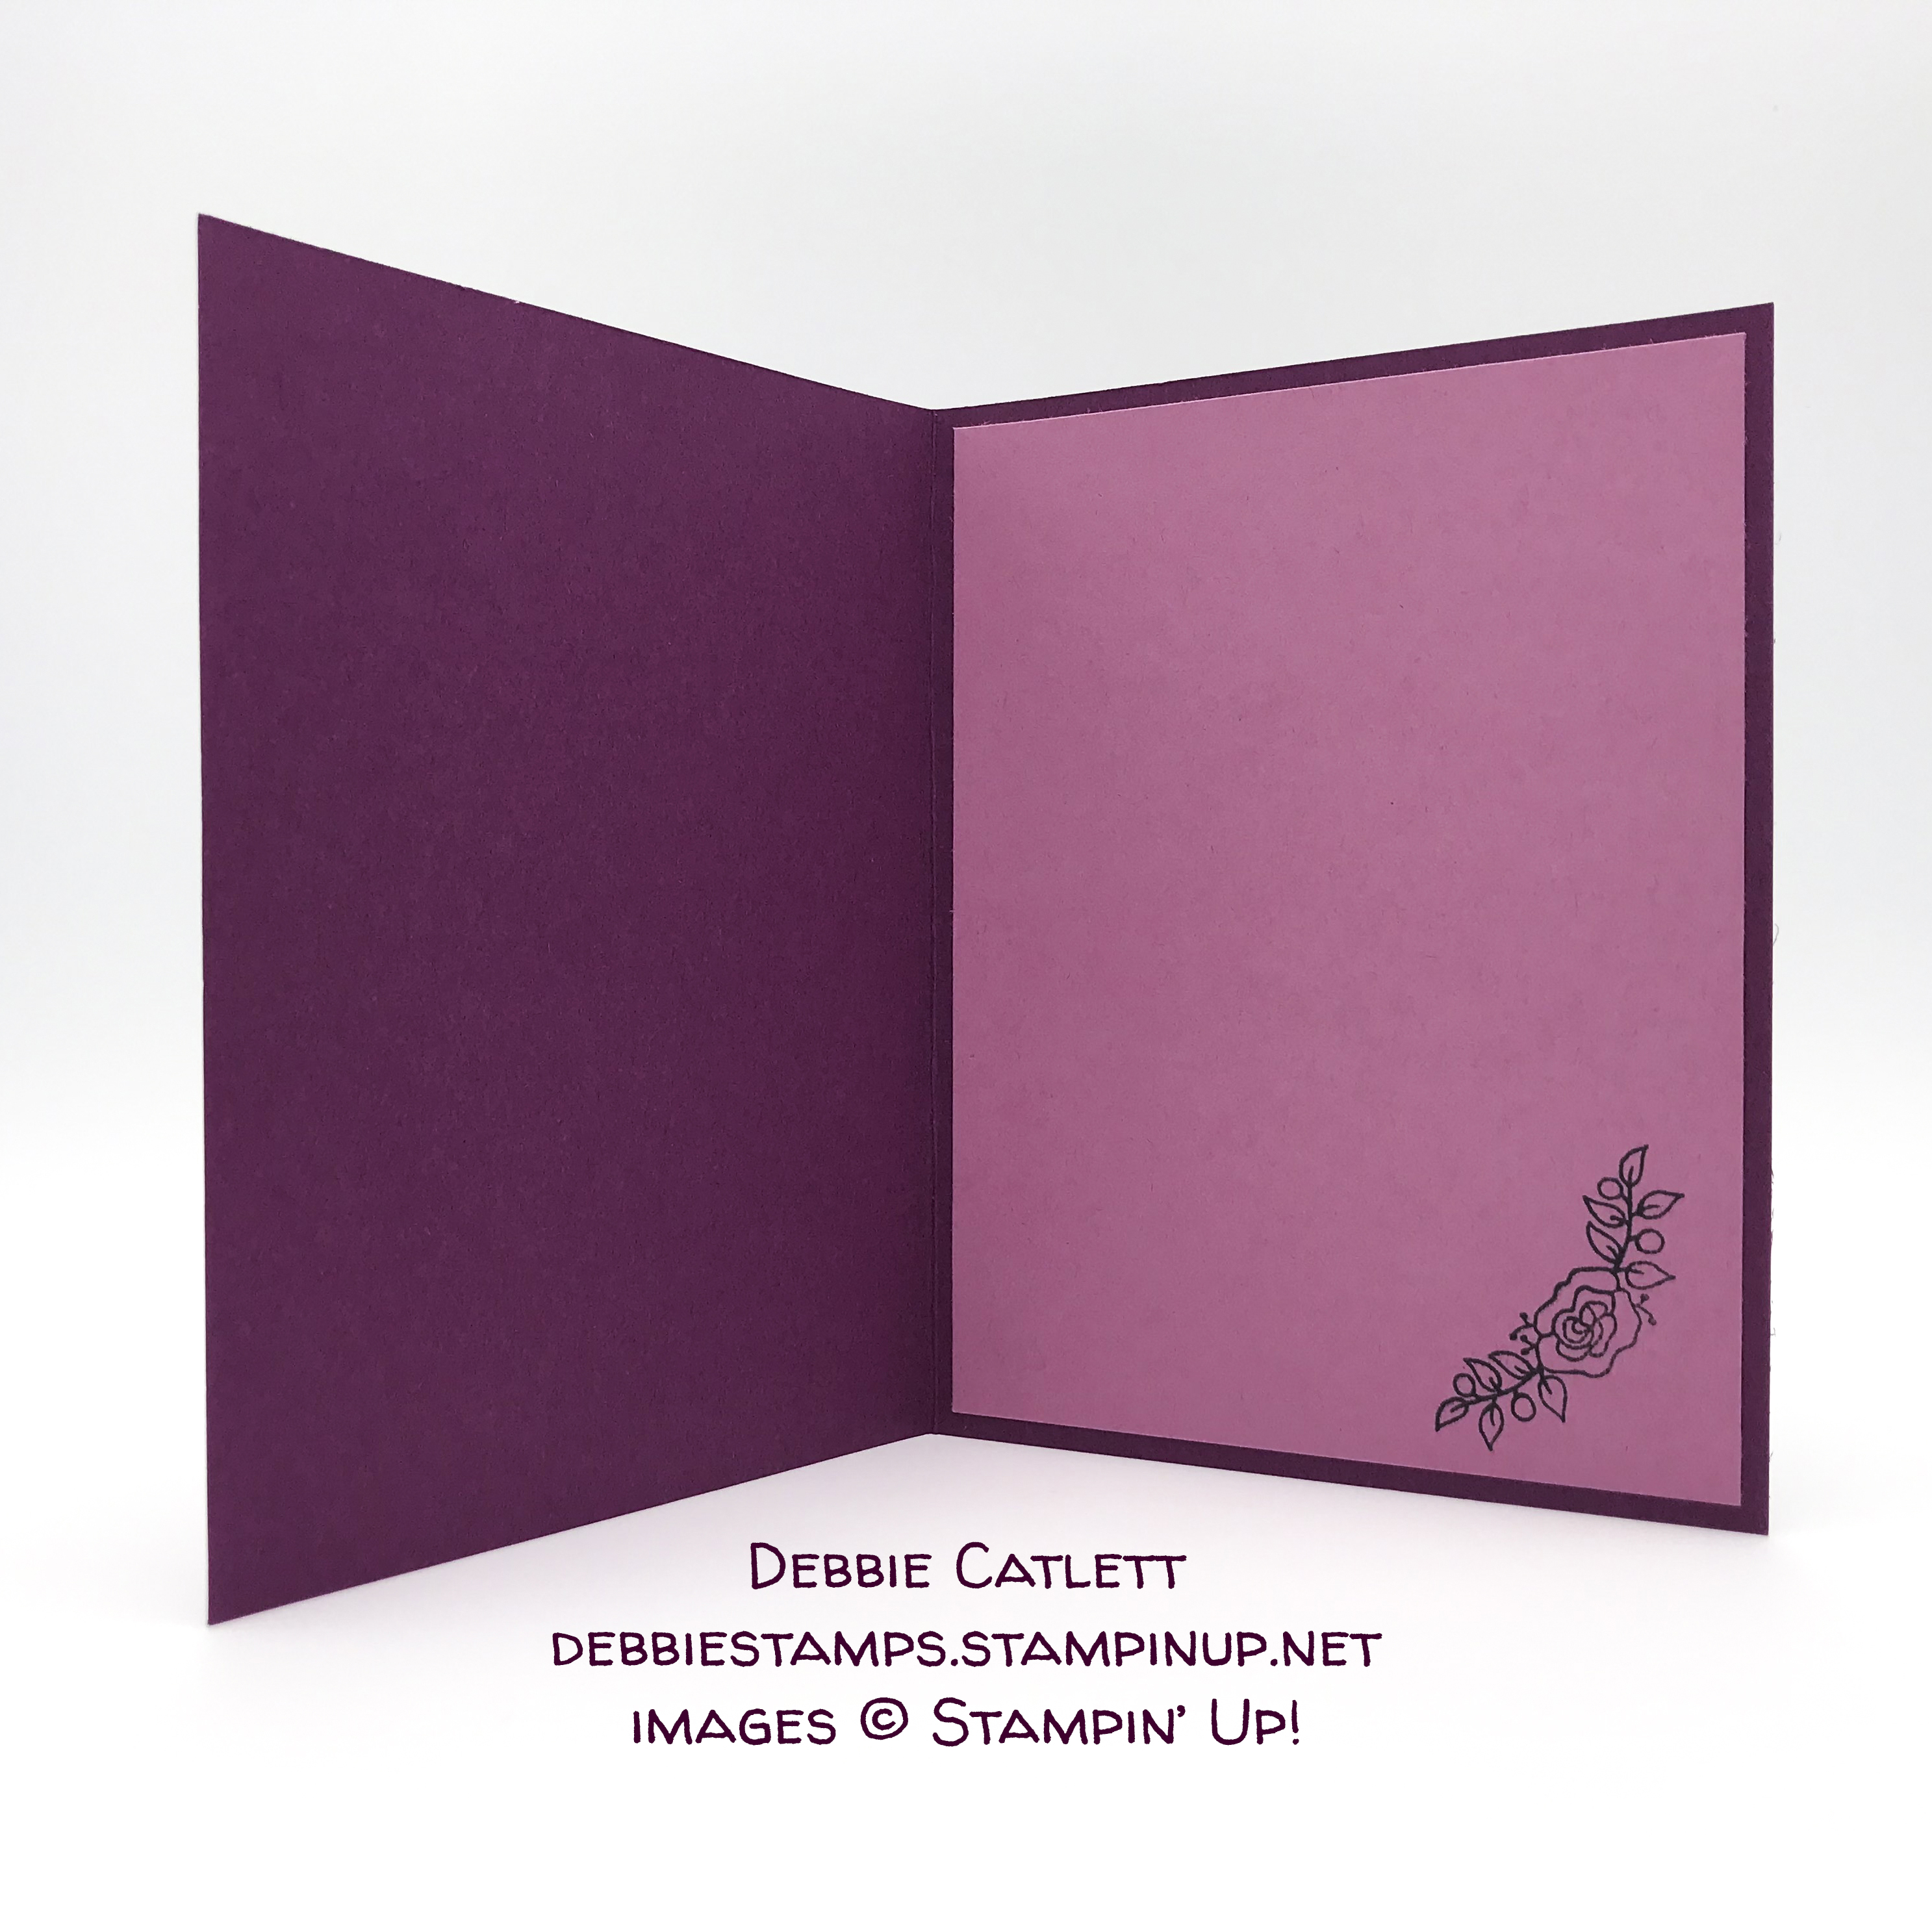
Here’s what she did:
Cut and scored with her Stampin’ Trimmer:
- Rich Razzleberry card stock (CS) cut to 8-1/2″ x 5-1/2″, then scored in half at 4-1/4″
- Sweet Sugarplum CS cut to 4″ x 5-1/4″ (2 pieces)
- Petal Garden Designer Series Paper (DSP) cut to 3″ x 5-1/4“
Stamped with the Lots of Lavender stamp set:
- bouquet in Basic Black ink onto a scrap of Whisper White CS
- small flower with leaves in Basic Black ink onto the Sweet Sugarplum CS for the inside of the card
Die cut using the Layering Ovals Framelits:
- sentiment with a plain oval die
- a scrap of Rich Razzleberry CS with a slightly larger scalloped oval die
Colored using Blender Pens:
- bouquet in Rich Razzleberry, Sweet Sugarplum, and Lemon Lime Twist
Assembled the card:
- burnished the fold in the card base with a Bone Folder
- stamped piece of Sweet Sugarplum CS glued onto the inside of the card base
- plain Sweet Sugarplum CS layer glued onto the front of the card base
- DSP layer glued onto the Sweet Sugarplum CS layer
- plain oval glued onto the scalloped oval
- doily glued onto the back of the scalloped oval so it shows on one side
- doily/oval glued onto the DSP layer (She used a retired doily. If you don’t have any of those, I recommend using the Delicate White Doilies.)
- small bow tied with a double piece of Linen Thread, and adhered to the bouquet with a Mini Glue Dot
Here are today’s colors:
You can click on each one to see all the products that come in that color!
Here’s what she used:
Click on these images for more details and to purchase.
Here’s some stuff you should know:
Thanks for stopping by today, and Sweet Stamping!
Mar 27, 2018 | Cards, Gallery, Guest Stamper |
I’m thrilled to share another card made by one of my Candy Hearts team members for our March gathering. Lonita Barron made this sympathy card for our creative challenge, using the Sheltering Tree stamp set. The pinks and browns create a sweet and comforting scene.

Sheltering Tree stamp set © Stampin’ Up!
Here’s what she made:

Here’s what she did:
Cut and scored with her Stampin’ Trimmer:
- Soft suede card stock (CS) cut to 8-1/2″ x 5-1/2″, then scored in half at 4-1/4″
- Blushing Bride CS cut to 4-1/8″ x 5-3/8″
- Whisper White CS cut to 4″ x 5-1/4″ (2 pieces)
Stamped with the Sheltering Tree stamp set:
- hill in Old Olive ink onto the front Whisper White CS layer
- tree in Soft Suede ink on the hill
- leaves in Blushing Bride, Flirty Flamingo, and Crumb Cake inks over the tree trunk
- swing in Soft Suede ink in the tree
- sentiment above the scene in Soft Suede ink
Assembled the card:
- burnished the fold in the card base with a Bone Folder
- stamped layer glued onto the Blushing Bride CS layer
- Blushing Bride CS layer glued onto the front of the card base
- remaining Whisper White CS glued to the inside of the card base
Here are today’s colors:
You can click on each one to see all the products that come in that color!
Here’s what she used:
Click on these images for more details and to purchase.
Here’s some stuff you should know:

Thanks for stopping by today, and Sweet Stamping!
Mar 26, 2018 | Cards, Gallery, Guest Stamper |
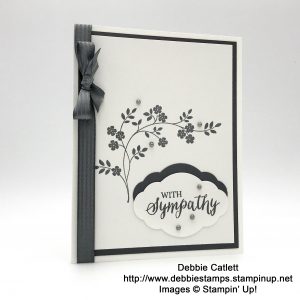
I love showing off my very talented Candy Hearts team members. In the next several days I’ll be sharing cards made by some of them for our March team gathering. There was a creative challenge to make a sympathy card. They aren’t fun to make, but it’s good to have them on hand. Today I’m sharing a sympathy card made by Debbie Catlett of Chattanooga, TN. She used the Thought & Prayers stamp set and the Pretty Label Punch to create this very elegant card.
Here’s what she made:

Here’s what she did:
Cut and scored with her Stampin’ Trimmer:
- Whisper White Thick card stock (CS) cut to 8-1/2″ x 5-1/2″, then scored in half at 4-1/4″
- Basic Gray CS cut to 4″ x 5-1/4″ (2 pieces)
- Whisper White CS cut to 3-3/4″ x 45″ (2 pieces)
Stamped with the Thoughts & Prayers stamp set:
- floral branch in Basic Gray ink onto the Whisper White CS layer for the front of the card
- part of the floral branch in Basic Gray ink onto the Whisper White CS layer for the inside of the card
- sentiment in Basic Gray ink onto a scrap of Whisper White CS
Cut using the Pretty Label Punch:
- sentiment
- scrap of Basic Gray CS
Colored using a Stampin’ Blends Marker:
- three Pearl Basic Jewels in Dark Smoky Slate
Assembled the card:
- burnished the fold in the card base with a Bone Folder
- front Whisper White CS layer glued onto one of the Basic Gray CS layers
- Basic Gray layer glued onto the front of the card base
- inside Whisper White CS layer glued onto the second Basic Gray CS layers
- the second Basic Gray CS layer glued onto the inside of the card base
- Basic Gray punched shape glued onto the front Whisper White CS layer
- sentiment adhered to the Basic Gray punched shape and the front Whisper White CS layer with Stampin’ Dimensionals
- three gray pearls applied to the sentiment
- Basic Gray ribbon wrapped around the front of the card base and tied in a small bow
Here are today’s colors:
You can click on each one to see all the products that come in that color!
Here’s what she used:
Click on these images for more details and to purchase.
Here’s some stuff you should know:

Thanks for stopping by today, and Sweet Stamping!
Mar 22, 2018 | Cards, Gallery, Guest Stamper |
I recently came across this card made months ago by Caitlin Jones, one of my very talented Candy Hearts team members. I realized I never shared it and thought you’d like to see it. She used the Magical Mermaid stamp set and the Hexagons Dynamic embossing folder to create this beautiful birthday card. The Shimmery White card stock takes the watercoloring beautifully. I think it looks like the mermaid is looking through an old stained glass window underwater.

Magical Mermaid stamp set © stampin’ Up!
Here’s what she made:

Here’s what (I think) she did:
Cut and scored with her Stampin’ Trimmer:
- Whisper White Thick card stock (CS) cut to 8-1/2″ x 5-1/2″, then scored in half at 4-1/4″
- Basic Black CS layer cut to 4-1/8″ x 5-3/8″
- Shimmery White CS layer cut to 4″ x 5-1/4″
Stamped with the Magical Mermaid stamp set:
- mermaid in Basic Black ink onto a scrap of Shimmery White CS
- sentiment in Pool Party ink onto a scrap of Shimmery White CS
Cut using the Paper Snips :
Die cut using the Layering Circles Framelits:
- larger circle from a scrap of Basic Black CS
- smaller circle from a scrap of Rich Razzleberry CS
Die cut using the Stitched Shapes Framelits:
Embossed using the Hexagon Dynamic embossing folder:
- inked one side of the folder with Basic Black ink, then used it to emboss the Shimmery White CS layer
Colored using Aqua Painters:
- mermaid in So Saffron, Soft Suede, Pink Pirouette, Marina Mist, and Pool Party inks
- embossed layer in Rich Razzleberry, Garden Green, Marina Mist, Pacific Point, Pool Party, and Bermuda Bay inks
Assembled the card:
- burnished the fold in the card base with a Bone Folder
- embossed layer glued onto the Basic Black CS layer
- Copper Trim spread wide, wrapped around the two layers, and adhered on the back using Tear & Tape
- Basic Black CS layer glued onto the front of the card base
- Basic Black, Rich Razzleberry, and sentiment circles glued onto the embossed layer, over the Copper Trim
- mermaid adhered to the card front using Stampin’ Dimensionals
Here are today’s colors:
You can click on each one to see all the products that come in that color!
Here’s what (I think) she used:
Click on these images for more details and to purchase.
Here’s some stuff you should know:

Thanks for stopping by today, and Sweet Stamping!

Mar 7, 2018 | Cards, Gallery, Guest Stamper, Sale-A-Bration |
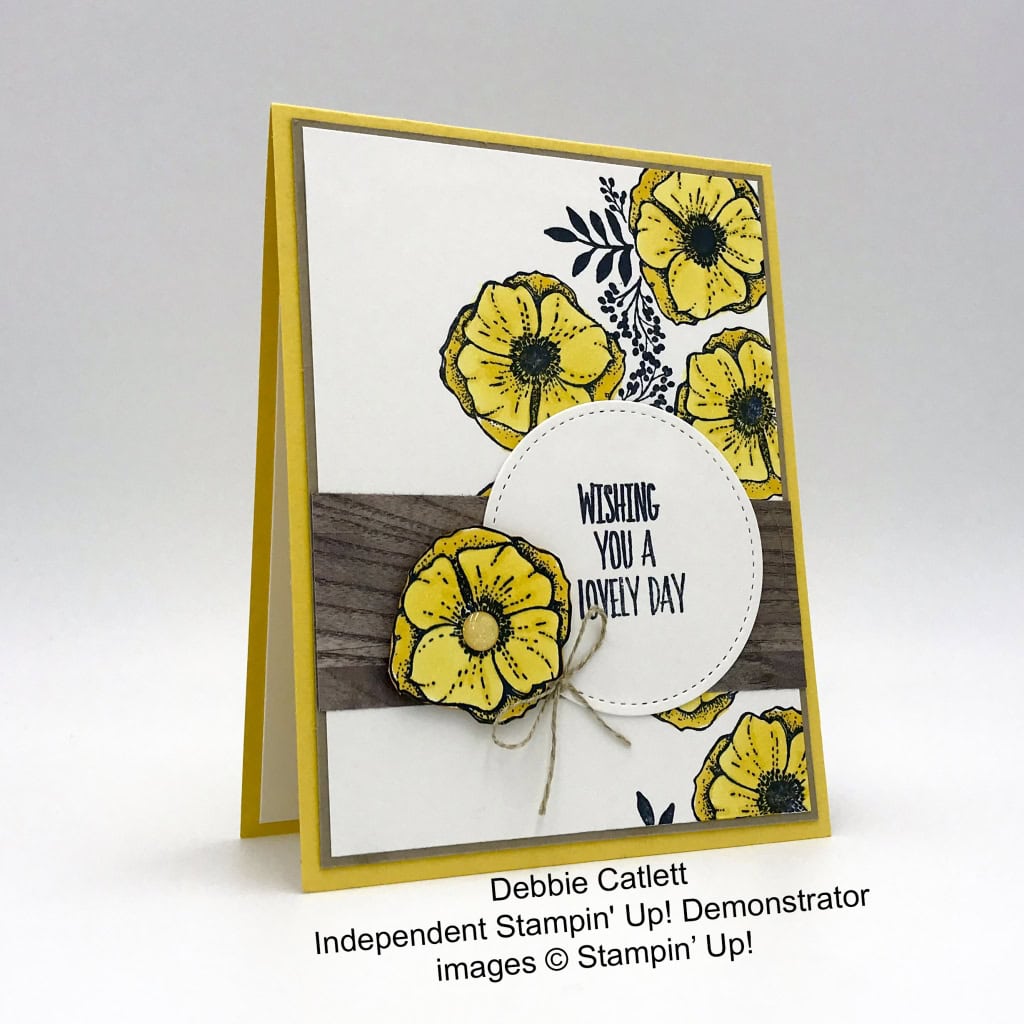
Today I get to share with you yet another card made one of my Candy Hearts team members, Debbie Catlett, for our February swap. She used the Amazing You stamp set (FREE with a $50 order, but only through March 31!), the Lovely Wishes Stamp set, Stitched Shapes Framelits Dies, and Stampin’ Blends Markers to create this stunning card
Here’s what she made:

Here’s what (I think) she did:
Cut and scored with her Stampin’ Trimmer:
- Daffodil Delight card stock (CS) cut to 4-1/4″ x 11″, then scored in half at 5-1/2″
- Soft Suede CS cut to 4″ x 5-1/4″
- Whisper White CS cut to 3-7/8″ x 5-1/8″
- Wood Textures Designer Series Paper (DSP) cut to 4″ x 2″
- Whisper White CS cut to 4″ x 5-1/4″ for the inside of the card
Stamped with the Amazing You stamp set:
- flowers in Memento Black ink onto the Whisper White CS layer
- one flower in Memento Black ink onto a scrap of Whisper White CS
Stamped with the Lovely Wishes stamp set:
- sentiment in Memento Black ink onto a scrap of Whisper White CS
Die cut using the Stitched Shapes Framelits:
- sentiment with a stitched circle die
Colored using Stampin’ Blends Markers:
- all flowers using the Dark and Light Daffodil Delight Markers
Cut using Paper Snips:
- the flower stamped onto a Scrap of Whisper White CS
Assembled the card:
- folded and burnished the score line in the card base with a Bone Folder
- Soft Suede CS layer glued onto the front of the card base
- stamped Whisper White CS layer glued onto the Soft Suede CS layer
- DSP glued onto the stamped layer
- sentiment glued onto the DSP
- loose flower adhered to the card front with Stampin’ Dimensionals
- bow tied with Linen Thread, then adhered to the card front with a Mini Glue Dot
- Glitter Enamel Dot applied to the center of the loose flower
- 4″ x 5-1/4″ Whisper White CS glued onto the inside of the card base
Here are today’s colors:
You can click on each one to see all the products that come in that color!
Here’s what she used:
Click on these images for more details and to purchase.
Here’s some stuff you should know:
- This is a fabulous time to join my team! Sale-A-Bration is the biggest event of the Stampin’ Up! year and you can save big on the ultimate bundle, the Starter Kit. CLICK HERE for more information. Contact me with any questions: email candy@stampcandy.net or call/text 404-661-5222
- Newsletter: subscribe for exclusive deals, projects, and more! Enter your email address and click SUBSCRIBE at the top right of this page, just under the picture of my smiling face. You can also choose to receive an email every day that I have a blog post.
- Check out My Events Calendar HERE
- Host Code for the month of March (34CJGPSJ) Find out more about HOW, WHEN and WHY to use the code HERE.
- My Thank You Gift to You in March: Mini Embroidery Hoops – Find out more HERE.
- Gift Certificates are available in any U.S. dollar amount from me. Contact me – email: candy@stampcandy.net OR call/text: 404-661-5222
- Gumball Rewards for all orders over $50. Find out more HERE.
Thanks for stopping by today, and Sweet Stamping!
Mar 6, 2018 | Cards, Gallery, Guest Stamper |
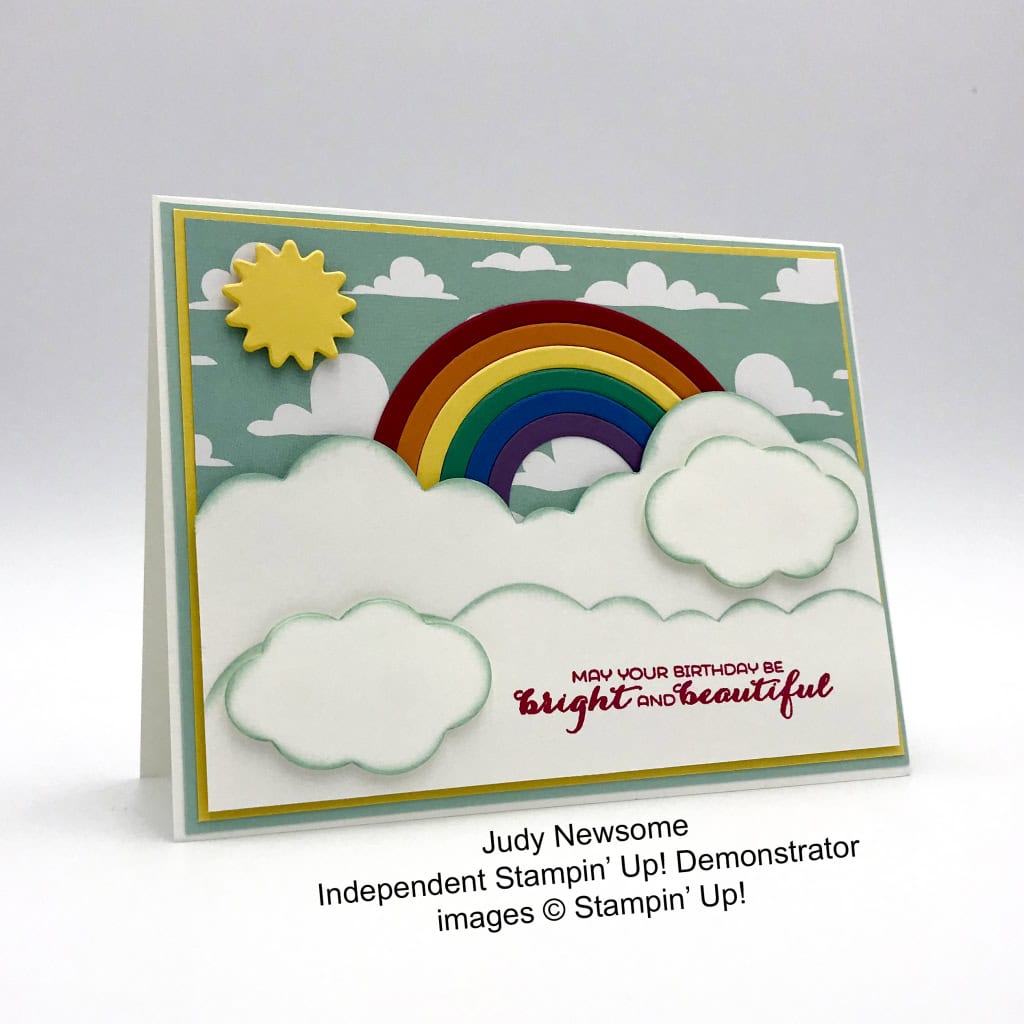
Today I get to share with you another card made one of my Candy Hearts team members, Judy Newsome, for our February swap. She used the Sunshine & Rainbows Bundle (Sunshine & Rainbows stamp set and Rainbow Builder Framelits Dies) to create this adorable, up in the clouds birthday card. The sky background is from the Myths & Magic Designer Series Paper, which goes perfectly with the bundle!
Here’s what she made:
Here’s what (I think) she did:
Cut and scored with her Stampin’ Trimmer:
- Whisper White Thick card stock (CS) cut to 5-1/2″ x 8-1/2″, then scored in half at 4-1/4″
- Pool Party CS cut to 5-3/8″ x 4-1/8″
- Daffodil Delight CS cut to 5-1/4″ x 4″
- Myths & Magic Designer Series Paper (DSP) cut to 3-7/8″ x 3″
- Whisper White CS cut to 3-7/8″ x 3″
- Whisper White CS cut to 3-7/8″ x 2″
Stamped with the Sunshine & Rainbows stamp set:
- sentiment in Real Red ink onto the 3-7/8″ x 2″ Whisper White CS
Die cut using the Rainbow Builder Framelits:
- top edges of both 3-7/8″ wide pieces of Whisper White CS (one had sentiment stamped on it)
- 3 small clouds from a scrap of Whisper White CS
- sun from a scrap of Daffodil Delight CS
- rainbow arcs from scraps of Real Red, Pumpkin Pie, Daffodil Delight, Garden Green, Pacific Point, and Perfect Plum CS
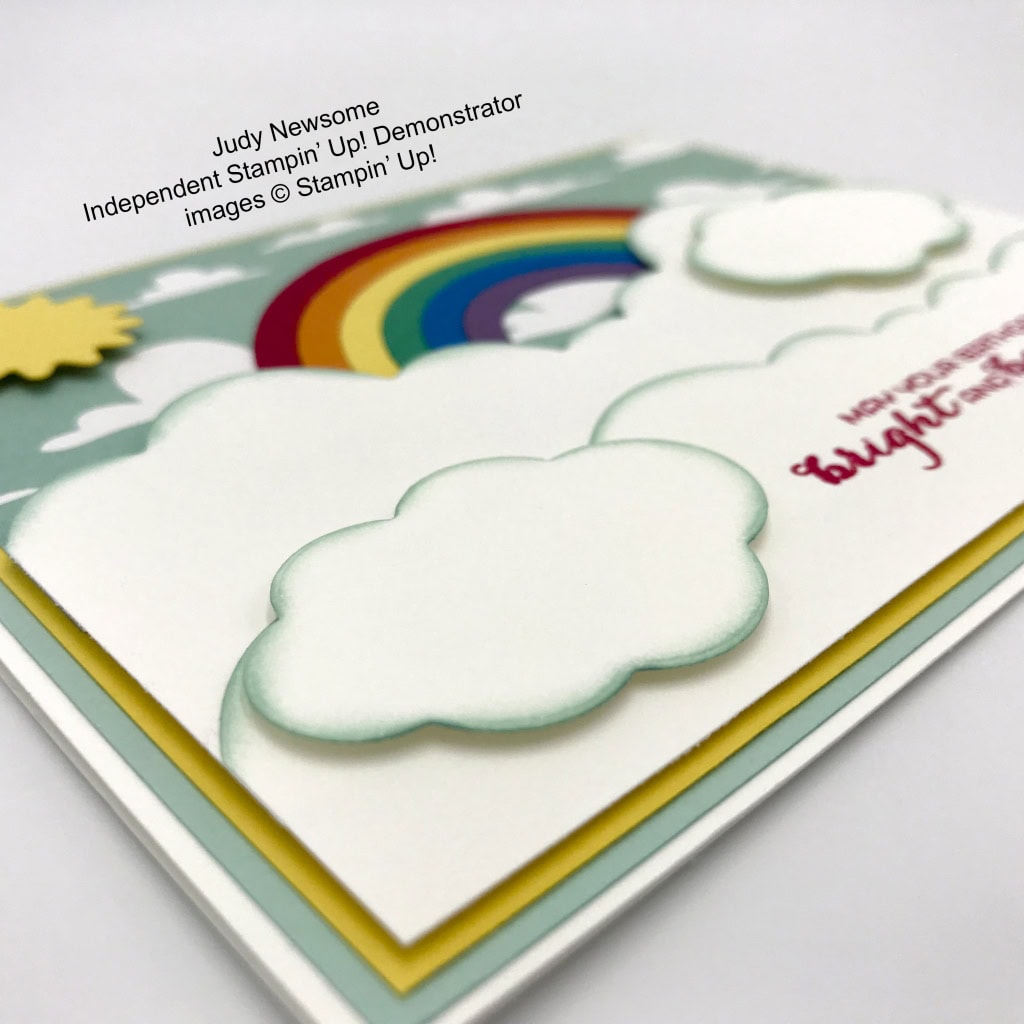
Inked with a Sponge Dauber:
- edges of the 3 small clouds in Pool Party ink
- top edges of the two 3-7/8″ wide die cut pieces of Whisper White CS in Pool Party ink
Assembled the card:
- folded and burnished the score line in the card base with a Bone Folder
- Pool Party CS layer glued onto the front of the card base
- Daffodil Delight CS layer glued onto the Pool Party CS layer
- DSP glued onto Daffodil Delight CS layer, near the top
- two 3-7/8″ wide die cut pieces glued together, then adhered to the Daffodil Delight CS layer, near the bottom, using Stampin’ Dimensionals
- rainbow pieces glued to the DSP, with the ends under the cloud layer
- two small clouds adhered to the card front using Stampin’ Dimensionals
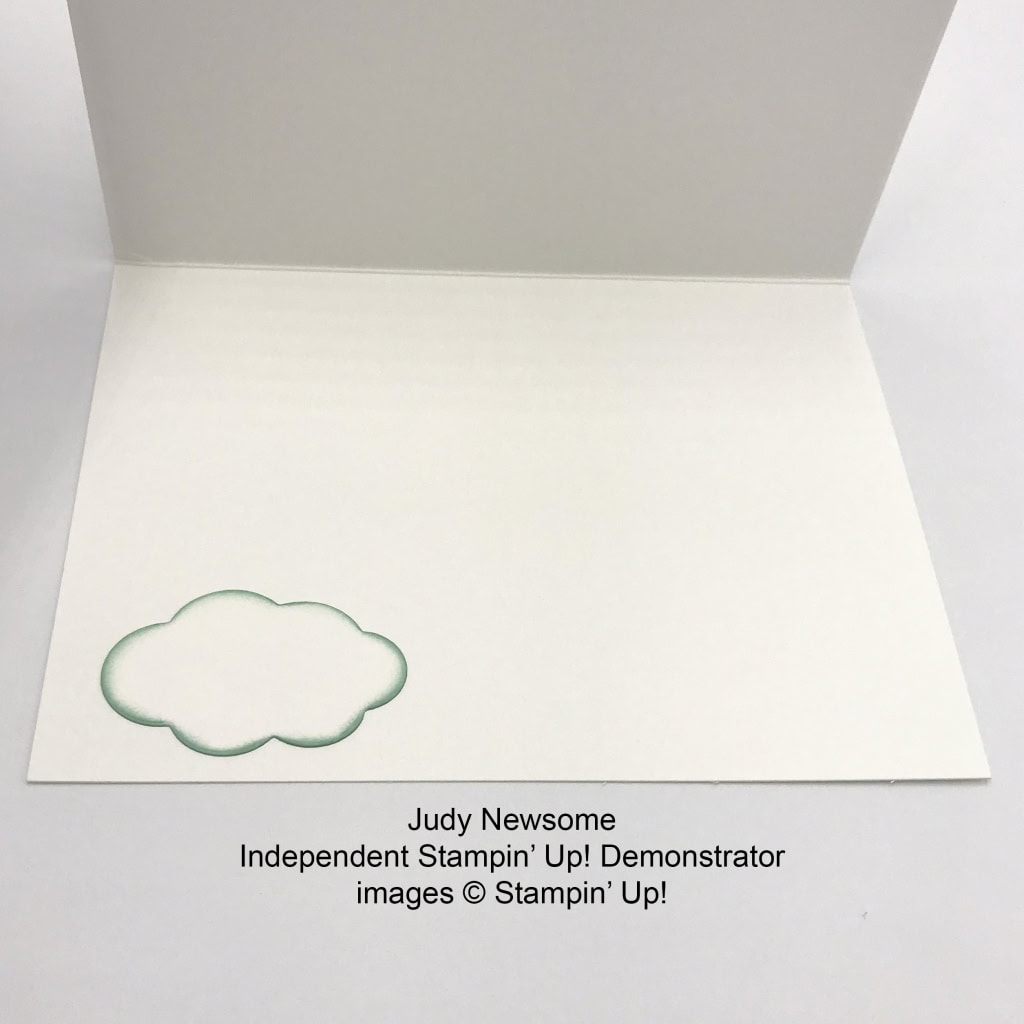
- one small cloud glued to the inside of the card base
Here are today’s colors:
You can click on each one to see all the products that come in that color!
Here’s what she used:
Click on these images for more details and to purchase.
Here’s some stuff you should know:
- This is a fabulous time to join my team! Sale-A-Bration is the biggest event of the Stampin’ Up! year and you can save big on the ultimate bundle, the Starter Kit. CLICK HERE for more information. Contact me with any questions: email candy@stampcandy.net or call/text 404-661-5222
- Newsletter: subscribe for exclusive deals, projects, and more! Enter your email address and click SUBSCRIBE at the top right of this page, just under the picture of my smiling face. You can also choose to receive an email every day that I have a blog post.
- Check out My Events Calendar HERE
- Host Code for the month of March (34CJGPSJ) Find out more about HOW, WHEN and WHY to use the code HERE.
- My Thank You Gift to You in March: Mini Embroidery Hoops – Find out more HERE.
- Gift Certificates are available in any U.S. dollar amount from me. Contact me – email: candy@stampcandy.net OR call/text: 404-661-5222
- Gumball Rewards for all orders over $50. Find out more HERE.
Thanks for stopping by today, and Sweet Stamping!
