Aug 20, 2020 | Cards, Gallery, Halloween, Holiday |
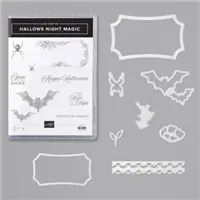
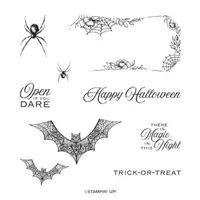
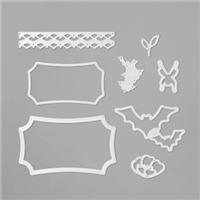
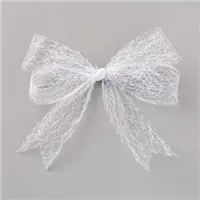
Happy Halloween card made with the Hallows Night Magic Bundle (Hallows Night Magic stamp set and Halloween Magic Dies) and Metallic Mesh Ribbon from the Magic in this Night Suite Collection. I created the background by stamping black ink onto the layer using the blob shaped rubber from the middle of the frame stamp. I think it gives the impression of dark spirits floating around in the background. And the little bit of Metallic Mesh Ribbon peeking out from under the sentiment looks like cobweb.
If you are reading this in email, some photos may appear blurry, or may not appear at all. Please click here to see the post on my blog.
S Halloween Magic Halloween Magic Halloween Magic Halloween Magic
Here’s what I made:


S
Here’s what I did:
Cut and scored with my paper trimmer:
- Basic Black card stock (CS) cut to 5-1/2″ x 8-1/2″, then scored in half at 4-1/4″
- Smoky Slate CS layer cut to 5-3/8″ x 4-1/4″
- Whisper White CS cut to 5-1/4″ x 4″ for the inside of the card base
Stamped with the Hallows Night Magic stamp set:
- frame and sentiment in Tuxedo Black Memento ink onto a scrap of Whisper White Thick CS
- blob in Tuxedo Black Memento ink onto the Smoky Slate CS layer
- NOTE: the blob is the piece of rubber from the center of the frame stamp
- 1 large and 2 small spiders onto the Whisper White CS for the inside of the card base
Cut using the Halloween Magic Dies:
- frame/sentiment
- scrap of Basic Black CS with the larger frame die
Colored using Stampin’ Blends Markers:
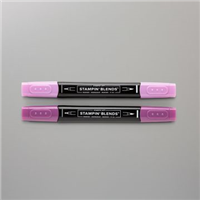
- flowers in Blackberry Bliss
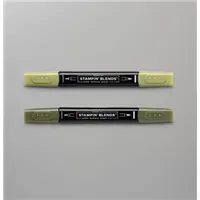
- leaves in Mossy Meadow
- spider bodies filled in with Blackberry Bliss
Assembled the card:
- burnished the fold in the card base with a Bone Folder
- Smoky Slate CS layer glued onto the front of the card base
- Basic Black CS die cut glued onto the Smoky Slate CS layer
- 4-1/2″ of Metallic Mesh Ribbon adhered onto the Basic Black CS die cut using Stampin’ Seal +
- die cut sentiment/frame adhered over the ribbon using Black Stampin’ Dimensionals
- Whisper White CS glued onto the inside of the card base
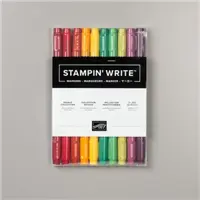
- flicked ink onto the front of the card base and onto the inside of the card base using a Blackberry Bliss Stampin’ Write Marker
- NOTE: I used the cap of the marker to flick the ink from the brush end of the marker
S
Here are today’s colors:
You can click on each one to see all the products that come in that color!
S
Here’s what I used:
Click on these images for more details and to purchase. If you are reading this post in email, the product images may not show up. Please click here to see the post on my blog.
Supply List. <— Click for a clickable and printable list of the products!
S
Use your Bonus Days coupons by August 31!
Click the image below to shop now and use your Bonus Days coupons!

S
Here are some helpful links:
S
Thanks for stopping by today, and Sweet Stamping!
Aug 6, 2020 | Cards, Gallery, Halloween, Holiday |
Today I’m sharing a card I made using the Hallows Night Magic Bundle and other products from the Magic in This Night Suite.
Last night I hosted a Mystery Stamping Party on Facebook, and I had such a great time! Throughout the party, I posted “clues” that participants followed to create a card, without seeing what the end result would look like. There were some really talented stampers making amazing cards. I look forward to doing this again.
If you’d like to invite your friends to a Facebook stamping party, let me know. You will earn Stampin’ Rewards on sales placed using the Host Code for the party.
If you are reading this in email, some photos may appear blurry, or may not appear at all. Please click here to see the post on my blog.
S night magic night magic night magic night magic
Here’s what I made:


S
Here’s what I did:
Cut and scored with my paper trimmer:
- Whisper White Thick card stock (CS) cut to 5-1/2″ x 6-1/4″, then scored along the longer side at 4-1/4″
- Whisper White Thick CS cut to 5-1/2″ x 1″
- Magic in This Night Designer Series Paper (DSP) layer cut to 5-1/4″ x 1-3/4″ (Blackberry Bliss pattern)
- Magic in This Night Designer Series Paper (DSP) layer cut to 5-1/4″ x 3/4″ (Blackberry Bliss pattern)
- Whisper White Thick CS layer cut to 2-1/2″ x 3-1/2″
- Magic in This Night Designer Series Paper (DSP) layer cut to 2-1/4″ x 3-1/4″ (Basic Black pattern)
Stamped with the Hallows Night Magic stamp set:
- sentiment in Tuxedo Black Memento ink onto the inside of the card base, where it will show through the “window”
- large spider in Tuxedo Black Memento ink onto a scrap of Basic Gray CS
Cut using the Halloween Magic Dies:
Assembled the card:
- burnished the fold in the card base with a Bone Folder
- 5-1/4″ x 1-3/4″ DSP layer glued onto the top of the front of the card base
- 5-1/4″ x 3/4″ DSP layer glued onto the 1″ strip of Whisper White Thick CS
- 2-1/4″ x 3-1/4 DSP layer glued onto the Whisper White Thick CS layer
- 1″ strip lined up along the bottom of the back of the card base
- Whisper White Thick CS layer glued, at the top and bottom only, onto the two parts of the front of the card base
- die cut spider glued onto the center of the black DSP layer
- Metallic Mesh Ribbon tied in a bow and adhered onto the top DSP layer using a Mini Glue Dot
S
Here are today’s colors:
You can click on each one to see all the products that come in that color!
S
Here’s what I used:
Click on these images for more details and to purchase. If you are reading this post in email, the product images may not show up. Please click here to see the post on my blog.
Supply List. <— Click for a clickable and printable list of the products!
S
The new catalog, and the new online store, are live!
Click the image to shop now!
S
Use your Bonus Days coupons by August 31!
Click the image below to shop now and use your Bonus Days coupons!

S
Here are some helpful links:
S
Thanks for stopping by today, and Sweet Stamping!
Aug 4, 2020 | Cards, Gallery, Halloween, Holiday, Techniques |
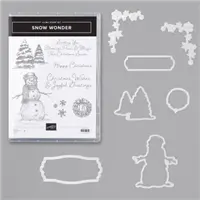
Today the brand new August – December 2020 Mini Catalog goes live! To celebrate, I used two brand new products. I used the stamp set from the Hallows Night Magic Bundle, and the dies from the Snow Wonder Bundle to create today’s Happy Halloween card. The background was created using the Smooshing Technique. Basically you smear some ink around a slick surface, like a Window Sheet, and spritz it with water, then “smoosh” paper into it. Every piece is unique.
If you are reading this in email, some photos may appear blurry, or may not appear at all. Please click here to see the post on my blog.
S hallows hallows hallows hallows
Here are the new products I used:
I used the stamp set from this bundle.
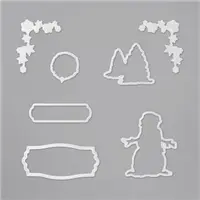
I used the dies from this bundle, specifically the one at the bottom left. The die is taller than the 7/8″ strip for the sentiment, but I centered it over the sentiment, and used it to cut only the ends.
S
Here’s what I made:

I heat embossed the sentiment in white, then colored it with a Dark Highland Heather Stampin’ Blends Marker.
S
Here’s what I did:
Cut and scored with my paper trimmer:
- Basic Black card stock (CS) cut to 5-1/2″ x 8-1/2″, then scored in half at 4-1/4″
- Shimmery White CS layer cut to 5-3/8″ x 4-1/8″
- Basic Black CS cut to 4″ x 7/8″
- Smoky Slate CS cut to 5-3/8″ x 4-1/8″ for the inside of the card base (Purple Posy or Highland Heather CS would work well also.)
Smooshing Technique:
- Gorgeous Grape and Tuxedo Black Memento ink refills dripped onto a Window Sheet, then swirled around
- water spritzed onto the ink
- Shimmery White CS layer laid on the Window Sheet to transfer the ink to it, then lifted it and laid it down in a different area of the Window Sheet
- continued “smooshing” the CS in the ink until I liked the look
- set the CS aside to dry completely
- Just a few drops of ink are more than enough for one card, so I smooshed 4 pieces of the Shimmery White CS. I’ll hold on to the other three for future projects. You can see in this photo that there was still some ink left on the Window Sheet.The piece at the bottom left is the one I used for today’s card, because I thought it looked the most like a spooky sky.

Stamped with the Hallows Night Magic stamp set:
- the bats in Tuxedo Black ink onto the smooshed CS layer
- sentiment in Versamark ink onto the strip of Basic Black CS, then heat embossed it in white
Cut using the Snow Time Dies:
- sentiment
- I centered the strip in the die to cut only the ends.
Colored using a Stampin’ Blends Marker:
- embossed sentiment in Dark Highland Heather
Assembled the card:
- burnished the fold in the card base with a Bone Folder
- smooshed layer glued onto the front of the card base
- sentiment adhered onto the smooshed layer using Black Stampin’ Dimensionals
- 2 Red Rhinestones applied onto the larger bat as eyes
- Smoky Slate CS glued onto the inside of the card base (I think I’ll try using Purple Posy or Highland Heather CS on the inside of the cards I make using the other smooshed pieces.)
S
Use the Bonus Days coupons you earned in the last month!
Click the image below to shop now and use your Bonus Days coupons!

S
Here are today’s main colors:
You can click on each one to see all the products that come in that color!
S
Here’s what I used:
Click on these images for more details and to purchase. If you are reading this post in email, the product images may not show up. Please click here to see the post on my blog.
Supply List. <— Click for a clickable and printable list of the products!
S
Here are some helpful links:
S
Thanks for stopping by today, and Sweet Stamping!
Sep 26, 2019 | Cards, Gallery, Halloween, Holiday, Paper Pumpkin |
 It’s time for the APPT Blog Hop for September! This month’s kit is called Bone Appétit, and it makes adorable treat boxes. I used the kit to decorate one of the boxes a little differently from the directions in the Bone Appétit kit, and to make a card that mimics the dots on the box. I love the intricate die cut “webs” of bones. And the die cut skeletons are so cute! The one on my card is holding a sign with the greeting, “Happy Halloween,” which is just one of several great sentiments in the Bone Appétit stamp set. I’ll be using this stamp set a lot, since our Halloween party theme this year is Bones!
I’m sorry there have been several days in the past couple weeks when I didn’t get a blog post done. If you’ve followed me for a while, you know that during this time of year our house is consumed with Halloween party prep. There’s little room in the whole place to walk because of all the boxes and totes packed full of skeletons, skulls, bones, etc., as well as other Halloween goodies. There’s a lot to do and not a lot of time left to do it. So please forgive me if I’m not as present online as usual in the next few weeks.
S
Here’s what I made:


I found these Pumpkin Spice Soft Caramels by Werther’s Originals at Party City. They are yummy!
S
Here’s what I did:
Cut and scored with my paper trimmer:
- Basic Black card stock (CS) cut to 5-1/2″ x 8-1/2″, then scored in half at 4-1/4″
- Whisper White CS cut to 5-1/4″ x 4″ for the inside of the card base
Stamped with the Bone Appétit stamp set:
- card sentiment in black ink onto an orange rimmed tag
- box sentiment in black ink onto the corresponding white tag
- skeleton in Pumpkin Pie ink onto the Whisper White CS for the inside of the card
Cut using the 1/2″ Circle Punch:
- 25 circles from a scrap of Pumpkin Pie CS
Colored using a Stampin’ Blends Marker:
- edges of the box sentiment
Assembled the card:
- burnished the fold in the card base using a Bone Folder
- Pumpkin Pie CS circles glued onto the front of the card base
- web and skeleton from the kit glued onto the front of the card base
- sentiment glued onto the front of the card base
- Whisper White CS glued onto the inside of the card base
Assembled the box:
- burnished the folds in the box using a Bone Folder, then folded the box into shape
- web glued onto the front of the box
- sentiment glued onto the top flap of the box, being careful not to glue it to the flap on the other side
- filled the box with caramels and closed it up
S
Here’s the APPT Bone Appétit Blog Hop:
Here are today’s colors:
You can click on each one to see all the products that come in that color!
S
Here’s what I used:
Click on these images for more details and to purchase.
<– Click here for a clickable and printable list!
S
Here are some helpful links:
S
Thanks for stopping by today, and Sweet Stamping!
Sep 24, 2019 | Cards, Gallery, Halloween, Holiday, Paper Pumpkin |
It’s time for the September PPP Blog Hop! This month’s kit is called Bone AAppétit, and it’s all about Halloween. The kit makes cute little 2″ treat boxes. For my projects I focused on the stamp set from the kit and used it to make a card, a box, and a tag. Enjoy! Or I should say, Bone Appétit!

S
Here’s what I made:


S
Here’s what I did:
Cut and scored with my paper trimmer:
- Gorgeous Grape card stock (CS) cut to 5-1/2″ x 8-1/2″, then scored in half at 4-1/4″
- Basic Black CS card layer cut to 5-1/4″ x 4″
- Whisper White CS card layer cut to 5″ x 3-3/4″
- Whisper White CS cut to 5-1/4″ x 4″ for the inside of the card base
- Gorgeous Grape CS cut to 2″ x 5-1/2″ for the tag base
- Basic Black CS tag layers cut to 1-7/8″ x 5-3/8″ (2 pieces)
- Whisper White CS tag layers cut to 1-3/4″ x 5-1/4″ (2 pieces)
Cut using the Scalloped Tag Topper Punch:
- top end of all 5 tags layers
Cut using the Banner Triple Punch:
- bottom end of all 5 tags layers
Stamped with the Bone Appétit stamp set:
- 2 skeletons in Gorgeous Grape ink onto one of the Whisper White CS tag layers
- skull and sentiment in Gorgeous Grape ink onto the other Whisper White CS tag layer
- 2 skeletons and sentiment in Gorgeous Grape ink onto the Whisper White CS card layer
- skull in Gorgeous Grape ink onto the Whisper White CS for the inside of the card base
- 2 skeletons in black ink onto the lid of the pizza box
Embossed using the Stylish Scroll Embossing Folder:
- card layer and tag layer stamped with skeletons
Colored using a Gorgeous Grape ink pad:
- the outside of a white Mini Pizza Box
- a bone “web” from the kit
Assembled the card:
- burnished the fold in the card base with a Bone Folder
- Basic Black CS layer glued onto the front of the card base
- Whisper White CS layer glued onto the Basic Black CS layer
- colored web adhered onto the Whisper White CS layer using a mini Black Stampin’ Dimensional
- Whisper White CS with skull glued onto the inside of the card base
Assembled the tag & box:
- burnished the folds in the pizza box using a Bone Folder (actually I did this before I colored it)
- white web glued onto the lid of the box
- treat put inside the box and Whisper White Baker’s Twine tied around it
- Gorgeous Grape CS tag layers glued onto either side of the Basic Black CS tag base
- Whisper White CS tag layers glued onto the Gorgeous Grape CS tag layers
- Black Organza ribbon run through the hole in the tag, then Gorgeous Grape ribbon tied in a knot around it
- Whisper White twine from the box pulled up through the hole in the tag and tied in a bow
S
Here’s the Bone Appétit blog hop:
Click the pumpkin to hop over to Anastasia Radloff of Stampin’ Blondie!

Here are today’s colors:
You can click on each one to see all the products that come in that color!
S
Here’s what I used:
Click on these images for more details and to purchase. The items don’t show in your email. You must click to open the blog post to see them.
<– Click here for a clickable and printable list!
S
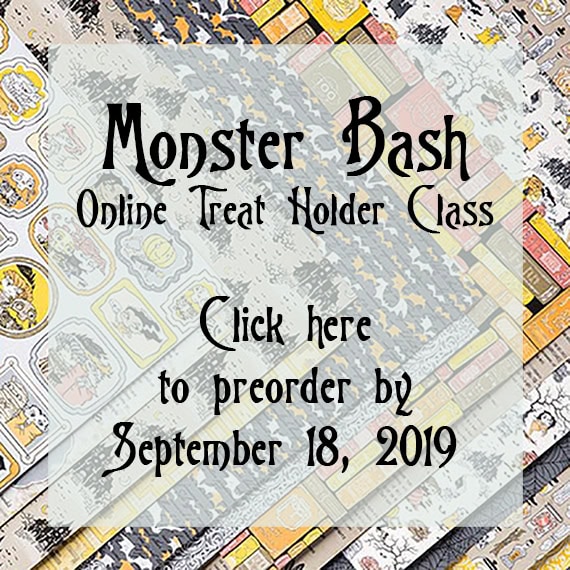
Preorder the Monster Bash Online Treat Holder Class by September 25 (extended one week!):
- Make 6 adorable treat holders in the comfort of your own home!
- 2 each of 3 designs
- Features the Monster Bash Suite on pages 52-54 of the 2019 Holiday Catalog
- I’ve done the trimming and scoring for you!
- You’ll receive the stamp set, dies, pre-cut kits, and Black Stampin’ Dimensionals.
- Full detailed instructions
- Limited spots available
Click on the image below for details and class options, or copy and paste this link into your browser: https://stampcandy.net/online-classes/monster-bash-treat-holder-class-preorder/
S
Here are some helpful links:
S
Thanks for stopping by today, and Sweet Stamping!
Sep 23, 2019 | Cards, Gallery, Halloween, Holiday |
Today I’m sharing one of the Make & Take projects from my September Stamp Club. It’s a card made with the The Raven stamp set, Ornate Frames Dies, Monster Bash Designer Series Paper, and Red Rhinestone Basic Jewels. I love the raven image in this stamp set, as well as the creepy branch. It really does bring to mind Edgar Allen Poe’s poem The Raven.
One of the members of the club made her raven card a little differently. I have included photos below of Brenda’s card, which she made as a vertical card, instead of horizontal like mine.
S
Here’s what I made:


Here’s what Brenda made:


S
Here’s what I did:
Cut and scored with my paper trimmer:
- Basic Black card stock (CS) cut to 5-1/2″ x 8-1/2″, then scored in half at 4-1/4″
- Monster Bash Designer Series Paper (DSP) layer cut to 5-1/2″ x 4-1/4″
- Basic Black CS layer cut to 2-3/4″ x 4″
- Smoky Slate CS layer cut to 3-5/8″ x 3-7/8″
- Whisper White CS cut to 5-1/4″ x 4″ for the inside of the card base
Stamped with the The Raven stamp set:
- raven and branch in Tuxedo Black Memento ink onto the Smoky Slate CS layer
- outer sentiment in Tuxedo Black Memento ink onto a scrap of Smoky Slate CS
- inner sentiment in Tuxedo Black Memento ink onto the Whisper White CS
Cut using the Ornate Frames Dies:
- outer sentiment
- ornate frame from a scrap of Basic Black CS
Assembled the card:
- burnished the fold in the card base with a Bone Folder
- DSP layer glued onto the front of the card base
- Smoky Slate CS layer glued onto the Basic Black CS layer
- Basic Black CS layer glued onto the DSP layer
- Red Rhinestone applied onto the Raven using the Take Your Pick Tool
- die cut sentiment glued onto the Basic Black CS ornate frame
- Basic Black CS ornate frame adhered over the top right edge of the Smoky Slate CS layer using Black Stampin’ Dimensionals
- Whisper White CS glued onto the inside of the card base
S
Here are today’s colors:
You can click on each one to see all the products that come in that color!
S
Here’s what I used:
Click on these images for more details and to purchase.
<– Click here for a clickable and printable list!
S
Preorder the Monster Bash Online Treat Holder Class by September 25:
- Extended one more week!
- Make 6 adorable treat holders in the comfort of your own home!
- 2 each of 3 designs
- Features the Monster Bash Suite on pages 52-54 of the 2019 Holiday Catalog
- I’ve done the trimming and scoring for you!
- You’ll receive the stamp set, dies, pre-cut kits, and Black Stampin’ Dimensionals.
- Full detailed instructions
- Limited spots available
Click on the image below for details and class options, or copy and paste this link into your browser: https://stampcandy.net/online-classes/monster-bash-treat-holder-class-preorder/

S
Here are some helpful links:
S
Thanks for stopping by today, and Sweet Stamping!


