Jan 7, 2020 | Cards, Gallery, New Products |
Today I’m sharing with you another card I made using the new Country Club Suite. It’s a birthday card I made using the Clubhouse stamp set, Golf Club Dies, Country Club Designer Series Paper, and Country Club Twine Combo Pack.


Here’s what I made:
S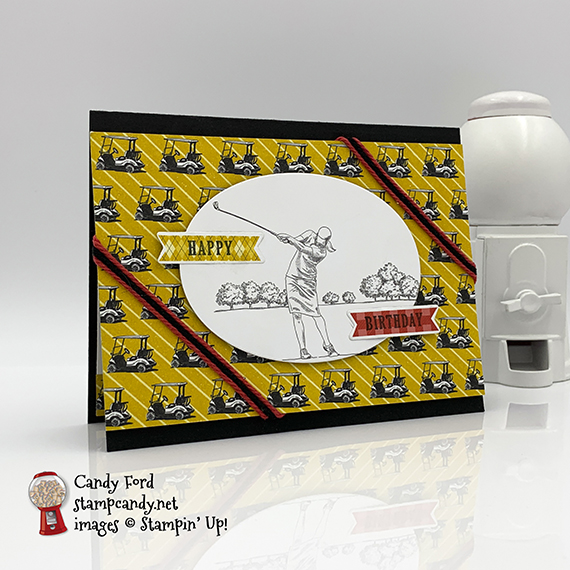

S
Here’s what I did:
Cut and scored with my paper trimmer:
- Basic Black card stock (CS) cut to 5-1/2″ x 8-1/2″, then scored in half at 4-1/4″
- Country Club Designer Series Paper (DSP) layer cut 5-1/2″ wide and about 3-3/4″ tall (cut between rows of golf carts)
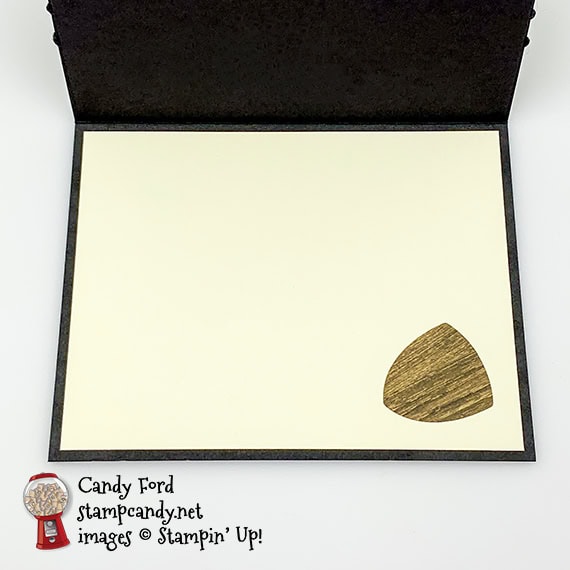
- Whisper White CS cut to 5-1/4″ x 4″ for the inside of the cardstock
- one row of golf cards 5-1/2″ long cut from DSP
Stamped with the Clubhouse stamp set:
- each half of the sentiment onto a banner from the DSP
Cut using the Golf Club Dies:
Cut using the Layering Ovals Dies:
Assembled the card:
- burnished the fold in the card base with a Bone Folder
- sentiment banners glued onto the oval scene
- oval adhered onto the DSP layer using Black Stampin’ Dimensionals
- twine (one piece Basic Black between two pieces of Poppy Parade) adhered onto the bottom left and top right corners of the DSP layer using Tear & Tape
- DSP layer glued onto the front of the card base
- strip of golf carts glued onto the Whisper White CS
- Whisper White CS glued onto the inside of the card base
S
Here are today’s colors:
You can click on each one to see all the products that come in that color!
S
Here’s what I used:
Click on these images for more details and to purchase.
Click “Supply List” for a clickable and printable list of the products!
S
Here are some helpful links:
S
Thanks for stopping by today, and Sweet Stamping!
Jan 6, 2020 | Cards, Gallery, New Products |
Recently I had the honor of presenting the new Country Club Suite at Stampin’ Up!’s OnStage event in Atlanta. I loved getting and playing with the products before anyone else had even heard of them. The suite is designed around golf, but isn’t limited to that. There is a die in the Golf Club Dies that is for a crest, but I kept seeing a guitar pick. So I decided to make a guitar card. I found the perfect sentiment in the Darling Label Punch Box stamp set, Congratulations, Rock Star!
Here’s what I made:

 S
S
Here’s what I did:
Cut and scored with my paper trimmer:
- Basic Black card stock (CS) cut to 5-1/2″ x 8-1/2″, then scored in half at 4-1/4″
- Pressed Petals Specialty Designer Series Paper (DSP) layer cut to 5-1/2″ x 4-1/4″
- Basic Black CS layer cut to 5-3/8″ x 4-1/8″
- Very Vanilla CS cut to 5-1/4″ x 4″ for the inside of the card base
Stamped with the Darling Label stamp set:
- sentiment in black Memento ink onto a scrap of Very Vanilla Thick CS
Cut using the Golf Clubs Dies:
- sentiment, and a scrap of DSP, using the crest shaped die
Cut using the Layering Circles Dies:
- center of DSP layer
- center of Basic Black CS layer
Assembled the guitar card:
- burnished the fold in the card base with a Bone Folder
- Basic Black CS layer glued onto the back of the DSP layer, lining up the die cut circles
- 6 pieces of Basic Black Baker’s Twine laid across the DSP layer, the ends wrapped around and adhered to the back of using Tear & Tape
- DSP/Basic Black CS layer adhered onto the front of the card base using Black Dimensionals
- adhered the sentiment onto the DSP layer using Mini Black Stampin’ Dimensionals, between the twine
- Very Vanilla CS glued onto the inside of the card base
- DSP die cut glued onto the Very Vanilla CS
S
Here are today’s colors:
You can click on each one to see all the products that come in that color!
S
Here’s what I used:
Click on these images for more details and to purchase.
<– Click here for a clickable and printable list!
S
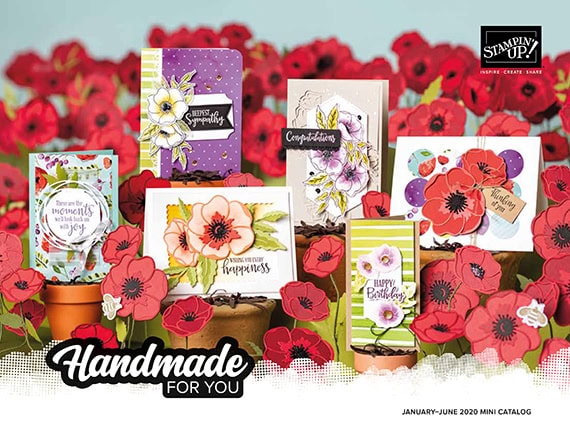
Need a catalog?
Click here to request your free catalogs. The January – June 2020 Mini Catalog is now live, as well at the 2020 Sale-a-bration brochure.

S
Here are some helpful links:
S
Thanks for stopping by today, and Sweet Stamping!
Sep 18, 2019 | Autumn, Bags, Blog Hop, Gallery, Gift Wrap, Gifts, New Products, Paper Pumpkin, Tags |

It’s time for the Inking Royalty Blog Hop for September! This month’s theme in Autumn. And what could be more Autumnal than beautifully colored leaves? For my project, I used products from the Come to Gather Suite to decorate a gift bag from last month’s Paper Pumpkin kit. (You can see another project I made using these bags here.) From the suite, I used the Gather Together bundle (Gather Together stamp set and Gathered Leaves Dies) and Come to Gather Designer Series Paper.
I was going to use the Come To Gather Ribbon Combo Pack as well, but I got so carried away with the leaves, I didn’t think it needed it. I used each embossed leaf die (3 in the set) to cut two each of four colors – and I used 18 of the 24 leaves I cut! Guess I just couldn’t stop until I had a big leaf pile! Doesn’t it make you want to jump in and scatter them?
Be sure to hop all the way around to all the stops. You don’t want to miss any of the great projects from this talented group!
S
Here’s what I made:


S
Here’s what I did:
Cut and scored with my paper trimmer:
- Come To Gather Designer Series Paper (DSP) cut to 2″ x 5-1/4″
- DSP cut to 1-1/2″ x 5″
- Copper Foil Sheet cut to 1-1/2″ x 4-3/4″
Stamped with the Gather Together stamp set:
- large leaf in Pretty Peacock ink onto a scrap of Pretty Peacock CS
- sentiment in Versamark ink on the leaf, then heat embossed in copper
Cut using the Gathered Leaves Dies:
- stamped leaf
- assortment of embossed leaves from scraps of Merry Merlot, Cajun Craze, and Pretty Peacock CS and Copper Foil Sheet
Cut using the Banner Triple Punch:
- one end of each of the 3 paper strips
Assembled the project:
- adhered the 3 tags together using Snail
- adhered the assorted leaves onto the tags and each other using Snail
- large stamped leaf adhered onto the leaf “pile” using Black Stampin’ Dimensionals
- tag assembly glued onto the front of the bag
- 3 Pretty Peacock Faceted Dots applied onto the bag, at bottom right
S
Here’s the hop:
Thank you for hopping along with us. If you get stuck during the Blog Hop, please use this line-up as a guide:
- Brian King at Stamp with Brian
- Linda Krueger at The Stamp Coach
- Lynn Kolcun at Avery’s Owlery
- Robbye Hamilton at Miss Hammie’s Crafts
- Jackie Beers at Blue Line Stamping
- Sue Jackson at Just Peachy Stamping
- Shawn de Oliveira at Shawn Stamps
- Jennifer Spiller at Westside Paper Creations
- Candy Ford at Stamp Candy <– YOU ARE HERE!!!
- Sheryl Sharp at Sharp Notes by Sheryl
- Julie DiMatteo at The Paper Pixie
Here are today’s colors:
You can click on each one to see all the products that come in that color!
S
Here’s what I used:
Click on these images for more details and to purchase.
<– Click here for a clickable and printable list!
S
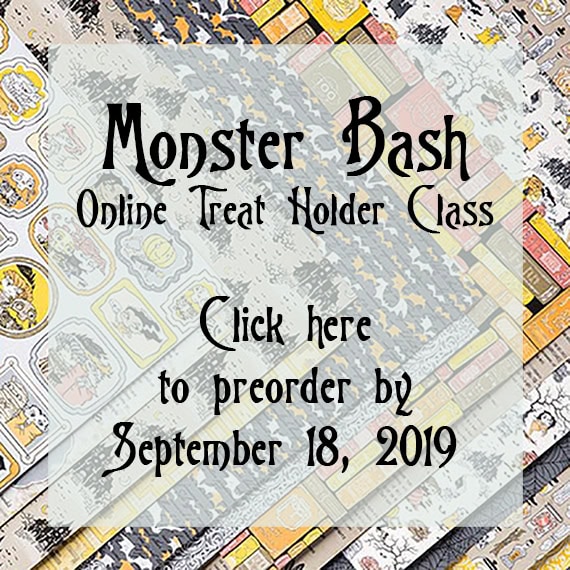
Preorder the Monster Bash Online Treat Holder Class:
- Extended for one more week! Order by September 25!
- Make 6 adorable treat holders in the comfort of your own home!
- 2 each of 3 designs
- Features the Monster Bash Suite on pages 52-54 of the 2019 Holiday Catalog
- I’ve done the trimming and scoring for you!
- You’ll receive the stamp set, dies, pre-cut kits, and Black Stampin’ Dimensionals.
- Full detailed instructions
- Limited spots available
Click on the image below for details and class options, or copy and paste this link into your browser: https://stampcandy.net/online-classes/monster-bash-treat-holder-class-preorder/
S
Here are some helpful links:
S
Thanks for stopping by today, and Sweet Stamping!
Sep 17, 2019 | Blog Hop, Decor, Gallery, Halloween, Holiday, New Products |

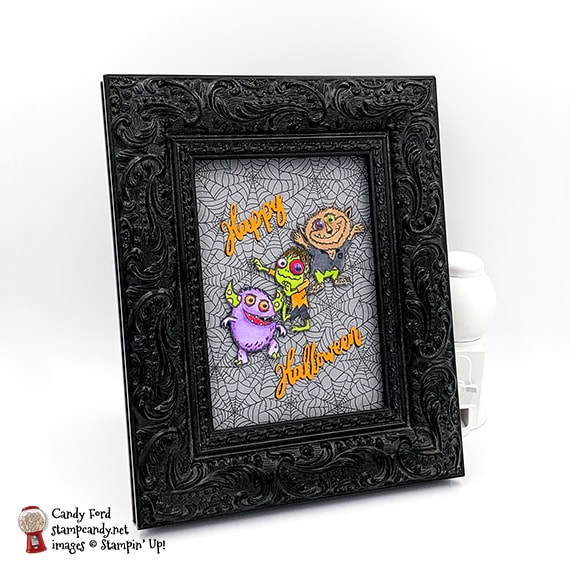
Today is my first time participating in the Home Decor SU Style Blog Hop. I used the Boo to You stamp set, Word Wishes Dies, and Monster Bash Designer Series Paper to create this greeting for my foyer table. I just love the Boo to You stamp set’s three adorable little monsters. Now I realize that “adorable monsters” might seem like an oxymoron, but these guys really are cute.
S
Here’s what I made:
S
Here’s what I did:
Cut and scored with my paper trimmer:
- Monster Bash Designer Series Paper (DSP) background cut to 5″ x 7″
Stamped with the Boo to You stamp set:
- 3 monsters in Tuxedo Black Memento ink onto Whisper White cardstock (CS)
Cut using the Word Wishes Dies:
- “Happy” and “Halloween” from scraps of Pumpkin Pie and Basic Black CS
Colored using Stampin’ Blends Markers:
- monsters in Granny Apple Green, Highland Heather, Pumpkin Pie, Real Red, Bronze, and Basic Black
- I also added some shading using an Early Espresso Stampin’ Write Marker.
Cut using Paper Snips:
Assembled the project:
- googly eyes glued onto the monsters (purple monster has two small orange eyes; zombie had a small white eye and a large purple eye; werewolf has a large purple eye and a small green eye.)
- Pumpkin Pie CS words glued on top of the Basic Black CS words, just slightly askew to make a shadow
- monsters adhered onto the DSP using Black Stampin’ Dimensionals
- die cut words glued onto the DSP
- the whole thing popped into a 5″ x 7″ frame
S
Here’s the hop:
Here are today’s colors:
You can click on each one to see all the products that come in that color!
S
Here’s what I used:
Click on these images for more details and to purchase.
<– Click here for a clickable and printable list!
S
Preorder the Monster Bash Online Treat Holder Class by TOMORROW, September 18:
- Make 6 adorable treat holders in the comfort of your own home!
- 2 each of 3 designs
- Features the Monster Bash Suite on pages 52-54 of the 2019 Holiday Catalog
- I’ve done the trimming and scoring for you!
- You’ll receive the stamp set, dies, pre-cut kits, and Black Stampin’ Dimensionals.
- Full detailed instructions
- Limited spots available
Click on the image below for details and class options, or copy and paste this link into your browser: https://stampcandy.net/online-classes/monster-bash-treat-holder-class-preorder/
S
Here are some helpful links:
S
Thanks for stopping by today, and Sweet Stamping!
Sep 17, 2019 | Cards, Gallery, Halloween, Holiday, New Products |
Today’s project is a card I made with the Harvest Hellos bundle (Harvest Hellos stamp set and Apple Builder Punch,) Layered Leaves embossing folder, and Ornate Frames Dies. The three enamel dots are from the Monster Bash Enamel Shapes, and the Mossy Meadow linen thread is from the Magnolia Lane Ribbon Combo Pack.
The Harvest Hellos bundle is quite versatile. You can make pumpkins, jack-o-lanterns, and apples for Autumn, Halloween, Thanksgiving, school, get well, and more.

S
Here’s what I made:


S
Here’s what I did:
Cut and scored with my paper trimmer:
- Mossy Meadow card stock (CS) cut to 4-1/4″ x 11″, then scored in half at 5-1/2″
- Basic Black CS layer cut to 4-1/8″ x 5-3/8″
- Very Vanilla CS layer cut to 2-5/8″ x 3-7/8″
- Mossy Meadow CS layer cut to 2-1/2″ x 3-3/4″
- Very Vanilla CS cut to 4″ x 5-1/4″ for the inside of the card base
Stamped with the Harvest Hellos stamp set:
- pumpkin in Pumpkin Pie ink onto a scrap of Pumpkin Pie CS
- face in Tuxedo Black Memento ink onto the Pumpkin Pie CS pumpkin
- pumpkin in Pumpkin Pie ink, stamped off once, onto the Very Vanilla CS for the inside of the card base (Oops, I forgot to photograph the inside of the card. I stamped the pumpkin in the bottom right corner.)
- sentiment in Tuxedo Black Memento ink onto a scrap of Very Vanilla CS
- leaf and tendril in Mossy Meadow ink onto the Mossy Meadow CS layer
- stem in Tuxedo Black Memento ink onto a scrap of Soft Suede CS
Cut using the Apple Builder Punch:
- Pumpkin Pie CS pumpkin
- stem
Cut using the Ornate Frames Dies:
Embossed using the Layered Leaves embossing folder:
Assembled the card:
- burnished the fold in the card base with a Bone Folder
- Mossy Meadow linen thread wrapped twice around the Basic Black CS layer and tied in a bow
- Basic Black CS layer glued onto the front of the card base
- stem glued onto the back of the punched pumpkin
- punched pumpkin glued onto the Mossy Meadow CS layer
- sentiment glued onto the Mossy Meadow CS layer
- Mossy Meadow CS layer glued onto the Very Vanilla CS layer
- Very Vanilla CS layer glued onto the Basic Black CS layer
- 2 Basic Gray enamel dots applied onto the Basic Black CS layer
- 1 Basic Black enamel dot applied onto Mossy Meadow CS layer
- Very Vanilla CS glued onto the inside of the card base
S
Here are today’s colors:
You can click on each one to see all the products that come in that color!
S
Here’s what I used:
Click on these images for more details and to purchase.
<– Click here for a clickable and printable list!
S
Preorder the Monster Bash Online Treat Holder Class by September 18:
- Make 6 adorable treat holders in the comfort of your own home!
- 2 each of 3 designs
- Features the Monster Bash Suite on pages 52-54 of the 2019 Holiday Catalog
- I’ve done the trimming and scoring for you!
- You’ll receive the stamp set, dies, pre-cut kits, and Black Stampin’ Dimensionals.
- Full detailed instructions
- Limited spots available
Click on the image below for details and class options, or copy and paste this link into your browser: https://stampcandy.net/online-classes/monster-bash-treat-holder-class-preorder/
S
Here are some helpful links:
S
Thanks for stopping by today, and Sweet Stamping!
Sep 14, 2019 | Boxes, Gallery, Gift Wrap, Gifts, Halloween, Holiday, New Products |
For today’s project, I used the Everything Festive and Boo to You stamp sets to decorate a Coffin Box. The Everything Festive stamp set has sentiments for several different holidays and occasions, and the Boo to You stamp set has three adorable little monsters. I used Stampin’ Blends Markers to color the little zombie guy, and I used a couple of the Assorted Googly Eyes to really make him pop!
S
Here are the stamp sets:


S
Here’s what I made:


S
Here’s what I did:
Cut and scored with my paper trimmer:
- bottom of coffin box traced onto Granny Apple Green card stock (CS), then cut just inside the lines
Stamped with the Boo to You stamp set:
- zombie in Tuxedo Black Memento ink onto a scrap of Whisper White Thick CS
- small sentiment in Tuxedo Black Memento ink next to the zombie
Stamped with the Everything Festive stamp set:
- large sentiment in Tuxedo Black Memento ink onto the coffin shaped Granny Apple Green CS
Cut using the Layering Ovals Dies:
Colored using Stampin’ Blends Markers:
- zombie in Basic Black, Smoky Slate, Granny Apple Green, Real Red, and Bronze
Assembled the project:
- burnished the folds in the box and lid with a Bone Folder
- glued the outside of the flaps onto the inside of the adjacent sides to create the box and lid shapes
- Granny Apple Green CS glued onto the inside of the box
- put lid on the box and wrapped ribbon around it, enough to overlap about 1″ or so on the lid
- NOTE: Be sure the ribbon is snug enough to stay on, and loose enough to be able to slide it off.
- adhered the ribbon ends together using Tear & Tape, being careful not to stick it to the lid
- googly eyes glued onto the zombie (I used a purple eye and an orange eye.)
- adhered the zombie oval onto the ribbon using Tear & Tape
S
Here are today’s colors:
You can click on each one to see all the products that come in that color!
S
Here’s what I used:
Click on these images for more details and to purchase.
<– Click here for a clickable and printable list!
S
Preorder the Monster Bash Online Treat Holder Class by September 18:
- Make 6 adorable treat holders in the comfort of your own home!
- 2 each of 3 designs
- Features the Monster Bash Suite on pages 52-54 of the 2019 Holiday Catalog
- I’ve done the trimming and scoring for you!
- You’ll receive the stamp set, dies, pre-cut kits, and Black Stampin’ Dimensionals.
- Full detailed instructions
- Limited spots available
Click on the image below for details and class options, or copy and paste this link into your browser: https://stampcandy.net/online-classes/monster-bash-treat-holder-class-preorder/
S
Here are some helpful links:
S
Thanks for stopping by today, and Sweet Stamping!

