It’s time for the 01-2020 APPT Blog Hop! This month’s kit is called I’ll Bee Yours and it make Valentines and treat bags. I’ve used products from the From My Heart Suite to make an alternate note card and candy tin.
Be sure to hop around to all the stops to check out all the great alternate projects!
S 01-2020 APPT Blog Hop 01-2020 APPT Blog Hop
Here’s what I made:
S
Here’s what I did:
Cut and scored with my paper trimmer:
Whisper White card stock (CS) cut to 3″ x 3″
envelope from the kit cut open then trimmed to 2-7/8″ x 2-7/8″, with the fold down the middle
Stamped with the I’ll Bee Yours stamp set:
larger sentiment in Mint Macaron ink onto a round tag from the kit
smaller sentiment in Mint Macaron ink onto a small tag from the kitx
Cut using the Heart Punch Pack:
scalloped heart from a scrap of Mint Macaron CS
scalloped heart from the center of a Mint Macaron note card base
Assembled the card:
burnished the fold in the card base with a Bone Folder
2-7/8″ square piece glued onto the inside of the note card front, so it shows through the punched heart
Whisper White CS glued over the 2-7/8″ square piece
twine from kit tied around the front of the note card and tied in a bow
larger round sentiment glued onto a Rococo Rose heart
Highland Heather sequins applied onto the Rococo Rose heart
tiny Real Red faceted gem glued onto the sequins
medium Real Red faceted gems glued onto the card front
large Real Red faceted gem glued onto the sentiment
Rococo Rose heart and sentiment adhered onto the card front, inside the heart punch, using Stampin’ Dimensionals
Assembled the tin:
Highland Heather heart glued onto the punched Mint Macaron CS scalloped heart
Mint Macaron heart glued onto the white side of a Heart Doily
small sentiment adhered onto the Highland Heather heart using Stampin’ Dimensionals
Rococo Rose sequins applied onto the Highland Heather heart
tiny Real Red faceted gem glued onto the sequins
2 medium and 1 large Real Red faceted gems glued around the Highland Heather Heart
medium Real Red faceted gem glued onto the sentiment
heart doily adhered onto the clear lid of the tin using Stampin’ Dimensionals
S
Here’s the 01-2020 APPT Blog Hop:
S
Here are today’s colors:
You can click on each one to see all the products that come in that color!
Gift Certificates are available in any U.S. dollar amount from me. Contact mefor details.
Have you shopped from me within the past year? Join my private VIP Facebook groupfor exclusive project tutorials and more!
Join my team and enjoy a 20% discount (or more) on all your purchases! You choose $125 in products and pay only $99, and get free shipping! No obligation! No selling required! AND NOW, only during Sale-a-bration, you’ll also receive an exclusive Mini Paper Cutter a 6″ x 6″ Sampler of Designer Series Paper from the new Mini Catalog, and another stamp set of your choice.
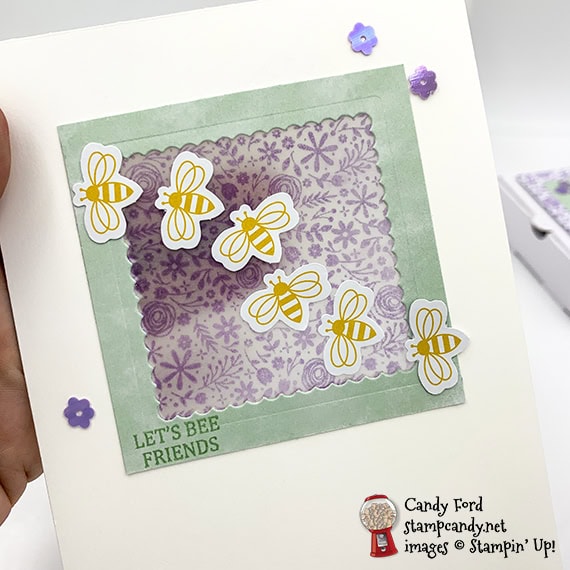
It’s time for the PPP Blog Hop 01-2020! This month’s kit is called I’ll Bee Yours and it makes adorable note cards and treat bags. Of course, we are sharing alternate projects with you today, so you can see just how versatile the kit is. I used the kit to adorn a Whisper White card and a Mini Pizza Box. And the sentiment is, you guessed it, a pun! You know how I like puns.
I cut a hole in the card front and filled it with vellum for a soft, ethereal feel. I used the cut out piece on the box. No waste!
PPP Blog Hop 01-2020 PPP Blog Hop 01-2020
Here’s what I made:
PPP Blog Hop 01-2020 PPP Blog Hop 01-2020
Here’s what I did:
Cut and scored with my paper trimmer:
Whisper White Thick card stock (CS) cut to 4-1/4″ x 11″, then scored in half at 5-1/2″
card from the kit cut in half and each side cut to 3″ x 3″, so you have a Mint Macaron layer for the card and a Whisper White layer for the box
Vellum CS cut to 2-7/8″ x 2-7/8″
Stamped with the I’ll Bee Yours stamp set:
large floral stamp in Highland Heather ink onto the center of the Vellum (I heat set the ink with my Heat Tool.)
large floral stamp in Highland Heather ink onto the Whisper White layer, around all the edges
sentiment in Mint Macaron ink onto the bottom left corner of the Mint Macaron layer
Cut using the Layering Squares Dies:
center from the Mint Macaron layer
same size cut from the front of the Whisper White Thick CS card basex
Assembled the card:
burnished the fold in the card base with a Bone Folder
vellum glued onto the back of the Mint Macaron layer, then glued onto the card front, lining up the die cuts
bees from the kit adhered onto the card front using glue dots
3 Highland Heather adhesive sequins applied onto the card front
Assembled the box:
burnished the folds in the pizza box with a Bone Folder, and folded to assemble
Mint Macaron die cut glued onto the Whisper White Thick CS layer
bees from the kit adhered onto the layers using glue dots
3 Highland Heather adhesive sequins applied onto the Mint Macaron layer
Whisper White CS layer adhered onto the top of the box using Stampin’ Dimensionals
Here you can see the translucence of the vellum window in the card front:S
Here’s the PPP Blog Hop 01-2020:
Click the Next button to hop to the next stop, Deb Naylor of The Flying Stamper:
S
Here are today’s colors:
You can click on each one to see all the products that come in that color!
Gift Certificates are available in any U.S. dollar amount from me. Contact mefor details.
Have you shopped from me within the past year? Join my private VIP Facebook groupfor exclusive project tutorials and more!
Join my team and enjoy a 20% discount (or more) on all your purchases! You choose $125 in products and pay only $99, and get free shipping! No obligation! No selling required! AND NOW, only during Sale-a-bration, you’ll also receive an exclusive Mini Paper Cutter a 6″ x 6″ Sampler of Designer Series Paper from the new Mini Catalog, and another stamp set of your choice.S
It’s time for the APPT Blog Hop for September! This month’s kit is called Bone Appétit, and it makes adorable treat boxes. I used the kit to decorate one of the boxes a little differently from the directions in the Bone Appétit kit, and to make a card that mimics the dots on the box. I love the intricate die cut “webs” of bones. And the die cut skeletons are so cute! The one on my card is holding a sign with the greeting, “Happy Halloween,” which is just one of several great sentiments in the Bone Appétit stamp set. I’ll be using this stamp set a lot, since our Halloween party theme this year is Bones!
I’m sorry there have been several days in the past couple weeks when I didn’t get a blog post done. If you’ve followed me for a while, you know that during this time of year our house is consumed with Halloween party prep. There’s little room in the whole place to walk because of all the boxes and totes packed full of skeletons, skulls, bones, etc., as well as other Halloween goodies. There’s a lot to do and not a lot of time left to do it. So please forgive me if I’m not as present online as usual in the next few weeks.
S
Here’s what I made:
I found these Pumpkin Spice Soft Caramels by Werther’s Originals at Party City. They are yummy!
S
Here’s what I did:
Cut and scored with my paper trimmer:
Basic Black card stock (CS) cut to 5-1/2″ x 8-1/2″, then scored in half at 4-1/4″
Whisper White CS cut to 5-1/4″ x 4″ for the inside of the card base
Stamped with the Bone Appétit stamp set:
card sentiment in black ink onto an orange rimmed tag
box sentiment in black ink onto the corresponding white tag
skeleton in Pumpkin Pie ink onto the Whisper White CS for the inside of the card
Cut using the 1/2″ Circle Punch:
25 circles from a scrap of Pumpkin Pie CS
Colored using a Stampin’ Blends Marker:
edges of the box sentiment
Assembled the card:
burnished the fold in the card base using a Bone Folder
Pumpkin Pie CS circles glued onto the front of the card base
web and skeleton from the kit glued onto the front of the card base
sentiment glued onto the front of the card base
Whisper White CS glued onto the inside of the card base
Assembled the box:
burnished the folds in the box using a Bone Folder, then folded the box into shape
web glued onto the front of the box
sentiment glued onto the top flap of the box, being careful not to glue it to the flap on the other side
filled the box with caramels and closed it up
S
Here’s the APPT Bone Appétit Blog Hop:
Here are today’s colors:
You can click on each one to see all the products that come in that color!
Gift Certificates are available in any U.S. dollar amount from me. Contact mefor details.
Have you shopped from me within the past year? Join my private VIP Facebook groupfor exclusive project tutorials and more!
Join my team and enjoy a 20% discount (or more) on all your purchases! You choose $125 in products and pay only $99, and get free shipping! No obligation! No selling required!
It’s time for the September PPP Blog Hop! This month’s kit is called Bone AAppétit, and it’s all about Halloween. The kit makes cute little 2″ treat boxes. For my projects I focused on the stamp set from the kit and used it to make a card, a box, and a tag. Enjoy! Or I should say, Bone Appétit!
S
Here’s what I made:
S
Here’s what I did:
Cut and scored with my paper trimmer:
Gorgeous Grape card stock (CS) cut to 5-1/2″ x 8-1/2″, then scored in half at 4-1/4″
Basic Black CS card layer cut to 5-1/4″ x 4″
Whisper White CS card layer cut to 5″ x 3-3/4″
Whisper White CS cut to 5-1/4″ x 4″ for the inside of the card base
Gorgeous Grape CS cut to 2″ x 5-1/2″ for the tag base
Basic Black CS tag layers cut to 1-7/8″ x 5-3/8″ (2 pieces)
Whisper White CS tag layers cut to 1-3/4″ x 5-1/4″ (2 pieces)
Cut using the Scalloped Tag Topper Punch:
top end of all 5 tags layers
Cut using the Banner Triple Punch:
bottom end of all 5 tags layers
Stamped with the Bone Appétit stamp set:
2 skeletons in Gorgeous Grape ink onto one of the Whisper White CS tag layers
skull and sentiment in Gorgeous Grape ink onto the other Whisper White CS tag layer
2 skeletons and sentiment in Gorgeous Grape ink onto the Whisper White CS card layer
skull in Gorgeous Grape ink onto the Whisper White CS for the inside of the card base
2 skeletons in black ink onto the lid of the pizza box
Embossed using the Stylish Scroll Embossing Folder:
card layer and tag layer stamped with skeletons
Colored using a Gorgeous Grape ink pad:
the outside of a white Mini Pizza Box
a bone “web” from the kit
Assembled the card:
burnished the fold in the card base with a Bone Folder
Basic Black CS layer glued onto the front of the card base
Whisper White CS layer glued onto the Basic Black CS layer
colored web adhered onto the Whisper White CS layer using a mini Black Stampin’ Dimensional
Whisper White CS with skull glued onto the inside of the card base
Assembled the tag & box:
burnished the folds in the pizza box using a Bone Folder (actually I did this before I colored it)
white web glued onto the lid of the box
treat put inside the box and Whisper White Baker’s Twine tied around it
Gorgeous Grape CS tag layers glued onto either side of the Basic Black CS tag base
Whisper White CS tag layers glued onto the Gorgeous Grape CS tag layers
Black Organza ribbon run through the hole in the tag, then Gorgeous Grape ribbon tied in a knot around it
Whisper White twine from the box pulled up through the hole in the tag and tied in a bow
S
Here’s the Bone Appétit blog hop:
Click the pumpkin to hop over to Anastasia Radloff of Stampin’ Blondie!
Here are today’s colors:
You can click on each one to see all the products that come in that color!
Click on these images for more details and to purchase. The items don’t show in your email. You must click to open the blog post to see them.
<– Click here for a clickable and printable list!
S
Preorder the Monster Bash Online Treat Holder Class by September 25 (extended one week!):
Make 6 adorable treat holders in the comfort of your own home!
2 each of 3 designs
Features the Monster Bash Suite on pages 52-54 of the 2019 Holiday Catalog
I’ve done the trimming and scoring for you!
You’ll receive the stamp set, dies, pre-cut kits, and Black Stampin’ Dimensionals.
Full detailed instructions
Limited spots available
Click on the image below for details and class options, or copy and paste this link into your browser: https://stampcandy.net/online-classes/monster-bash-treat-holder-class-preorder/
Gift Certificates are available in any U.S. dollar amount from me. Contact mefor details.
Have you shopped from me within the past year? Join my private VIP Facebook groupfor exclusive project tutorials and more!
Join my team and enjoy a 20% discount (or more) on all your purchases! You choose $125 in products and pay only $99, and get free shipping! No obligation! No selling required!
It’s time for the Inking Royalty Blog Hop for September! This month’s theme in Autumn. And what could be more Autumnal than beautifully colored leaves? For my project, I used products from the Come to Gather Suite to decorate a gift bag from last month’s Paper Pumpkin kit. (You can see another project I made using these bags here.) From the suite, I used the Gather Together bundle (Gather Together stamp set and Gathered Leaves Dies) and Come to Gather Designer Series Paper.
I was going to use the Come To Gather Ribbon Combo Pack as well, but I got so carried away with the leaves, I didn’t think it needed it. I used each embossed leaf die (3 in the set) to cut two each of four colors – and I used 18 of the 24 leaves I cut! Guess I just couldn’t stop until I had a big leaf pile! Doesn’t it make you want to jump in and scatter them?
Be sure to hop all the way around to all the stops. You don’t want to miss any of the great projects from this talented group!
S
Here’s what I made:
S
Here’s what I did:
Cut and scored with my paper trimmer:
Come To Gather Designer Series Paper (DSP) cut to 2″ x 5-1/4″
DSP cut to 1-1/2″ x 5″
Copper Foil Sheet cut to 1-1/2″ x 4-3/4″
Stamped with the Gather Together stamp set:
large leaf in Pretty Peacock ink onto a scrap of Pretty Peacock CS
sentiment in Versamark ink on the leaf, then heat embossed in copper
Cut using the Gathered Leaves Dies:
stamped leaf
assortment of embossed leaves from scraps of Merry Merlot, Cajun Craze, and Pretty Peacock CS and Copper Foil Sheet
Cut using the Banner Triple Punch:
one end of each of the 3 paper strips
Assembled the project:
adhered the 3 tags together using Snail
adhered the assorted leaves onto the tags and each other using Snail
large stamped leaf adhered onto the leaf “pile” using Black Stampin’ Dimensionals
tag assembly glued onto the front of the bag
3 Pretty Peacock Faceted Dots applied onto the bag, at bottom right
S
Here’s the hop:
Thank you for hopping along with us. If you get stuck during the Blog Hop, please use this line-up as a guide:
Click on these images for more details and to purchase.
<– Click here for a clickable and printable list!
S
Preorder the Monster Bash Online Treat Holder Class:
Extended for one more week! Order by September 25!
Make 6 adorable treat holders in the comfort of your own home!
2 each of 3 designs
Features the Monster Bash Suite on pages 52-54 of the 2019 Holiday Catalog
I’ve done the trimming and scoring for you!
You’ll receive the stamp set, dies, pre-cut kits, and Black Stampin’ Dimensionals.
Full detailed instructions
Limited spots available
Click on the image below for details and class options, or copy and paste this link into your browser: https://stampcandy.net/online-classes/monster-bash-treat-holder-class-preorder/
Gift Certificates are available in any U.S. dollar amount from me. Contact mefor details.
Have you shopped from me within the past year? Join my private VIP Facebook groupfor exclusive project tutorials and more!
Join my team and enjoy a 20% discount (or more) on all your purchases! You choose $125 in products and pay only $99, and get free shipping! No obligation! No selling required!
It’s time for the APPT 08-2019 Blog Hop! This month’s kit is called Gift of Fall and it is a beauty. There are lots and lots of die cut pieces to use, so you can mix and match them in many ways. There is also an Add-On Bundle available with coordinating note cards and envelopes. I used one of the note cards to create a 4-1/4″ x 5-1/2″ card, and I used tags from the kit to line a Clear Tiny Treat Box (I just love these little boxes; they’re so versatile!) Be sure to hop all the way around to all the stops of the APPT 08-2019 Blog Hop to see all the wonderful alternate projects for this month’s kit.
S
Here’s the kit:
stamp set:
S
Here’s the add-on bundle:
S
Here’s what I made:
I didn’t line the bottom of the box, but you certainly could. I wanted to save the rest of the tags for other projects.
This is the corner of the box where the two blue ends meet.
This is the corner where the red ends meet.
S
Here’s what I did:
Cut and scored with my paper trimmer:
Blackberry Bliss card stock (CS) cut to 4-1/4″ x 11″, then scored in half at 5-1/2″
3 colorful tags from the kit cut to 2″ x 4″ and scored in half at 2″
a note card separated into two pieces, the front and the back, cutting away the score line
excess from the left end of the small banner with the card sentiment (after stamping)*
Stamped with the Gift of Fall stamp set:
box sentiment in Pretty Peacock ink onto a small banner from the kit
*card sentiment in Pretty Peacock ink onto the right end of a small banner from the kit (then cut away the excess at the left end)
Cut using a 1/2″ Circle Punch:
finger notch in the side of one of the trimmed colorful tags, so it will be at the front of the box when inserted
Assembled the card:
burnished the fold in the larger (Blackberry Bliss) card base with a Bone Folder
Crumb Cake leaves glued onto the front of the card base along the left side and the top
note card front adhered onto the front of the larger card base using Stampin’ Dimensionals
sentiment glued onto the note card front, near the bottom left
gold sequins applied onto the wreath image on the note card front
note card back glued onto the inside of the larger card base
vellum piece glued onto the inside of the card base
Assembled the box:
burnished the folds in the box with a Bone Folder, and folded it into the box shape
inserted two of the trimmed colorful tags to line the sides (I inserted them so the two blue ends would meet each other, and the two red ends would meet each other. I made sure the punched finger notch lined up with the notch in the front of the box.)
inserted the third trimmed colorful tag into the box so it lined the top and continued down the back of the box (inside the piece already there lining the sides)
2 vellum pieces glued onto the back of the small banner with the box sentiment
about 8 or 9 Crumb Cake leaves glued onto the back of the vellum pieces
sentiment banner/vellum/leaves adhered onto the top of the box using Tear & Tape (you can use the glue dots that came in the kit)
3 gold sequins applied onto the vellum pieces
S
Here’s the APPT 08-2019 Hop:
S
Here are the colors in the kit:
You can see them all in today’s projects. Click on each one to see all the products that come in that color!
Here’s the official Stampin’ Up! video for this kit:
SS
Click here to order
your 2019 Holiday Catalog
DSP Swatch Books and Product Shares
by September 3!
S
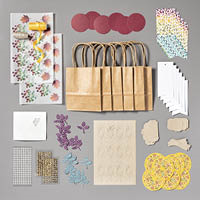
Preorder the Pretty Petals Online Class by September 5:
Make 6 cards at home in your PJs!
2 each of 3 designs
Features the Pretty Petals Suite on pages 72-74 of the 2019-2020 Annual Catalog
I’ve done the trimming and scoring for you!
You’ll receive the stamp set, dies, embossing folder, pre-cut card kits, and 6 Very Vanilla envelopes.
Full detailed instructions
Limited spots available
Click on the image below for details and class options, or copy and paste this link into your browser: https://stampcandy.net/online-classes/pretty-petals-class-preorder/
Gift Certificates are available in any U.S. dollar amount from me. Contact mefor details.
Have you shopped from me within the past year? Join my private VIP Facebook groupfor exclusive project tutorials and more!
Join my team and enjoy a 20% discount (or more) on all your purchases! You choose $125 in products and pay only $99, and get free shipping! No obligation! No selling required!