Apr 14, 2018 | Food, Gallery, Gifts, Parties |
Today I’m sharing another project I made for my presentation at last weekend’s Spring Stamp-Along hosted by Brian King of stampwithbrian.com. It’s an oh so quick and easy project (you know how I like those!) that I made for a kid’s birthday party theme. I used a little plastic champagne bottle filled with Mini M&Ms. The bottom comes off the tiny bottle so it’s easy to fill. I know it looks as big as my gumball machine prop in the pictures, but it’s only about 3″ tall. The sentiment is from the Teeny Tiny Wishes stamp set. I’ve been saying for years that everyone should own this stamp set. It has a sentiment for all the major occasions in life. If you don’t already have it, I strongly encourage you to get it before it disappears!
Here’s what I made:


Here’s what I did:
Stamped with the Teeny Tiny Wishes stamp set:
- sentiment in Pacific Point ink onto a scrap of Whisper White cardstock (CS)
Cut using the Classic Label Punch:
Assembled the project:
- adhered the sentiment to the bottle using Tear & Tape
- tied a piece of ribbon around the bottle neck and into a bow
Here are today’s colors:
You can click on each one to see all the products that come in that color!
Here’s what I used:
Click on these images for more details and to purchase.
The little champagne bottles came from orientaltrading.com. The Mini M&Ms came from the grocery store.
Here’s some stuff you should know:
Thanks for stopping by today, and Sweet Stamping!
Apr 11, 2018 | Baby, Food, Gallery, Gifts, Parties |
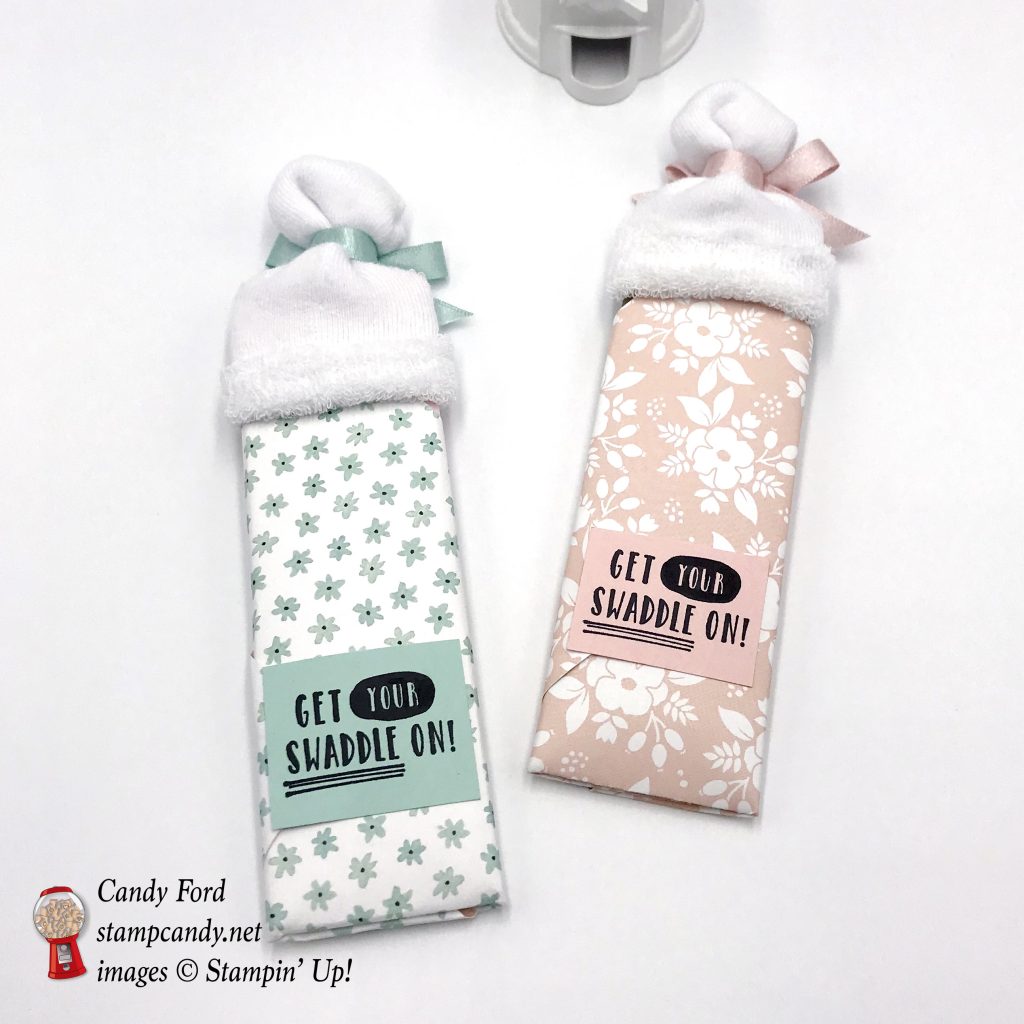
I am back from a fun, amazing, full, exhausting weekend full of stamping events: two official Stampin’ Up! events and two events hosted by Stampin’ Up! Demonstrators. I gave a presentation at the first event, Brian’s Spring Stamp-Along on April 6 hosted by Brian King. Today I’m sharing one of the projects from my presentation; chocolate bars decorated with A Whole Lot of Lovely Designer Series Paper for a baby shower. It’s a very quick and easy project. I mean very quick and easy. For the basic design, you need a chocolate bar, a couple pieces of paper, and a baby sock. Then you can froufrou it up however you want.
Here’s what I made:

Here’s what I did:
Cut and scored with my Stampin’ Trimmer:
- A Whole Lot of Lovely Designer Series Paper (DSP) cut to 6″ x 6″ (2 pieces)
- Pink Pirouette card stock (CS) cut to 5″ x 6-1/4″ (the chocolate bar is 6-1/4″ long and just over 4″ around)
- Soft Suede CS cut to 5″ x 6-1/4″
- Pool Party CS cut to 1-3/4″ x 1-1/4″
- Powder Pink CS cut to 1-3/4″ x 1-1/4″
Stamped with the Little One stamp set:
- sentiment in Basic Black ink onto each 1-3/4″ x 1-1/4″ CS piece
Stamped with the Better Together stamp set:
- diaper pin in Basic Black ink onto the front of the DSP “blankets”
Drew using Journaling Markers:
- faces on the front of the CS wrapped chocolate bar “babies”
Assembled the project:
- wrapped each chocolate bar with a 5″ x 6-1/4″ piece of CS and adhered together on the back with Tear & Tape
- DSP wrapped around chocolate bar like a blanket, and adhered with Tear & Tape
- sentiment adhered to the back using Tear & Tape
- baby sock put on top like a hat
- ribbon tied around the top of the hat and tied in a bow
Here are today’s colors:
You can click on each one to see all the products that come in that color!
Here’s what I used:
Click on these images for more details and to purchase.
Here’s some stuff you should know:
Thanks for stopping by today, and Sweet Stamping!
Dec 14, 2017 | Christmas, Food, Gallery, Gift Wrap, Gifts, Holiday, Parties |
But first:
Today is the U.S. deadline to order from Stampin’ Up! and receive your order by Christmas. Anything ordered after today isn’t likely to arrive in time. But you know what? It isn’t too late to get a Gift Certificate! Give them to your favorite stampers, or better yet, ask Santa for one yourself.
I offer them in any U.S. dollar amount, but I recommend $50 increments. Why? Because Sale-A-Bration begins January 3, and you can earn free exclusive Sale-A-Bration products with orders of $50 or $100. Contact me (or ask Santa) to order your Gift Certificates now!
Email: candy@stampcandy.net OR call/text 404-661-5222.
And now:
Today’s project is one that I absolutely love to make this time of year. It’s a Christmas tree made of Hershey’s Kisses. Did you know about all the different flavors they come in now? Holy cow. I got some regular milk chocolate ones in green, red, and silver wrappers, and some white chocolate peppermint ones with cute silver wrappers with candy canes. My store didn’t have Hershey’s Nuggets in Christmas wrappers yet, so I used the usual four flavor assortment.
What’s so amazing to me is how these trees stay together with much less adhesive than you would expect to use. All the pieces inside the tree shape are held in place by the snug fit of the outer piece. And while they look complicated, they really are easy to make. Remember to use your Bone Folder to make all the creases crisp!
I’ve been making these trees for a couple years now, and I just found out this project originated with the amazing Brenda Quintano of Qbee’s Quest. CLICK HERE to see her original post. Thank you, Brenda!
Here’s what I made:
I made several trees with different color combinations of Kisses and Nuggets.
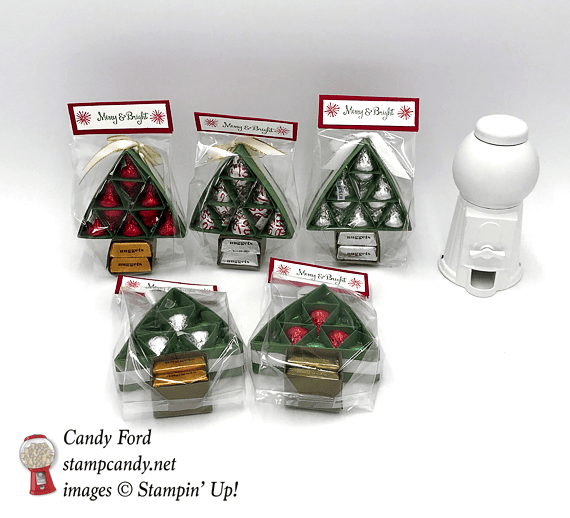


This is what the back looks like:
Here’s what I did:
I did a blog post on these little trees about this time last year. CLICK HERE to see that post with full instructions and photos. Today’s trees are made of Garden Green and Soft Suede CS. I wrapped each tree in either Gold or Silver 3/8″ Metallic-Edge Ribbon. Here’s how I made the packaging:
Cut and scored with my Stampin’ Trimmer:
- Real Red card stock (CS) cut to 3″ x 2″, then scored in half at 1″
- Whisper White CS cut to 2-3/4″ x3/4″
Stamped with the Season to Sparkle stamp set:
- sentiment in Garden Green ink onto the Whisper White CS piece
- starburst shapes in Real Red ink on either side of the sentiment
Assembled the gift:
- inserted tree into a 3″ x 6″ Gusseted Cellophane Bag
- Real Red CS piece folded in half over the top of the bag, then stapled it in place
- sentiment glued onto the front of the Real Red CS to cover the staples on the front
Here are today’s colors:
You can click on each one to see all the products that come in that color!
Here’s what I used:
Click on the images for more details and to purchase.
Here are some key points to remember:
- Gift Certificates are available in any U.S. dollar amount from me. Contact me – email: candy@stampcandy.net OR call/text: 404-661-5222
- Swatch Books and Product Shares from the 2018 Occasions and Sale-A-Bration Catalogs – you can order yours now HERE.
- Year End Sales Event – December 1, 2017 to January 2, 2018 – CLICK HERE for details. Order soon so you don’t miss your favorite retiring items!
- This is a great time to join my team! With the demonstrator discount of at least 20%, you can get Christmas gifts for all the stampers on your list! CLICK HERE for more information. Contact me with any questions: email candy@stampcandy.net or call/text 404-661-5222
- Sale-a-bration Stamp Fest coming January 20. Details and register HERE
- Check out My Events Calendar HERE
- Stampin’ Blends alcohol markers are now available! Click HERE for more info.
- Hostess Code for the month of December (HS67FXTS) Find out more about HOW, WHEN and WHY to use the code HERE.
- December’s FREE gift: Year of Cheer Specialty Washi Tape – Find out more HERE.
- Gumball Rewards for all orders over $50. Find out more HERE
Thanks for stopping by today, and Sweet Stamping!

Oct 18, 2017 | Cards, Gallery, Halloween, Holiday, Parties |
My husband and I host a Halloween party every year, and it’s coming up very soon – this Saturday as a matter of fact! So today I’m sharing an idea for an invitation for your Halloween event. I used the Graveyard Gate stamp set, which is available in a bundle with the exquisite Detailed Gate Thinlits Dies, to create a spooky yet inviting scene. It’s very simple

Graveyard Gate stamp set © Stampin’ Up!
Here’s what I made:

Here’s what I did:
Cut and scored with my Stampin’ Trimmer:
- Basic Gray card stock (CS) cut to 4 1/4″ x 11″, scored at 5 1/2″
- Pumpkin Pie CS cut to 4″ x 5 1/4″
- Basic Black CS cut to 4″ x 5 1/4″
- Very Vanilla CS to cut 3 7/8″ x 5 1/8″
Stamped with the Graveyard Gate stamp set:
- gate, arch, raven, and bats in Basic Black ink onto the Very Vanilla CS layer
- columns in Basic Gray ink onto the Very Vanilla CS layer
- NOTE: the Stamp-a-ma-jig makes it easy to line up all the images. I used it for everything but the bats.
Die Cut using the Patterned Pumpkins Thinlits:
- jack-o-lantern from a piece of Spooky Night Designer Series Paper
Assembled the card:
- jack-o-lantern glued onto the Very Vanilla CS layer
- Very Vanilla CS layer glued onto Basic Black CS layer
- Basic Black CS layer glued onto the front of the Basic Gray card base
- Pumpkin Pie CS glued to the inside of card base
Here are today’s colors:
You can click on each one to see all the products that come in that color!
Here’s what I used:
Click on the images for more details and to purchase.
Here are some key points to remember:
- Designer Series Paper Sale October 1-31, Buy 3 Get 1 FREE! See details HERE.
- Hostess Code for the month of October (HGB2HGXK)
Find out more about HOW, WHEN and WHY to use that HERE. - October’s FREE gift
Mini Pizza Boxes
Find out more HERE. - Merry Patterns Hostess Stamp Set – added to your Host Rewards only through October 31! You can’t buy it, but you can get if for free with a qualifying order! You can host a party, or place your own order, or join under me and get a 20% discount on your demonstrator order. Find out more HERE.
- Gumball Rewards for all orders over $50
Find out more HERE.
Thanks for stopping by today, and Sweet Stamping!
Aug 28, 2017 | Cards, Catalogs, Deals, Events, Food, Gallery, Gift Wrap, Gifts, Halloween, Holiday, Kits, New Products, Open House, Parties, Promotions |
Yesterday, I hosted an Open House style Launch Party highlighting products from the new Holiday Catalog. It was a lot of fun! Below are some photos of the displays, and instructions for the Make & Take. (Wouldn’t you know, I completely forgot to take any photos during the actual event. Guess I was having too much fun!)
Here are the Launch Party photos:
I recreated the scene on this card made with the Ready for Christmas Bundle.

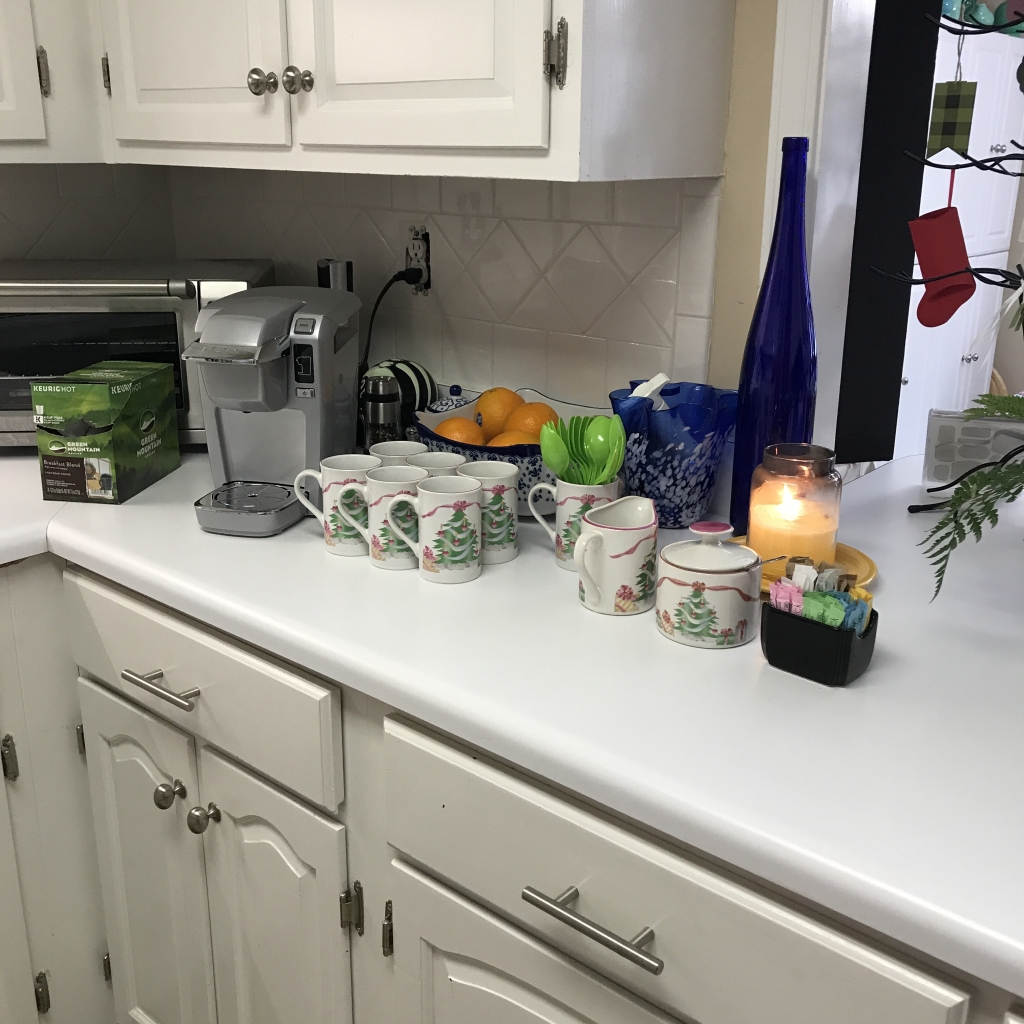
Coffee bar
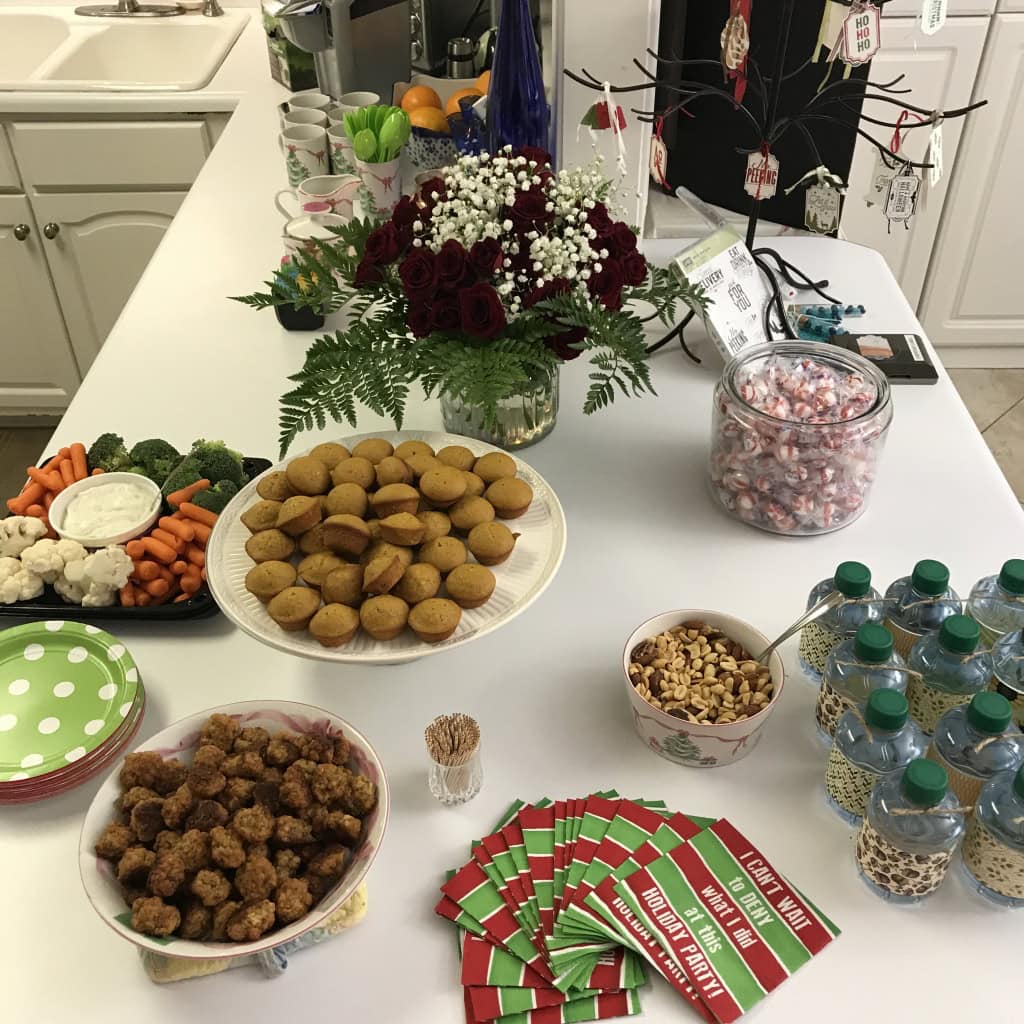
Yummy snacks, and a lovely floral arrangement from Fresh Market
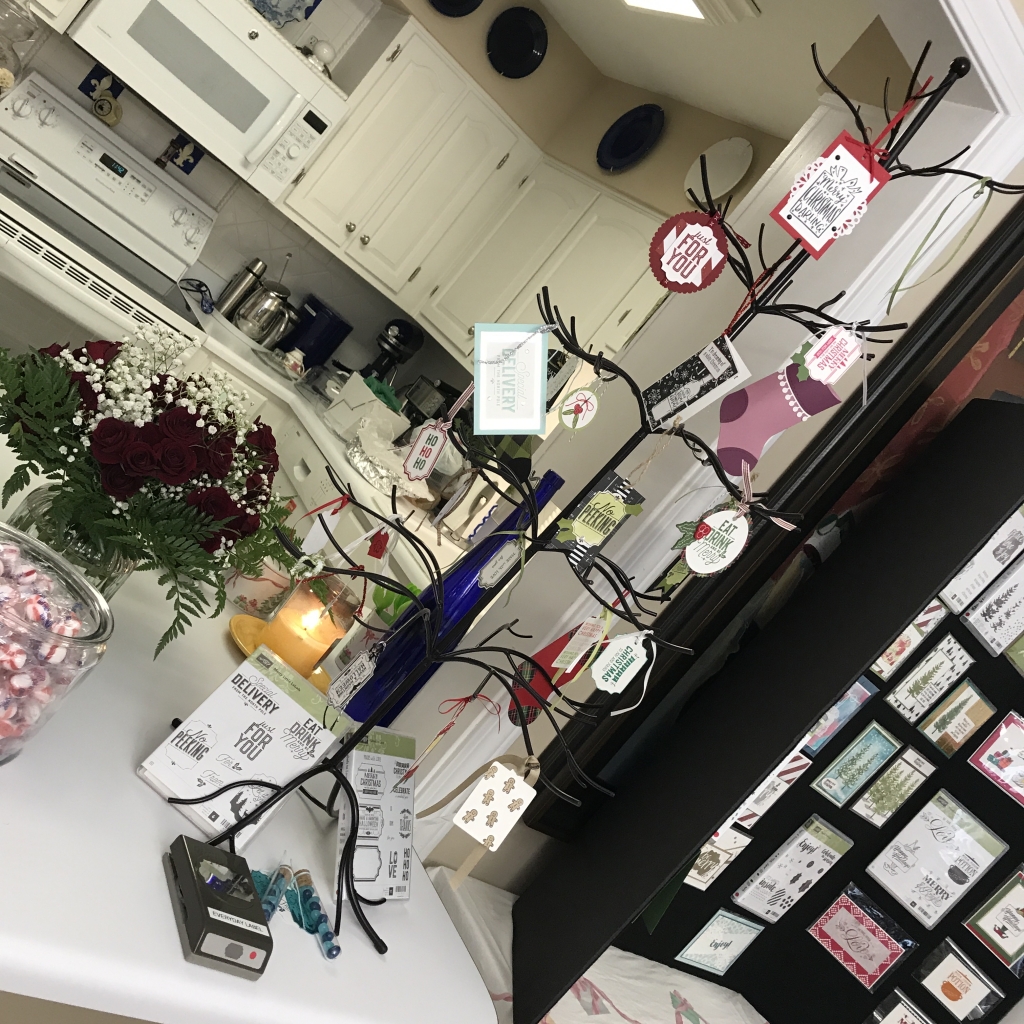
Tags and stockings on the ornament tree
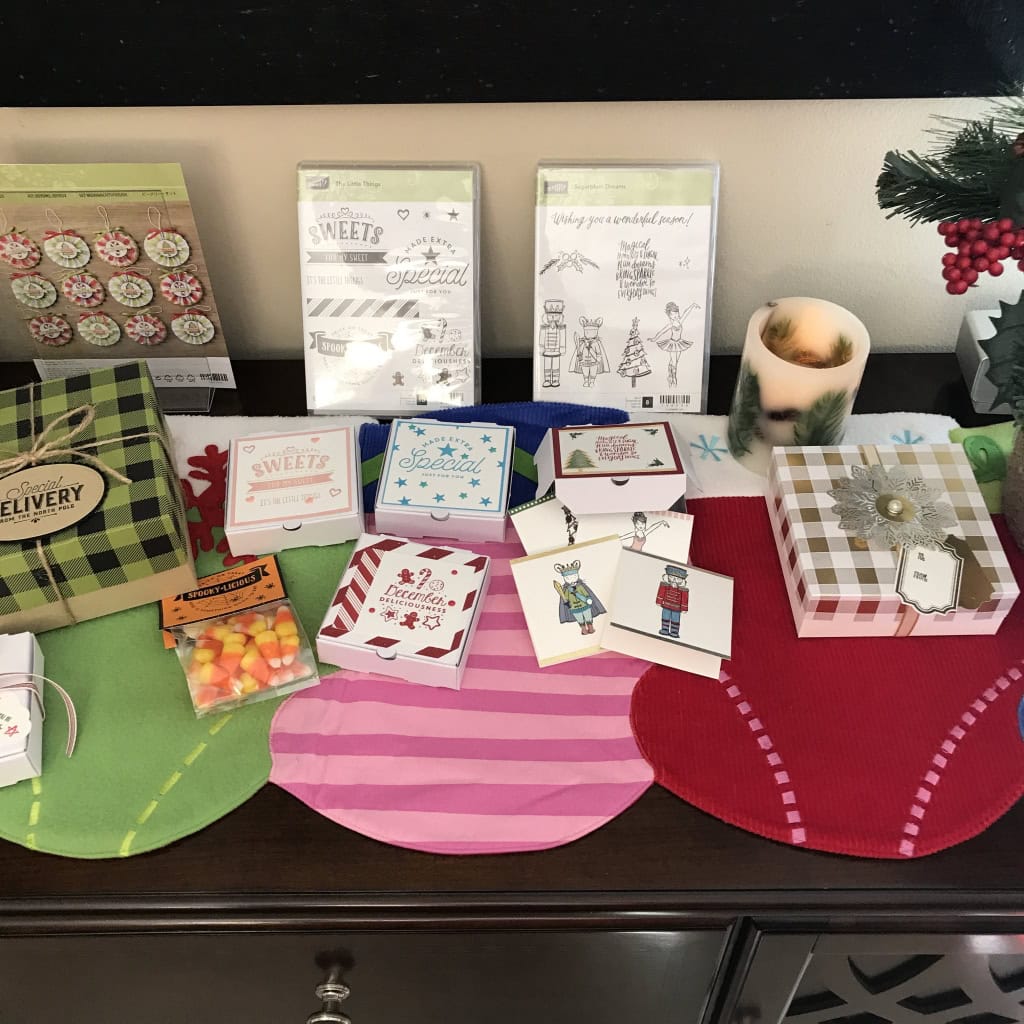
#1 display board
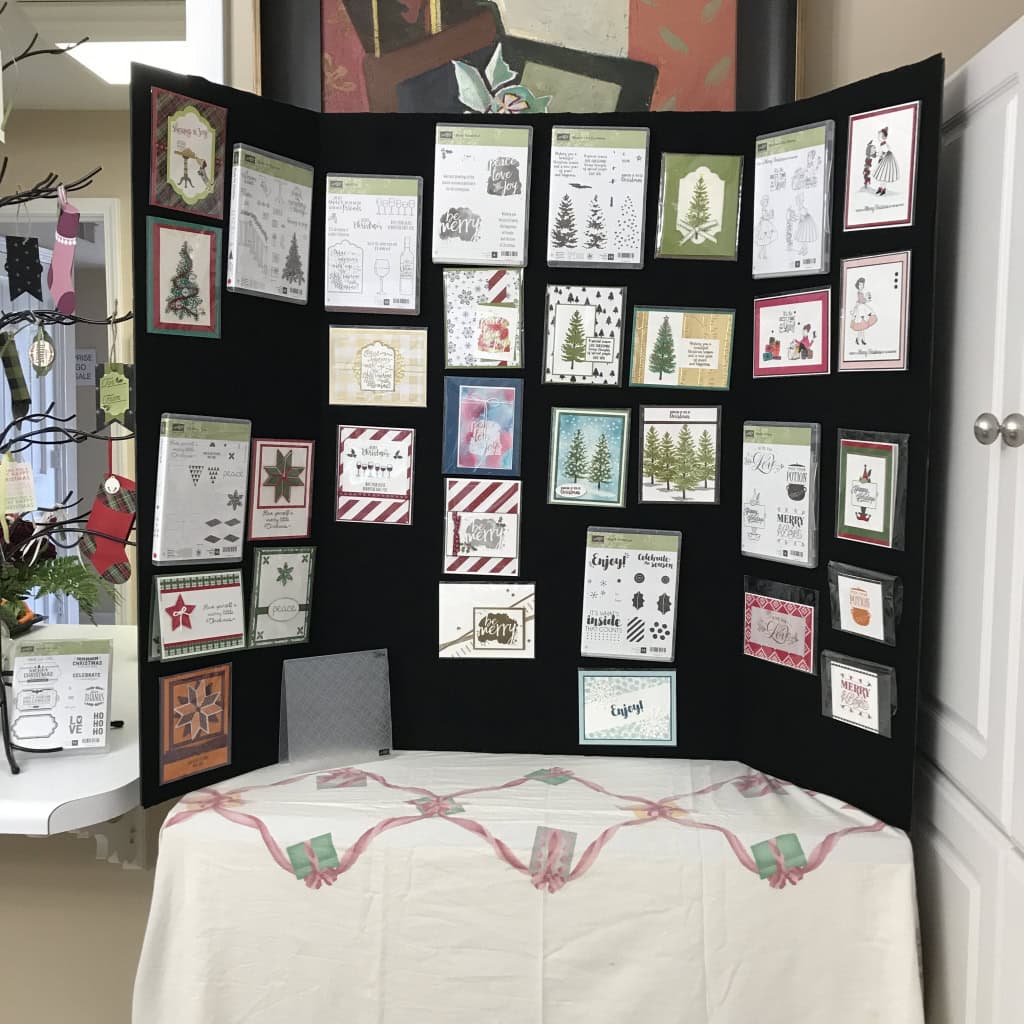
Be Merry Ornament Kit, and gift ideas

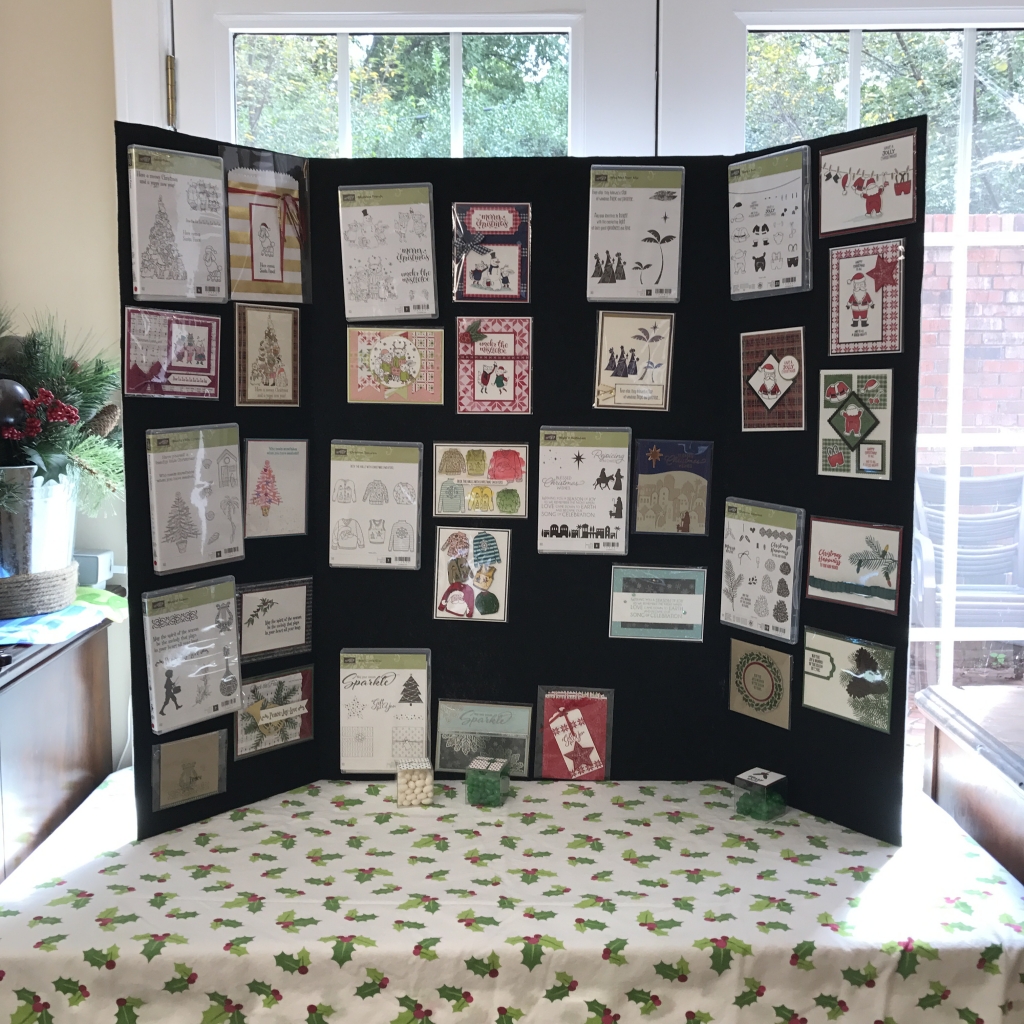
#2 display board
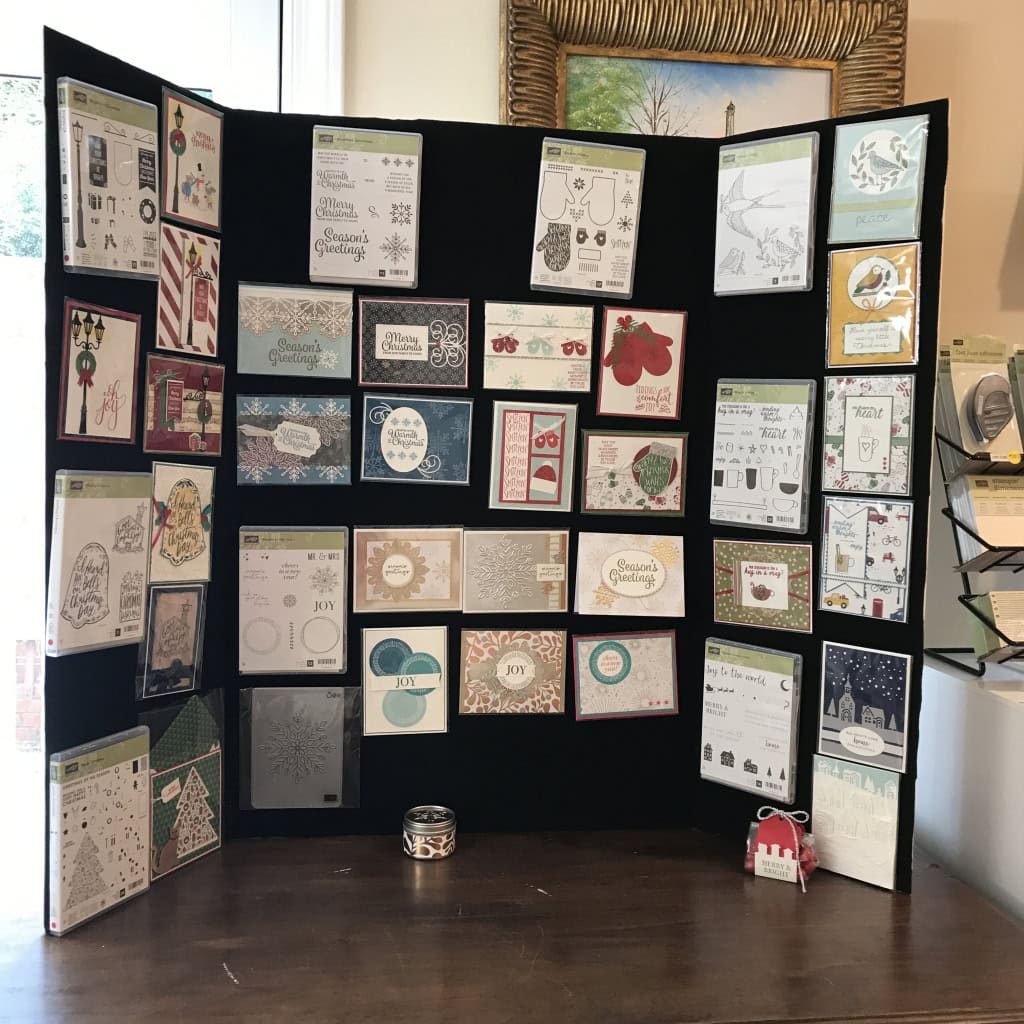
#3 display Board
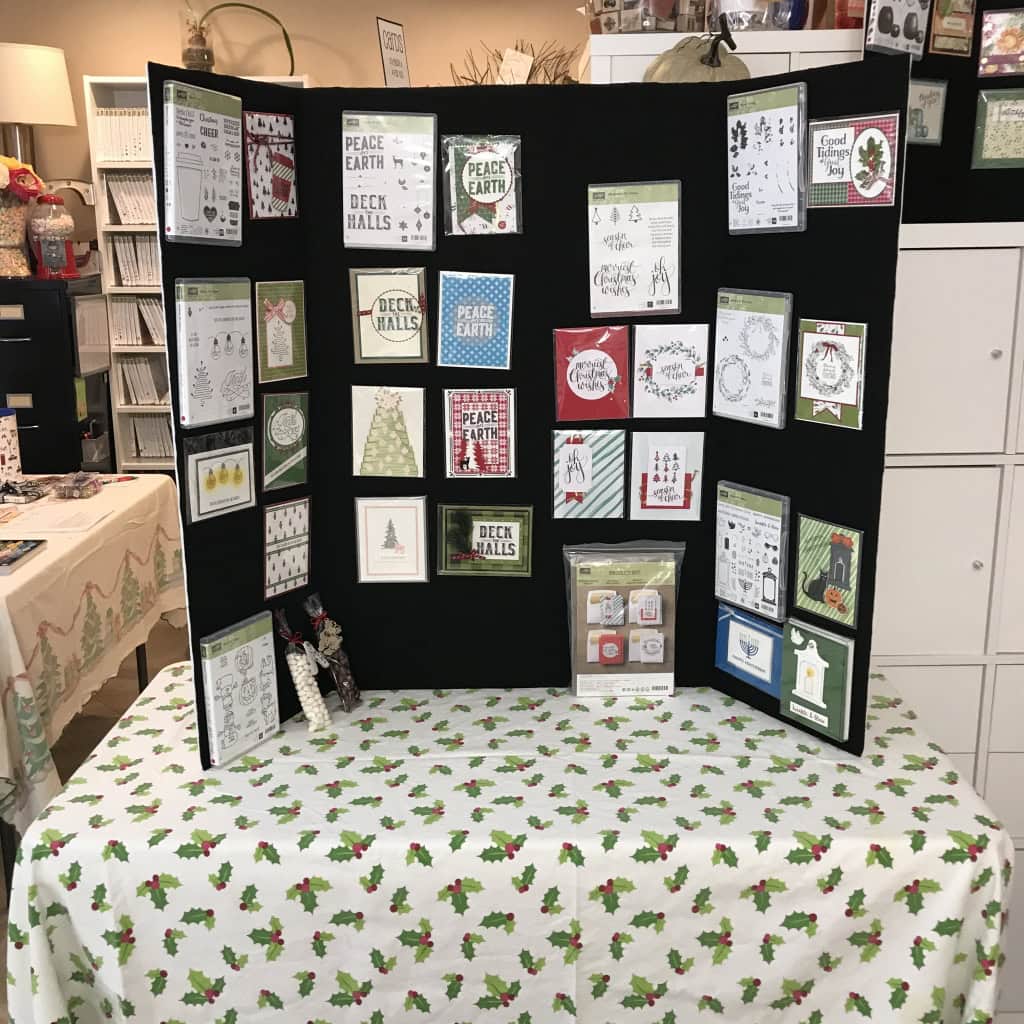
#4 display board
a little Autumn decor

#5 display board
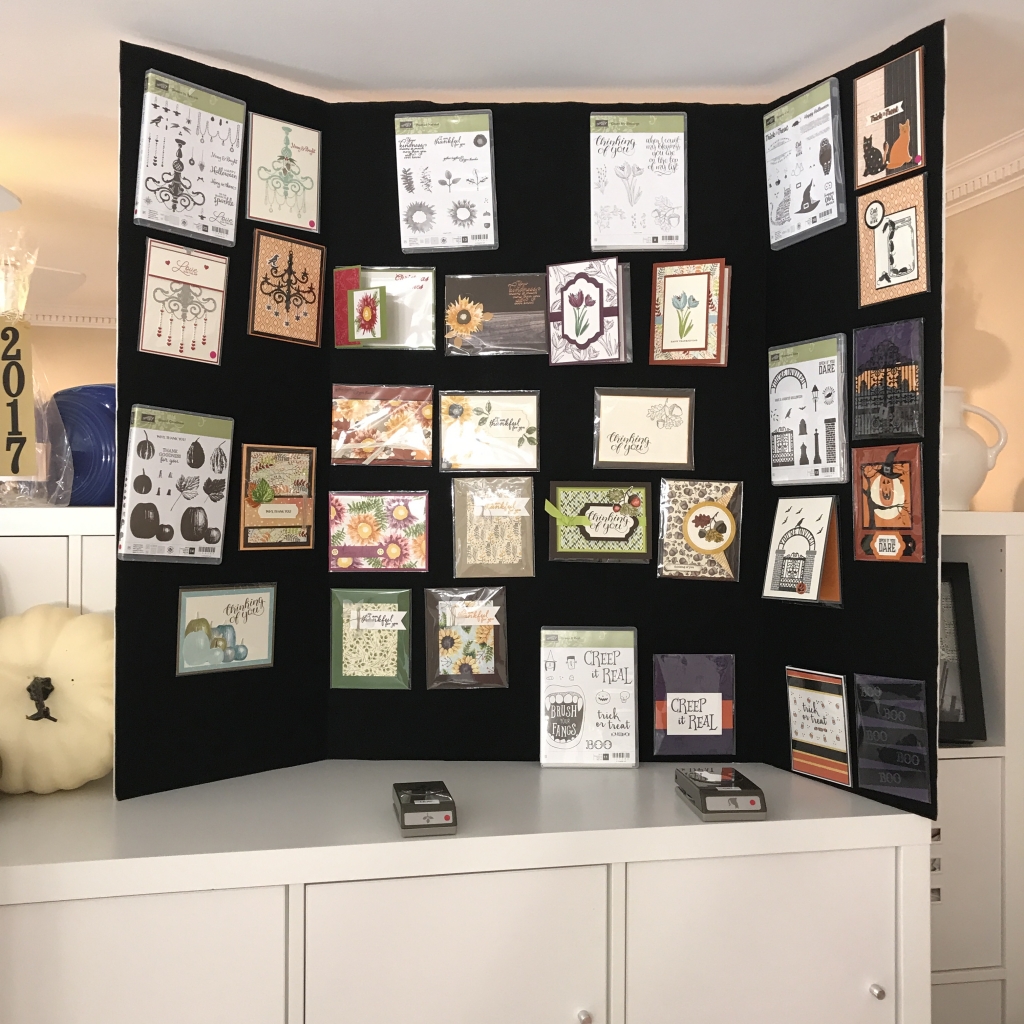
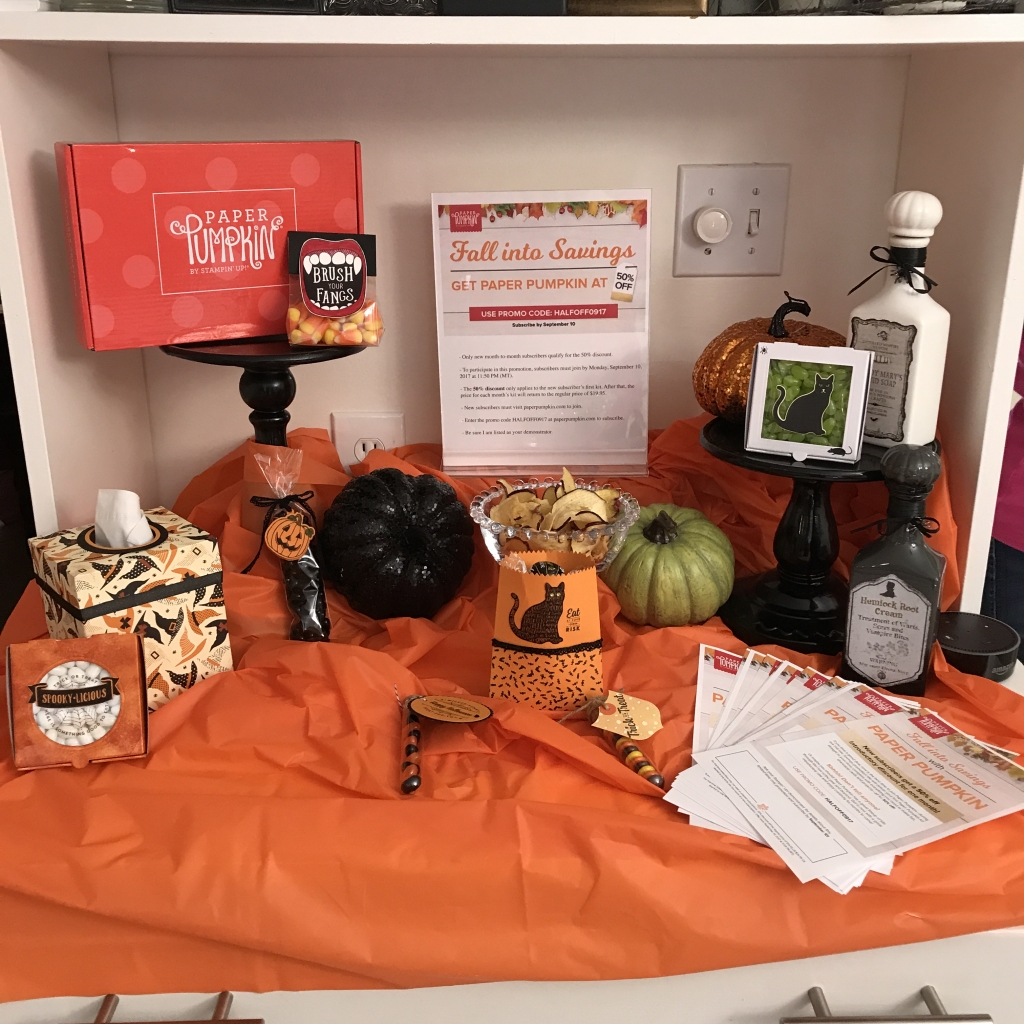
Paper Pumpkin Half Off Promotion, and Halloween treat ideas
catalogs, forms, and prizes

samples of ribbons and embellishments in my Product Shares, Swatch Books,
and espresso cups full of candies for bringing someone new

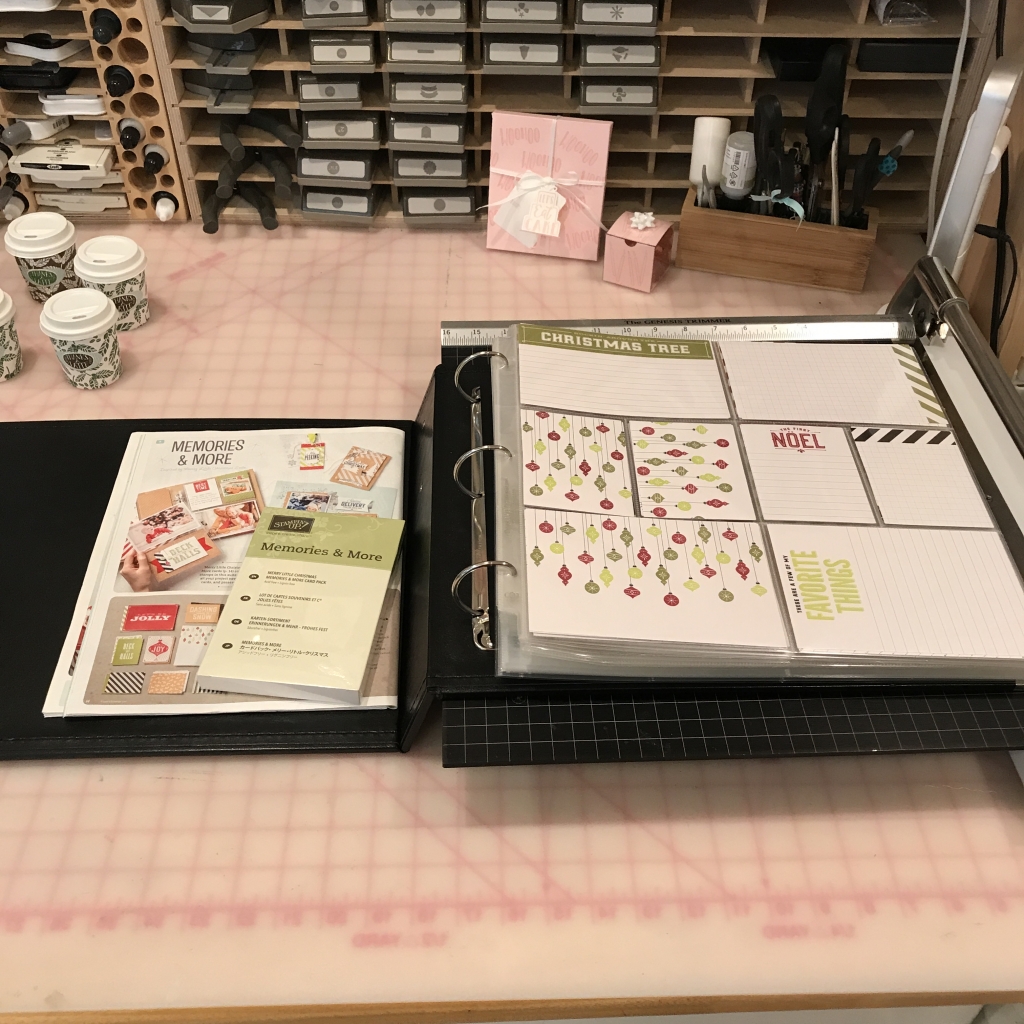
Merry Little Christmas Memories & More Card Pack display
Make & Take table
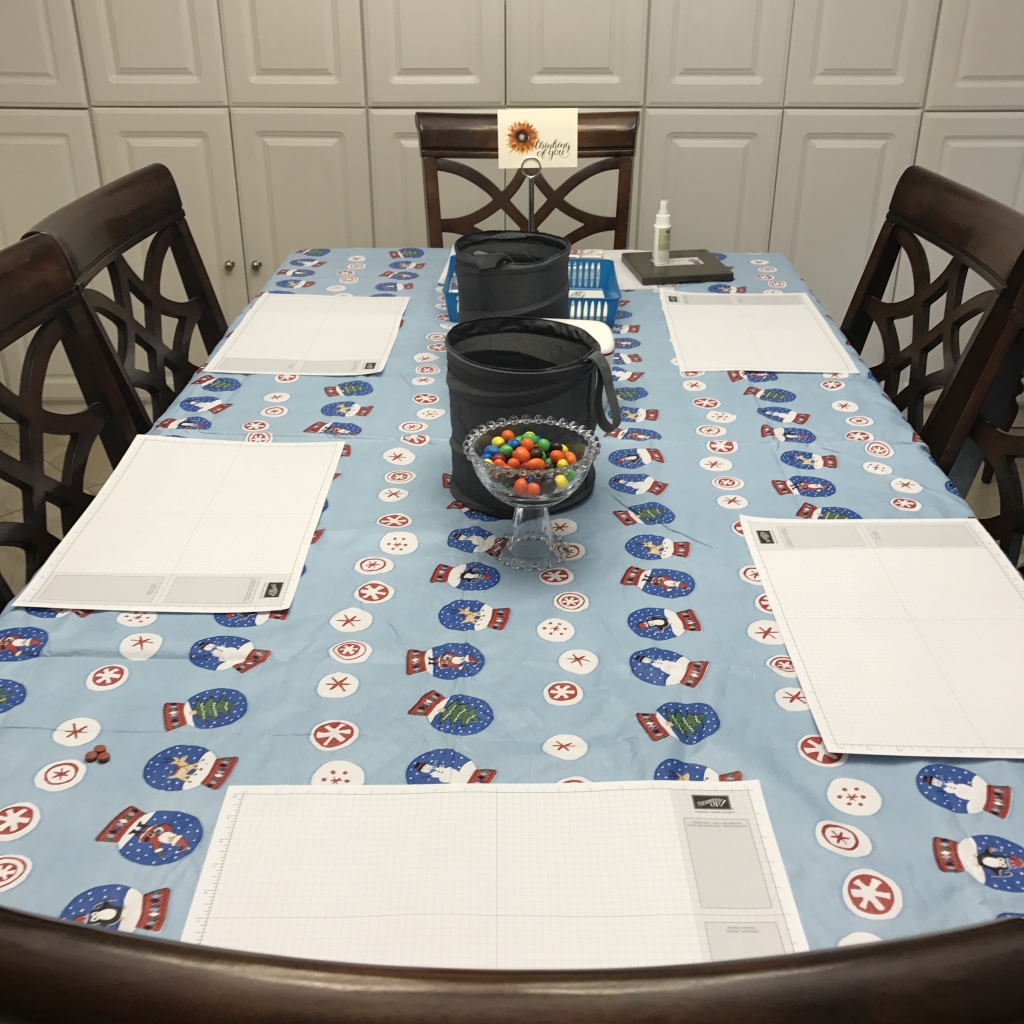
Here’s what we made:
I borrowed an extra stamp set, so there are more stamps in this photo than you actually need.
We used two stamp sets for this card. The Painted Harvest stamp set (which will be available in a Bundle with the new Leaf Punch) has some lovely sentiments, but I just adore the font used in the Count My Blessings stamp set.
If you’ve wanted to try a multi-step stamp set but were afraid to, the Painted Harvest stamp set is the perfect one to try first. The flower layers don’t have to be lined up exactly, so it’s good practice for the ones that do.
Here’s what we did:
Stamped with the Painted Harvest stamp set:
- first flower layer in Crushed Curry onto the front of the card base
- second flower layer in Cajun Craze
- flower center in Chocolate Chip
Stamped with the Count My Blessing stamp set:
- sentiment in Chocolate Chip
Assembled the card:
- used a Bone Folder to burnish the score line in the Note Card
- put the card in the envelope
That’s it! Using the pre-cut and pre-scored Note Cards makes this card super easy!
Here are today’s colors:
You can click on each color to see all the products that come in/with that color!
Here’s what we used:
The new products will be available to purchase on September 1, 2017!

Just 3 more days to take advantage of these three great deals!
1) My Alaska Promotion
Through August 31, 2017, for each $50 on your order, I will give you $10 more in product of your choice!
- $50-$99.99 order gets you $10 more
- $100-$149.99 gets you $20 more
- $150-$199.99 gets you $30 more PLUS Stampin’ Rewards
- and so on
Contact me to place your order: email candy@stampcandy.net or call/text 404-661-5222.
2) My Free Gift to You
August Host Code
BF94WFWR
Use the Host Code on online orders less than $150. See how to use a Host Code here.
Online orders of $75-149.99 placed with the Host Code will receive the FREE gift of the month!
Online orders of $150 or more will automatically receive the FREE gift of the month! Do not use the Host Code.
August’s FREE gift is a pack of Touches of Nature Elements:
- 36 pieces: 6 each of 4 designs, and 12 of 1 design
- wood flowers and leaves with light whitewash finish on one side
- largest piece: 1-5/8″ x 3/4″

I can ship within US only. “No Contact” orders are not eligible for the free gift.
This promotion can be combined with my Alaska promotion above.
3) Bonus Days Coupons

CLICK HERE for directions on how to use a coupon code.
Thanks for stopping by today, and Sweet Stamping!

Jul 4, 2017 | Boxes, Gallery, Gifts, Holiday, Parties |
Happy Independence Day, America! Today is one of the most popular holidays in the United States. It’s in the summer, when most kids are out of school, and many companies shut down for the week. The beaches, lakes, parks, and backyards are filled with people swimming and barbecuing. There are fireworks displays once it gets dark. I’m celebrating the holiday by sharing a patriotic project with you today. Check out this crate full of red, white, and blue balloons.
These are perfect for party favors or even to use as place cards – just add a tag with the person’s name!
Here’s what I made:

Here’s what I did:
Die cut using the Wood Crate Framelits:
- 2 of the crate shapes from Wood Textures Designer Series Paper (DSP)
Stamped with the Wood Words stamp set:
- stars in Real Red and Pacific Point inks onto the sides of the DSP crate pieces
Stamped with the Balloon Celebration stamp set:
- balloons in Real Red, Pacific Point and Smoky Slate inks onto Whisper White card stock (CS)
- NOTE: I stamped off before stamping some of the Real Red and Pacific Point balloons
Cut using the Balloon Bouquet Punch:
- stamped balloons
- same number and sizes of balloons from Whisper White CS
Assembled the project:
- bottoms of the two crate pieces glued onto together
- flaps glued to the inside of the ends of the crate
- balloons arranges and glued together
- Whisper White Bakers Twine taped to the back of each stamped balloon, and wrapped around the bottom of the three balloons at the bottom of the cluster
- a piece of craft wire taped to the back of the balloon cluster, and bent at a 90 degree angle so I could tape it to the inside bottom of the crate
- Whisper White balloons glued to the backs of the stamped balloons, to cover the tape and wire. You could also trace around the whole balloon cluster onto a large piece of CS, cut it out with scissors, and glue it to the back.
- twine pieces tied onto the bottom part of the wire, to pull them taut (but not too taut or it will come apart)
- wire and twine taped to the inside bottom of the crate
- crate filled with whatever you like: candies, popcorn, small gifts, etc. (This was one of the items I made for a display board, so it had to be light enough to be held up with velcro. I stuffed it with two Easter bunny tails I just happened to have on hand.)
Here are today’s colors:
You can click on each one to see all the products that come in that color!
Here’s what I used:
Click on the images for more details and to purchase.


For every $50 you spend in July, you get a $5 coupon to spend in August! Click here for details.

If you join my team in July, you will receive $72 EXTRA FREE PRODUCT! There is no obligation to sell. There’s no risk at all! Click here for the details.
Plus if you join now, you’ll be able to preorder items from the upcoming Holiday Catalog in July and August!
July Host Code
WXKSQ6HT
Use the Host Code on online orders less than $150. See how to use a Host Code here.
Online orders of $75-149.99 placed with the Host Code will receive the FREE gift of the month!
Online orders of $150 or more will automatically receive the FREE gift of the month! Do not use the Host Code.
July’s FREE gift is a pack of 3″ x 6″ Gusseted Cellophane Bags! Use these bags for treat or gift bags. Just pop the treat or gift into one of our shiny cellophane bags and add a stamped header. These bags are also great for storing finished projects, parts for future projects, or any other odds and ends
* 25 gusseted bags
* 3″ x 6″ (7.6 x 15.2 cm)
* Stampable with StazOn ink
* Food safe
* Acid free

(I can ship within US only.)
“No Contact” orders are not eligible for the free gift.
LAST DAY!
Swatch Books & Paper Shares
for the brand new
2017-2018 Annual Catalog
Designer Series Papers
are available to order TODAY ONLY!
Click here to order yours now!
Gum Ball Rewards
 You always earn a Gum Ball for every $50 you spend on an order with me. Earn 10 Gum Balls and I’ll send you a free stamp set of your choice! See the Gum Ball Rewards page for details.
Click here to shop my online store!
Thanks for stopping by today, and Sweet Stamping!