Dec 23, 2020 | Cards, Christmas, Club, Gallery, Holiday, Retiring Products, Techniques |
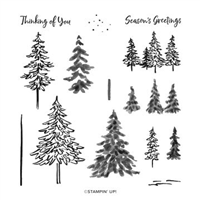
Today I’m sharing an envelope shaker card that we made at my December Stamp Club meeting. We used the In the Pines stamp set, Pine Woods Dies, In Good Taste Designer Series Paper, Sequins for Everything, and a Clear Medium Envelope. You won’t believe how quick and easy it is!
If you are reading this in email, some photos may appear blurry, or may not appear at all. Please click here to see the post on my blog.
S envelope shaker envelope shaker envelope shaker envelope shaker
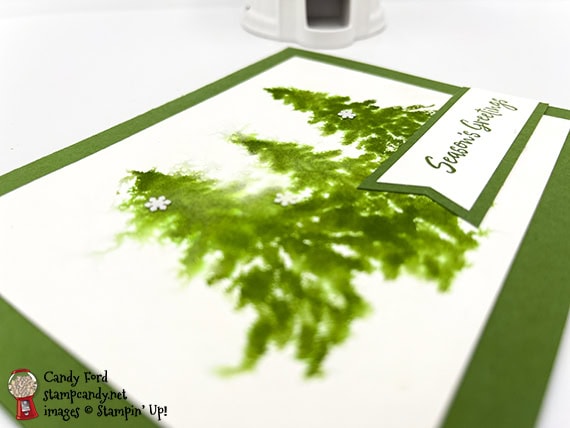
Here’s what I made:
It looks like a bunch of pine trees growing up against a huge stone wall.

S
Here’s what I did:
Cut and scored with my paper trimmer:
- Shaded Spruce card stock (CS) cut to 4-1/4″ x 11″, then scored in half at 5-1/2″
- In Good Taste Designer Series Paper (DSP) layer cut to4″ x 5-1/4″
- Whisper White CS cut to 4″ x 5-1/4″ for the inside of the card base (Oops! I forgot to photograph the inside.)
Stamped with the In the Pines stamp set:
- trees in Shaded Spruce ink onto the DSP layer
- sentiment in Shaded Spruce ink onto the Whisper White CS
Cut using the Pine Woods Dies:
- 3 trees from a scrap of Shaded Spruce CS
Created the envelope shaker:
- put the DSP layer in a clear medium envelope, making sure it was snugly down in one corner
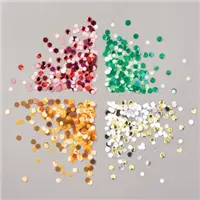
- put some Sequins for Everything in the envelope in front of the DSP layer
- closed the envelope flap, folding down the envelope to the edge of the DSP layer
- folded over the extra envelope to the back and secured with Tear & Tape (Stampin’ Seal or Seal + would work well, too.)
Assembled the card:
- burnished the fold in the card base with a Bone Folder
- envelope shaker adhered onto the front of the card base using Tear & Tape
- 3 die cut trees glued together, then adhered onto the front of the envelope using Stampin’ Seal+ (I pulled off the little strips and placed them on the back of the trees where they wouldn’t show
- Whisper White CS glued onto the inside of the card base
S
Here are today’s main colors:
You can click on each one to see all the products that come in that color!
S
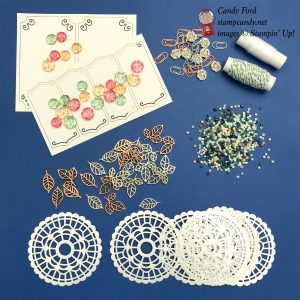
Here’s what I used:
The In the Pines stamp set and Pines Woods Dies are retiring. The dies have already sold out, but the stamp set is still available. Click on the images below for more details and to purchase. If you are reading this post in email, the product images may not show up. Please click here to see the post on my blog.
Supply List. <— Click for a clickable and printable list of the products!
S
Here’s some news: Whisper White is going away
The facility that manufactures Whisper White paper is closing due to COVID-19. But don’t fret. The new Basic White products are in the works! No other colors are affected. The following items are now available while supplies last with an order limit of 2 per item per order.
- Cardstock, Whisper White 12″ x 12″ (124302)
- Cards & Envelopes, Assorted Memories & More (149710)
- Cards & Envelopes, Whisper White Note (131527)
- Envelopes, Whisper White 3″ x 3″ (145829)
- Cardstock, Whisper White 8-1/2″ x 11″ (100730)
- Cardstock, Whisper White 8-1/2″ x 11″ Thick (140272)
- Envelopes, Whisper White Medium (107301)
S
Here’s the Year-End Closeout
All retiring items will be available through 4 January 2021, or while supplies last. Click on the image to shop now!

S
Here’s the Curvy Celebrations offering:
Click the image to see it in my online store. The Curvy Christmas stamp set and Classic Christmas Designer Series Paper are available only through January 4, or while supplies last!

S
Here’s the new catalog:
Click the image below to request your January-June 2021 Mini Catalog AND Sale-a-bration Brochure:


S
Here are some helpful links:
S
Thanks for stopping by today, and Sweet Stamping!

Dec 21, 2020 | Cards, Christmas, Gallery, Holiday, Retiring Products, Techniques |
Today I’m sharing one of the cards we made at my Stamp Club’s December virtual gathering. We used the In the Pines stamp set, the Banners Pick a Punch, Watercolor Paper, and a Stampin’ Spritzer to create this simple holiday card.
If you are reading this in email, some photos may appear blurry, or may not appear at all. Please click here to see the post on my blog.
S Pines Pines Pines Pines
Here’s what I made:
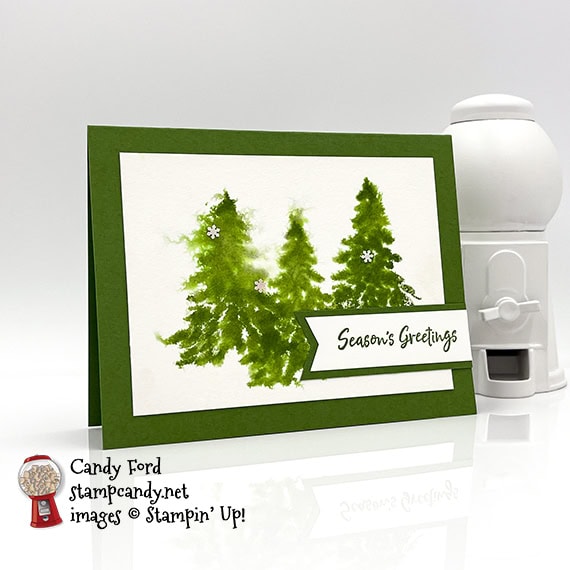
S
Here’s what I did:
Cut and scored with my paper trimmer:
- Garden Green card stock (CS) cut to 5-1/2″ x 8-1/2″, then scored in half at 4-1/4″
- Fluid 100 Watercolor Paper layer cut to 4-1/2″ x 3-1/4″
- Garden Green CS strip cut to 4″ x 1″
- Whisper White CS strip cut to 4″ x 3/4″
- Whisper White CS cut to 5-1/4″ x 4″ for the inside of the card base
Stamped with the In the Pines stamp set:
- sentiment in Garden Green ink onto the Whisper White CS strip
- spritzed the watercolor paper layer with water, then stamped the tree in Garden Green ink three times onto the wet layer, then set aside and allowed to dry completely
Cut using the Banners Pick a Punch:
- the left end of the two CS strips
Assembled the card:
- burnished the fold in the card base with a Bone Folder
- fully dry watercolor layer adhered onto the front of the card base using Stampin’ Seal+
- sentiment strip glued onto the Garden Green CS strip
- Garden Green CS strip glued onto the front of the card, then any excess trimmed away using Paper Snips
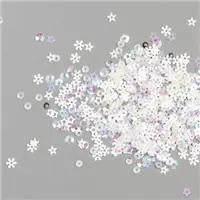
- 3 Adhesive-Backed Snowflake Sequins applied onto the watercolor layer using my Take Your Pick tool
- Whisper White CS glued onto the inside of the card base
S
Here are today’s colors:
You can click on each one to see all the products that come in that color!
S
Here’s what I used:
Click on these images for more details and to purchase. If you are reading this post in email, the product images may not show up. Please click here to see the post on my blog.
Supply List. <— Click for a clickable and printable list of the products!
S
Here’s some news: Whisper White is going away
The facility that manufactures Whisper White paper is closing due to COVID-19. But don’t fret. The new Basic White products are in the works! No other colors are affected. The following items are now available while supplies last with an order limit of 2 per item per order.
- Cardstock, Whisper White 12″ x 12″ (124302)
- Cards & Envelopes, Assorted Memories & More (149710)
- Cards & Envelopes, Whisper White Note (131527)
- Envelopes, Whisper White 3″ x 3″ (145829)
- Cardstock, Whisper White 8-1/2″ x 11″ (100730)
- Cardstock, Whisper White 8-1/2″ x 11″ Thick (140272)
- Envelopes, Whisper White Medium (107301)
S
Here’s the Year-End Closeout
All retiring items will be available through 4 January 2021, or while supplies last. Click on the image to shop now!
S
Here’s the Curvy Celebrations offering:
Click the image to see it in my online store. The Curvy Christmas stamp set and Classic Christmas Designer Series Paper are available only through January 4, or while supplies last!
S
Here’s the new catalog:
Click the image below to request your January-June 2021 Mini Catalog AND Sale-a-bration Brochure:
S
Here are some helpful links:
S
Thanks for stopping by today, and Sweet Stamping!
Apr 15, 2019 | Catalogs, Retiring Products |
Stampin’ Up! just released the Retiring List for the 2018-2019 Annual Catalog and 2019 Occasions Catalog. If there is anything on this list you want, get it now, because these items won’t last long.
Remember that all current “bundles” are retiring, even if the individual products are carrying over to the new catalog. But this is your last chance to get both products with the 10% bundle discount!
Also, all red rubber stamps (wood or clear mount) are on the retiring list. That’s because the ones that are carrying over to the new catalog will convert to Cling. For example, the Hold On To Hope stamp set is currently offered in wood mount and clear mount. It will be in the new catalog as a cling stamp set only. It’s listed on the retiring list, even though it is carrying over, because the format will change. The wood and clear mount stamps will be sold through June 3, or while supplies last. On June 4, or when the old format stamp sets sell out, whichever comes first, the new format stamps will start going out.
All photopolymer stamps that are on the retiring lists are actually retiring, and will be available only through June 3, or while supplies last.
Click here to download the Occasions Catalog Retiring List, listed by page number.
Click here to download the Occasions Catalog Retiring List, listed by category.
Click here to download the 2018-2019 Annual Catalog Retiring List, listed by page number.
Click here to download the 2018-2019 Annual Catalog Retiring List, listed by category.
Click here to see ALL the retiring products and to purchase.
SS
Preorder the Life is Grand Online Card Class by April 17:
- Make 6 pretty cards at home in your PJs!
- 2 each of 3 designs
- Features the Life Is Grand stamp set, Un-inked Spectrum Ink Pad (with 5 reinkers), and Petal Promenade Designer Series Paper
- Featured colors: Petal Pink, Powder PInk, Blushing Bride, Flirty Flamingo, and Lovely Lipstick
- I’ve done the cutting, scoring, and embossing for you!
- You’ll receive all you need to make the cards, including the stamp set, spectrum Pad, reinkers, the precut/prescored/pre-embossed card kits, 6 Very Vanilla envelopes and envelope liners.
- Limited spots available
Click on the image below for details and class options, or copy and paste this link into your browser: https://stampcandy.net/online-classes/life-grand-card-class-preorder/

S
Here are some helpful links:
S
Thanks for stopping by today, and Sweet Stamping!

May 27, 2018 | Boxes, Gallery, Gift Wrap, Gifts, Retiring Products, Wedding |
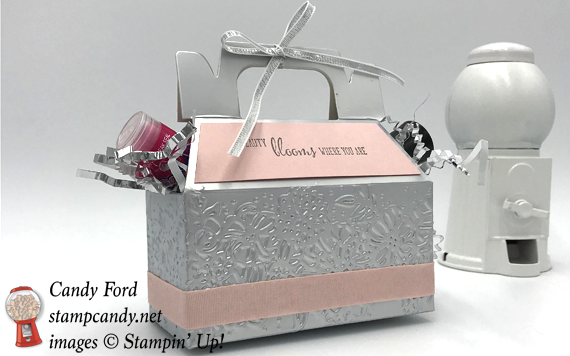
The Silver Gable Boxes are so pretty and so versatile. Don’t you just love products like that? Today I’ve decorated one for a bridesmaid’s gift. One stamp, an embossing folder, and some ribbon turned the simple box into a frilly gift, full of nail polish, lip glass, etc. – all pink of course.
Here’s what I made:

Here’s what I did:
Cut with my Stampin’ Trimmer:
- Powder Pink card stock (CS) cut to fit the top panel of the box, as shown
Stamped with the Friendship’s Sweetest Thoughts stamp set:
- sentiment in Smoky Slate ink onto the Powder Pink CS piece
Embossed using one of the Petal Pair Embossing Folders (TIEF):
- sides of the box (see below for details)
Assembled the project:
- burnished all the folds in the box with a Bone Folder to give it nice crisp edges
- used a Heat Tool to warm the adhered seam of the box and pulled it apart
- ran the box through the Big Shot twice, once on each side, with the TIEF
- glued the box back together at the seam
- assembled box, tucking the two end flaps down into the box
- put gifts inside the box with some shreddie, then tied the top closed with a piece of 1/8″ Silver Ribbon
- adhered Powder Pink all the way ribbon around the sides of the box using Tear & Tape
- adhered the sentiment onto the box panel using Tear & Tape
Here are today’s colors:
You can click on each one to see all the products that come in that color!
Here’s what I used:
Click on these images for more details and to purchase.
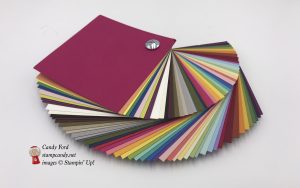
Swatch Books & Product Shares
Order by May 31 to receive them early- to mid-June. Click here for details and to order!
Here’s some information you should check out:
Thanks for stopping by today, and Sweet Stamping!
May 25, 2018 | Bags, Gallery, Gift Wrap, Gifts, Retiring Products, Wedding |
Order your Swatch Books and Product Shares now!
And now for today’s project. This would be perfect for a small gift or favor for a bridal shower or wedding. And it’s SO easy! I used a pre-made bag, doily, ribbon, and clip – I made only the heart with sentiment embossed in gold.
Here’s what I made:


Here’s what I did:
Cut and scored with my Stampin’ Trimmer:
- scored the top of a striped gift bag 1″ from the top
Stamped with the Born to Be Loved stamp set:
- sentiment in Versamark ink onto a scrap of Powder Pink card stock, then heat embossed it in gold
Die cut using the Sweet & Sassy Framelits:
Cut using Paper Snips:
- about 12″ each of three ribbons: Powder Pink Finely Woven Ribbon, Gold Metallic Edge Ribbon, and Gold 1/8″ Ribbon
Assembled the project:
- folded the ribbons in half and adhered the tops to the center of a Gold Metallic Doily using Tear & Tape
- adhered the die cut heart to the doily using Stampin’ Dimensionals
- put goodies in the bag
- folded over the top of the bag and clipped the decoration on with a Gold Binder Clip
Here are today’s colors:
Here’s what I used:
Click here to order your Swatch Books and Product Shares now!
Here’s some information you should check out:
Thanks for stopping by today, and Sweet Stamping!
May 19, 2018 | Cards, Gallery, Retiring Products |
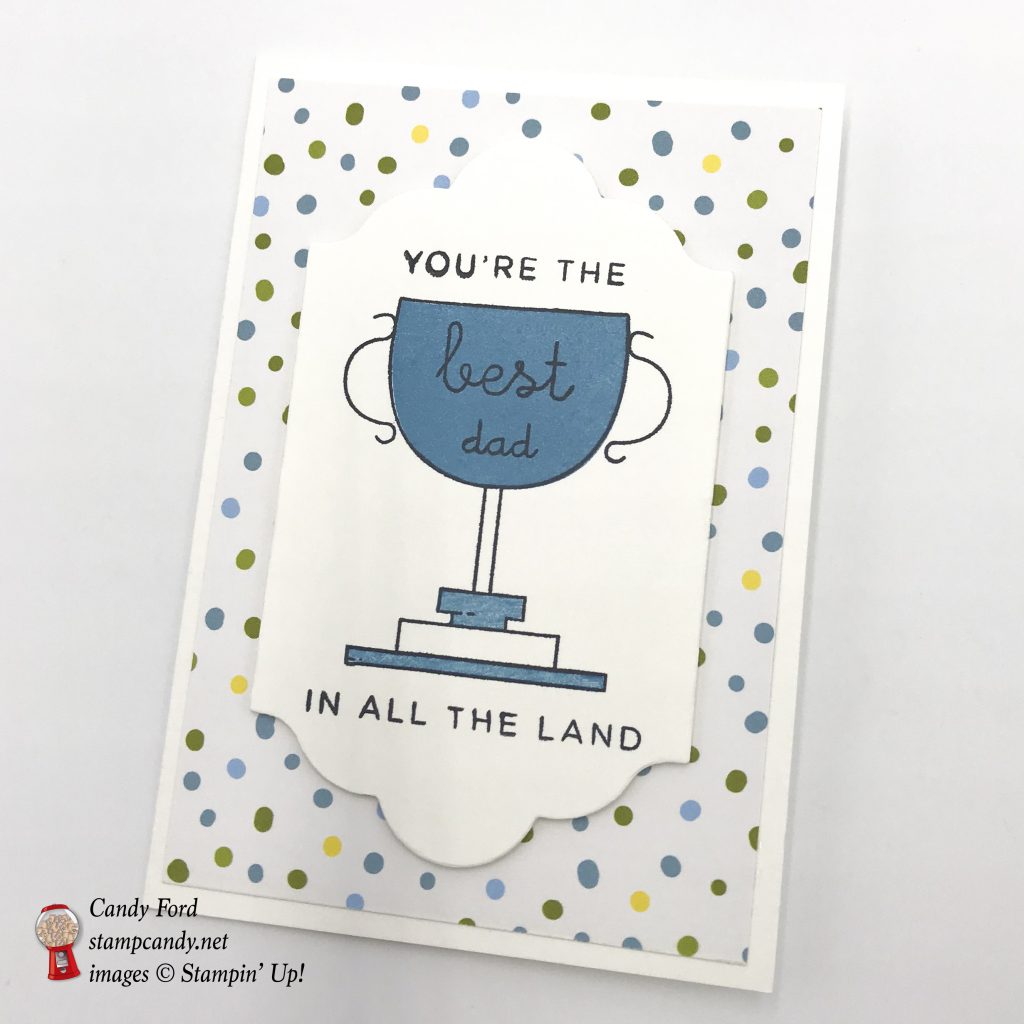
Today’s card is a super quick and easy one for Dad. It’s a note card made using the World’s Best Trophy stamp set and Sweet Soiree Specialty Designer Series Paper. You can use it for Father’s Day, Dad’s birthday, or just to let him know how you feel.
Here’s what I made:

Here’s what I did:
Cut and scored with my Stampin’ Trimmer:
- Sweet Soiree Specialty Designer Series Paper (DSP) cut to 3-1/4″ x 4-3/4″
Stamped with the World’s Best Trophy stamp set:
- trophy outline and sentiments in Tuxedo Black Memento ink onto a scrap of Whisper White card stock (CS)
Die cut using the Lots of Labels Framelits:
Assembled the card:
- burnished the fold in the note card base with a Bone Folder
- DSP glued onto the front of a Whisper White Note Card base
- die cut adhere to the DSP using Stampin’ Dimensionals
Here are today’s colors:
You can click on each one to see all the products that come in that color!
Here’s what I used:
Click on these images for more details and to purchase.
Here’s some stuff you should check out:
Thanks for stopping by today, and Sweet Stamping!