Mar 5, 2019 | Cards, Gallery, Sale-A-Bration, Techniques |
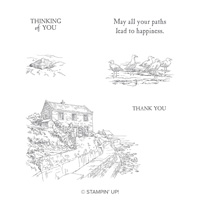
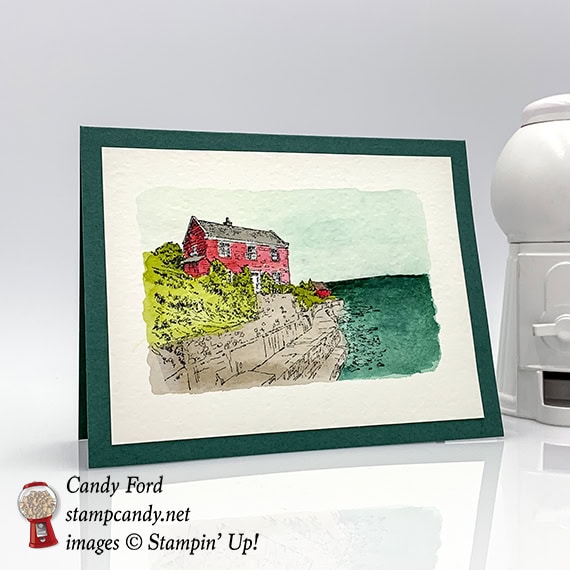
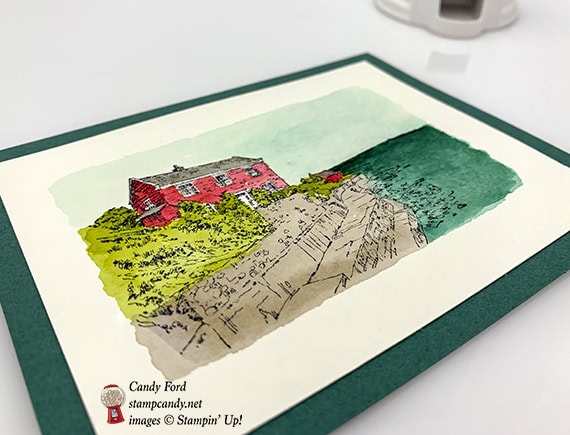
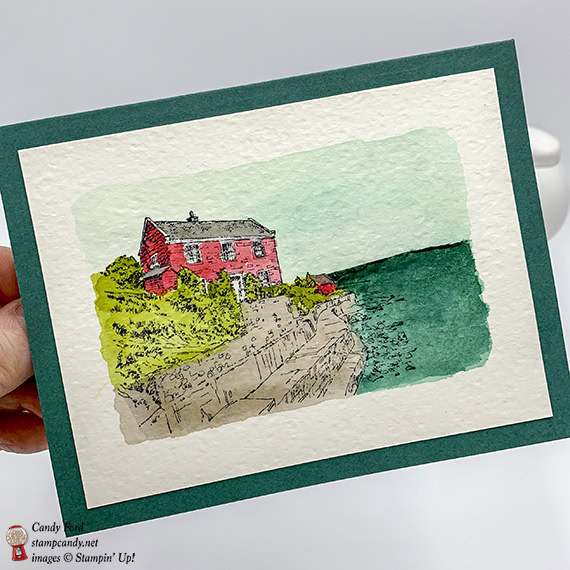
Today’s card is very very simple. One stamp, three pieces of paper, an Aqua Painter, and some ink refills. That’s all it is. The By the Bay Sale-a-bration stamp set really does all the work for you.
I was going to stamp the image onto Watercolor Paper, then crop it down to just the stamped image area. But once I saw it on the larger piece of paper, I decided to try my hand a making a watercolor similar to some I’ve seen in galleries, with no real border except where the ink stops.
You may be surprised when you see which colors I used. They are pretty deep, dark colors, but they are much lighter when they are watered down. I decided not to put a sentiment on this card. You could use it as is for an all occasion notecard, or you could stamp a sentiment on the inside. I really like only the image on the front.
S
Here’s what I made:
 S
S
Here’s what I did:
Cut and scored with my Stampin’ Trimmer:
- Tranquil Tide card stock (CS) cut to 5-1/2″ x 8-1/2″, then scored in half at 4-1/4″
- Watercolor Paper cut to 5″ x 3-3/4″
- Whisper White CS cut to 5-1/4″ x 4″ for the inside of the card base
Stamped with the By the Bay stamp set:
- the largest image in the set
Colored using an Aqua Painter and inks:
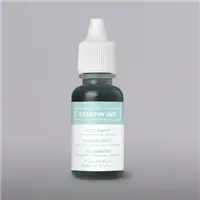
- sky in Pool Party
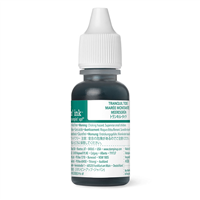
- water in Tranquil Tide
- greenery in Old Olive
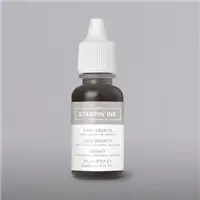
- wall in Gray Granite
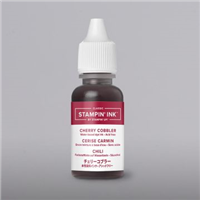
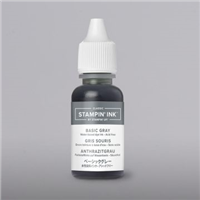
- houses in Cherry Cobbler, and roofs in Basic Gray
- NOTE: There are a few ways to do this, but I put a drop of each color on a clear acrylic block, then used the Aqua Painter filled with water to pick up the color.
- Let the ink dry completely before doing anything else with it. You can speed up this process using a Heat Tool.
Assembled the card:
- burnished the fold in the card base with a Bone Folder
- colored layer glued onto the front of the card base
- Whisper White CS glued onto the inside of the card base
S
Here are today’s colors:
You can click on each one to see all the products that come in that color!
S
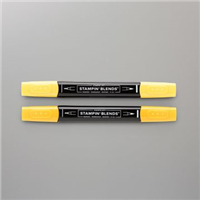
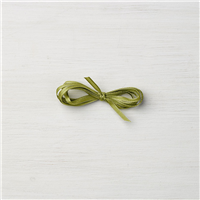
Here’s what I used:
Click on these images for more details and to purchase.
S
Preorder the Floral Romance Online Class by March 6!
- Make 6 beautiful cards at home in your PJs!
- 2 each of 3 designs
- Soft, elegant designs are perfect for wedding, anniversary, and much more
- Limited spots available! Order early – this one is sure to sell out!
Click on the image below for details:
S
Here are some helpful links to check out:

S
Thanks for stopping by today, and Sweet Stamping!

Mar 3, 2019 | Cards, Gallery, Sale-A-Bration |
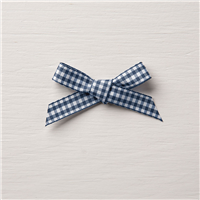
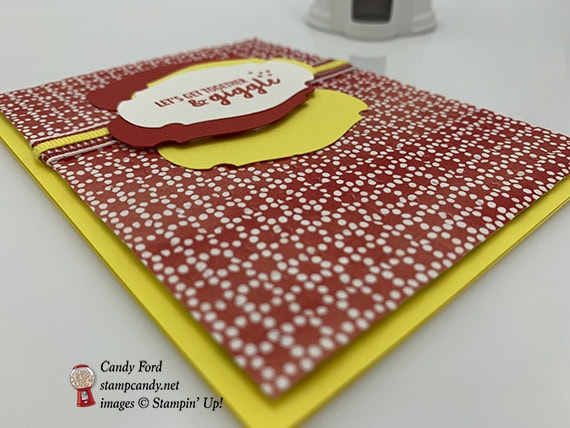
I made today’s card using the Part of My Story stamp set and the Story Label Punch, along with the Oh My Stars embossing folder. The sentiment made me think of patriotic heroes, which is why I used the red, white, and blue color scheme. The star embossed background, gingham ribbon, and Red Rhinestones added to the patriotic feel (think checkered tablecloths and fireworks on the 4th of July.) Of course, anyone can inspire you, and you could make this card with any color combination you like.
Here’s what I made:


 S
S
Here’s what I did:
Cut and scored with my Stampin’ Trimmer:
- Real Red card stock (CS) cut to 4-1/4″ x 11″, then scored in half at 5-1/2″
- Night of Navy CS cut to 4″ x 5-1/4″
- Whisper White CS cut to 4″ x 5-1/4″ for the inside of the card base
Stamped with the Part of My Story stamp set:
- sentiment in Night of Navy and Real Red inks onto a scrap of Whisper White CS
- NOTE: I used Stampin’ Write Markers to color the different areas of the stamp
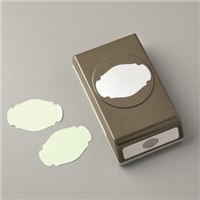
Cut using the Story Label Punch:
Embossed using the Oh My Stars embossing folder:
Assembled the card:
- burnished the fold in the card base with a Bone Folder
- gingham ribbon adhered onto the Night of Navy CS layer using Tear & Tape, wrapping the ends around to the back
- gingham ribbon adhered onto the Whisper White CS using Tear & Tape, wrapping the ends around to the back
- Night of Navy CS layer glued onto the front of the card base
- sentiment glued over the ribbon onto the Night of Navy CS layer
- 2 Red Rhinestones applied to the sentiment
- Whisper White CS glued onto the inside of the card base
S
Here are today’s colors:
You can click on each one to see all the products that come in that color!
S
Here’s what I used:
Click on these images for more details and to purchase.
The stamp set is free with a $50 order through March 31, or while supplies last.
S
Preorder the Floral Romance Online Class by March 6!
- Make 6 beautiful cards at home in your PJs!
- 2 each of 3 designs
- Soft, elegant designs perfect for wedding, anniversary, and much more
- Limited spots available! Order early – this one is sure to sell out!
Click on the image below for details:
S
Here are some helpful links to check out:
S
Thanks for stopping by today, and Sweet Stamping!
Mar 2, 2019 | Cards, Gallery, Sale-A-Bration |
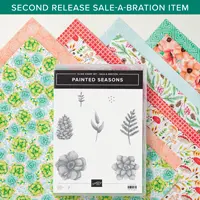
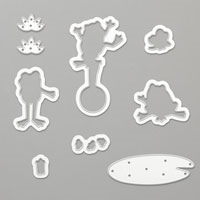
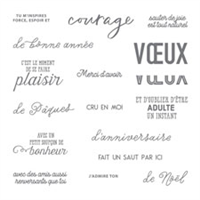
The Part of My Story stamp set is free with a $50 order during Sale-a-bration, and has wonderful sentiments for telling people just how special they are. For today’s card, I’ve paired it with the new Painted Seasons bundle (free with a $100 order) and its coordinating die set, the Four Seasons Framelits. All the colors came from the Painted Seasons Designer Series Paper.
I’m sure there are some people you’d like to tell, “the world needs more people like you.” Do it with this card.
S
Here’s what I made:

 S
S
Here’s what I did:
Cut and scored with my Stampin’ Trimmer:
- Poppy Parade card stock (CS) cut to 4-1/4″ x 11″, then scored in half at 5-1/2″
- Early Espresso CS cut to 3-5/8″ x 4-7/8″
- Painted Seasons Designer Series Paper (DSP) cutt o 3-1/2″ x 4-3/4″
- Whisper White CS cut to 4″ x 5-1/4″ for the inside of the card
Stamped with the Part of My Story stamp set:
- sentiment in Pumpkin Pie and Poppy Parade inks
- NOTE: colored the sections of the stamp using Stampin’ Write Markers
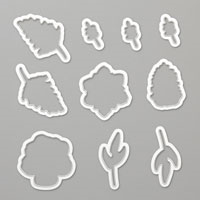
Stamped with the Painted Seasons stamp set:
- 13 leaves in Lemon Lime Twist ink onto a scrap of Whisper White CS
- NOTE: You can stamp 12 leaves on the scrap for die cutting, and the 13th directly onto the Whisper White CS for the inside of the card. I just happened to cut an extra leaf, so I used it on the inside.
Die cut using the Four Seasons Framelits:
- 12 (or 13) stamped leaves
Cut using Circle Punches:
- sentiment with the 1-1/2″ punch
- Call Me Clover CS with the 1-3/4″ punch
- NOTE: these two pieces could also be cut using the Layering Circles Dies
Cut using the Layering Circles Framelits:
- Early Espresso CS with circle die about 2-5/8″ in diameter
Assembled the card:
- burnished the fold in the card base with a Bone Folder
- Early Espresso CS layer glued onto the front of the card base
- DSP layer glued onto the Early Espresso CS layer
- sentiment glued onto the Call Me Clover CS circle
- 12 die cut leaves glued onto the back of the Call Me Clover die cut circle, in a radiating pattern
- sentiment/wreath glued onto the Early Espresso die cut circle
- Early Espresso circle glued onto the DSP layer
- Whisper White CS glued onto the inside of the card base
- 13th leaf (if die cut) glued onto the Whisper White CS
S
Here are today’s colors:
You can click on each one to see all the products that come in that color!
S
Here’s what I used:
Click on these images for more details and to purchase.
S
Preorder the Floral Romance Online Class by March 6!
- Make 6 beautiful cards at home in your PJs!
- 2 each of 3 designs
- Soft, elegant designs perfect for wedding, anniversary, and much more
- Limited spots available! Order early – this one is sure to sell out!
Click on the image below for details:
S
Here are some helpful links to check out:
S
Thanks for stopping by today, and Sweet Stamping!
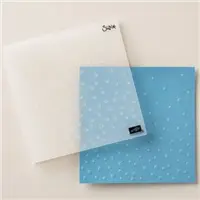
Mar 1, 2019 | Cards, Gallery, New Products, Sale-A-Bration |
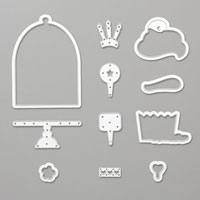
It’s March 1, and that means the brand new Sale-a-bration Coordination products are now available to purchase! I’ve used one of them on today’s card, the Story Label Punch, along with the coordinating Part of My Story Sale-a-bration stamp set. The Painted Seasons Designer Series Paper (another SAB item) provides the background.
S
Here’s what I made:


 S
S
Here’s what I did:
Cut and scored with my Stampin’ Trimmer:
- Pineapple Punch card stock (CS) cut to 4-1/4″ x 11″, then scored in half at 5-1/2″
- Painted Seasons Designer Series Paper (DSP) cut to 4″ x 5-1/4″
- Whisper White CS cut to 4″ x 5-1/4″ for the inside of the card base
Stamped with the Part of My Story stamp set:
- sentiment in Poppy Parade ink onto a scrap of Whisper White CS
- just the dots from the sentiment stamp in Poppy Parade ink onto the 4″ x 5-1/4″ Whisper White CS
Cut using the brand new Story Label Punch:
- sentiment
- 2 pieces from a scrap of Pineapple Punch CS and 2 from a scrap of Poppy Parade CS
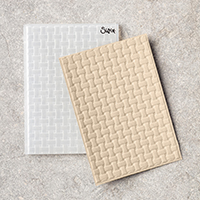
Embossed using the Basket Weave embossing folder:
- DSP layer
- NOTE: unfortunately the embossing doesn’t show in the photos
Assembled the card:
- burnished the fold in the card base with a Bone Folder
- Poppy Parade 1/2″ Textured Weave Ribbon adhered onto the DSP layer with Tear & Tape, wrapping the ends around to the back of the layer
- Poppy Parade 1/4″ Mini Striped Ribbon adhered onto the 1/2″ ribbon with Tear & Tape, wrapping the ends around to the back of the layer
- Pineapple Punch 1/8″ Grosgrain Ribbon adhered onto the 1/4″ ribbon with Tear & Tape, wrapping the ends around to the back of the layer
- DSP layer adhered onto the front of the card base with Stampin’ Dimensionals
- Poppy Parade punched shape glued onto the DSP layer, just above the ribbon
- Pineapple Punch punched shape glued onto the DSP layer, just below the ribbon
- sentiment glued to the remaining two punched pieces, then all three adhered over the ribbon with Stampin’ Dimensionals
- Whisper White CS glued onto the inside of the card base
S
Here are today’s colors:
You can click on each one to see all the products that come in that color!
S
Here’s what I used:
Click on these images for more details and to purchase.
S
Here are all the new products:
They’re available only through March 31, or while supplies last.
Preorder the Floral Romance Online Class by March 6!
- Make 6 beautiful cards at home in your PJs!
- 2 each of 3 designs
- Soft, elegant designs are perfect for wedding, anniversary, and much more
- Limited spots available! Order early – this one is sure to sell out!
Click on the image below for details:
S
Here are some helpful links to check out:
S
Thanks for stopping by today, and Sweet Stamping!
Mar 1, 2019 | Promotions, Sale-A-Bration, Sales |
Today is a big, big day for Sale-a-bration! Two new sets of products are now available – but only through March 31 or while supplies last:
Sale-a-bration 3rd Release Items:
These are items you already know and love that are now available FREE with a qualifying order! But only through March 31!
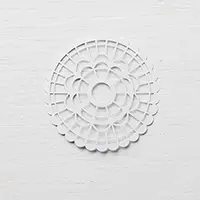
- Share What You Love Embellishment Kit
- Scattered Sequins Dynamic Textured Impressions Embossing Folder
- Mini Pizza Boxes
- Pearlized Doilies: You get two packs!
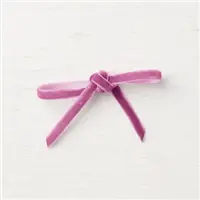
- Rich Razzleberry 1/4″ Velvet Ribbon: You get two rolls!
- Petal Promenade Designer Series Paper
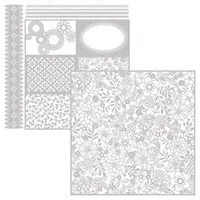
- Delightfully Detailed Laser-Cut Specialty Paper
- Painted Seasons Designer Series Paper: This has been available in a Sale-a-bration bundle with the Painted Seasons stamp set. Now you can get it the paper by itself, so you’ll have enough to make all the projects you want.
S
Sale-a-bration Coordination Items:
These are brand new items that coordinate with current Sale-a-bration items.
- Story Label Punch
- Four Seasons Framelits Dies
- Hop Around Framelits Dies
- Call Me Cupcake Framelits Dies
- Lily Framelits Dies
- More Than Words stamp set
- Au-Delà Des Mots stamp set (French)
Dies and Punches make stamp sets so much more versatile!


 S
S
Preorder the Floral Romance Online Class by March 6!
- Make 6 beautiful cards at home in your PJs!
- 2 each of 3 designs
- Soft, elegant designs perfect for wedding, anniversary, and much more
- Limited spots available! Order early – this one is sure to sell out!
Click on the image below for details:
S
Here are some helpful links to check out:
S
Thanks for stopping by today, and Sweet Stamping!
Feb 25, 2019 | Cards, Gallery, Holiday, Occasions, Sale-A-Bration |
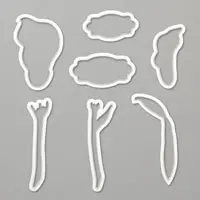
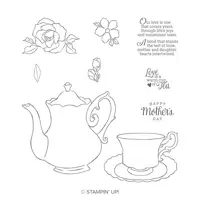
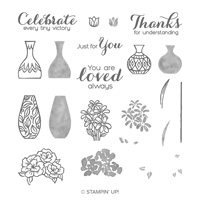
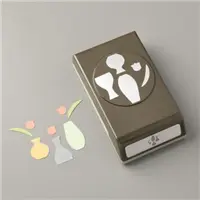
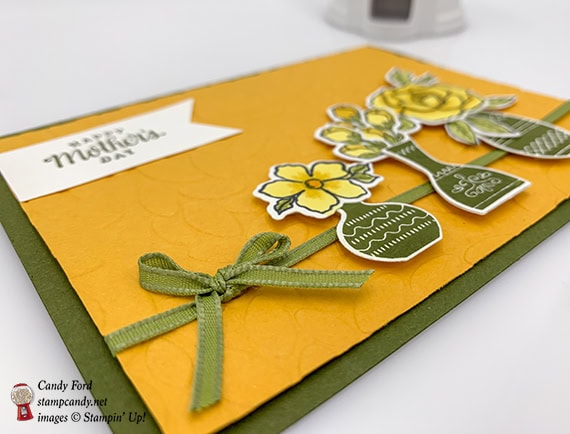
Today’s card is for Mother’s Day. I used the Tea Together stamp set and the coordinating Tea Time Framelits Dies, but only the flowers, and not the more obvious teapot and teacup. I plopped the flowers into vases from the Vibrant Vases stamp set, and cut using the Vases Builder Punch. For the background, I used the Petal Burst Textured Impressions Embossing Folder (TIEF) to create a totally floral motif.
S
Here’s what I made:
 You may notice at the bottom right corner of the card front, I neglected to get the corner of the layer stuck down properly before taking the picture. I’m not sure how I didn’t notice that, but rest assured it is fixed now.

 S
S
Here’s what I did:
Cut and scored with my Stampin’ Trimmer:
- Mossy Meadow card stock (CS) cut to 5-1/2″ x 8-1/2″, then scored in half at 4-1/4″
- Mango Melody CS cut to 5-1/4″ x 4″
- Whisper White CS cut to 4″ x 1″
- Whisper White Cs cut to 5-1/4″ x 4″ for the inside of the card
Stamped with the Tea Together stamp set:
- sentiment in Mossy Meadow ink onto the 1″ strip of Whisper White CS
- flowers (1 large, 1 medium, and 3 rose buds) and 3 leaves in Memento black ink onto a scrap of Whisper White CS
- 2 large flowers in Daffodil Delight ink onto the Whisper White CS for the inside of the card
Stamped with the Vibrant Vases stamp set:
- the 3 vases in Mossy Meadow ink onto a scrap of Whisper White CS
Colored using Stampin’ Blends Markers:
- all the Memento black ink stamped flowers and leaves: flowers in Daffodil Delight and Mango Melody, and leaves in Old Olive
Die cut using the Tea Time Framelits:
- the colored flowers and leaves
Embossed using the Petal Burst embossing folder:
Cut using the Vases Builder Punch:
Cut using the Banner Triple Punch:
- the left end of the sentiment strip
Assembled the card:
- burnished the fold in the card base with a Bone Folder
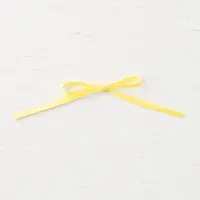
- adhere a piece of Old Olive 1/8″ ribbon onto the embossed Mango Melody CS layer, securing the ends on the back with Tear & Tape
- embossed Mango Melody CS layer glued onto the front of the card base
- piece of the same ribbon tied around the first piece, and tied in a bow – I secured the bow to the card using a Mini Glue Dot
- flowers and leaves glued together with vases, then adhered onto the embossed Mango Melody CS layer, over the ribbon, using Stampin’ Dimensionals
- sentiment glued onto the embossed Mango Melody CS layer
- Whisper White CS glued onto the inside of the card base
S
Here are today’s colors:
You can click on each one to see all the products that come in that color!
S
Here’s what I used:
Click on these images for more details and to purchase.
S
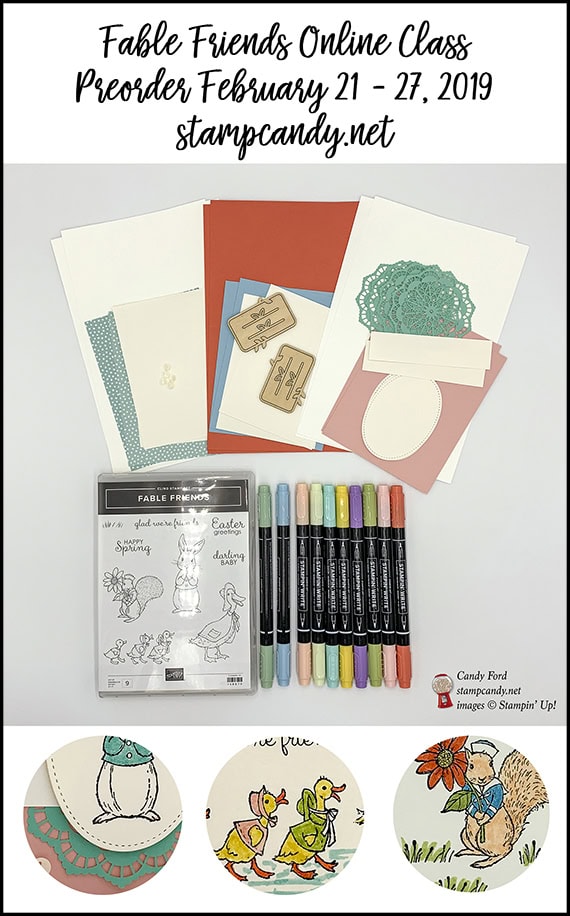
Preorder the Fable Friends Online Class by February 27!
- Make 6 adorable cards at home in your PJs!
- 2 each of 3 designs
- Perfect for Spring!
- Limited spots available!
Click on the image below for details:
S
Here are some helpful links to check out:
S
Thanks for stopping by today, and Sweet Stamping!