Jan 10, 2022 | Blog Hop, Cards, Fun Folds, Gallery, Sale-A-Bration |

Welcome to the January 2022 Candy Hearts Blog Hop! Today we are sharing projects made with new Sale-a-bration items. After reading my post, I hope you will hop to the next person on the list below. Be sure to hop around to see ALL the great projects the Candy Hearts have created for you!
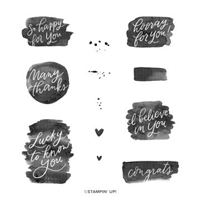
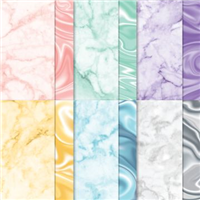
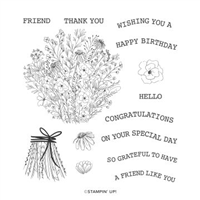
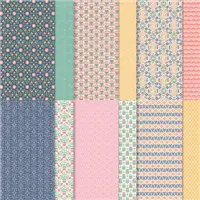
The Sale-a-bration item I used on my card today is the Simply Marbleous Designer Series Paper, which I used along with the Lucky You stamp set and Layering Circles Dies. I made a Triple Fold fun fold card, and used a few colors of the marble pattern paper for the different layers. I didn’t add any embellishments because I wanted the gorgeous paper to take center stage.
If you are reading this in email, some photos may appear blurry, or may not appear at all. Please click here to see the post on my blog.
S January 2022 Candy Hearts Blog Hop January 2022 Candy Hearts Blog Hop January 2022 Candy Hearts Blog Hop January 2022 Candy Hearts Blog Hop
Here’s what I made:
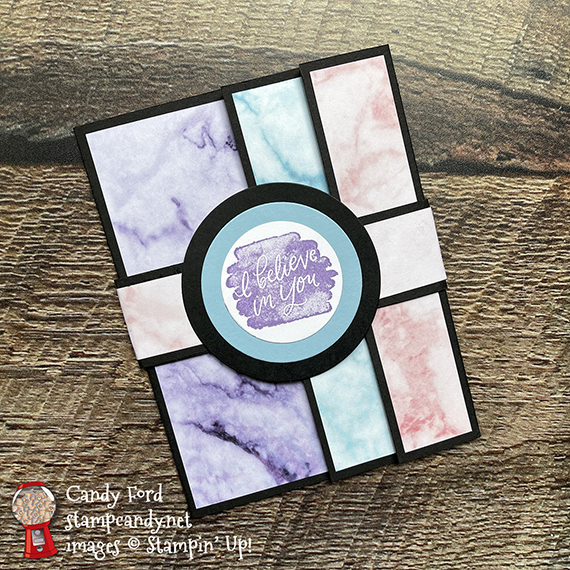

Inside: I used a different color of the DSP on the back side of the purple section, because I had pulled out only one sheet of each color, and I didn’t want to get up to get another piece of the purple. Can you say “lazy stamper?”
Back: If you want, you can add another piece of Basic White CS to the empty panel for more writing space.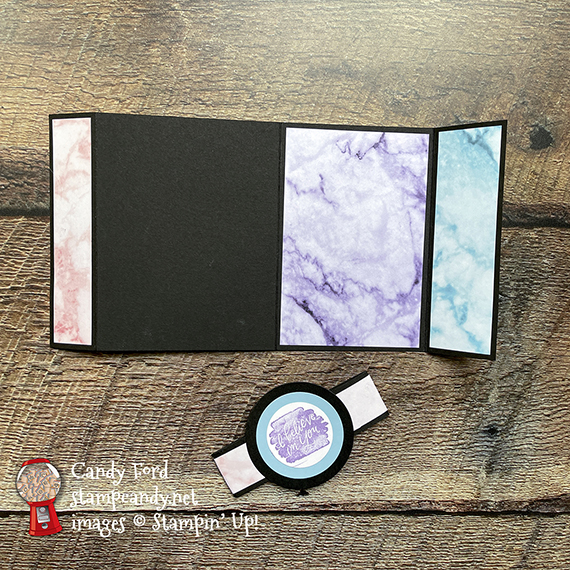
Here’s what I did:
Cut and scored with my paper trimmer:
- Basic Black card stock (CS) cut to 11″ x 5-1/2″, then scored at 1-3/4″, 5-1/2″, & 9-3/4″
- Simply Marbleous Designer Series Paper (DSP) layers (purple) cut to 3-1/2″ x 5-1/4″ (2 pieces) Actually, for this particular card, I cut one purple layer and one green layer, instead of 2 purples.
- blue DSP layers cut to 1-1/2″ x 5-1/4″ (2 pieces)
- pink DSP layers cut to 1″ x 5-1/4″ (2 pieces)
- Basic Black CS cut to 11″ x 1-1/4″
- pink DSP strip cut to 6″ x 1″ (2 pieces)
- Basic White CS cut to 4″ x 5-1/4″ for the inside of the card base
Stamped with the Lucky You stamp set:
- sentiment in Highland Heather ink onto a scrap of Basic White CS
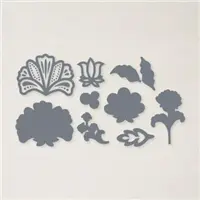
Cut using the Layering Circles Dies:
- sentiment
- larger circle from a scrap of Balmy Blue CS
- even larger circle from a scrap of Basic Black CS
Assembled the card:
- burnished the folds in the card base with a Bone Folder, so the first one at 1-3/4″ is a mountain fold, and the other two are valley folds
- card base closed with the two smaller flaps on the right
- 3-1/2″ x 5-1/4″ DSP glued onto the largest section of the front. The right edge of this DSP layer will be hidden under one of the flaps when the card is closed.
- 1-1/2″ x 5-1/2″ DSP glued onto the middle section
- 1″ x 5-1/4″ DSP glued onto the smallest section
- three corresponding DSP pieces glued onto the backs of those same sections
- 4″ x 5-1/4″ Basic White CS glued onto the inside of the card base
- burnished the 11″ strip of Basic Black CS with a Bone Folder, only a few times to soften the fibers
- wrapped the 11″ strip of Basic Black CS around the card so the ends overlapped in front, making sure it was snug enough so it wouldn’t fall off and loose enough so it could be removed easily
- the two 6″ DSP strips glued together to make an 11″ strip, then glued onto the Basic Black CS belly band
- sentiment glued onto the Balmy Blue CS circle, then that glued onto the Basic Black CS circle
- Basic Black CS circle glued onto the front of the belly band
S
Here’s the January 2022 Candy Hearts Blog Hop:
Thank you for hopping with the Candy Hearts today! Be sure to hop around to all the stops. You do not want to miss any of the creativity in this talented group of stampers! If you get lost, use the list below.
s
Here are today’s colors:
You can click on each one to see all the products that come in that color!
S
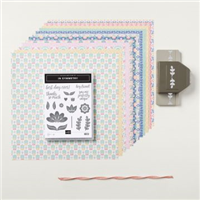
Here’s what I used:
Click on these images for more details and to purchase. If you are reading this post in email, the product images may not show up. Please click here to see the post on my blog.
Supply List. <— Click for a clickable and printable list of the products!
Here are some helpful links:
S
Thanks for stopping by today, and Sweet Stamping!
Dec 13, 2021 | Blog Hop, Cards, Gallery, Winter |

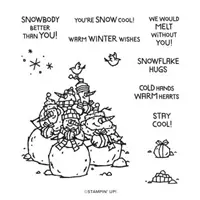
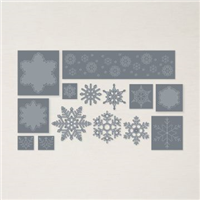
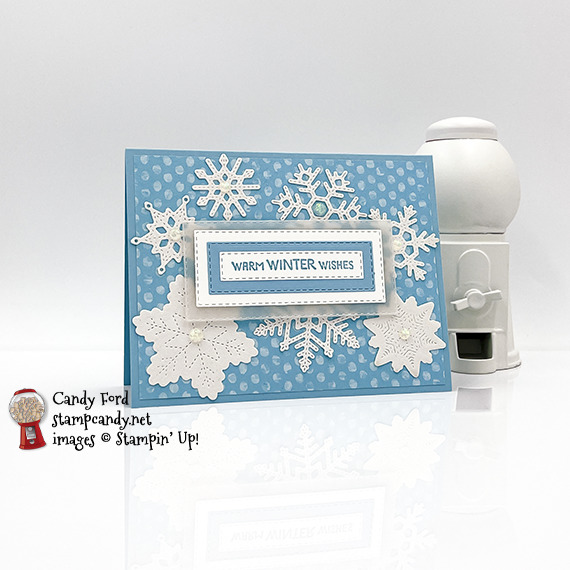
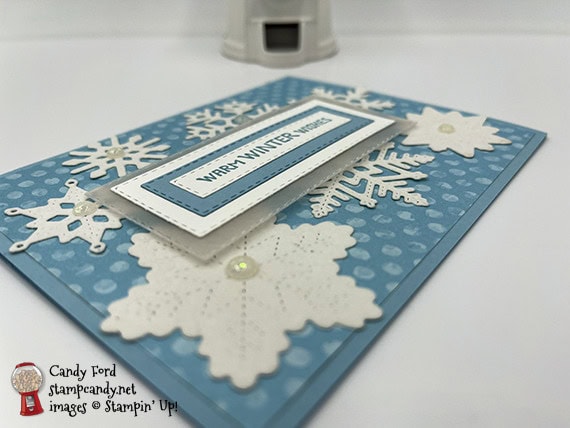
Welcome to the December 2021 Candy Hearts Blog Hop! Today we are sharing Winter themed projects. I used the Snowbody Better stamp set along with the Stitched Snowflakes Dies and the Rectangle Stitched Dies to create a wintery, snowy card. It’s a great way to send warm wishes when the weather is cold. After reading my post, I hope you will hop to the next person on the list below. Be sure to hop around to see all the great projects the Candy Hearts have created for you!
If you are reading this in email, some photos may appear blurry, or may not appear at all. Please click here to see the post on my blog.
S December 2021 Candy Hearts Blog Hop December 2021 Candy Hearts Blog Hop December 2021 Candy Hearts Blog Hop December 2021 Candy Hearts Blog Hop
Here’s what I made:
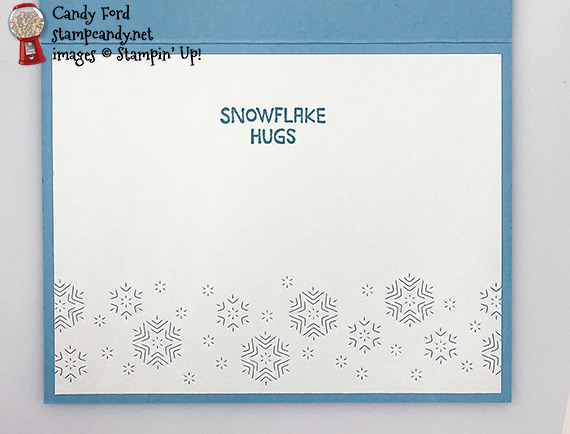
 Inside:
S
Here’s what I did:
Cut and scored with my paper trimmer:
- Balmy Blue card stock (CS) cut to 5-1/2″ x 8-1/2″, then scored in half at 4-1/4″
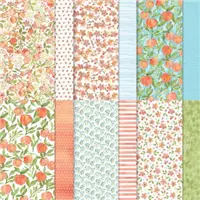
- You’re A Peach Designer Series Paper (DSP) layer cut to 5-1/4″ x 4″
- Basic White CS cut to 5-1/4″ x 4″ for the inside of the card base
Stamped with the Snowbody Better stamp set:
- front sentiment in Balmy Blue ink onto a scrap of Basic White CS
- inside sentiment onto the 5-1/4″ x 4″ Basic White CS for the inside
Cut using the Stitched Snowflake Dies:
- 7 snowflakes from Snowy White Velvet Paper
- snowflakes cut into the 5-1/4″ x 4″ Basic White CS for the inside
Cut using the Stitched Rectangle Dies:
- front sentiment
- first mat from a scrap of Balmy Blue CS
- second mat from a scrap of Basic White CS
- third mat from a scrap of Vellum
Assembled the card:
- burnished the fold in the card base with a Bone Folder
- DSP layer glued onto the front of the card base
- snowflakes glued onto the DSP layer
- front sentiment glued onto the Balmy Blue CS mat
- Balmy Blue CS mat glued onto the Basic White CS mat
- Basic White CS mat adhered onto the Vellum mat using Stampin’ Seal+
- Vellum mat adhered over the snowflakes using a piece of a Foam Adhesive Sheet
- Opal Rounds applied onto the exposed centers of the snowflakes using my Take Your Pick tool
- Basic White CS glued onto the inside of the card base
S
Here’s the December 2021 Candy Hearts Blog Hop:
s
Here are today’s colors:
You can click on each one to see all the products that come in that color!
S
Here’s what I used:
Click on these images for more details and to purchase. If you are reading this post in email, the product images may not show up. Please click here to see the post on my blog.
Sale: $16.80
Price: $21.00
Supply List. <— Click for a clickable and printable list of the products!
Here are some helpful links:
S
Thanks for stopping by today, and Sweet Stamping!
Oct 11, 2021 | Blog Hop, Cards, Gallery |

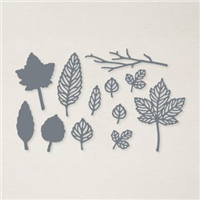
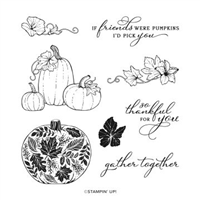
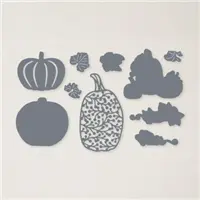
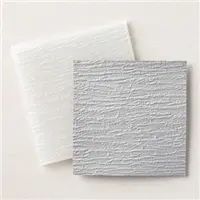
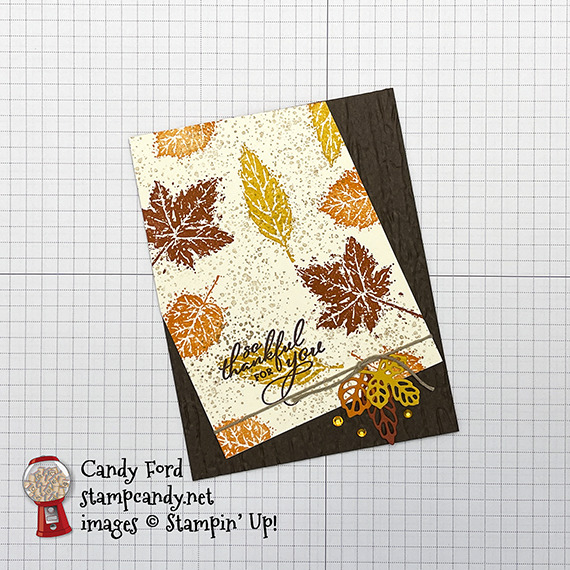
Welcome to the October 2021 Candy Hearts Blog Hop! Today we are sharing Thank You projects. I used the Gorgeous Leaves Bundle, Pretty Pumpkins stamp set, and Bark 3D Embossing Folder to create my card. After reading my post, I hope you’ll hop to the next person on the list below. Be sure to hop around to see ALL the great projects the Candy Hearts have created for you!
If you are reading this post in email, the product images may not show up. Please click here to see the post on my blog.
S October 2021 Candy Hearts October 2021 Candy Hearts October 2021 Candy Hearts October 2021 Candy Hearts
Here’s what I made:
inside the card: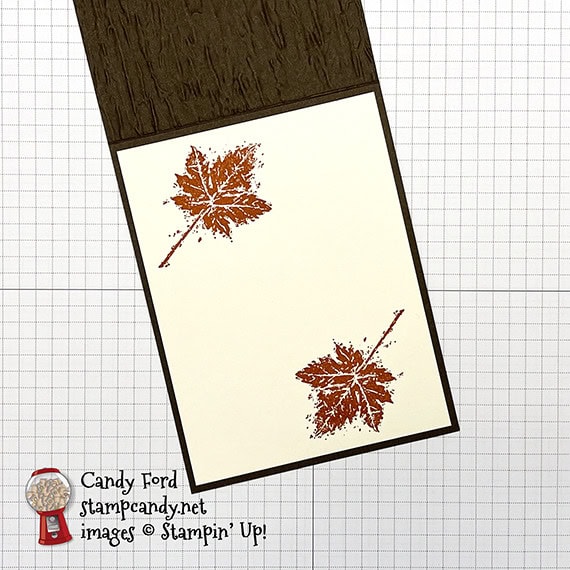
S
Here’s what I did:
Cut and scored with my paper trimmer:
- Early Espresso card stock (CS) cut to 4-1/4″ x 11″, then scored in half at 5-1/2″
- Very Vanilla CS layer cut to 3-3/4″ x 5″, then cut at an angle as shown (Note: I laid it on the card base front and marked with a pencil where I wanted to cut.)
- Very Vanilla CS cut to 4″ x 5-1/4″ for the inside of the card base
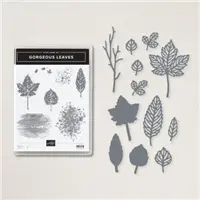
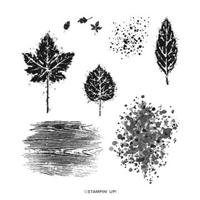
Stamped with the Gorgeous Leaves stamp set:
- leaves in Crushed Curry, Pumpkin Pie, and Cajun Craze inks onto the Very Vanilla CS layer
- speckled background between the leaves in Crumb Cake ink
- 2 leaves in Cajun Craze ink onto the Very Vanilla CS for the inside
Stamped with the Pretty Pumpkins stamp set:
- sentiment in Early Espresso ink over one of the Crushed Curry stamped leaves
Cut using the Intricate Leaves Dies:
- 3 small leaves, one each from a scrap of Crushed Curry, Pumpkin Pie, and Cajun Craze CS
Embossed using the Bark 3D Embossing Folder:
- the front of the card base
Assembled the card:
- burnished the fold in the card base with a Bone Folder
- Crumb Cake twine wrapped around the stamped layer, secured on the back with Stampin’ Seal, and tied in a knot on the front
- knot secured to the front of the layer using a Mini Glue Dot
- stamped layer glued onto the front of the card base
- 3 die cut leaves glued at the knot
- 3 Pumpkin Pie rhinestones applied onto the card front using my Take Your Pick tool
- Very Vanilla CS glued onto the inside of the card base
S
Here’s the October 2021 Candy Hearts Blog Hop:
Thank you for hopping with the Candy Hearts today! Be sure to hop around to all the stops. You do not want to miss any of the creativity in this talented group of stampers! If you get lost, use the list below.
s
Here are today’s colors:
You can click on each one to see all the products that come in that color!
S
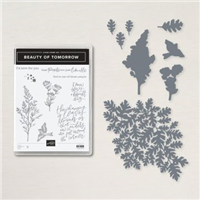
Here’s what I used:
Click on these images for more details and to purchase. If you are reading this post in email, the product images may not show up. Please click here to see the post on my blog.
Supply List. <— Click for a clickable and printable list of the products!
Here are some helpful links:
S
Thanks for stopping by today, and Sweet Stamping!
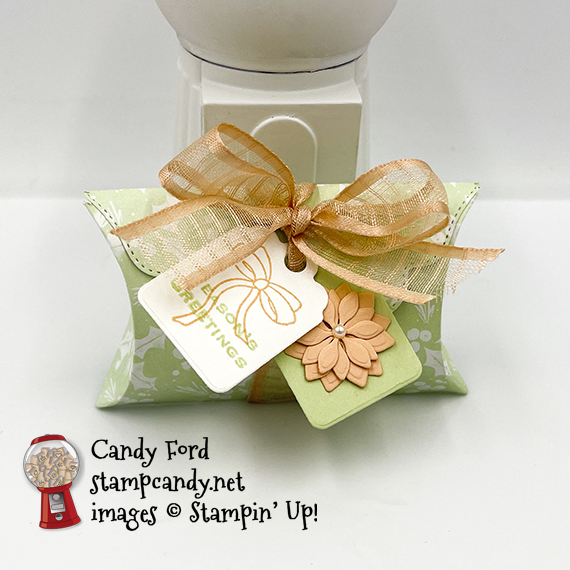
Aug 16, 2021 | Blog Hop, Boxes, Christmas, Gallery, Gift Wrap, Gifts, Holiday, Tags, Treat Holders |

Welcome to the August 2021 CHBH! This month we are featuring 3D projects. I’m sharing a treat box I made using some new holiday products from the July-December 2021 Mini Catalog: the Pretty Pillowbox Dies and Painted Christmas Designer Series Paper.
After reading my post, be sure to hop around to all the stops to see the wonderful 3D projects this creative group has in store for you.
If you are reading this in email, some photos may appear blurry, or may not appear at all. Please click here to see the post on my blog.
S August 2021 CHBH August 2021 CHBH August 2021 CHBH August 2021 CHBH
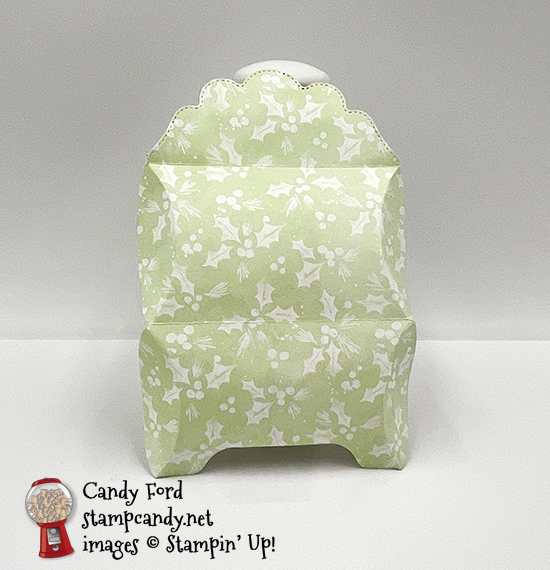
Here’s what I made:
You can fold in the ends as I’ve done here, or you can glue the ends shut, since it opens at the flap.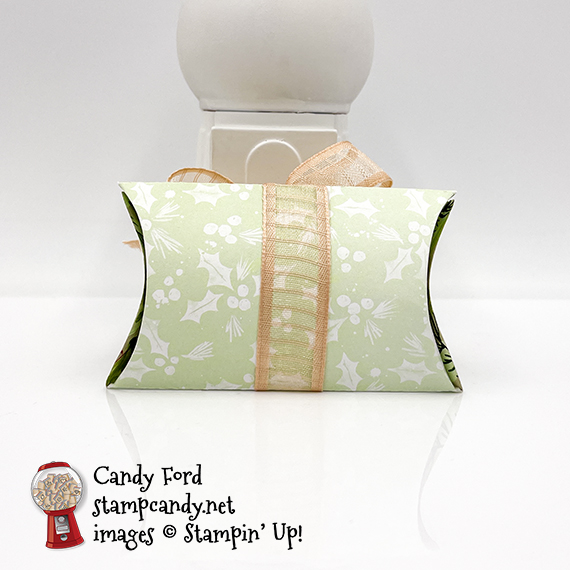
A couple of Burt’s Bees lip balms fit inside for a small and functional gift.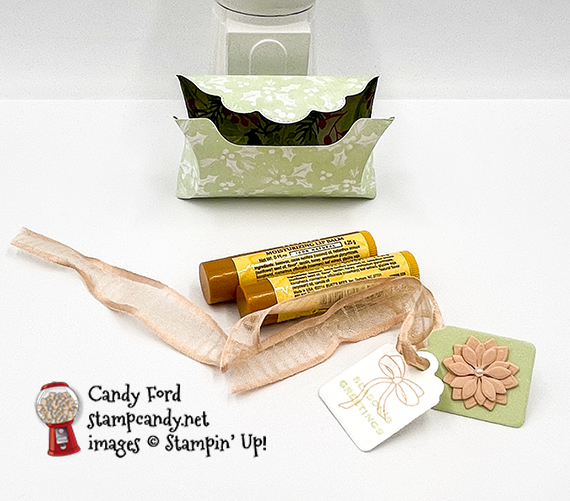


S
Here’s what I did:
Cut using the Pretty Pillowbox Dies:
- box from a 4-1/2″ x 6″ piece of Painted Christmas DSP
- 2 large and 2 small flower pieces from a scrap of Petal Pink CS
- tags from scraps of Soft Sea Foam and Basic White Thick CS
Stamped with the Tidings & Trimmings stamp set:
- bow in Petal Pink ink onto the Basic White Thick CS tag
- sentiment in Soft Sea Foam ink over the bow
Assembled the box:
- burnished the folds in the box with a Bone Folder
- 4 flower pieces stacked and glued together, then glued onto the Soft Sea Foam CS tag
- pearl applied onto the center of the flower using a Take Your Pick tool
- box folded closed, and 2 lip balms put inside
- tags strung onto ribbon, then the ribbon tied around the box and tied in a bow
S
Here’s the August 2021 CHBH:
Thank you for hopping with the Hearts today! Be sure to hop around to all the stops. You do not want to miss any of the creativity in this talented group of stampers! If you get lost, use the list below.
s
Here are today’s colors:
You can click on each one to see all the products that come in that color!
S
Here’s what I used:
Click on these images for more details and to purchase. If you are reading this post in email, the product images may not show up. Please click here to see the post on my blog.
Supply List. <— Click for a clickable and printable list of the products!
S
It’s Sale-a-bration time…AGAIN!
Stampin’ Up! is having the second Sale-a-bration of this year! Through 30 September 2021, you can choose a free Level 1 Sale-a-bration item for every $50 on an order, and a free Level 2 item for every $100 on an order (before tax & shipping.)
When you join my Candy Hearts team of stampers during Sale-a-bration, you get to choose $125 in product and FREE shipping and pay only $99 (plus tax) PLUS you get to choose one of a dozen new bundles! for free! You can click on each bundle below to see all the details in my online store.
S
Here are some helpful links:
S
Thanks for stopping by today, and Sweet Stamping!

Jul 12, 2021 | Birthday, Blog Hop, Cards, Gallery |

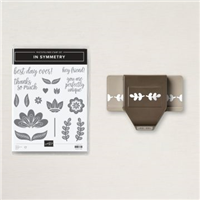
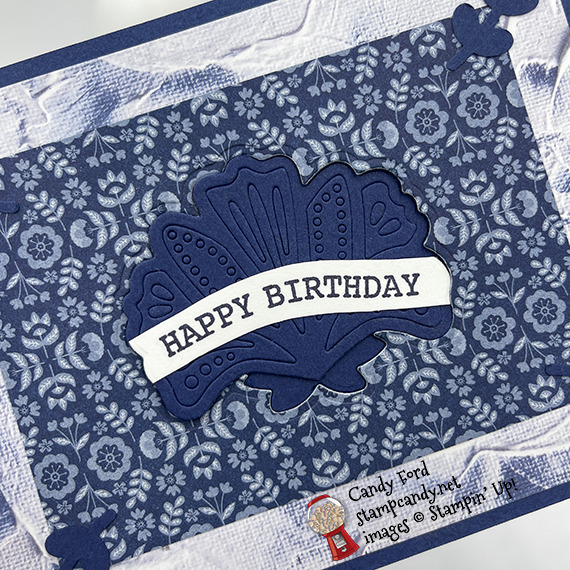
Welcome to the July 2021 Candy Hearts Blog Hop! This month we are sharing projects featuring a Birthday theme. I used the In Symmetry Bundle, Hand-Drawn Blooms stamp set, Batik Dies, and two Designer Series Papers (In Good Taste and Sweet Symmetry) to create a lever card.
After reading my post, I hope you will hop to the next person on the list below. Be sure to hop around to see all the great projects the Candy Hearts have created for you!
If you are reading this in email, some photos may appear blurry, or may not appear at all. Please click here to see the post on my blog.
S July 2021 Candy Hearts July 2021 Candy Hearts July 2021 Candy Hearts July 2021 Candy Hearts
Here’s what I made:

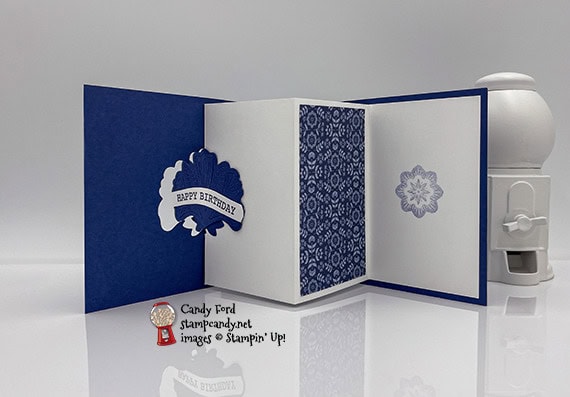
S
Here’s what I did:
Cut and scored with my paper trimmer:
- Night of Navy card stock (CS) cut to 11″ x 4-1/4″, then scored in half at 5-1/2″
- In Good Taste Designer Series Paper (DSP) layer cut to 5-1/4″ x 4″
- Sweet Symmetry DSP layer cut to 4-1/4″ x 3″
- Sweet Symmetry DSP layer cut to 2-3/8″ x 3-3/4″
- Basic White Thick CS insert cut to 8-3/8″ x 4″, scored at 1/2″, 3-1/8″, and 5-3/4″
Stamped with the Hand-Drawn Blooms stamp set:
- sentiment in Night of Navy ink onto a scrap of Basic White Thick CS
Stamped using the In Symmetry stamp set:
- flower in Night of Navy ink, stamped off 3 times, onto the far right section of the Basic White Thick CS insert
Cut using the Batik Dies:
- scrap of Night of Navy CS using the two largest dies
- sentiment using the largest open die
- card front with two DSP layers (see below)
Fussy Cut using Paper Snips:
- sentiment along the top and bottom
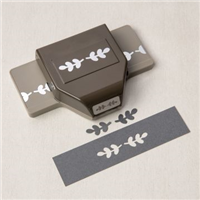
Cut using the Symmetrical Stems Border Punch:
- 4 sprigs from a scrap of Night of Navy CS
Assembled the card:
- burnished the folds in the card base and the Basic White Thick CS insert with a Bone Folder
- In Good Taste DSP layer glued onto the front of the card base
- 4-1/4″ x 3″ Sweet Symmetry DSP layer glued onto the In Good Taste DSP Layer
- using the largest open Batik Die, cut through the three layers of the card front in the center
- 4 sprigs glued onto the corners of the card front
- far right section of the Basic White Thick CS insert glued onto the inside of the card base so that 1/8″ of the card base shows around the top, bottom, and right sides
- 2-3/8″ x 3-3/4″ Sweet Symmetry DSP layer glued onto the middle of the 3 larger sections of the insert
- accordion-folded the insert, except for the 1/2″ section, and closed the card so the score line showing through the die cut hole was centered
- pencil marks made on the 1/2″ section of the insert along the edges of the die cut hole
- fussy cut outside the pencil lines and along the score line to remove the middle of the 1/2″ section and create two tabs
- detailed die cut glued onto the solid die cut
- sentiment glued onto the detailed die cut, lining up the die cut sides
- glue applied onto the part of the insert that shows through the hole
- solid die cut fit into the hole and pressed to adhere onto the insert
- card opened, glue applied onto the two tabs of the insert, then card closed again to adhere
S
Here’s the July 2021 Candy Hearts Blog Hop:
Thank you for hopping with the Hearts today! Be sure to hop around to all the stops. You do not want to miss any of the creativity in this talented group of stampers! If you get lost, use the list below.
s
Here are today’s colors:
You can click on each one to see all the products that come in that color!
S
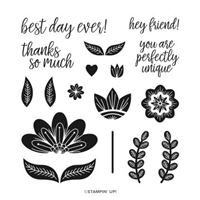
Here’s what I used:
Click on these images for more details and to purchase. If you are reading this post in email, the product images may not show up. Please click here to see the post on my blog.
Supply List. <— Click for a clickable and printable list of the products!
S
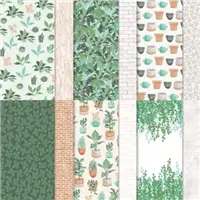
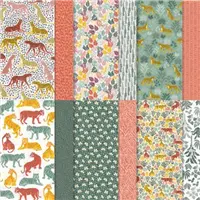
Reserve Your DSP Swatch Books and Product Shares Now!
CLICK HERE to get all the details on swatch books and product shares. You must order by 2 August!
s
Designer Series Paper Sale!

These nine Designer Series Papers are out not only of this world gorgeous. They’re also on sale! Click on the images below to see them in my online store.
s
S
Here are some helpful links:
S
Thanks for stopping by today, and Sweet Stamping!