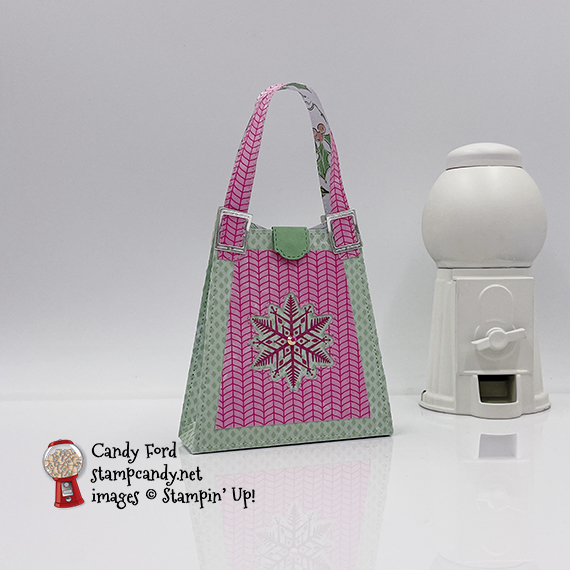
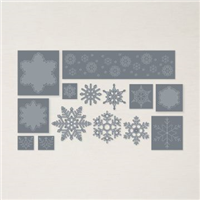
Welcome to the November 2021 IRBH! This month’s theme is Pretty Packages & Tags, and we’re featuring Christmas gift packaging. I used the All Dressed Up Dies with the Merry Snowflakes Bundle (Merry Snowflakes stamp set and Stitched Snowflakes Dies) and the Whimsy & Wonder designer Series paper to create a cute little bag that can hold any number of small gifts.
If you are reading this in email, some photos may appear blurry, or may not appear at all. Please click here to see the post on my blog.
S November 2021 IRBH November 2021 IRBH November 2021 IRBH November 2021 IRBH
Here’s what I made:
You can tuck in the sides for a slim look…
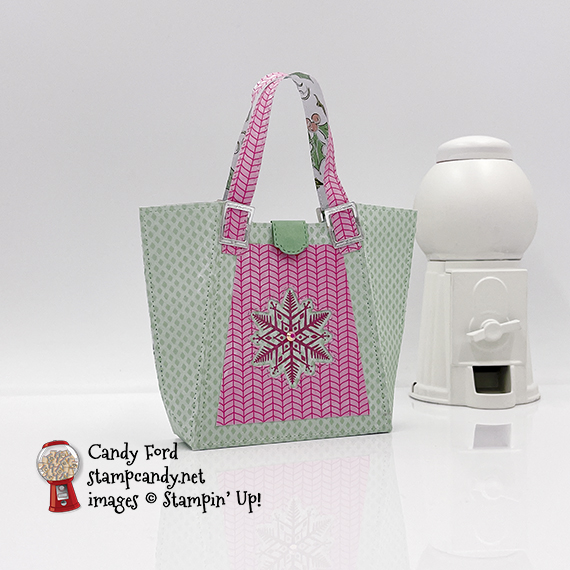
… or you can pull out the sides for a wider look.
The back:
Close up of the front:
S
Here’s what I did:
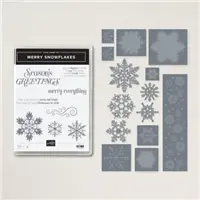
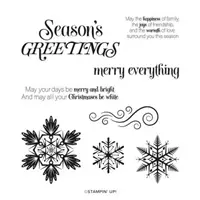
Stamped with the Merry Snowflakes stamp set:
snowflake in Polished Pink ink onto the front of the purse
Cut using the All Dressed Up Dies:
2 pieces of Whimsy & Wonder Designer Series Paper (DSP) for the body of the purse (green)
1 piece of Whimsy & Wonder DSP using the same die (pink)
2 straps cut from the pink DSP
latch cut from a scrap of Mint Macaron card stock (CS)
4 buckle pieces cut from a scrap of Silver Foil paper
Cut and scored with my paper trimmer:
trimmed down the pink DSP purse half to about 1/4″ smaller on each side than the green purse
Cut using the Stitched Snowflakes Dies:
snowflake out of the center of the pink DSP front piece
Assembled the bag:
burnished the folds in the bag with a Bone Folder
glued the tabs of each half of the purse onto the inside of the other half
bottom tabs glued together to form the bottom of the purse
pink straps threaded through silver buckles and glued onto the purse, one strap on the front and one on the back
pink DSP glued onto the front of the purse so that stamped snowflake shows through the die cut hole
Polished Pink gem applied onto the center of the snowflake using my Take Your Pick tool
tiny magnets adhered onto the latch and the inside of the purse using Mini Glue Dots…
S
Here’s the November 2021 IRBH:
Thank you for hopping along with us. If you get stuck during the Blog Hop, please use this line-up as a guide:
Click on these images for more details and to purchase. If you are reading this post in email, the product images may not show up. Please click hereto see the post on my blog.
Gift Certificates are available in any U.S. dollar amount from me. Contact me for details.
Have you shopped from me within the past year? Join my private VIP Facebook group for exclusive project tutorials and more!
Join my team and enjoy a 20% discount (or more) on all your purchases! You choose $125 in products and pay only $99, and get free shipping! No obligation! No selling required!
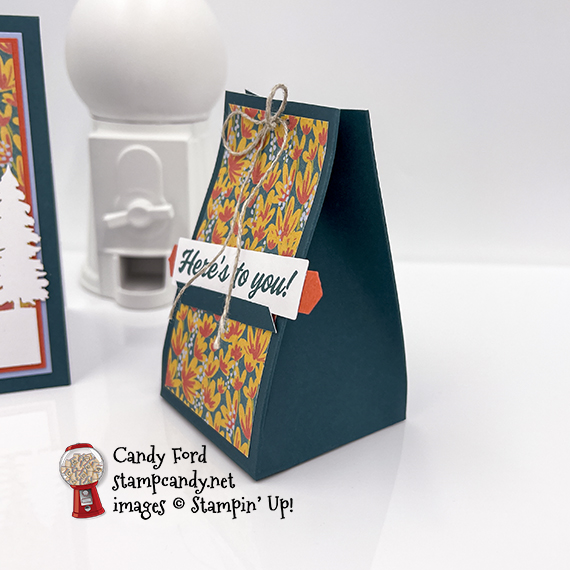
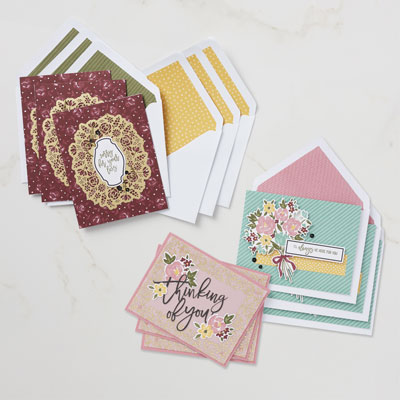
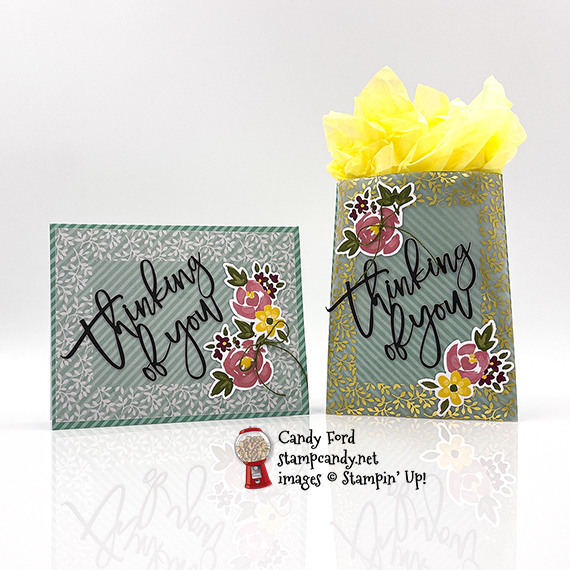
Welcome to the March 2021 Paper Pumpkin Possibilities Blog Hop! This month’s kit is called Here’s to You and it comes with everything you need to create eight fun cards with lined envelopes. I used pieces from the kit to make an alternate card and treat bag. Be sure to hop all the way around to see all the great alternate projects this group has come up with for you today!
If you are reading this in email, some photos may appear blurry, or may not appear at all. Please click here to see the post on my blog.
S March 2021 Paper March 2021 Paper March 2021 Paper March 2021 Paper
Here’s what I made:
S
Here’s what I did:
Cut and scored with my paper trimmer:
Seaside Spray card stock (CS) layer cut to 5-1/8″ x 3-7/8″
Calypso Coral CS layer cut to 5″ x 3-3/4″
floral envelope insert cut to 4-7/8″ x 3-5/8″
Pretty Peacock card base scored at 2-1/4″, 6-1/4″, and 8-1/4″, then horizontally 2″ from the bottom, for the bag base (It’s already scored at 4-1/4″.)
cut 1/4″ away from the left end of the bag base (keep this piece)
floral envelope insert cut to 1-1/2″ x 3-1/4″
Stamped with the Here’s to You stamp set:
“Happy Birthday” in Pretty Peacock ink onto one of the small labels from the kit
“Here’s to you!” in Pretty Peacock ink onto one of the larger labels from the kit
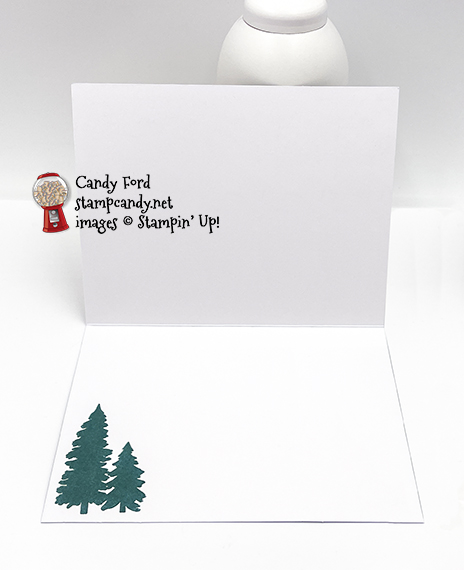
trees in Pretty Peacock ink onto the inside of the card base
Cut using the Classic Label Punch:
a scrap of Calypso Coral CS
Cut using Paper Snips:
punched shape cut in half
bottom 2 scored corners cut from the bag base, and the skinny tab angled on both sides
cut one of these extra 1/4″ pieces to 2″ long and angled both ends
cut up the score lines on the bottom of the bag, only up to the score line
Click on the template image to see it larger. For reference only – not to scale.
Assembled the card:
burnished the fold in the card base with a Bone Folder
Seaside Spray CS layer glued onto the front of the card base
Click on these images for more details and to purchase. If you are reading this post in email, the product images may not show up. Please click hereto see the post on my blog.
Supply List. <— Click for a clickable and printable list of the products!
S
Here’s the Here’s to You kit:
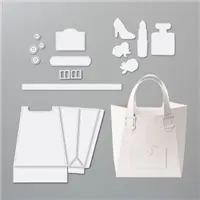
What comes in the kit:
What the kit makes:
The stamp set:
Click hereto download the stamp case insert, so you can keep the stamp set and any leftover parts!
s
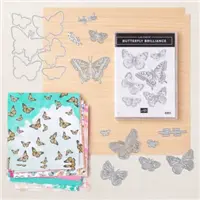
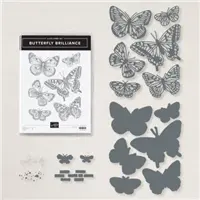
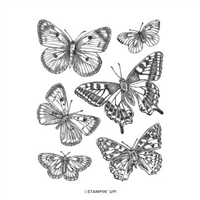
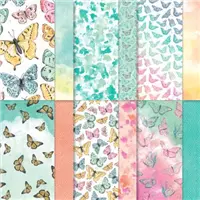
Butterfly Brilliance is here for a limited time!
These new products are out of this world gorgeous. And they’re only available for a couple months, so definitely get them as soon as you can in case they sell out! Click on the images below to see them in my online store. Or CLICK HERE to see them all.
UPDATE: The Butterfly Bijou Designer Series Paper has sold out!
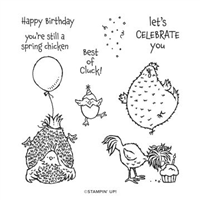
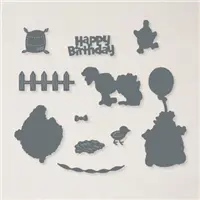
The Hey Chick stamp set from 2017 Sale-a-bration was so popular, Stampin’ Up! has brought it back. But that’s not all! Now there are coordinating dies. AND there’s a second stamp set, Hey Birthday Chick, that also has coordinating dies. One thing though – they’re available for a limited time, so get them while you can! Click on the images below to see them in my online store. Or CLICK HERE to see them all.
Gift Certificates are available in any U.S. dollar amount from me. Contact mefor details.
Have you shopped from me within the past year? Join my private VIP Facebook groupfor exclusive project tutorials and more!
Join my team and enjoy a 20% discount (or more) on all your purchases! You choose $125 in products and pay only $99, and get free shipping! No obligation! No selling required!
Welcome to the February 2021 APPTBH! This month’s kit is called Bouquet of Hope and it makes lovely cards for sad occasions. I used the kit to make an alternate card and a little gift bag. They’re so easy, there isn’t even any stamping involved!
Be sure to scroll down to the blog hop list and hop to the next blog. You don’t want to miss any of the great alternative projects this group has made for you!
If you are reading this in email, some photos may appear blurry, or may not appear at all. Please click here to see the post on my blog.
S February 2021 APPTBH February 2021 APPTBH February 2021 APPTBH February 2021 APPTBH
Here’s the Bouquet of Hope Kit:
s
The stamp set:
s
What comes in the kit:
s
What the kit makes:
s
Click here to down load the pdf of the stamp case insert, so you can store your stamp set and any leftover parts for later use.
Just Jade card base from kit scored and cut as shown below for the gift bag
Assembled the card:
burnished the fold in the card base with a Bone Folder
vellum sheet glued onto the front of the card base (I coated the entire surface of the vellum with glue, using a wedge of a Stampin’ Sponge, so spots of adhesive wouldn’t show)
thinking of you sticker applied onto the vellum
2 floral die cuts glued onto the vellum
twine tied into a bow and applied onto the flower using a glue dot rolled into a little log
Assembled the bag:
burnished the folds in the card base with a Bone Folder
tabs on the side and bottom glued onto the inside of the opposite side, to form the bag
vellum sheet glued onto the front of the bag, the same way as onto the card above
NOTE: I intended to glue the vellum on with the gold side down, as on the card – Oops!
thinking of you sticker applied onto the vellum
2 floral die cuts glued onto the vellum
twine tied into a bow and applied onto the flower using a glue dot rolled into a little log
S
Here’s the February 2021 APPTBH:
s
Here are the colors in the kit:
You can click on each one to see all the products that come in that color!
Click on these images for more details and to purchase. If you are reading this post in email, the product images may not show up. Please click hereto see the post on my blog.
Join and receive 5 packs of exclusive Designer Series Papers
That’s in addition to everything else you get with the Starter Kit! Click the image below for all the details!
No selling required. You can join for the discount,.That’s what I did! Drop anytime. No penalties. No risk. No brainer!
s
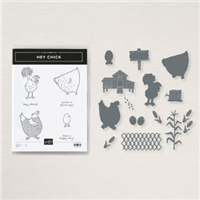
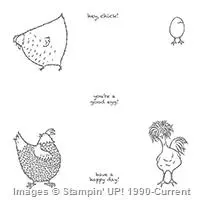
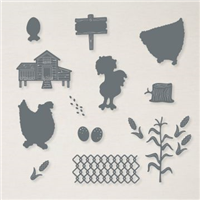
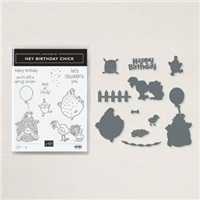
Hey Chick is here!
The Hey Chick stamp set from 2017 Sale-a-bration was so popular, Stampin’ Up! has brought it back. But that’s not all! Now there are coordinating dies. AND there’s a second stamp set, Hey Birthday Chick, that also has coordinating dies. CLICK HERE to see them all. One thing though – they’re available for a limited time, so get them while you can!
S
Basic White is here!
The facility that manufactures Whisper White paper is closed due to COVID-19. But don’t fret. The new Basic White products are here!
Gift Certificates are available in any U.S. dollar amount from me. Contact mefor details.
Have you shopped from me within the past year? Join my private VIP Facebook groupfor exclusive project tutorials and more!
Join my team and enjoy a 20% discount (or more) on all your purchases! You choose $125 in products and pay only $99, and get free shipping! No obligation! No selling required!
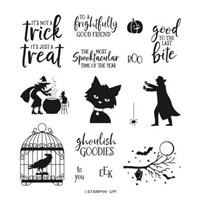
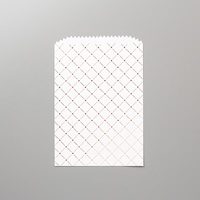
Welcome to the September 2020 Inking Royalty Blog Hop! During this year’s blog hops, we are enjoying a year of celebrations. This month’s projects are all about Halloween. I used the Ghoulish Goodies stamp set, Essential Tag Punch, and Fancy Label Punch to create tags for this cute and scary little treat bag. The candies inside are Bloody Bones Sweet Tarts Candy. Ooooooo spooky! You can buy them here.
Prepare yourself for a wonderful mix of spooky, scary and sweet. We are excited to share our creations with you today! After you read my post, I hope you’ll hop over to the next person, Ann Murray at Murray Stamps Ink, on the list you can see when you scroll down. Be sure to hop around to ALL the stops, because you definitely want to see all the projects this group has created for you!
If you are reading this in email, some photos may appear blurry, or may not appear at all. Please click here to see the post on my blog.
S september 2020 inking royalty september 2020 inking royalty september 2020 inking royalty september 2020 inking royalty
Here’s what I made:
S
Here’s what I did:
Stamped with the Ghoulish Goodies stamp set:
raven in cage in Memento Tuxedo Black ink onto a scrap of Whisper White Thick CS
sentiment in Memento Tuxedo Black ink onto a scrap of Real Red CS
Cut using the Essential Tag Punch:
stamped image and sentiment
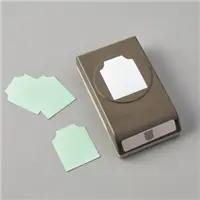
Cut using the Label Me Fancy Punch:
a hole in the top of each tag
NOTE: I found it a little difficult to line up the punch exactly where I wanted it, so I drew a tiny dot on the tags where I wanted to punch, then positioned each tag so I could see the dot through the hole in the punch. Easy Peasy!
Put it all together:
put candies in a Mpsaic Gusseted Cellophane Bag and tied the top with a piece of Black Glittered Organdy Ribbon
black and white twine run through the 2 tags and tied around the top of the bag, tying a small bow in the back
For the photo, I glued the tags together so you could see both at the same time. You can leave them loose if you prefer.
S
Here’s the September 2020 Inking Royalty Blog Hop:
Thank you for hopping along with us. If you get stuck during the Blog Hop, please use this line-up as a guide:
You can click on each one to see all the products that come in that color!
My husband and I have a Halloween party every year, and this year’s theme was going to be “What’s black and white and red all over?” Unfortunately we had to cancel it this year. But I just realized as I was typing this post that those are the colors of my project today. I’m sure that fact was floating around in the back of my brain somewhere as I made the tags.
Click on these images for more details and to purchase. If you are reading this post in email, the product images may not show up. Please click hereto see the post on my blog.
Supply List. <— Click for a clickable and printable list of the products!
S
Two ways to save in September!
Buy the Starter Kit and receive even more! It’s already the best deal: $99 for $125 in product of your choice plus Free shipping! In September you will also receive the Queen Anne’s Lace stamp set, the So Much Love stamp set, Rhinestone Basic Jewels, and 16 precut card kits! Wow! This is the perfect time to work on your wish list of Stampin’ Up! products! CLICK HERE for more details.
Buy the new Stampin’ Cut & Emboss Machine (standard size) from me by September 30 and I will give you a Magnetic Cutting Plate FREE! You’ll save almost $30! CLICK HERE for more details and to order.
S
Mystery Stamping Party!
Go ahead and click the image above to join the Facebook group now. A few days before the party I will post what you will need to complete the mystery card. On September 23 at 8:00pm ET, I will begin posting clues you can follow to create the card. We’ll also have games and prizes! And it’s all FREE!
S
World Card Making Day 2020:
Join me for an afternoon of Bingo, cardmaking, prizes, and fun!
Gift Certificates are available in any U.S. dollar amount from me. Contact mefor details.
Have you shopped from me within the past year? Join my private VIP Facebook groupfor exclusive project tutorials and more!
Join my team and enjoy a 20% discount (or more) on all your purchases! You choose $125 in products and pay only $99, and get free shipping! No obligation! No selling required! Only through September 30, you will also receive 2 stamp sets, rhinestones, 16 precut card kit and instructions.
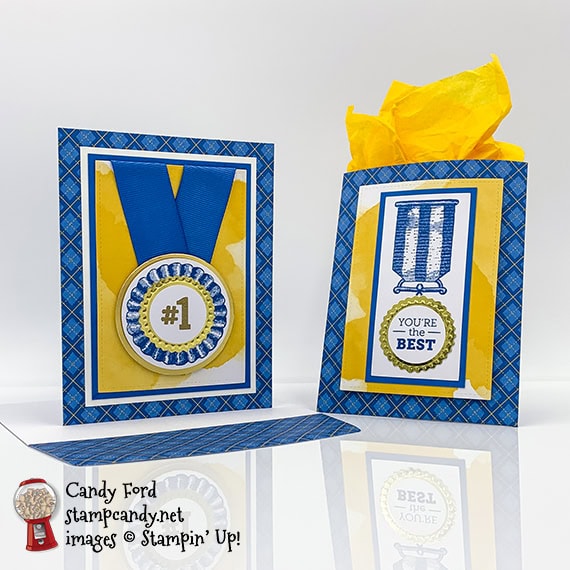
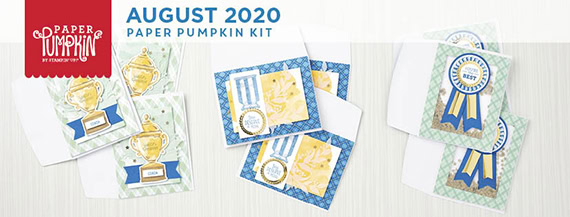
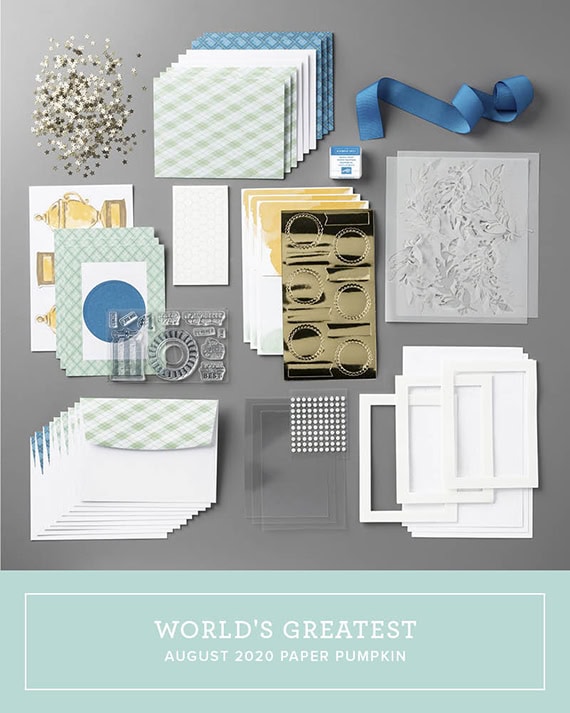
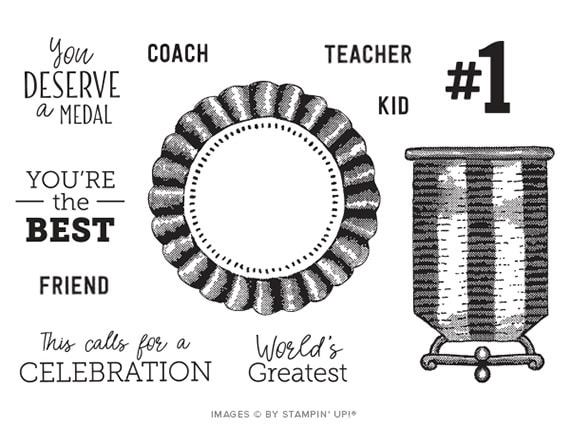
Welcome to the August 2020 PPP Blog Hop! This month’s kit is called World’s Greatest, and it’s all about celebrating the heroes in our lives. You can celebrate a teacher, friend, coach, kid, or anyone else you think is the greatest. For my projects, I used the kit along with some extra card stock to create a card and gift bag. I used the ribbon on the card to make it look more like a race medal than a blue ribbon prize. My husband used to be a runner and triathlete, so there’s quite a collection of these medals in our house. I used glue and Stampin’ Seal for my projects, but you can absolutely use the glue dots that come with the kit. You could also use Stampin’ Seal+ or Tear & Tape.
Be sure to hop all the way around to all the stops so you can see all the great alternative projects made with this fun kit by this talented group.
If you are reading this in email, some photos may appear blurry, or may not appear at all. Please click here to see the post on my blog.
S August 2020 PPP August 2020 PPP August 2020 PPP August 2020 PPP
Here’s what I made:
S
Here’s what I did:
Cut and scored with my paper trimmer:
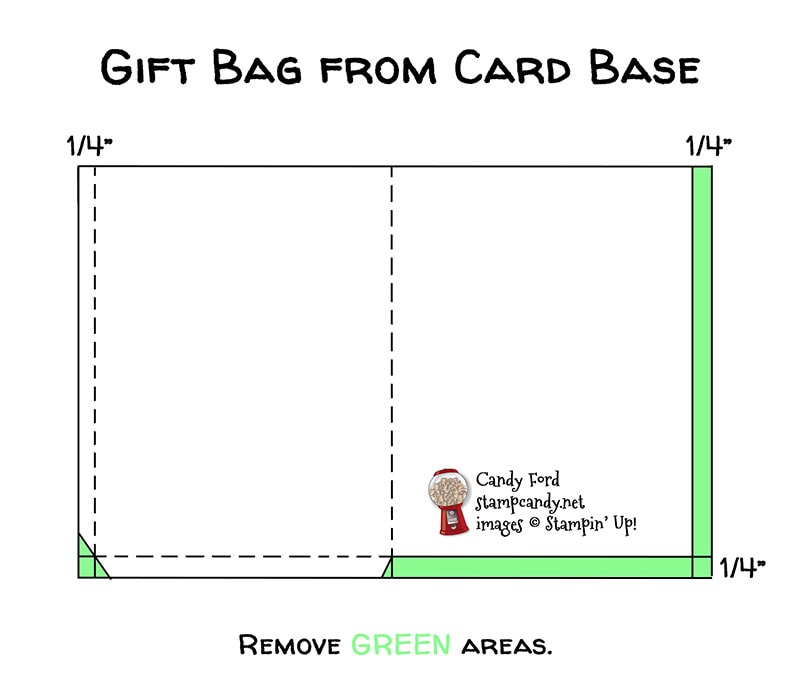
blue card from the kit scored 1/4″ from one end and cut 1/4″ from the other end
same blue card scored 1/4″ from the bottom, then trimmed according to the diagram below
Whisper White CS layer cut to 3-1/2″ x 4-7/8″
Pacific Point CS layer cut to 3-1/4″ x 4-5/8″
Pacific Point CS layer cut to 2″ x 4″
Stamped with the World’s Greatest stamp set:
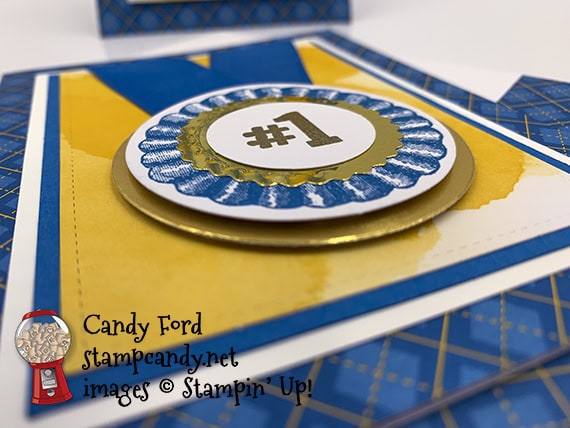
round ribbon in Pacific Point ink onto one of the larger white die cut circles
long ribbon in Pacific Point ink onto one of the larger white die cut rectangles
“You’re the BEST” in Pacific Point ink onto one of the smaller white die cut circles
“#1” in Versamark ink onto one of the smaller white die cut circles, then heat embossed in gold
Cut using the Layering Circle Dies:
a scrap of Gold Foil Sheet
OR you could ink the edges of one of the large blue round die cuts from the kit in Versamark ink and heat emboss in gold
Assembled the card:
burnished the fold in the card base with a Bone Folder
Whisper White CS layer glued onto the front of the card base
larger Pacific Point CS layer glued onto the Whisper White CS layer
piece of ribbon folded in half and adhered onto a yellow die cut layer, folding the ends over the top of the layer, using Stampin’ Seal
heat embossed small circle adhered onto a gold circle using Stampin’ Seal
gold circle adhered onto the large round white die cut, centered on the stamped ribbon, using Stampin’ Seal
large round white die cut adhered onto the gold die cut circle using Stampin’ Dimensionals
gold circle adhered onto the yellow die cut layer, over the fold in the ribbon, using Stampin’ Dimensionals
Assembled the bag:
burnished the folds in the card base with a Bone Folder
1/4″ tabs folded in and glued onto the inside of the opposite side of the card base, to form the bag
small stamped circle adhered onto a gold circle using Stampin’ Seal
gold circle adhered onto the large white rectangle, just under the stamped ribbon, using Stampin’ Seal
white rectangle glued onto the smaller Pacific Point CS layer
Pacific Point CS layer glued onto a yellow die cut layer
yellow die cut layer adhered onto the front of the bag using Stampin’ Dimensionals
The yellow tissue paper I used is from the June 2020 Paper Pumpkin kit, called Box of Sunshine.
S
Here’s the August 2020 PPP Blog Hop:
Click the Next button below to hop to the next stop, Sharon Hashimoto Burkert of As The Ink Dries:
S
Here are today’s colors:
You can click on each one to see all the products that come in that color!
Here’s what I used, other than what came in the kit:
Click on these images for more details and to purchase. If you are reading this post in email, the product images may not show up. Please click hereto see the post on my blog.
Gift Certificates are available in any U.S. dollar amount from me. Contact mefor details.
Have you shopped from me within the past year? Join my private VIP Facebook groupfor exclusive project tutorials and more!
Join my team and enjoy a 20% discount (or more) on all your purchases! You choose $125 in products and pay only $99, and get free shipping! No obligation! No selling required!
Welcome to the April 2020 APPT Blog Hop! This month’s kit is called My Wonderful Family and it makes 8 cards great to send to your kinfolk. I used the kit to make an alternate card and a gift bag of cookies. Be sure to hop around to all the stops on the and see all the great alternate projects made with this kit.
If you are reading this in email, some photos may appear blurry, or may not appear at all. Please click here to see the post on my blog.
S 2020 APPT Blog Hop April 2020 APPT Blog Hop April 2020 APPT Blog Hop
Here’s what I made:
S
Here’s what I did:
Cut and scored with my paper trimmer:
Soft Sea Foam card stock (CS) cut to 4-1/4″ x 11″, then scored in half at 5-1/2″
4-1/4″ x 1-1/2″ cut from the printed end of a card base from the kit
optional: Whisper White CS cut to 4″ x 5-1/4″ for the inside of the card base
Stamped with the My Wonderful Family stamp set:
leaves of the tree in Mint Macaron ink onto the front of the card base, to the left
sentiment in Versamark ink onto a Soft Sea Foam banner from the kit, then heat embossed in copper
Assembled the card:
burnished the fold in the card base with a Bone Folder
4-1/4″ x 1-1/2″ patterned piece glued onto the front of the card base
piece of ribbon from the kit notched at one end using Paper Snips, then adhered onto the back of the sentiment at the end
sentiment glued onto the patterned piece
tree die cut glued over the stamped leaves and the sentiment
optional: Whisper White CS glued onto the inside of the card base
Assembled the bag:
folded over the top of the bag and burnished the fold with a Bone Folder
text piece from the kit clipped onto the top of the bag with a Mini Library Clip
ribbon from the kit tied in a bow, then adhered onto the text piece with a Mini Glue Dot
S
Here’s the April 2020 APPT Blog Hop:
S
Here are today’s colors:
You can click on each one to see all the products that come in that color!
Click on these images for more details and to purchase. If you are reading this post in email, the product images may not show up. Click hereto see the post on my blog.
Gift Certificates are available in any U.S. dollar amount from me. Contact mefor details.
Have you shopped from me within the past year? Join my private VIP Facebook groupfor exclusive project tutorials and more!
Join my team and enjoy a 20% discount (or more) on all your purchases! You choose $125 in products and pay only $99, and get free shipping! No obligation! No selling required!
 s
s