Sep 24, 2020 | Autumn, Blog Hop, Boxes, Cards, Gallery, Gift Wrap, Gifts, Halloween, Holiday, Kits, Paper Pumpkin |

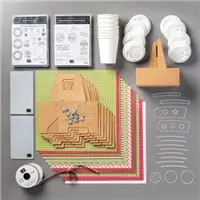
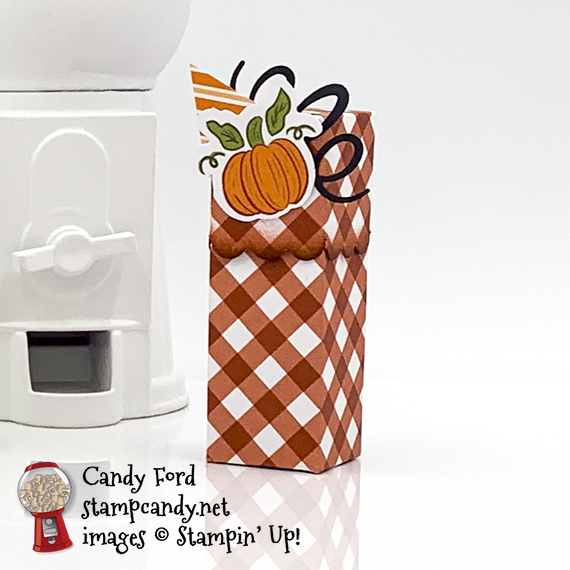
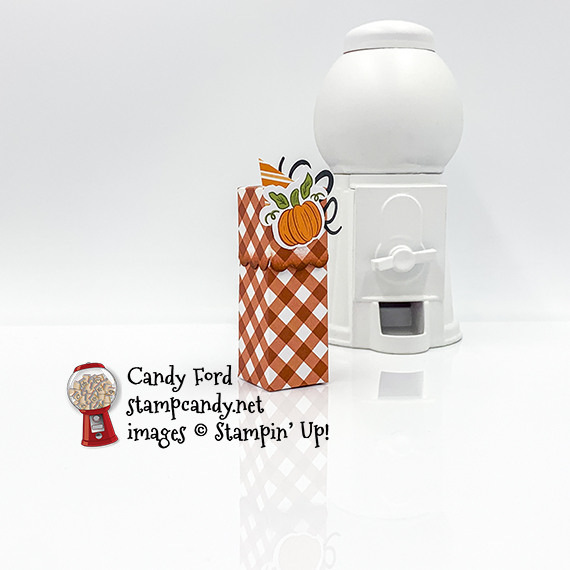
Welcome to the September 2020 APPT Blog Hop! This month’s kit is called Hello Pumpkin, and it makes the most adorable little treat holders. I used the pieces fro the kit to make a card and a little treat box. My treat box is 4 sided, which is different from the 5 sided one designed by Stampin’ Up! for the kit. I started by popping out all the die cut pieces from their sheets, including all the diamond shapes from the treat holders, saving everything. I used Black Stampin’ Dimensionals and Multipurpose Liquid Glue, but you can certainly use the Dimensionals and Glue Dots that came in the kit.
Be sure to hop around to all the stops, so you don’t miss any of the great projects this group has made for you!
If you are reading this in email, some photos may appear blurry, or may not appear at all. Please click here to see the post on my blog.
S September 2020 APPT September 2020 APPT September 2020 APPT September 2020 APPT
Here’s what I made:
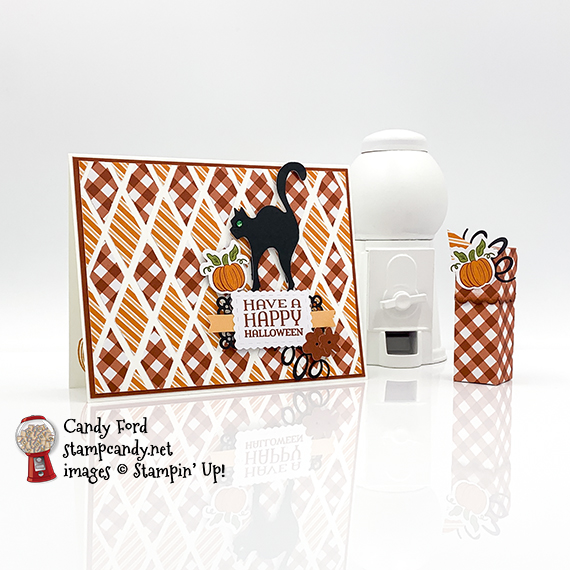
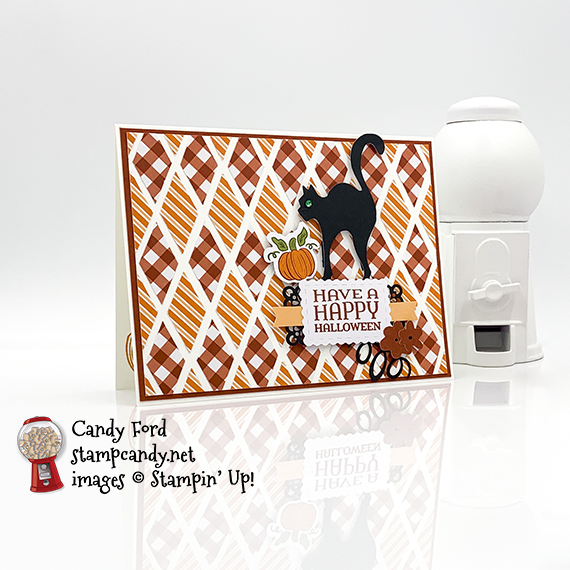
The cat’s green eye really shows up in this photo: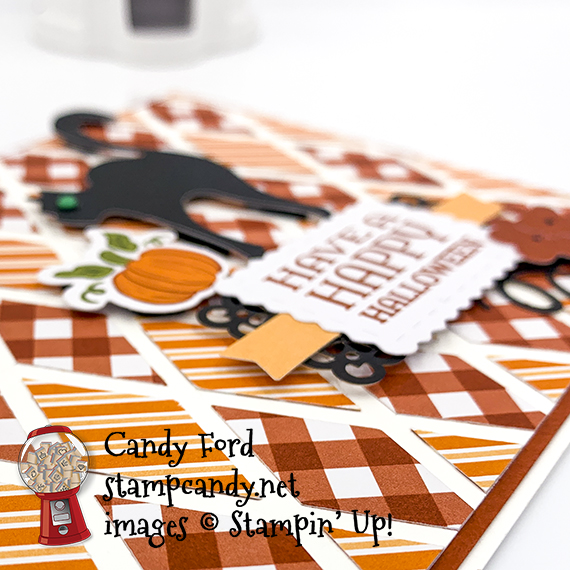

S
Here’s what I did:
Cut and scored with my paper trimmer:
- Whisper White Thick card stock (CS) cut to 5-1/2″ x 8-1/2″, then scored in half at 4-1/4″
- Cajun Craze CS layer cut to 5-3/8″ x 4-1/8″
- Whisper White Thick CS layer cut to 5-1/4″ x 4″
- cut apart a treat holder from the kit according to the photos below
Cut along the black lines. Remove the shaded areas.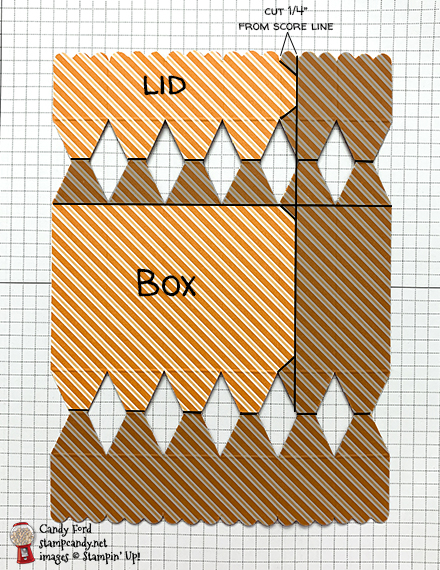

Stamped with the Hello Pumpkin stamp set:
- card sentiment in Cajun Craze ink onto a die cut label from the kit
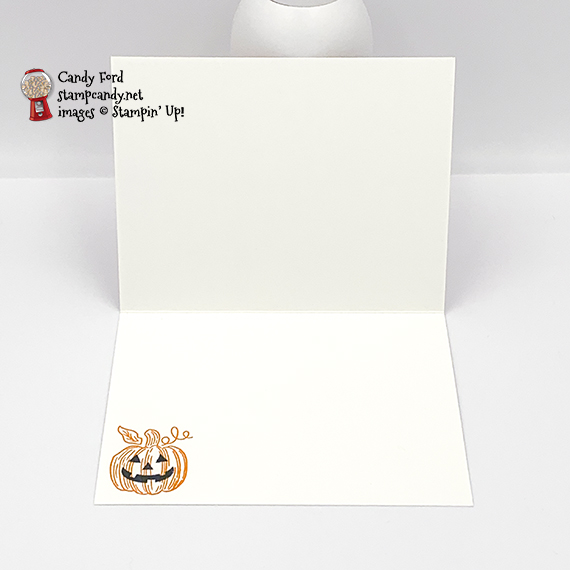
- pumpkin in Pumpkin pie ink onto the inside of the card base
- pumpkin face in Tuxedo Black Memento ink over the pumpkin
Cut using Paper Snips:
- halved a small banner for behind the card sentiment
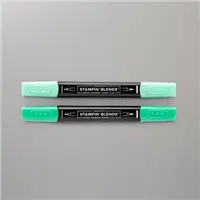
Colored using a Stampin’ Blends Marker:
- a small Rhinestone Basic Jewel in Dark Shaded Spruce
- NOTE: I started with the Old Olive and Mossy Meadow markers, since those are the greens in the kit, but I thought the dark Shaded Spruce showed up better against the black cat
Colored using a Sponge Dauber:
- bottom edges of the box top in Cajun Craze
Assembled the card:
- burnished the fold in the Whisper White Thick card base with a Bone Folder
- faint pencil lines drawn onto the Whisper White CS layer, vertical lines 3/4″ apart and horizontal lines 1-1/2″ apart
- diamond pieces glued onto Whisper White CS layer, using the pencil lines to arrange them evenly
- any pencil lines that still showed were erased
- Whisper White CS layer with diamonds glued onto the Cajun Craze CS layer
- Cajun Craze CS layer glued onto the front of the card base
- two halves of the small banner glued onto the back of the sentiment
- sentiment glued onto a black lace die cut piece from the kit
- two Cajun Craze flowers glued onto the bottom right corner of the sentiment, then the whole piece adhered onto the card front using Black Stampin’ Dimensionals
- black curly die cut glued onto the card front under the bottom right corner of the sentiment cluster
- green rhinestone applied onto the cat using the Take Your Pick tool
- cat adhered onto the card front above the sentiment using Black Stampin’ Dimensionals
- small pumpkin die cut adhered onto the card front, next to the cat, using Black Stampin’ Dimensionals
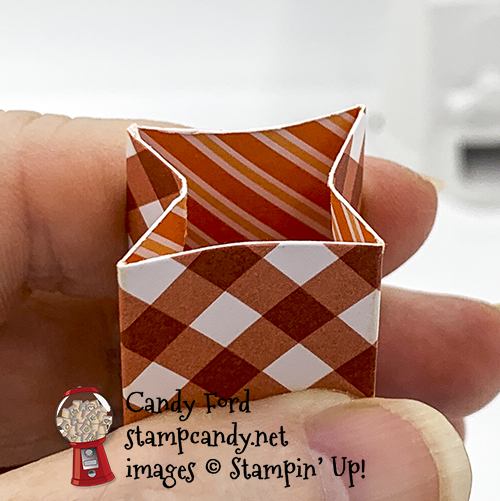
Assembled the treat box:
- burnished the folds in the box with a Bone Folder
- 1/4″ flap of box glued onto the inside of the opposite side, to form the body of the box
- end flaps folded in and glued together one at a time to form the bottom
Assembled the treat box lid:
- burnished the folds in the lid with a Bone Folder
- 1/4″ flap glued onto the inside of the opposite side, to form the body of the lid
- end flaps folded in and glued together one at a time to form the top
- a diamond and a black curly piece glued onto the back of a small pumpkin, then glued onto the front of the box lid
- NOTE: Since the box and the lid are the same size (width) it helps to squeeze the top of the box a little bit to get the lid over the top.
S
Here’s the September 2020 APPT Blog Hop:
S
Here are today’s colors:
You can click on each one to see all the products that come in that color!
S
Here’s what I used, other than what came in the kit:
Click on these images for more details and to purchase. If you are reading this post in email, the product images may not show up. Please click here to see the post on my blog.
Supply List. <— Click for a clickable and printable list of the products!
S
World Card Making Day 2020:

- Join me for an afternoon of Bingo, cardmaking, prizes, and fun!
- October 3 at 2:00 pm ET
- See details and register HERE by September 25
- $25 (extra Bingo cards available for $5 each)
- Tell your friends! The more people who register, the bigger the prizes!
S
Two ways to save in September!
Buy the Starter Kit and receive even more! It’s already the best deal: $99 for $125 in product of your choice plus Free shipping! In September you will also receive the Queen Anne’s Lace stamp set, the So Much Love stamp set, Rhinestone Basic Jewels, and 16 precut card kits! Wow! This is the perfect time to work on your wish list of Stampin’ Up! products! CLICK HERE for more details.

Buy the new Stampin’ Cut & Emboss Machine (standard size) from me by September 30 and I will give you a Magnetic Cutting Plate FREE! You’ll save almost $30! CLICK HERE for more details and to order.

S
Here are some helpful links:
S
Thanks for stopping by today, and Sweet Stamping!

Sep 21, 2020 | Cards, Christmas, Fun Folds, Gallery, Holiday |
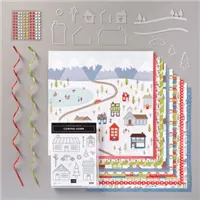
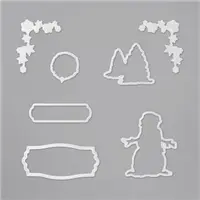
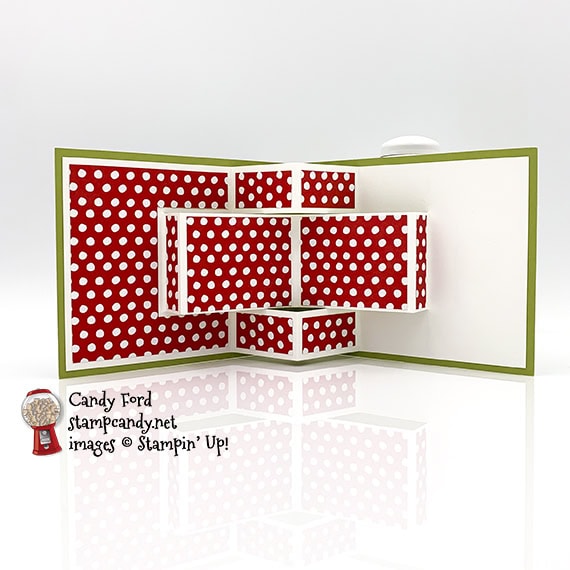
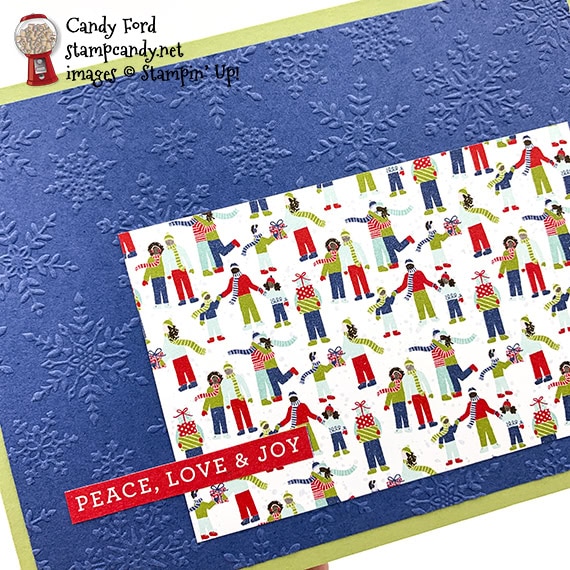
Today I’m sharing another 3D Pop Up Card. When my some members of my Candy Hearts team saw the one I posted last week, which you can see here, they requested we make one at our next team meeting, which was yesterday. For today’s card, we used products from the Trimming the Town Suite: Trimming the Town Designer Series Paper and Winter Snow Embossing Folder.
If you are reading this in email, some photos may appear blurry, or may not appear at all. Please click here to see the post on my blog.
S 3D Pop Up Card 3D Pop Up Card 3D Pop Up Card 3D Pop Up Card
Here’s what I made:
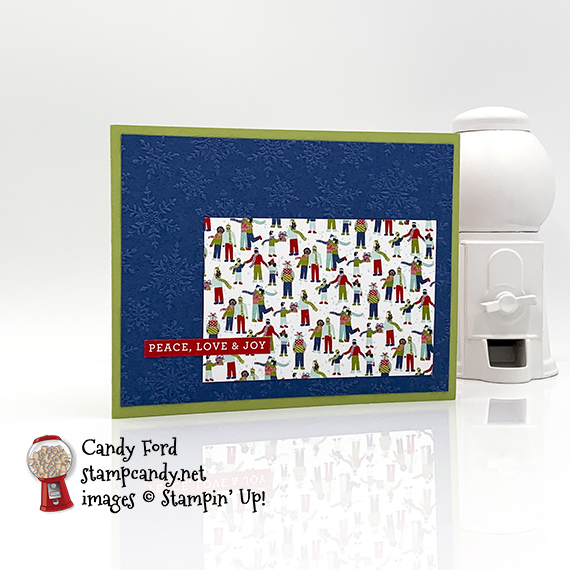
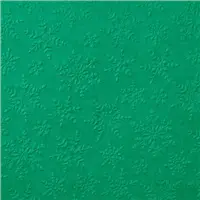
Here you can really see the beautiful and dainty embossed snowflakes:
S
Here’s what I did:
Cut and scored with my paper trimmer:
- Pear Pizzazz card stock (CS) cut to 11″ x 4-1/4″, then scored in half at 5-1/2″
- Misty Moonlight CS layer cut to 5-1/4″ x 4″
- Trimming The Town Designer Series Paper (DSP) layer cut to 3-3/4″ x 2-1/2″ (people)
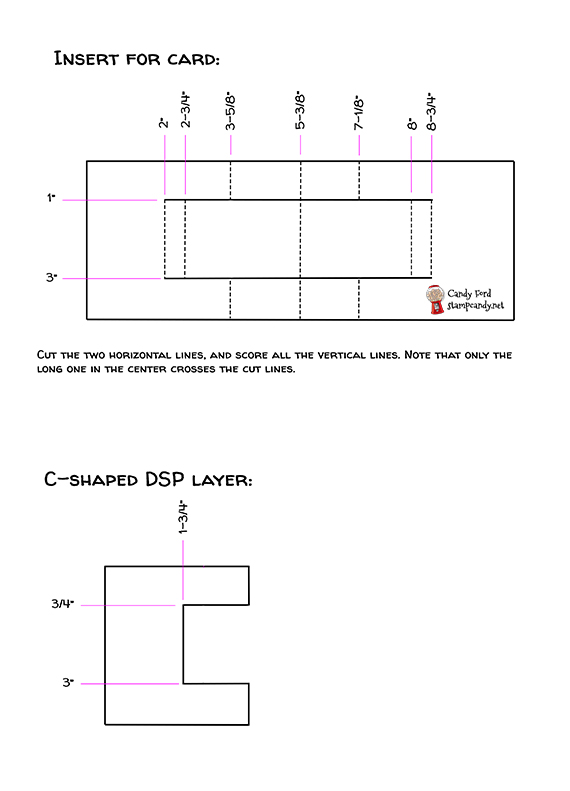
- Whisper White Thick CS cut to 10-3/4″ x 4″, then cut and scored according to the diagram below
- DSP (polka dots) cut to 2-3/8″ x 1-3/4″ (2 pieces), to 1-1/2″ x 3/4″ (4 pieces), and to 1/2″ x 1-3/4″ (2 pieces)
- DSP (polka dots) cut to 3-3/8″ x 3-3/4″ (1 piece) then cut into a C shape according to the diagram below
Cut using Paper Snips:
- sentiment from a piece of DSP
Embossed using the Winter Snow Embossing Folder:
Assembled the 3D Pop Up Card:
- burnished the fold in the card base with a Bone Folder
- embossed Misty Moonlight CS layer glued onto the front of the card base
- DSP layer (people) glued onto the Misty Moonlight CS layer
- sentiment glued onto the card front
- burnished all the score lines in the Whisper White Thick CS insert with a Bone Folder
- center score line of the Whisper White Thick CS lined up with the score line in the card base, then the C-shaped areas at both ends glued onto the inside of the card base
- polka dot DSP pieces glued onto their corresponding scored areas of the Whisper White Thick CS
S
Here are today’s main colors:
You can click on each one to see all the products that come in that color!
S
Here’s what I used:
Click on these images for more details and to purchase. If you are reading this post in email, the product images may not show up. Please click here to see the post on my blog.
Supply List. <— Click for a clickable and printable list of the products!
S
Two ways to save in September!
Buy the Starter Kit and receive even more! It’s already the best deal: $99 for $125 in product of your choice plus Free shipping! In September you will also receive the Queen Anne’s Lace stamp set, the So Much Love stamp set, Rhinestone Basic Jewels, and 16 precut card kits! Wow! This is the perfect time to work on your wish list of Stampin’ Up! products! CLICK HERE for more details.
Buy the new Stampin’ Cut & Emboss Machine (standard size) from me by September 30 and I will give you a Magnetic Cutting Plate FREE! You’ll save almost $30! CLICK HERE for more details and to order.
S
Mystery Stamping Party!

Go ahead and click the image above to join the Facebook group now. A few days before the party I will post what you will need to complete the mystery card. On September 23 at 8:00pm ET, I will begin posting clues you can follow to create the card. We’ll also have games and prizes! And it’s all FREE!
S
World Card Making Day 2020:
- Join me for an afternoon of Bingo, cardmaking, prizes, and fun!
- October 3 at 2:00 pm ET
- See details and register HERE by September 25
- $25 (extra Bingo cards available for $5 each)
- Tell your friends! The more people who register, the bigger the prizes!
S
Here are some helpful links:
S
Thanks for stopping by today, and Sweet Stamping!
Sep 17, 2020 | Cards, Christmas, Fun Folds, Gallery, Holiday |
Whether it’s a warm cup of coffee or hot cocoa, nothing says Happy Holidays like sharing a warm cuppa with someone special. This is a card for someone extra special in your life. The triple cube card if very popular right now. I decided to change it up a little by having it a full 5-1/2″ tall, instead of the 4″ tall ones I’ve seen. I realize the height doesn’t technically make it a “cube,” but I’m calling it a cube anyway. The base itself is really easy to put together. I used 3 patterns of Designer Series Paper from the Heartwarming Hugs Designer Series Paper. With all the different paper elements, I didn’t feel the need for any embellishments. What do you think?
If you are reading this in email, some photos may appear blurry, or may not appear at all. Please click here to see the post on my blog.
S warm warm warm warm
Here’s what I made:
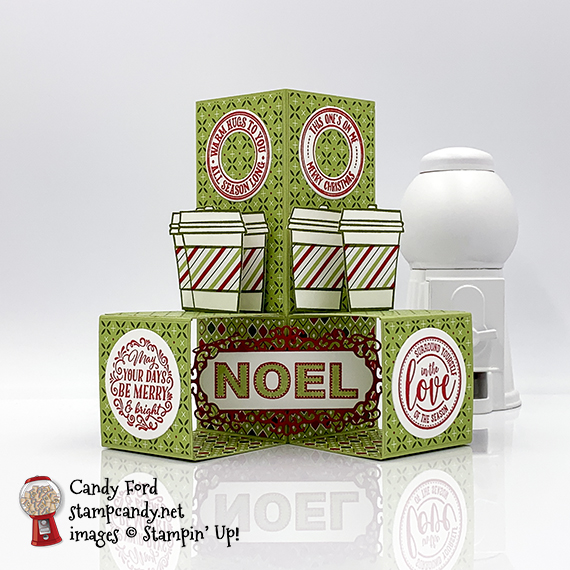


It folds flat to fit into a Whisper White Medium Envelope! When folded flat, the card is 4″ x 51/2″. You can see I have a cup sticking out just a little bit on one side. This is okay because the card is 4″ wide instead of the regular 4-1/4″. But be aware of your placement, so you don’t have any thing sticking out too far.
S
Here’s what I did:
Cut and scored with my Paper Trimmer & Simply Scored Tool:
- Pear Pizzazz card stock (CS) cut to 8-1/4″ x 5-1/2″. then scored at 2″, 4″, 6″, and 8″
- 2 pieces of Pear Pizzazz CS cut to 2″ x 8-1/4″, and scored at 2″, 4″, 6″, and 8″
- 2 Heartwarming Hugs Designer Series Paper pattern 1 (DSP-1) layers cut to 1-7/8″ x 3-3/8″
- 4 DSP-1 layers cut to 1-7/8″ x 1-7/8″
- 6 DSP-2 layers cut to 1-7/8″ x 1-7/8″
- 2 Whisper White CS layers cut to 1-7/8” x 5-3/8”
- 2 Real Red CS strips cut to 1/2″ x 2″, and scored in half at 1″
- 1/4″ strips of Pear Pizzazz CS cut as follows:
- 1 piece cut to 3-1/2″ long, and scored at 1″, 1-1/2”, 2-1/2”, and 3”
- 1 piece cut to 3-1/4″, and scored at 1″, 1-3/8″, 2-3/8″, and 2-3/4″
- 2 pieces cut to 3” long and scored at 1”, 1-1/4”, 2-1/4”, and 2-1/2”
- 1 piece cut to 2-3/4” and scored at 1”, 1-1/8”, 2-1/8”, and 2-1/4”
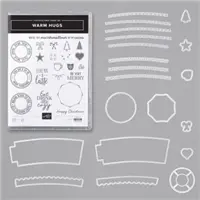
Stamped with the Warm Hugs stamp set:
- the 2 donut-shaped sentiments in Real Red ink onto a scrap of Whisper White Thick CS
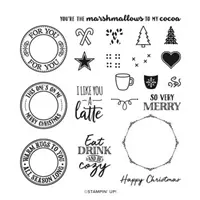
Stamped with the Wrapped in Christmas stamp set:
- the two round sentiments in Real Red ink onto a scrap of Whisper White Thick CS
- “NOEL” in Real Red ink onto a scrap of Whisper White Thick CS
Stamped with the Press On stamp set:
- largest cup in Mossy Meadow ink onto a scrap of Whisper White Thick CS (5 of them)
- largest cup in Mossy Meadow ink onto a scrap of DSP-3 (5 of them)
Cut using the Warm Wraps Dies:
- the 2 donut-shaped sentiments
Cut using the Ornate Frames Dies:
- a scrap of Real Red CS to frame “NOEL”
Cut using the Layering Circles Dies:
Cut using Paper Snips:
- the 5 Whisper White Thick CS cups
- only cup wraps from the 5 DSP 3 cups
Colored using the a Stampin’ Write Marker:
Assembled the base:
- burnished all the folds in the three large Pear Pizzazz CS pieces with a Bone Folder
- burnished the folds in the 2 Real Red CS strips with a Bone Folder
- 1/4″ section of the largest piece of Pear Pizzazz CS glued onto the inside of the opposite side, to create a tall, open ended “cube”
- 1/4″ section of both of the smaller Pear Pizzazz CS pieces glued onto the inside of the opposite side, to create 2 smaller, open ended “cubes”
- small cubes glued onto two adjacent sides of the tall cube, at the bottom
- 4 of the DSP-2 layers glued onto the back and bottom inside of the two small cubes
- remaining 2 DSP-2 layers glued onto the inside of the tall cube, on the 2 back sides, so you can see them when looking down from the front
- 2 larger DSP-1 layers glued onto the tall cube above the small cubes
- 4 remaining DSP-1 layers glued onto the top and front of the small cubes
- Whisper White CS layers glued onto the 2 back sides of the tall cube
- NOEL glued onto the Real Red CD die cut
- one half of each Real Red CS strip glued onto the back of the Real Red die cut, with the fold lines meeting in the middle, so the other halves of the strips stuck out in a V-shape
- glued the V-shape onto the corner between the two small cubes, on half of the V on each cube
- round sentiments glued onto the fronts of the 2 small cubes
- donut-shaped sentiments glued onto the 2 front sides of the tall cube, near the top
Attached the cups:
- burnished all the folds in the 5 Pear Pizzazz CS strips with a Bone Folder
- one DSP-3 cup wrap glued onto each Whisper White Thick CS cup
- 1/2″ section at one end of the 1/4″ Pear Pizzazz CS strips glued onto the 1″ section at the other end, to create tiny open rectangles
- a long side of one rectangle glued onto the back of each cup, vertically, making sure the bottom/short side is even with the bottom of the cup
- cup with 1/8″ thick rectangle glued onto the the top of the left small cube, gluing the bottom side to the small cube, and the back side to the tall cube
- 3/8″ thick rectangle cup glued the same way to the left of the first cup, so it sticks out farther
- 1/4″ rectangle cup glued onto the front of the second cup, with its bottom glued onto the top of the small cube
- the other cup with a 1/4″ rectangle glued onto the cube on the right, the same way as the others
- cup with the 1/2″ rectangle glued onto the top of the small cube on the right, with the back glued to the tall cube, so it sticks out farther than the previous cup
- NOTE: It’s best to let the glue dry completely, to make sure the cups stay in position when the card is folded flat, especially the bottoms.
I drew white lines on this photo to highlight one of the Read Red CS strips on the back of the NOEL sentiment. One half of the strip is glued onto the cube and the other half is glued onto the back of the sentiment. The other strip is glued on the same way on the other side. This is how to attach the flat piece onto the corner:
S
Here are today’s colors:
You can click on each one to see all the products that come in that color!
S
Here’s what I used:
Click on these images for more details and to purchase. If you are reading this post in email, the product images may not show up. Please click here to see the post on my blog.
Supply List. <— Click for a clickable and printable list of the products!
Two ways to save in September!
Buy the Starter Kit and receive even more! It’s already the best deal: $99 for $125 in product of your choice plus Free shipping! In September you will also receive the Queen Anne’s Lace stamp set, the So Much Love stamp set, Rhinestone Basic Jewels, and 16 precut card kits! Wow! This is the perfect time to work on your wish list of Stampin’ Up! products! CLICK HERE for more details.
Buy the new Stampin’ Cut & Emboss Machine (standard size) from me by September 30 and I will give you a Magnetic Cutting Plate FREE! You’ll save almost $30! CLICK HERE for more details and to order.
S
Mystery Stamping Party!
Go ahead and click the image above to join the Facebook group now. A few days before the party I will post what you will need to complete the mystery card. On September 23 at 8:00pm ET, I will begin posting clues you can follow to create the card. We’ll also have games and prizes! And it’s all FREE!
S
World Card Making Day 2020:
- Join me for an afternoon of Bingo, cardmaking, prizes, and fun!
- October 3 at 2:00 pm ET
- See details and register HERE by September 25
- $25 (extra Bingo cards available for $5 each)
- Tell your friends! The more people who register, the bigger the prizes!
S
Here are some helpful links:
S
Thanks for stopping by today, and Sweet Stamping!
Sep 15, 2020 | Autumn, Boxes, Cards, Fun Folds, Gallery, Gift Wrap, Gifts |
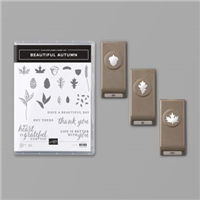
Autumn is almost here, and today’s project is a thank you card that’s all about the season. I used the Beautiful Autumn stamp set and Stitched So Sweetly Dies to create this simple fun fold card. I also made a coordinating little lip balm gift box, which I’ll share with you in a few days (you can see a sneak peek of it below.)
If you are reading this in email, some photos may appear blurry, or may not appear at all. Please click here to see the post on my blog.
S Autumn Autumn Autumn Autumn
Here’s what I made:


S
Here’s what I did:
Cut and scored with my paper trimmer:
- Early Espresso card stock (CS) cut to 5-1/2″ x 8-1/2″, then scored in half at 4-1/4″ and at 7-1/2″
- Gilded Autumn Designer Series Paper (DSP) layer cut to 3″ x 5-1/4″ (speckled)
- speckled DSP layer cut to 1″ x 5-1/4″
- herringbone pattern DSP layer cut to 5-1/4″ tall by 4 pattern stripes wide (just over 3/4″)
- acorn/leaf pattern DSP layer cut to 2-1/2″ x 4-1/4″
- Very Vanilla CS cut to 4″ x 5-1/4″ for the inside of the card base
Stamped with the Beautiful Autumn stamp set:
- sentiment in Versamark ink onto a scrap of Early Espresso CS, then heat embossed in gold
- acorn in Early Espresso ink onto the bottom left corner of the Very Vanilla CS
Cut using the Stitched So Sweetly Dies:
Assembled the card:
- burnished the folds in the card base with a Bone Folder, folding the 1″ section back onto the card front
- larger speckled DSP layer glued onto the front of the card base (left side and under the folded over flap)
- acorn/leaf DSP layer glued onto the speckled DSP layer
- herringbone DSP layer glued onto the flap of the card base
- flap glued down onto the DSP layers
- sentiment glued onto the flap and DSP layers, but not the small part hanging off the right side
- 1″ speckled DSP strip glued onto the right side of the Very Vanilla CS
- Very Vanilla CS glued onto the inside of the card base
- If you prefer, you can skip gluing down the flap, and then only glue the sentiment to the flap, leaving the rest loose. I just felt the card would be easier to photograph if I glued them down.
S
Here are today’s main colors:
You can click on each one to see all the products that come in that color!
S
Here’s what I used:
Click on these images for more details and to purchase. If you are reading this post in email, the product images may not show up. Please click here to see the post on my blog.
Supply List. <— Click for a clickable and printable list of the products!
S
Two ways to save in September!
Buy the Starter Kit and receive even more! It’s already the best deal: $99 for $125 in product of your choice plus Free shipping! In September you will also receive the Queen Anne’s Lace stamp set, the So Much Love stamp set, Rhinestone Basic Jewels, and 16 precut card kits! Wow! This is the perfect time to work on your wish list of Stampin’ Up! products! CLICK HERE for more details.
Buy the new Stampin’ Cut & Emboss Machine (standard size) from me by September 30 and I will give you a Magnetic Cutting Plate FREE! You’ll save almost $30! CLICK HERE for more details and to order.
S
Here are some helpful links:
S
Thanks for stopping by today, and Sweet Stamping!
Sep 14, 2020 | Blog Hop, Cards, Fun Folds, Gallery, Halloween, Holiday |

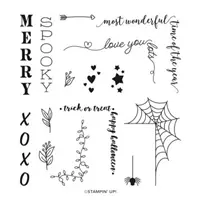
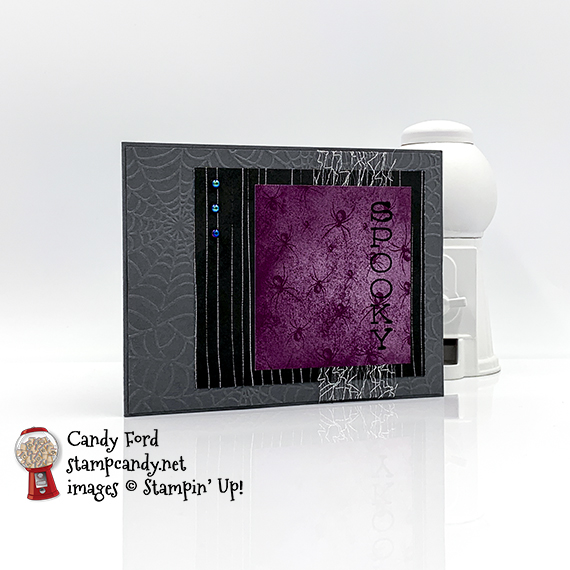
Welcome to the September 2020 Candy Hearts Blog Hop! This month’s theme is Halloween. I used the Festive Corners stamp set, Cobwebs 3D Embossing Folder, and Magic in this Night Designer Series Paper to create a spooky fun 3D Pop Up card.
We have two special guests hopping with us today. One is the amazing and talented Mikaela Titheridge of The Crafty Oink Pen, and I can’t wait to see what she has in store for us. Mikaela has been a member of the prestigious Stampin’ Up! Artisan Design Team, and her projects are always spectacular. She’s also cute as a button! Next, Pam Morris of Tap Tap Stamp, is joining us on a regular basis, and I know she’ll have a super fun project for us. She is one of my Stampin’ Up! uplines, and she’s an absolute hoot and a half!
Be sure to hop around to all the stops, be cause you definitely don’t want to miss any of the projects from this group of terrific stampers!
If you are reading this in email, some photos may appear blurry, or may not appear at all. Please click here to see the post on my blog.
S September 2020 Candy Hearts September 2020 Candy Hearts September 2020 Candy Hearts September 2020 Candy Hearts
Here’s what I made:

S
Here’s what I did:
Cut and scored with my paper trimmer:
- Basic Gray card stock (CS) cut to 11″ x 4-1/4″, then scored in half at 5-1/2″
- Basic Gray CS layer cut to 5-3/8″ x 4-1/8″
- Magic in this Night Designer Series Paper (DSP) layer cut to 4″ x 3-1/2″ (stripes)
- DSP layer cut to 2-3/4″ x 3″ (spiders)
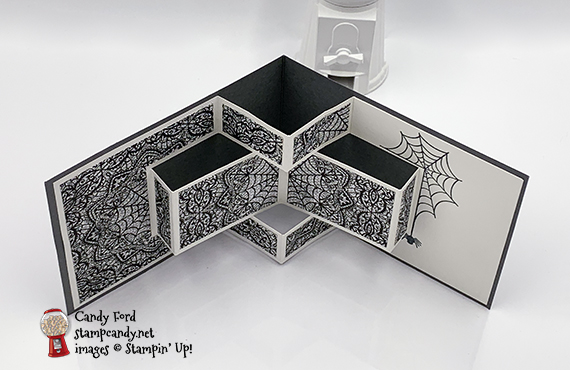
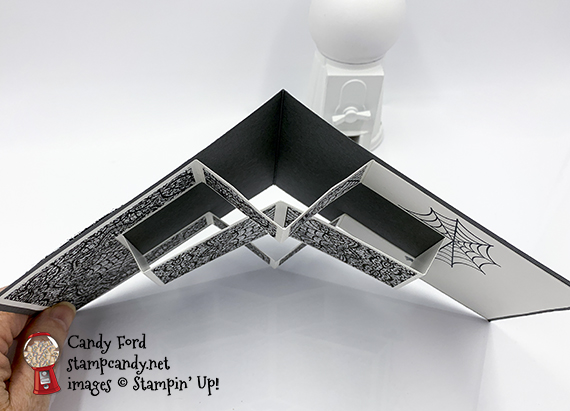
- Whisper White Thick CS cut to 5-1/2″ x 8-1/2″, then cut and scored according to the diagram below
- DSP (cobwebs) cut to 2-3/8″ x 1-3/4″ (2 pieces), to 1-1/2″ x 3/4″ (4 pieces), and to 1/2″ x 1-3/4″ (2 pieces)
- DSP (cobwebs) cut to 3-3/8″ x 3-3/4″ (1 piece) then cut into a C shape according to the diagram below
Stamped with the Festive Corners stamp set:
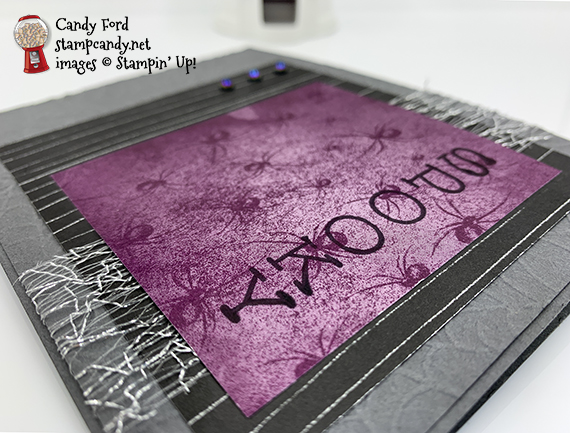
- sentiment in Memento Tuxedo Black ink onto the spider DSP layer (I used my Stamparatus to stamp it a couple of times so it would be nice and dark.)
- cobweb in Memento Tuxedo Black ink onto the Whisper White Thick CS around the farthest right cut/score line
- spider in Memento Tuxedo Black ink hanging from the cobweb
Embossed using the Cobwebs 3D Embossing Folder:
Assembled the card:
- burnished the fold in the card base, and all the folds in the Whisper White Thick CS, with a Bone Folder
- striped DSP layer glued onto the embossed Basic Gray CS layer
- Metallic Mesh ribbon wrapped around both layers and adhered onto the back using Stampin’ Seal +
- Basic Gray CS layer glued onto the front of the card base
- spider DSP layer glued onto the striped DSP layer over the ribbon
- 3 Iridescent pearls applied onto the striped DSP layer (I like to use the pointy end of the Take Your Pick tool.)
- center score line of the Whisper White Thick CS lined up with the score line in the card base, then the C-shaped areas at both ends glued onto the inside of the card base
- cobwebs DSP pieces glued onto their corresponding scored areas of the Whisper White Thick CS
S
Here’s the September 2020 Candy Hearts Blog Hop:
Thank you for hopping with the Hearts today! Be sure to hop around to all the stops. You do not want to miss any of the creativity in this talented group of stampers!
S
Here are today’s colors:
You can click on each one to see all the products that come in that color!
S
Here’s what I used:
Click on these images for more details and to purchase. If you are reading this post in email, the product images may not show up. Please click here to see the post on my blog.
Supply List. <— Click for a clickable and printable list of the products!
S
Two ways to save in September!
Buy the Starter Kit and receive even more! It’s already the best deal: $99 for $125 in product of your choice plus Free shipping! In September you will also receive the Queen Anne’s Lace stamp set, the So Much Love stamp set, Rhinestone Basic Jewels, and 16 precut card kits! Wow! This is the perfect time to work on your wish list of Stampin’ Up! products! CLICK HERE for more details.
Buy the new Stampin’ Cut & Emboss Machine (standard size) from me by September 30 and I will give you a Magnetic Cutting Plate FREE! You’ll save almost $30! CLICK HERE for more details and to order.
S
Here are some helpful links:
S
Thanks for stopping by today, and Sweet Stamping!
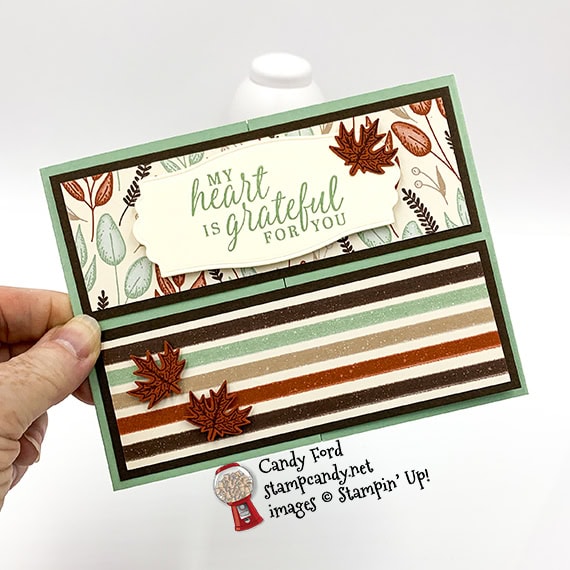
Sep 11, 2020 | Autumn, Cards, Fun Folds, Gallery |
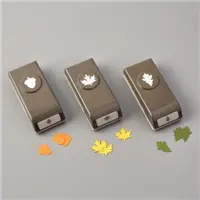
For today’s gate fold card, I used the Beautiful Autumn Bundle (Beautiful Autumn stamp set and Autumn Punch Pack,) Snow Time Dies, and Gilded Autumn Designer Series Paper. It’s a simple fun fold, or fancy fold, that packs a lot of punch for little effort.
If you are reading this in email, some photos may appear blurry, or may not appear at all. Please click here to see the post on my blog.
S beautiful beautiful beautiful beautiful
Here’s what I made:
S
Here’s what I did:
Cut and scored with my paper trimmer:
- Mint Macaron card stock (CS) cut to 11″ x 4-1/4″, then scored at 2-3/4″ and 8-1/4″
- 2 Early Espresso CS layers cut to 5-1/4″ x 1-7/8″
- 2 Gilded Autumn Designer Series Paper (DSP) layers cut to 5″ x 1-5/8″
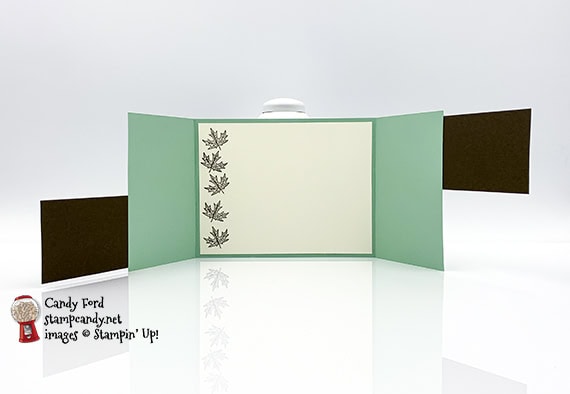
- Very Vanilla CS cut to 5-1/4″ x 4″ for the inside of the card base
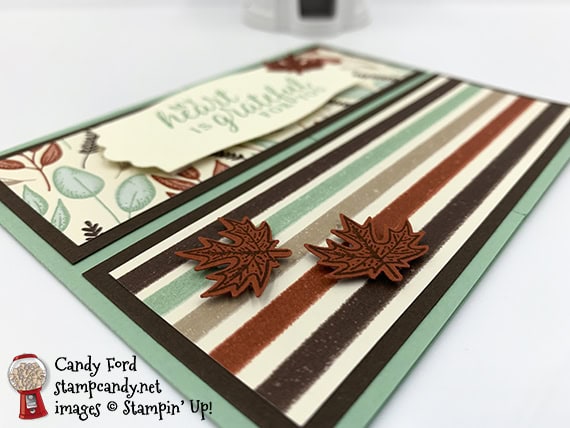
Stamped with the Beautiful Autumn stamp set:
- sentiment in Mint Macaron ink onto a scrap of Very Vanilla Thick CS
- 3 leaves in Early Espresso ink onto a scrap of Cajun Craze CS
- 5 leaves in Early Espresso ink onto the Very Vanilla CS for the inside
Cut using the Autumn Punch Pack:
- the 3 stamped leaves on Cajun Craze CS
Cut using the Snow Time Dies:
Assembled the card:
- burnished the folds in the card base with a Bone Folder
- the 2 Early Espresso CS layer lined up on the front of the closed card, then the right end of the top one glued only on the right, and the left end of the bottom glued only on the left
- DSP layers glued onto the Early Espresso CS layers
- die cut sentiment adhered onto the top DSP layer using Stampin’ Dimensionals
- one punched leaf glued onto the sentiment
- 2 punched leaves adhered onto the bottom DSP layer using Mini Stampin’ Dimensionals
- Very Vanilla CS glued onto the inside of the card base
S
Here are today’s colors:
You can click on each one to see all the products that come in that color!
S
Here’s what I used:
Click on these images for more details and to purchase. I appreciate your business! If you are reading this post in email, the product images may not show up. Please click here to see the post on my blog.
Supply List. <— Click for a clickable and printable list of the products!
S
Two ways to save in September!
Buy the Starter Kit and receive even more! It’s already the best deal: $99 for $125 in product of your choice plus Free shipping! In September you will also receive the Queen Anne’s Lace stamp set, the So Much Love stamp set, Rhinestone Basic Jewels, and 16 precut card kits! Wow! This is the perfect time to work on your wish list of Stampin’ Up! products! CLICK HERE for more details.
Buy the new Stampin’ Cut & Emboss Machine (standard size) from me by September 30 and I will give you a Magnetic Cutting Plate FREE! You’ll save almost $30! CLICK HERE for more details and to order.
S
Here are some helpful links:
S
Thanks for stopping by today, and Sweet Stamping!