Aug 17, 2022 | Blog Hop, Cards, Gallery |
 s
s
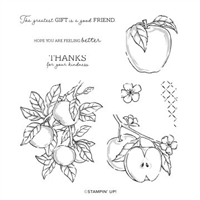
Welcome to the August 2022 InKing Royalty Blog Hop! Can you believe it’s already time for schools to start back up?! The return to school after summer vacation is a really big deal for students, teachers, school workers and the parents who are left home alone. To honor this big event, we have created projects with a back to school theme. We are excited to share our creations and hope you love them! I used the *Apple Harvest bundle, *Playful Piggy Dies, and **Amazing Phrasing stamp set to create my Slimline card for today. After you read my post, I hope you’ll hop over to the next person on the list below.
* Apple Harvest bundle, Apple Blossoms Dies, and Playful Piggy Dies will be available to order 1-30 September 2022.
** Amazing Phrasing stamp set is available only until 31 August 2022, as a free Sale-a-bration item.
If you are reading this in email, some photos may appear blurry, or may not appear at all. Please click here to see the post on my blog.
S August 2022 InKing Royalty Blog Hop August 2022 InKing Royalty Blog Hop August 2022 InKing Royalty Blog Hop August 2022 InKing Royalty Blog Hop
Here’s what I made:

S
Here’s what I did:
Cut and scored with my Paper Trimmer:
- Basic Black card stock (CS) cut to 7″ x 8-1/2″, then scored in half at 3-1/2″
- Sweet Sorbet CS layer cut to 3-3/8″ x 8-3/8″
- Basic White CS layer cut to x 3-1/4″ x 8-1/4″
- Basic White CS layer cut to 3-1/4″ x 8-1/4″ for the inside of the card base
Stamped with the Apple Harvest stamp set:
- apple in Tuxedo Black Memento ink onto a scrap of Basic White CS
Stamped with the Amazing Phrasing stamp set:
- sentiments in Sweet Sorbet and Parakeet Party inks onto the Basic White CS layer
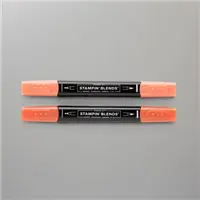
Colored using Stampin’ Blends Markers:
- apple in Sweet Sorbet and Parakeet Party
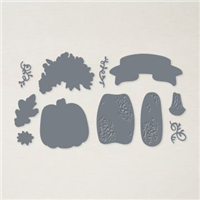
Cut using the Apple Blossoms Dies:
Cut using the Playful Piggy Dies:
- wagon from a scrap of Texture Chic Designer Series Paper (DSP)
- wheels and handle from a scrap of Basic Black CS
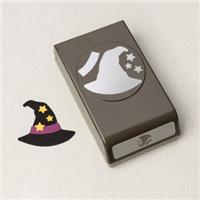
Cut using the Witch Hat Builder Punch:
- stars from a scrap of Daffodil Delight CS
Assembled the card:
- burnished the fold in the card base with a Bone Folder
- wheels and handle glued onto the DSP wagon
- apple glued onto the back of the wagon
- apple and wagon glued onto the Basic White CS layer
- stars glued around sentiments and apple – I dropped them from several inches above, and glued them where they landed. A few landed on top of the apple, so I re-dropped them.
- Sweet Sorbet CS layer glued onto the front of the card base
- Basic White CS layer glued onto the Sweet Sorbet CS layer
- plain Basic White CS glued onto the inside of the card base
S
Here’s the August 2022 InKing Royalty Blog Hop:
Thank you for hopping along with us. If you get stuck during the Blog Hop, please use this line-up as a guide:
- Brian King at Stamp with Brian
- Candy Ford at Stamp Candy
- Jackie Beers at Blue Line Stamping
- Pam Morris at Tap Tap Stamp
- Marilyn Jones at Stamp with MJ
- Jan Dufour at Stamp Me Silly
- Jessica Atchison at Stampin with the Atchisons
- Sue Jackson at Just Peachy Stamping
- Renae Novak at Blessed by Cards
- Robin Myren at Songbird Designs by Robin
s
Here are today’s colors:
You can click on each one to see all the products that come in that color!
S
Here’s what I used:
These items will be available to order 1-30 September 2022:
- Apple Blossoms Dies (160255)
- Playful Piggy Dies (160254)
Click on these images for more details and to purchase. If you are reading this post in email, the product images may not show up. Please click here to see the post on my blog.
Supply List. <— Click for a clickable and printable list of the products!
S
Here are some helpful links:
S
Thanks for stopping by today, and Sweet Stamping!
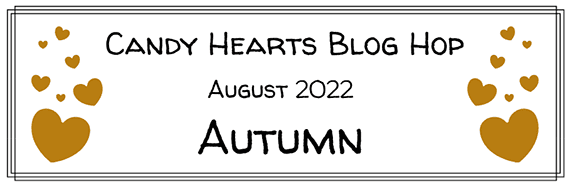
Aug 8, 2022 | Autumn, Blog Hop, Cards, Gallery |
 s
s
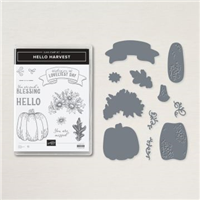
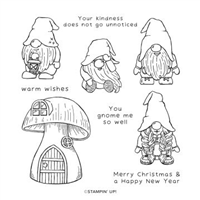
Welcome to the August 2022 Candy Hearts Blog Hop! This month we are featuring Autumn themed projects. I used the Hello Harvest bundle (Hello Harvest Stamp Set and Rustic Pumpkin Dies) with the Kindest Gnomes Stamp Set to create my Slimline card for today.
If you are reading this in email, some photos may appear blurry, or may not appear at all. Please click here to see the post on my blog.
S August 2022 Candy Hearts Blog Hop August 2022 Candy Hearts Blog Hop August 2022 Candy Hearts Blog Hop August 2022 Candy Hearts Blog Hop
Here’s what I made:
I CASEd a card by Stesha Bloodhart of StampinHoot.com.

 S
S
Here’s what I did:
Cut and scored with my Paper Trimmer:
- Early Espresso card stock (CS) cut to 7″ x 8-1/2″, then scored in half at 3-1/2″
- Cherry Cobbler CS layer cut to 3-3/8″ x 2-1/2″
- Cajun Craze CS layer cut to 3-3/8″ x 2-1/2″
- Pumpkin Pie CS layer cut to 3-3/8″ x 2-1/2″
- Basic White CS layer cut to 3-1/4″ x 8-1/4″
- Basic White CS layer cut to 3-1/4″ x 8-1/4″ for the inside of the card base
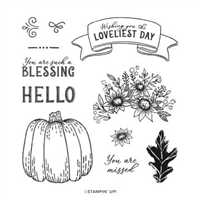
Stamped with the Hello Harvest stamp set:
- 3 pumpkins in Memento Tuxedo Black ink onto a scrap of Basic White CS
Stamped with the Kindest Gnomes stamp set:
- sentiment in Versamark ink onto a scrap of Early Espresso CS, then heat embosses in white
Colored using Stampin’ Blends Markers:
- pumpkins in Pumpkin Pie, Cajun Craze, Cherry Cobbler, and Bronze
Cut using the Rustic Pumpkin Dies:
- the 3 pumpkins
- 3 tendrils from a scrap of Early Espresso CS
Cut using Paper Snips:
- the sentiment into three parts
Assembled the card:
- burnished the fold in the card base with a Bone Folder
- Pumpkin Pie, Cajun Craze, and Cherry Cobbler CS layers glued onto the back of the 3-1/4″ x 8-1/4″ Basic White CS layer
- Basic White CS layer (with smaller layers on the back) glued onto the front of the card base
- 3 pumpkins glued onto the Basic White CS layer
- tendrils glued at tops of pumpkins
- sentiment pieces glued onto the pumpkins
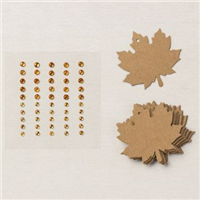
- Amber gems applied onto the card front with a Take Your Pick tool
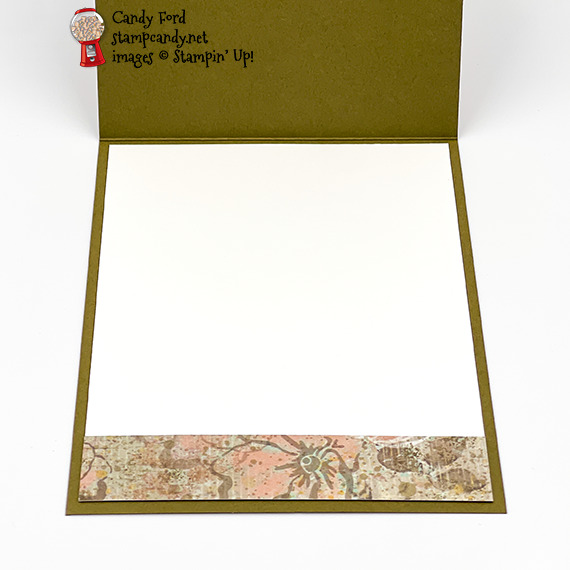
- 3-1/4″ x 8-1/4″ Basic White CS glued onto the inside of the card base
S
Here’s the August 2022 Candy Hearts Blog Hop:
s
Here are today’s colors:
You can click on each one to see all the products that come in that color!
S
Here’s what I used:
Click on these images for more details and to purchase. If you are reading this post in email, the product images may not show up. Please click here to see the post on my blog.
Supply List. <— Click for a clickable and printable list of the products!
S
Here are some helpful links:
S
Thanks for stopping by today, and Sweet Stamping!
May 18, 2022 | Blog Hop, Cards, Gallery, New Products |

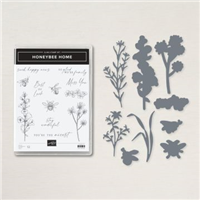
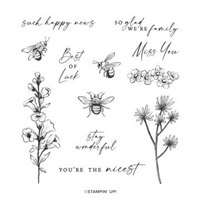
Welcome to the May 2022 InKing Royalty Blog Hop! This month we are sharing projects that feature birds and bees, not to be confused with “the birds and the bees.” That’s something entirely different. I used 2 sets of stamps (Honeybee Home and Etched in Nature) and 2 sets of dies (Honeybee Blooms & Eden) to create my card for today. The Etched in Nature stamp set is retired, but I accidentally left it with my current stamps, so I used it on today’s card. Oops!
Be sure to hop around to all the stops on the hop, because you don’t want to miss any of the great projects the Royals have made for you today.
If you are reading this in email, some photos may appear blurry, or may not appear at all. Please click here to see the post on my blog.
S May 2022 InKing Royalty Blog Hop May 2022 InKing Royalty Blog Hop May 2022 InKing Royalty Blog Hop May 2022 InKing Royalty Blog Hop
Here’s what I made:

S
Here’s what I did:
Cut and scored with my paper trimmer:
- Soft Suede card stock (CS) cut to 4-1/4″ x 11″, then scored in half at 5-1/2″
- Texture Chic Designer Series Paper (DSP) layer cut to 4″ x 5-1/4″
- Soft Succulent CS layer cut to 2-1/2″ x 2-1/8″
- Petal Pink CS layer cut to 2-3/4″ x 2-3/8″
- Sahara Sand CS layer cut to 3″ x 2-5/8″
- Basic White CS cut to 4″ x 5-1/4″ for the inside of the card base
- DSP strip cut to 4″ x 3/4″
Stamped with the Honeybee Blooms stamp set:
- two bees in Tuxedo Black Memento ink onto a scrap of Vellum CS, then set the ink with my Heat Tool
- the same two bees in Tuxedo Black Memento ink onto a scrap of Mango Melody CS
- sentiment in Soft Suede ink onto a scrap of Vellum CS, then set the ink with my Heat Tool
Stamped with the Etched in Nature stamp set:
- bird in Tuxedo Black Memento ink onto the Sahara Sand CS layer
Colored using Stampin’ Blends Markers:
- bird image in Petal Pink, Flirty Flamingo, Pool Party, Soft Succulent, Daffodil Delight, and Soft Suede
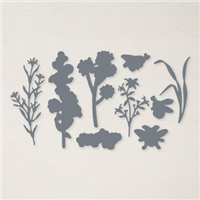
Cut using the Honeybee Blooms Dies:
Cut using the Eden Dies:
- the sentiment
- Since the die is solid, I lined up the sentiment on the back (easy to do with the Vellum) and held it in place with Post-It tape.
Cut using Paper Snips:
- only the bodies of the two Mango Melody bees, no legs or wings
Assembled the card:
- burnished the fold in the card base with a Bone Folder
- DSP layer glued onto the front of the card base
- Sahara Sand CS layer glued onto the Petal Pink CS layer
- Petal Pink CS layer glued onto the Soft Succulent CS layer
- Soft Succulent CS layer glued onto the DSP layer
- sentiment glued onto the DSP layer, spreading glue over the entire back of the vellum except at the ends
- Mango Melody bee parts glued onto the backs of the vellum bees
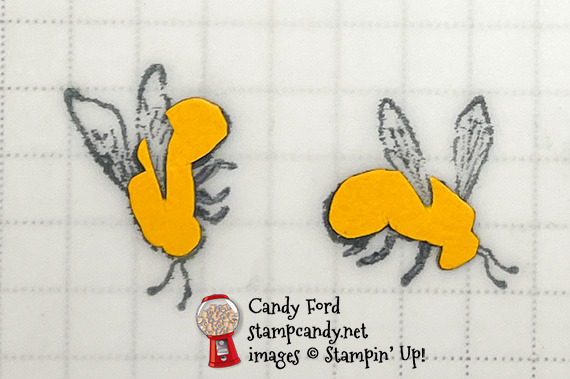
- bees adhered onto the DSP layer using Mini Stampin’ Dimensionals

- small strip of DSP glued onto the Basic White CS, along the bottom edge
- Basic White CS glued onto the inside of the card base
S
Here’s the May 2022 InKing Royalty Blog Hop:
Thank you for hopping along with us. If you get stuck during the Blog Hop, please use this line-up as a guide:
- Brian King at Stamp with Brian
- Sue Jackson at Just Peachy Stamping
- Candy Ford at Stamp Candy <——- YOU ARE HERE!!!
- Renae Novak at Blessed by Cards
- Ann Murray at Murray Stamps Ink
- Pam Morris at Tap Tap Stamp
- Sheryl Abernathy at Elegant Sentiments
- Robin Myren at Songbird Designs by Robin
- Lynn Kolcun at Avery’s Owlery
- Jan Dufour at Stamp Me Silly
s
Here are today’s main colors:
You can click on each one to see all the products that come in that color!
S
Here’s what I used:
Click on these images for more details and to purchase. If you are reading this post in email, the product images may not show up. Please click here to see the post on my blog.
Supply List. <— Click for a clickable and printable list of the products!
Here are some helpful links:
S
Thanks for stopping by today, and Sweet Stamping!
May 16, 2022 | Blog Hop, Cards, Gallery, New Products |

Welcome to the May 2022 Candy Hearts Blog Hop! This month we are featuring projects made using the new 2022-2024 In Colors: Parakeet Party, Sweet Sorbet, Tahitian Tide, Starry Sky, and Orchid Oasis.
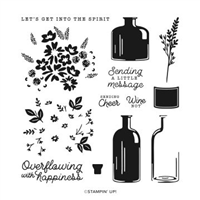
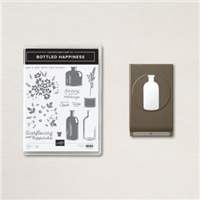
I used two of the new In Colors – Orchid Oasis and Starry Sky – to create this simple card. I think it would qualify as “simple stamping” if it weren’t for the punch. Otherwise it’s just stamps, ink, and paper. I used the Bottled Happiness stamp set, which is available in a bundle (save 10%!) with the Vintage Bottle Punch. You can also get Vintage Bottle Shaker Domes to make shaker cards. I’ll link them in my supply list near the bottom of this post.
If you are reading this in email, some photos may appear blurry, or may not appear at all. Please click here to see the post on my blog.
S May 2022 Candy Hearts May 2022 Candy Hearts May 2022 Candy Hearts May 2022 Candy Hearts
Here’s what I made:
S
Here’s what I did:
Cut and scored with my paper trimmer:
- Orchid Oasis card stock (CS) cut to 5-1/2″ x 8-1/2″, then scored in half at 4-1/4″
- Basic White CS layer cut to 5-1/4″ x 4″
- Basic White CS cut to 5-1/4″ x 4″ for the inside of the card base
Stamped with the Bottles Happiness stamp set:
- sentiment in Orchid Oasis ink onto a scrap of Basic White Thick CS
- large flower image in Orchid Oasis ink onto the Basic White CS layer, once in the top right corner and once in the bottom left
- overlay flower image in Starry Sky ink (I found it easiest to line up the flower centers.)
- sprig stamp in Starry Sky ink from the center of the flowers toward the top left and bottom right. I inked the stamp only once per side and stamped off three times for the varied darkness
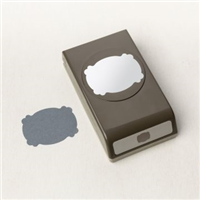
Cut using the Lasting Label Punch:
- sentiment
- a blank piece of Basic White Thick CS
Colored using a Stampin’ Write Marker:
- filled in the flower center in Starry Sky ink, where I didn’t get the two-step stamping lined up just right
Assembled the card:
- burnished the fold in the card base with a Bone Folder
- stamped Basic White CS layer glued onto the front of the card base
- the two punched pieces glued together, perpendicular to each other
- sentiment stack adhered onto the card front using a piece of Foam Adhesive Sheet
- remaining 5-1/4″ x 4″ Basic White CS glued onto the inside of the card base
S
Here’s the May 2022 Candy Hearts Blog Hop:
s
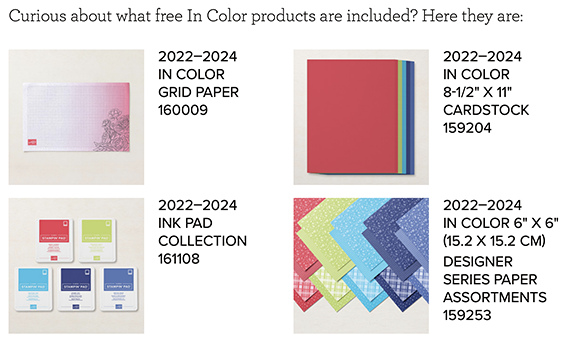
How would you like to get $66.50 in new 2022-2024 In Color products FREE?
All you have to do is join my Candy Hearts group. The In Color Starter Kit costs you $99 plus tax. You get to choose $125 in product, AND you’ll receive the products below free, AND you get free shipping, AND you’ll get a free Paper Pumpkin kit. Now that’s a deal. But this promotion only lasts through 31 May, so click here for more details today!
Here are today’s colors:
You can click on each one to see all the products that come in that color!
S
Here’s what I used:
Click on these images for more details and to purchase. If you are reading this post in email, the product images may not show up. Please click here to see the post on my blog.
Supply List. <— Click for a clickable and printable list of the products!
Here are some helpful links:
S
Thanks for stopping by today, and Sweet Stamping!
Apr 20, 2022 | Blog Hop, Cards, Gallery |

s
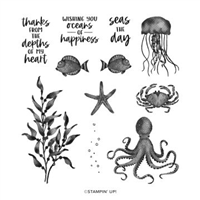
Welcome to the April 2022 IRBH (InKing Royalty Blog Hop!) As the weather gets warmer, it’s time to start planning our trips to the beach, the lake or the in-town aquarium. Today we’re sharing projects inspired by the ocean and sea. We are excited to share our creations and hope you love them! After you read my post, I hope you’ll hop over to the next person on the list at the base of this post: Brian King at Stamp with Brian.
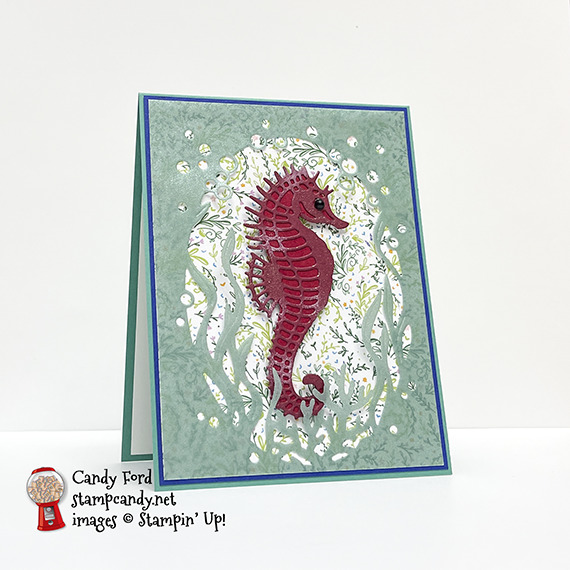
For my card, I used retiring products, carrying-over products, and new products together to create a calm underwater scene. The background is from the new Tea Boutique Designer Series Paper. It’s tiny flowers and greenery, but I thought it had kind of a swirly underwater feel.
If you are reading this in email, some photos may appear blurry, or may not appear at all. Please click here to see the post on my blog.
S April 2022 IRBH April 2022 IRBH April 2022 IRBH April 2022 IRBH
Here’s what I made:

S
Here’s what I did:
Cut and scored with my paper trimmer:
- Just Jade card stock (CS) cut to 4-1/4″ x 11″, then scored in half at 5-1/2″
- Starry Sky CS layer cut to 4-1/8″ x 5-3/8″
- Tea Boutique Designer Series Paper (DSP) layer cut to 4″ x 5-1/4″
- Shimmer Vellum layer cut to 4″ x 5-1/4″
- Basic White CS cut to 4″ x 5-1/4″ for the inside of the card base
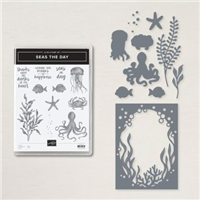
Stamped with the Seas the Day stamp set:
- sentiment in Starry Sky ink onto the Basic White CS for the inside
- starfish in Calypso Coral ink onto the Basic White CS for the inside
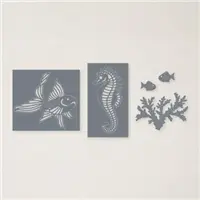
Cut using the Sea Dies:
- underwater “frame” from the Shimmer Vellum layer
Cut using the Sea Life Dies:
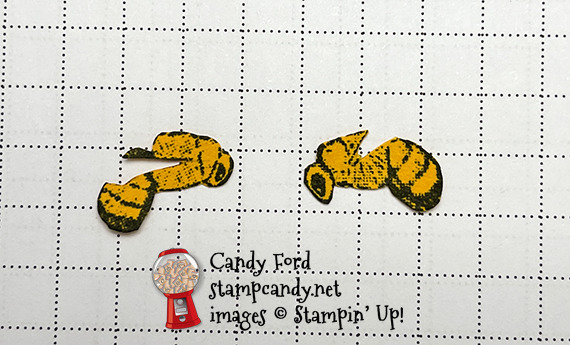
- seahorse from a scrap of Merry Merlot CS
- traced around the die cut onto a scrap of Cherry Cobbler CS, then cut using Paper Snips
Used a Sponge Dauber:
- to apply dots of white ink onto the die cut seahorse
- to spread glue around the perimeter of the vellum layer, leaving the kelp, etc. at the bottom loose
Assembled the card:
- burnished the fold in the card base with a Bone Folder
- Basic White CS glued onto the inside of the card base
- Starry Sky CS layer glued onto the front of the card base
- DSP layer (with vellum attached) glued onto the Starry Sky CS layer
- die cut seahorse glued onto the fussy cut seahorse
- Wink of Stella applied over seahorse
- Black Matte Dot applied as the eye
- seahorse adhered onto the DSP layer (and under the vellum kelp) using Mini Black Stampin’ Dimensionals
S
Here’s the April 2022 IRBH:
Thank you for hopping along with us. If you get stuck during the Blog Hop, please use this line-up as a guide:
- Brian King at Stamp with Brian
- Sheryl Abernathy at Elegant Sentiments
- Renae Novak at Blessed by Cards
- Jan Dufour at Stamp Me Silly
- Jackie Beers at Blue Line Stamping
- Lisa Graham at Lisa’s Little Ink Spot
- Pam Morris at Tap Tap Stamp
- Marilyn Jones at Stamp with MJ
- Sue Jackson at Just Peachy Stamping
- Candy Ford at Stamp Candy <—– YOU ARE HERE!!!
s
Here’s my inspiration for the sea horse:

s
Here are today’s colors:
You can click on each one to see all the products that come in that color!
S
Here’s what I used:
These products will be available 3 May 2022:
- Tea Boutique Designer Series Paper (158659)
- Starry Sky 8-1/2″ x 11″ Card Stock (159263)
- Starry Sky Classic Stampin’ Pad (159212)
s
Click on these images for more details and to purchase. If you are reading this post in email, the product images may not show up – please click here to see the post on my blog.
Sale: $23.20
Price: $29.00
Supply List. <— Click for a clickable and printable list of the products!
s
Reserve Your Swatch Books and Product Shares Now!
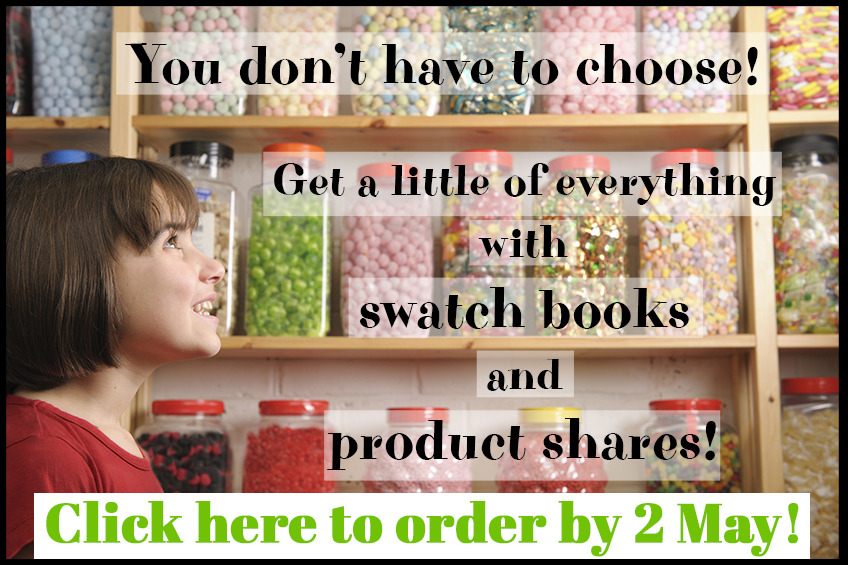
I will be selling Designer Series Paper Swatch Books as well as Paper Shares, Ribbon Shares, and Embellishment Shares from the new 2022-2023 Annual Catalog. You must order by 2 May 2022. Click here for all the details!
S
Here are some helpful links:
S
Thanks for stopping by today, and Sweet Stamping!

Apr 18, 2022 | Blog Hop, Cards, Fun Folds, Gallery |
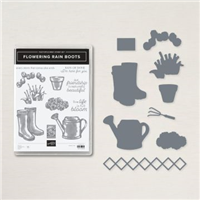
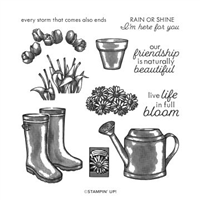
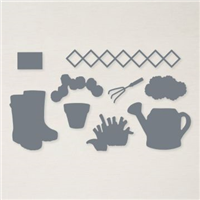
Welcome to the April 2022 Candy Hearts Blog Hop! This month we are featuring Fancy Folds, or Fun Folds. I used the Flowering Rain Boots Bundle and Flowering Fields Designer Series Paper to create an easel card. After you read my post, I hope you’ll hop around to all the stops on the hop. You don’t want to miss any of the great projects this talented group has created for you today.
If you are reading this in email, some photos may appear blurry, or may not appear at all. Please click here to see the post on my blog.
S April 2022 Candy Hearts Blog Hop April 2022 Candy Hearts Blog Hop April 2022 Candy Hearts Blog Hop April 2022 Candy Hearts Blog Ho
Here’s what I made:

S
Here’s what I did:
Cut and scored with my paper trimmer:
- Pool Party card stock (CS) cut to 4-1/4″ x 11″, then scored at 2-3/4″ and 5-1/2″
- Pool Party CS cut to 4-1/4″ x 5-1/2″
- Blushing Bride CS layer cut to 3-3/4” x 5”
- Flowering Fields Designer Series Paper (DSP) layer cut to 3-5/8” x 4-7/8”
- Pool Party CS layer cut to 2-5/8” x 3-3/4”
- Basic White CS layer cut to 2-1/2” x 3-5/8”
- Blushing Bride CS cut to 3-3/4” x 1-3/4”
- DSP layer cut to 3-5/8” x 1-5/8”
- Basic White CS cut to 4″ x 5-1/4″ for the inside of the card base
Stamped with the Flowering Rain Boots stamp set:
- sentiment and flowers in Flirty Flamingo ink onto a scrap of Basic White Thick CS
- watering can in Pool Party ink onto a scrap of Basic White Thick CS
Cut using the Rain Boots Dies:
- watering can and flowers
- tool from a scrap of Smoky Slate CS and from a scrap of Pool Party CS
Cut using Stitched Rectangle Dies:
Cut using Stitched So Sweetly Dies:
- a piece of Blushing Bride CS
Embossed with the Brick & Mortar 3D Embossing Folder:
- 2-1/2” x 3-5/8” Basic White CS layer
Assembled the card:
- burnished the folds in the card base with a Bone Folder, so that the one at 5-1/2″ is a mountain fold, and the one at 2-3/4″ is a valley fold
- glued the top half of the 4-1/4″ x 5-1/2″ Pool Party CS onto the top half of the card front (which is really the bottom of the card front that has been flipped up)
- 3-3/4” x 5” Blushing Bride CS glued onto the 4-1/4″ x 5-1/2″ Pool Party CS
- 3-5/8” x 4-7/8” DSP glued onto the 3-3/4” x 5” Blushing Bride CS
- the die cut Blushing Bride CS glued onto the 3-5/8” x 4-7/8” DSP
- 2-5/8” x 3-3/4” Pool Party CS glued onto the die cut Blushing Bride CS
- 2-1/2” x 3-5/8” Basic White CS glued onto the 2-5/8” x 3-3/4” Pool Party CS
- watering can and flowers glued onto the 2-1/2” x 3-5/8” Basic White CS
- cut the handle from the Pool Party tool using scissors, and glue it onto the handle of the Smoky Slate tool
- tool glued over watering can
- 3 Artistry Blooms Sequins applied onto the 2-1/2” x 3-5/8” Basic White CS layer, using a Take Your Pick tool
- 3-5/8” x 1-5/8” DSP glued onto the 3-3/4” x 1-3/4” Blushing Bride CS
- sentiment glued onto the 3-5/8” x 1-5/8” DSP
- 4″ x 5-1/4″ Basic White CS glued onto the inside of the card base
- sentiment stack adhered onto the bottom of the 4″ x 5-1/4″ Basic White CS using a piece of Foam Adhesive Sheet, making sure to leave an even border around the bottom and two sides
- prop the card front behind the raised sentiment stack
S
Here’s the April 2022 Candy Hearts Blog Hop:
Thank you for hopping with the Candy Hearts today! Be sure to hop around to all the stops. You do not want to miss any of the creativity in this talented group of stampers! If you get lost, use the list below.
s
Here are today’s colors:
You can click on each one to see all the products that come in that color!
S
Here’s what I used:
Click on these images for more details and to purchase. If you are reading this post in email, the product images may not show up. Please click here to see the post on my blog.
Supply List. <— Click for a clickable and printable list of the products!
Reserve Your Swatch Books and Product Shares Now!
I will be selling Designer Series Paper Swatch Books as well as Paper Shares, Ribbon Shares, and Embellishment Shares from the new 2022-2023 Annual Catalog. You must order by 2 May 2022. Click here for all the details!
Here are some helpful links:
S
Thanks for stopping by today, and Sweet Stamping!