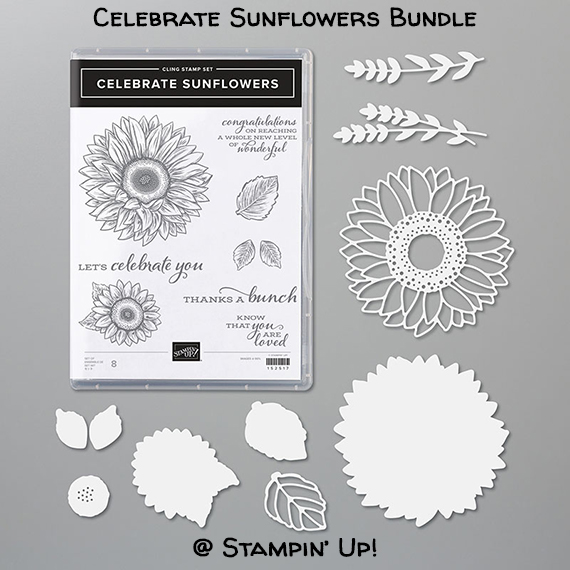
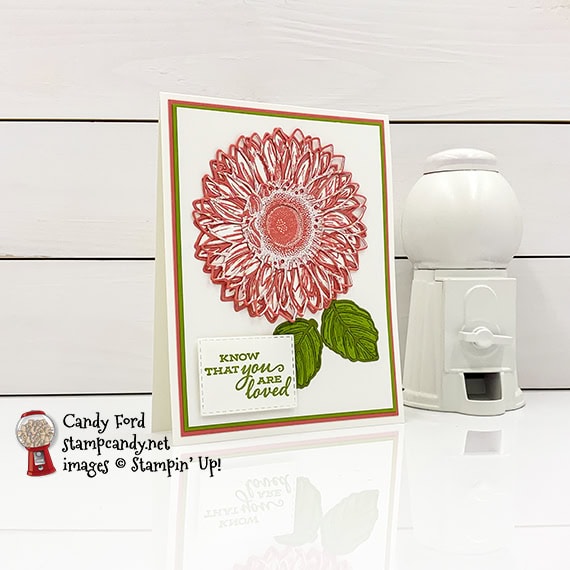
Today I’m sharing another card I made using the Celebrate Sunflowers Bundle (Celebrate Sunflowers stamp set and Sunflowers Dies) and the PPPST (Paper Piecing Press n Seal Technique.) A couple people have said the flower looks like it’s crocheted.
I think I’m sort of addicted to this technique. I mean I just can’t stop using it. Today’s card is similar to another one I made recently using the PPPST. You can see that card here.
Be sure to check back tomorrow to see the card I made using the leftovers from today’s card!
If you are reading this in email, some photos may appear blurry, or may not appear at all. Please click here to see the post on my blog.
S celebrate celebrate celebrate celebrate celebrate
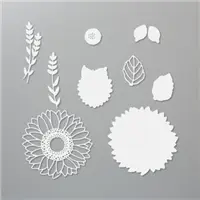
Here’s the bundle:
S
Here’s what I made:
S
Here’s what I did:
Cut and scored with my paper trimmer:
Whisper White Thick card stock (CS) cut to 4-1/4″ x 11″, then scored in half at 5-1/2″
Flirty Flamingo CS layer cut to 4″ x 5-1/4″
Granny Apple Green CS layer cut ti 3-7/8″ x 4-7/8″
Whisper White CS (regular or thick) layer cut to 3-3/4″ x 5″
Stamped with the Celebrate Sunflowers stamp set:
sentiment in Granny Apple Green ink onto a scrap of Whisper White Thick CS
large sunflower in Versamark ink onto a scrap of Flirty Flamingo CS, then heat embossed in white
2 leaves in Granny Apple Green ink onto a scrap of Granny Apple Green CS
Cut using the Sunflower Dies:
stamped sunflower using the large detailed sunflower die
scrap of Flirty Flamingo CS using the large detailed sunflower die
stamped leaves using the detailed leaf die
2 leaves from a scrap of Old Olive CS using the detailed leaf die
Note: I pressed a piece of Press n Seal plastic wrap over the die cuts to keep all the pieces in place
Cut using the Stitched Rectangles Dies:
sentiment
Assembled the card:
burnished the fold in the card base with a Bone Folder
Flirty Flamingo CS layer glued onto the front of the card base
Granny Apple Green CS layer glued onto the Flirty Flamingo CS layer
Whisper White CS layer glued onto the Granny Apple Green CS layer
outline pieces of the plain Flirty Flamingo sunflower and the Old Olive leaf die cuts removed from the Press n Seal, then glued onto the Whisper White CS layer
outline of the stamped and embossed sunflower pulled away from the Press n Seal
stamped and embossed sunflower petals (and center piece) glued onto the Whisper White CS layer, putting them inside the outline piece
outline of the Granny Apple Green leaf die cuts removed from the Press n Seal
inner pieces of the Granny Apple Green leaves glued inside the Old Olive outlines
outline of the stamped and embossed sunflower glued onto the Flirty Flamingo outline piece, glueing only around the center and leaving the petal outlines loose
sentiment adhered onto the Whisper White CS layer using Stampin’ Dimensionals
S
Here are today’s colors:
You can click on each one to see all the products that come in that color!
Click on these images for more details and to purchase. If you are reading this post in email, the product images may not show up. Please click hereto see the post on my blog.
Gift Certificates are available in any U.S. dollar amount from me. Contact mefor details.
Have you shopped from me within the past year? Join my private VIP Facebook groupfor exclusive project tutorials and more!
Join my team and enjoy a 20% discount (or more) on all your purchases! You choose $125 in products and pay only $99, and get free shipping! No obligation! No selling required!
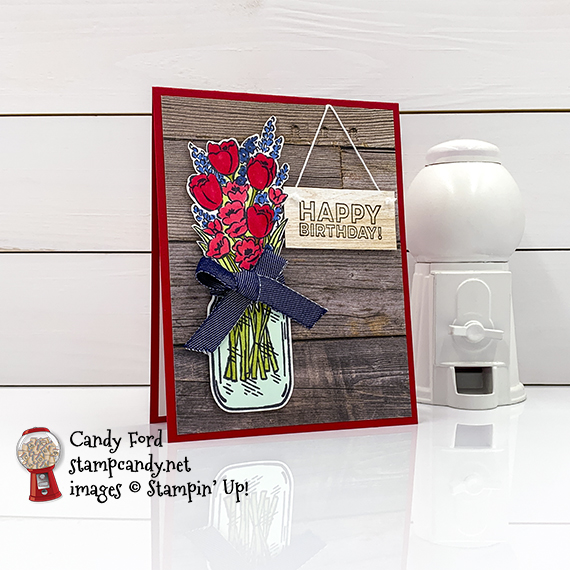
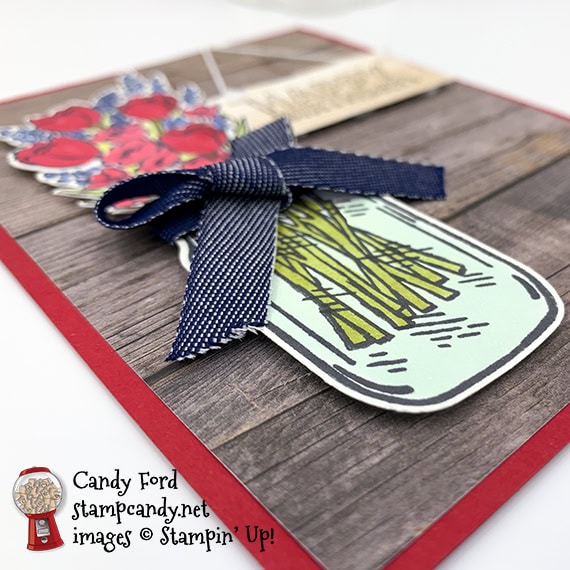
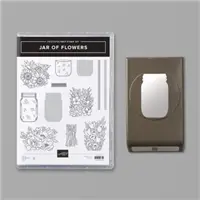
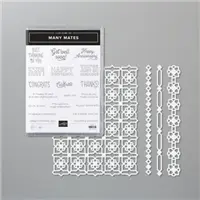
Today’s project is a birthday card I made using the Jar of Flowers Bundle (Jar of Flowers stamp set and Jar Punch) and the Many Mates stamp set (available in a bundle with the Many Medallions Dies.) Once I had made the card, I realized I could have used it for the 4th of July blog hop a couple days ago. You can see the card I made for it here. I guess I got my patriotic card mojo a couple days too late.
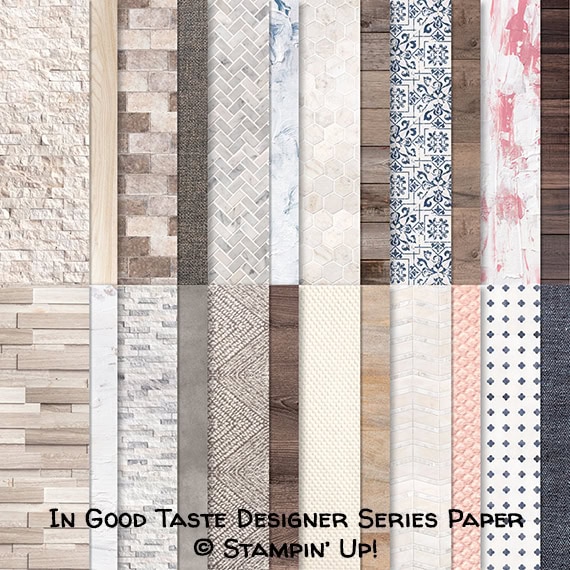
I also used the new In Good Taste Designer Series Paper, which is full of amazing designs including carpet, tile, wood, etc. These papers are so incredibly versatile, they make this a must have pack of DSP for everyone. And check out the new 3/8″ Denim Ribbon. If that’s isn’t pure Americana, I don’t know what it.
If you are reading this in email, some photos may appear blurry, or may not appear at all. Please click here to see the post on my blog.
S jar of flowers jar of flowers jar of flowers jar of flowers jar of flowers
Here’s what I made:
S
Here’s what I did:
Cut and scored with my paper trimmer:
Real Red card stock (CS) cut to 4-1/4″ x 11″, then scored in half at 5-1/2″
In Good Taste Designer Series Paper (DSP) layer cut to 4 x 5-1/4″ (darker wood)
In Good Taste Designer Series Paper (DSP) cut to 2″ x 1″ for the sentiment (lighter wood)
Whisper White CS cut to 4″ x 5-1/4″ for the inside of the card base
Stamped with the Jar of Flowers stamp set:
jar in black Memento ink onto a scrap of Whisper White Thick CS
stems in black Memento ink in jar
flowers in black Memento ink onto another scrap of Whisper White Thick CS
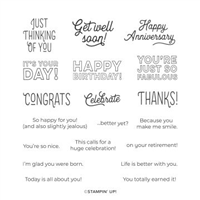
Stamped with the Many Mates stamp set:
sentiment in Early Espresso ink onto the smaller piece of DSP
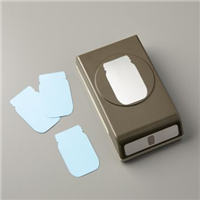
Cut using the Jar Punch:
jar with stems
Cut using Paper Snips:
flowers
Colored using Stampin’ Blends Markers:
stems in Old Olive
water in jar in Pool Party
flowers in Real Red, Night of Navy, and Old Olivx
Assembled the card:
burnished the fold in the card base with a Bone Folder
ribbon adhered onto the top of the jar with Stampin’ Seal, wrapped around the jar, and tied in a bow
jar and flowers adhered onto the DSP layer using Stampin’ Dimensionals
poked a hole in the top two corners of the sentiment using a Take Your Pick Tool (paper piercer attachment)
pulled apart a piece of blue/white/silver twine: pulled the silver out of one end, then the blue and white untwist from each other easily
threaded the white twine through the two holes in the sentiment and tied both ends in knots on the front
sentiment adhered onto the DSP layer using Stampin’ Dimensionals
twine pulled over the top of the DSP layer and adhered onto the back using Stampin’ Seal
DSP layer glued onto the front of the card base
Whisper White CS glued onto the inside of the card base
S
Here are today’s colors:
You can click on each one to see all the products that come in that color!
Click on these images for more details and to purchase. If you are reading this post in email, the product images may not show up. Please click hereto see the post on my blog.
Gift Certificates are available in any U.S. dollar amount from me. Contact mefor details.
Have you shopped from me within the past year? Join my private VIP Facebook groupfor exclusive project tutorials and more!
Join my team and enjoy a 20% discount (or more) on all your purchases! You choose $125 in products and pay only $99, and get free shipping! No obligation! No selling required!
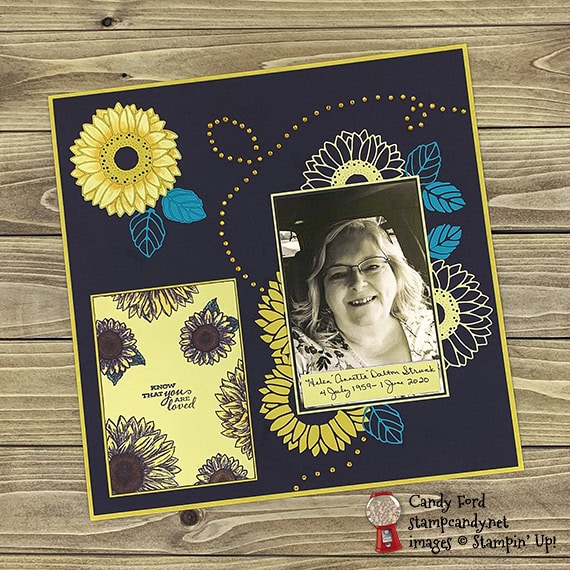
Welcome to the Scrapbooking Global June 2020 Blog Hop! This month we’re featuring new products from the new 2020-2021 Annual Catalog. I used the new Celebrate Sunflowers bundle (Celebrate Sunflowers stamp set & Sunflowers Dies) as well as a few of the new 2020-2022 In Colors (Bumblebee, Cinnamon Cider, and Just Jade.) I used Press n Seal plastic wrap to keep all the little pieces of the die cuts in the right place. I’ve used this technique several times in the last couple weeks. I printed the photo in sepia so it would match the yellow/brown feel of the page.
S
S
If you are reading this in email, some photos may appear blurry, or may not appear at all. Please click here to see the post on my blog.
SScrapbooking Global June 2020 Scrapbooking Global June 2020 Scrapbooking Global June 2020 Scrapbooking Global June 2020e
Here’s the bundle:
S
Here’s what I made:
My dear, sweet cousin Annette and her husband were both infected with COVID-19 last month. He has been in ICU since May 19, and on a ventilator since June 6, but he’s still hanging on. She went into ICU on May 21 and died on June 1.
S
Here’s what I did:
Cut and scored with my paper trimmer:
Early Espresso card stock (CS) cut to 11-3/4″ x 11-3/4″
Bumblebee CS cut to 4-1/8″ x 5-5/8″
So Saffron CS cut to 4″ x 5-1/2″
So Saffron CS cut to 4-1/4″ x 6-1/4″
Early Espresso CS cut to 4-1/8″ x 6-1/8″
So Saffron CS cut to 3-3/4″ x 7/8″
Stamped with the Celebrate Sunflowers stamp set:
sentiment and sunflowers (large and small) in Early Espresso ink onto the 4″ x 5-1/2″ So Saffron CS
I also used the Early Espresso ink pad to ink just the very edges of the stamped CS piece.
Cut using the Sunflowers Dies:
one detailed sunflower from a scrap of So Saffron CS
one detailed sunflower from a scrap of Bumblebee CS
4 leaves from a scrap of Just Jade CS
NOTE: I applied Press n Seal plastic wrap over the tops of all the die cuts to keep all the little pieces in place while I transferred them to the page.
Colored using Stampin’ Blends Markers:
stamped sunflowers in So Saffron, Just Jade, and Cinnamon Cider
die cut sunflower at top left in So Saffron
Assembled the page:
11-3/4″ square Early Espresso CS glued onto a piece of 12″ x 12″ Bumblebee CS
stamped So Saffron CS glued onto the 4-1/8″ x 5-5/8″ Bumblebee CS, then glued onto the Early Espresso CS background
wrote name and dates on the So Saffron CS strip and adhered it onto the 4″ x 6″ photo using Stampin’ Seal
photo adhered onto the 4-1/8″ x 6-1/8″ Early Espresso CS, then onto the 4-1/4″ x 6-1/4″ So Saffron CS, using Stampin’ Seal
NOTE: I never use a wet adhesive, like glue, on photos.
outline parts removed from both die cut sunflowers – very carefully, making sure none of the inner petals came off of the Press n Seal
Bumblebee sunflower outline glued onto the top left of the Early Espresso CS background
applied glue onto the backs of all the So Saffron sunflower petals and used the Press n Seal to line them up inside the Bumblebee outline, then colored the petals with the So Saffron Stampin’ Blends Marker
So Saffron sunflower outline cut in half with my Paper Snips and glued onto the Early Espresso background so the cut edges would be covered up by the photo
Bumblebee sunflower (petals only) cut into 2 different size pieces, then applied glue to the backs of the petals and used the Press n Seal to place them so the cut edges would be covered up by the photo
photo adhered onto the Early Espresso background using Stampin’ Seal
leaves glued around the sunflowers, some whole, some only outlines, some only insides
Pumpkin Pie rhinestones applied onto the Early Espresso background in a meandering pattern
Sa
Here’s the Scrapbooking Global June 2020 Blog Hop:
Click the next button to go to the next stop on the hop, Sharni Haines of Stampin’ at the Maples.
S
If you get lost during the hop, use this line up as a guide:
S
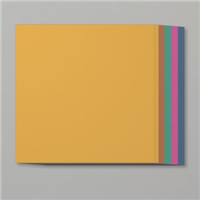
Here are today’s colors:
You can click on each one to see all the products that come in that color!
Click on these images for more details and to purchase. If you are reading this post in email, the product images may not show up. Please click hereto see the post on my blog.
Gift Certificates are available in any U.S. dollar amount from me. Contact mefor details.
Have you shopped from me within the past year? Join my private VIP Facebook groupfor exclusive project tutorials and more!
Join my team and enjoy a 20% discount (or more) on all your purchases! You choose $125 in products and pay only $99, and get free shipping! No obligation! No selling required!
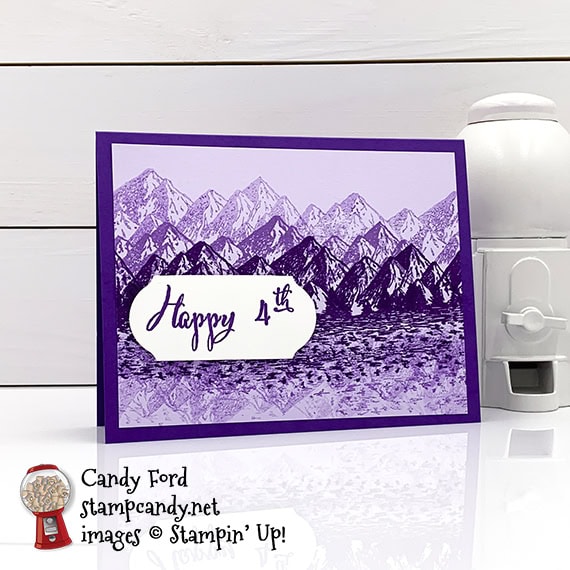
Welcome to the 06-2020 IRBH! This month we are featuring projects with a 4th of July theme. When you first look at my card, you may wonder what it has to do with America’s Independence Day holiday, other than the obvious sentiment. It’s purple instead of red, white, and blue – wait, what?
I started to make a more traditionally hued card, I really did, but I just couldn’t find my mojo. I started looking through my stamp sets for inspiration and realized I was humming “America the Beautiful.” Just when I got to the line “purple mountain majesties” my eyes fell upon the Mountain Air stamp set. Light bulb! So I used the Mountain Air stamp set to create a scene of purple mountains, along with a purple lake and a purple sky. I imagined one of those sunsets with vibrant purple at the bottom (you know the ones I’m talking about, right?) that casts its purple glow on everything for a brief moment.
Be sure to visit all the stops on the hop! You don’t want to miss any of the great projects this group has to share!
If you are reading this in email, some photos may appear blurry, or may not appear at all. Please click here to see the post on my blog.
Gorgeous Grape card stock (CS) cut to 5-1/2″ x 8-1/2″, then scored in half at 4-1/4″
Purple Posy CS layer cut to 5-1/8″ x 3-7/8″
Whisper White Thick CS cut to 4″ x 1-1/8″
Whisper White CS cut to 5-1/4″ x 4″ for the inside of the card base
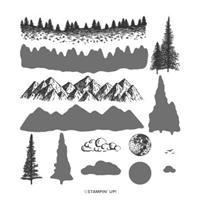
Stamped with the Mountain Air stamp set:
trees/water and first row of mountains in Gorgeous Grape ink across the center of the Purple Posy CS layer
second row of mountains in Highland Heather ink above the first row
third row of mountains in Highland Heather ink, stamped off once, above the second row
mountains upside down in the water in Highland Heather ink, stamped off once
inked up just the bottom (water) part of the tree/water stamp with Gorgeous Grape ink and stamped below the original water stamp
Stamped with the Make a Difference stamp set:
“Happy 4th” in Gorgeous Grape ink onto the strip of Whisper White Thick CS
Cut using the Timeless Label Punch:
both ends of the sentiment – I inserted each end down into the back of the punch to cut.
Assembled the card:
burnished the fold in the card base with a Bone Folder
Purple Posy CS layer glued onto the front of the card base
sentiment adhered onto the Purple Posy CS layer using Stampin’ Dimensonals
5-1/4″ x 4″ Whisper White CS glued onto the inside of the card base
S
Here’s the 4th of July 06-2020 IRBH:
Thank you for hopping along with us. I hope you’ll hop along to the next stop on the hop, Jennifer Spiller at Westside Paper Creations. There’s an awful lot of inspiration to be found in this group, and you don’t want to miss any of it!
If you get stuck during the Blog Hop, please use this line-up as a guide:
Inspired by a trip to Pikes Peak in 1893, Katherine Lee Bates (1859-1929) wrote the poem America the Beautiful, which first appeared in print on July 4, 1895 in The Congregationalist, a weekly journal. Ms. Bates revised the lyrics in 1904 and again in 1913. It has 8 verses! Click here to download it.
S
Here are today’s colors:
You can click on each one to see all the products that come in that color!
Click on these images for more details and to purchase. If you are reading this post in email, the product images may not show up. Please click hereto see the post on my blog.
Gift Certificates are available in any U.S. dollar amount from me. Contact mefor details.
Have you shopped from me within the past year? Join my private VIP Facebook groupfor exclusive project tutorials and more!
Join my team and enjoy a 20% discount (or more) on all your purchases! You choose $125 in products and pay only $99, and get free shipping! No obligation! No selling required!
Whether you’re a hardcore stamper or just starting out, you’ll love the product suites in the new Stampin’ Up! 2020-2021 Annual Catalog. There are 10 of them! Products in each suite coordinate perfectly, taking the stress out of combining colors, designs, and accents. I’m highlighting them today because I want to make sure you know about them all. There are videos for some of the suites, which I’ve included below.
You can see and purchase all the suites and the products in them in my online store here.
If you are reading this in email, some photos may appear blurry, or may not appear at all. Please click hereto see the post on my blog.
The Whale of a Time Suite Collection includes
* Whale Done Photopolymer Stamp Set (10% off)
* Whale of a Time 6″ x 6″ (15.2 x 15.2 cm) Designer Series Paper
* Whale of a Time Sequins
* Pool Party 3/8″ (1 cm) Sheer Ribbon
* Whale Punch (10% off)
* Seabed 3D Embossing Folder
S
World of Good Suite:
The World of Good Suite Collection includes * Beautiful World Cling Stamp Set (10% off) * World of Good Specialty Designer Series Paper * Brass Foil Sheets * World of Good Memories & More Card Pack * Antiqued Corners & Slides * Early Espresso 1/4″ (6.4 mm) Faux Suede Trim * Old World Paper 3D Embossing Folder * World Map Dies (10% off)
S
Artistry Blooms Suite:
The Artistry Blooms Suite includes:
* Hand-Drawn Blooms Bundle (Hand-Drawn Blooms Stamp Set + Banner Blooms Dies) * Artistry Blooms Designer Series Paper * Rainbow Glimmer Paper * Artistry Blooms Sequins
S
Peony Garden Suite:
The Peony Garden Suite Collection includes * Prized Peony Cling Stamp Set (10% off) * Peony Garden Designer Series Paper * Square Vellum Doilies * Elegant Faceted Gems * Gray Granite 1/4″ (6.4 mm) Shimmer Ribbon * Dainty Diamonds 3D Embossing Folder * Peony Dies (10% off)
S
Ornate Garden Suite:
The Ornate Garden Suite Collection includes * Ornate Style Cling Stamp Set (10% off) * Ornate Thanks Photopolymer Stamp Set (10% off) * Ornate Borders Dies (10% off) * Ornate Layers Dies (10% off) * Ornate Floral 3D Embossing Folder * Ornate Garden Ribbon Combo Pack * Ornate Garden Specialty Designer Series Paper * Gilded Gems
S
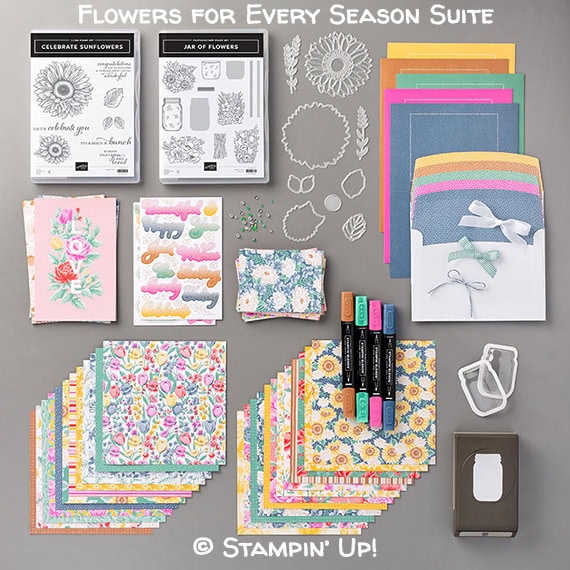
Flowers for Every Season Suite:
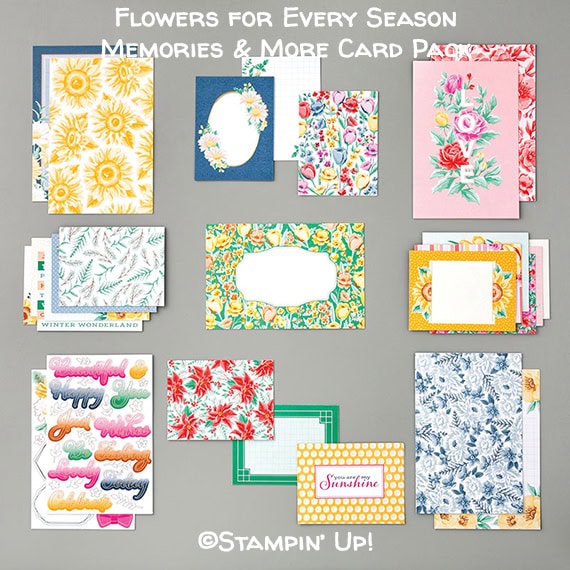
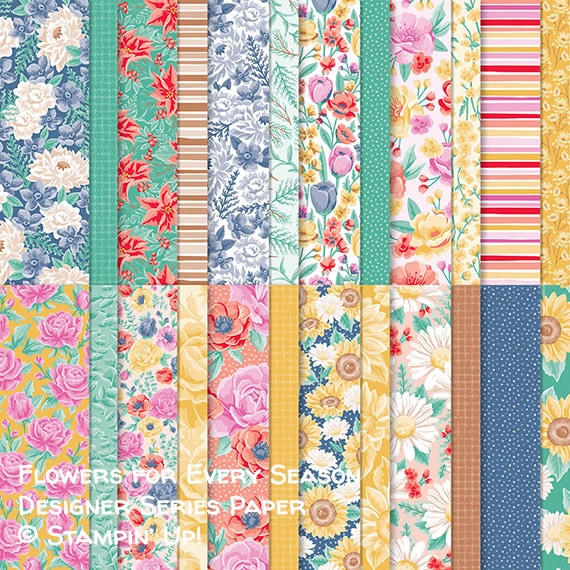
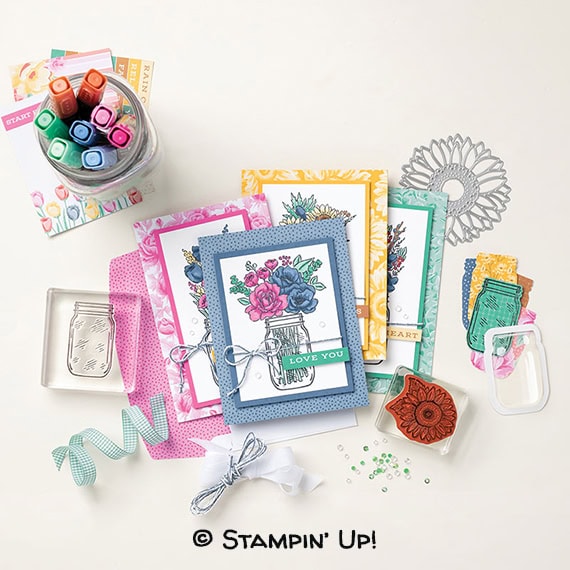
The Flowers for Every Season Suite Collection includes: * Jar of Flowers Photopolymer Stamp Set (10% off) * Jar Punch (10% off) * Celebrate Sunflowers Cling Stamp Set (10% off) * Sunflower Dies (10% off) * Flowers for Every Season 6″ x 6″ (15.2 x 15.2 cm) Designer Series Paper * Flowers for Every Season Memories & More Card Pack * Flowers for Every Season Memories & More Cards & Envelopes * Mason Jar Shaker Domes * Flowers for Every Season Ribbon Combo Pack * Flowers for Every Season Gems * Cinnamon Cider Stampin’ Blends Combo Pack * Just Jade Stampin’ Blends Combo Pack * Magenta Madness Stampin’ Blends Combo Pack * Misty Moonlight Stampin’ Blends Combo Pack
S
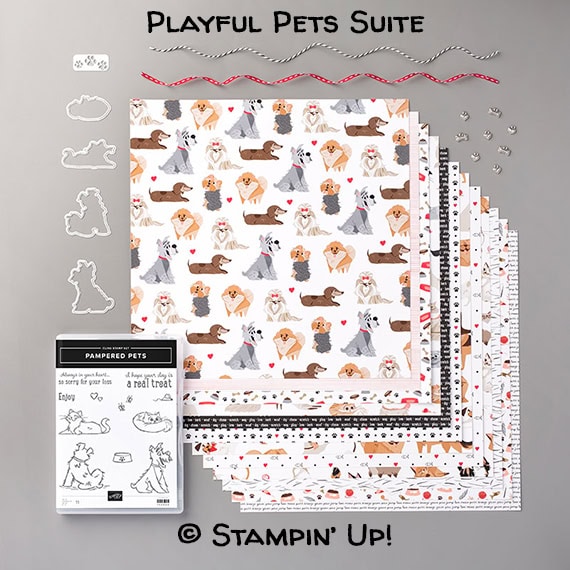
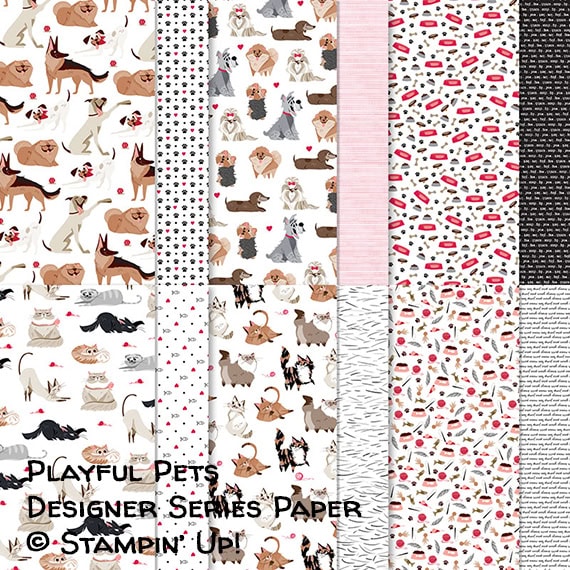
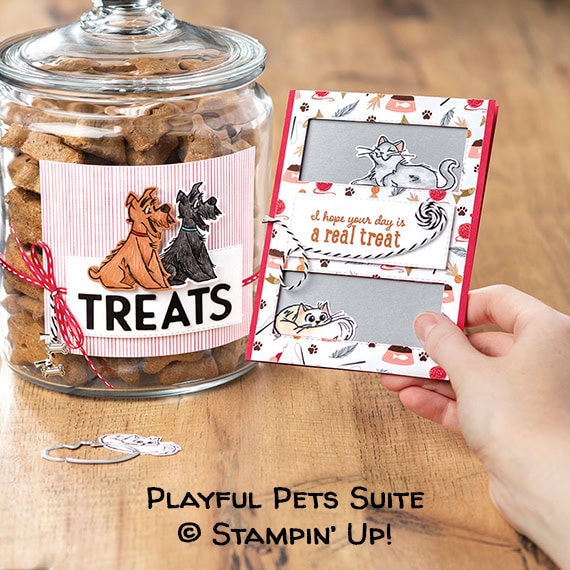
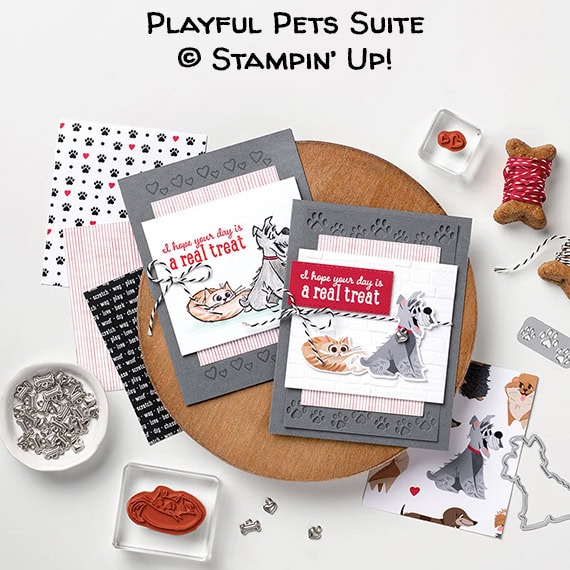
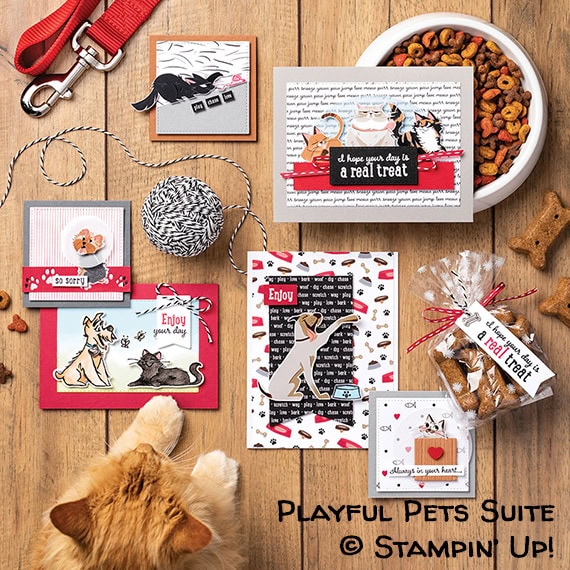
Playful Pets Suite:
Celebrate pets with the whimsical designs in the Playful Pets Suite Collection by Stampin’ Up! The Playful Pets Suite Collection includes * Pampered Pets Cling Stamp Set (10% off) * Playful Pets Designer Series Paper * Playful Pets Trim Combo Pack * Playful Pets Trinkets * Pets Dies (10% off)
S
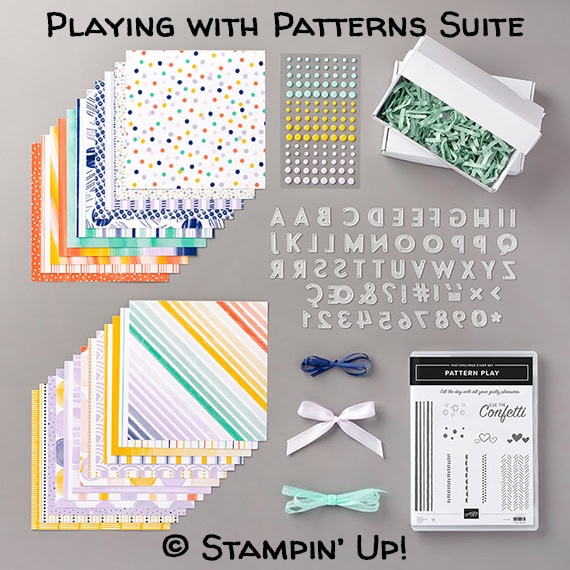
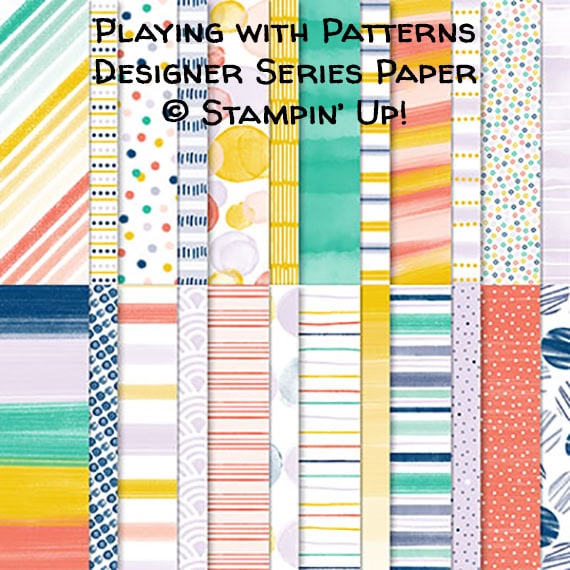
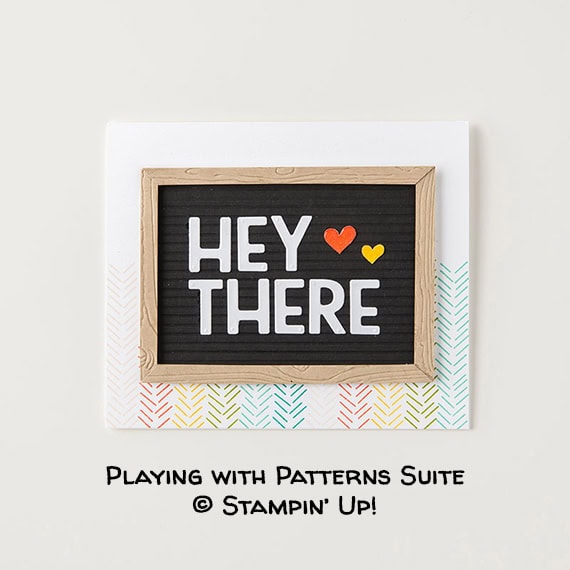
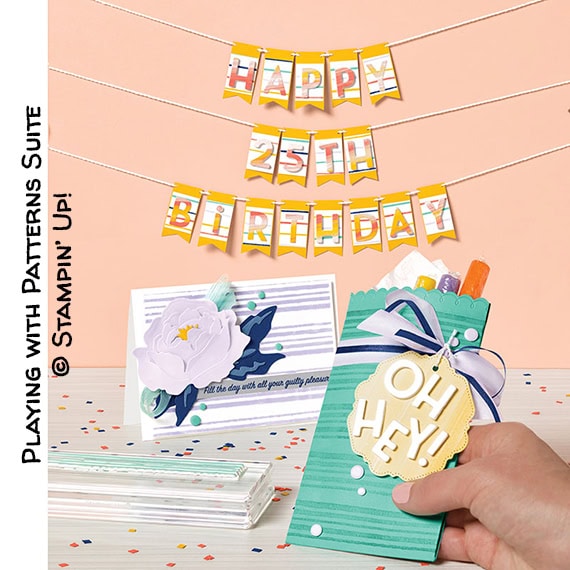
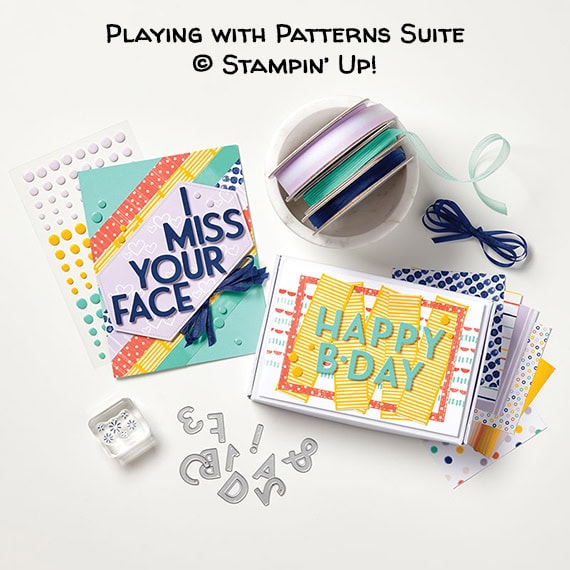
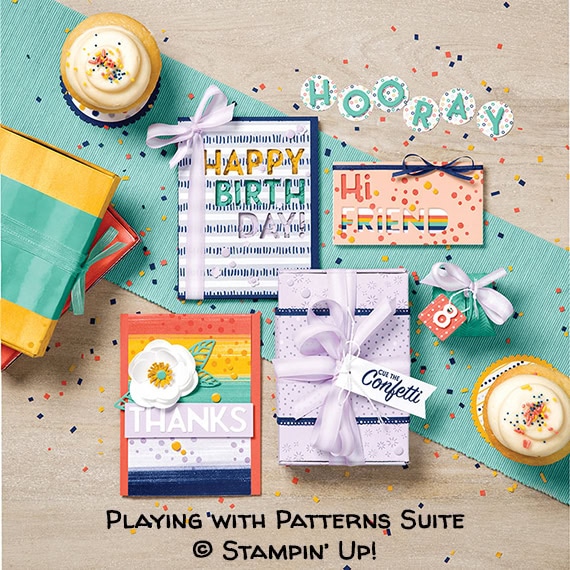
Playing with Patterns Suite:
The Playing with Patterns Suite Collection includes * Pattern Play Photopolymer Stamp Set (10% off) * Playing with Patterns 6″ x 6″ (15.2 x 15.2 cm) Designer Series Paper * Playing with Patterns Ribbon Combo Pack * Mini Paper Pumpkin Boxes * Playing with Patterns Resin Dots * Playful Alphabet Dies (10% off)
S
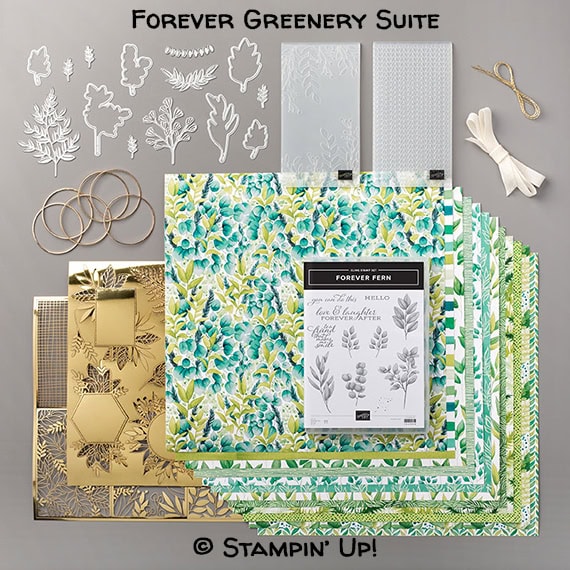
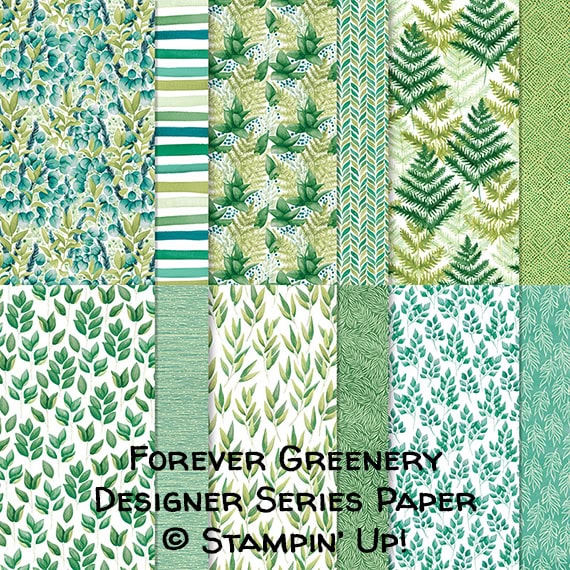
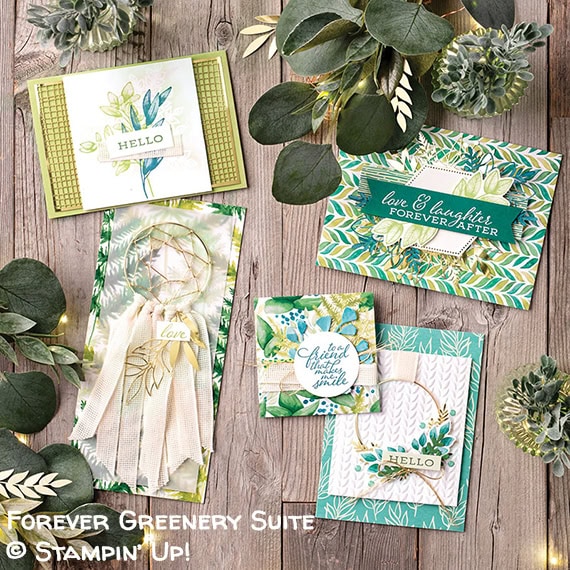
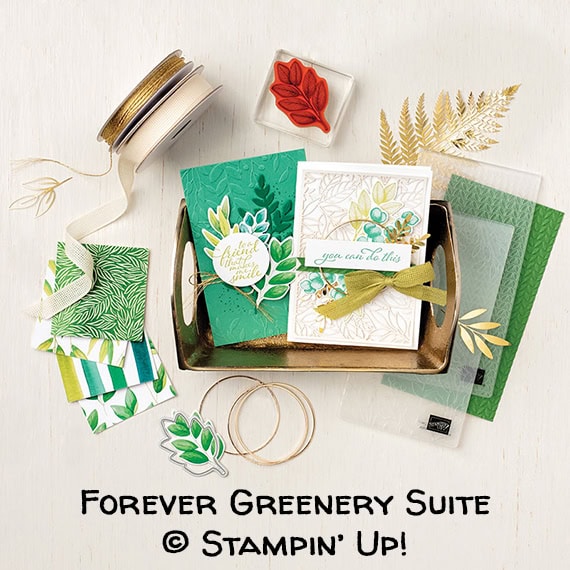
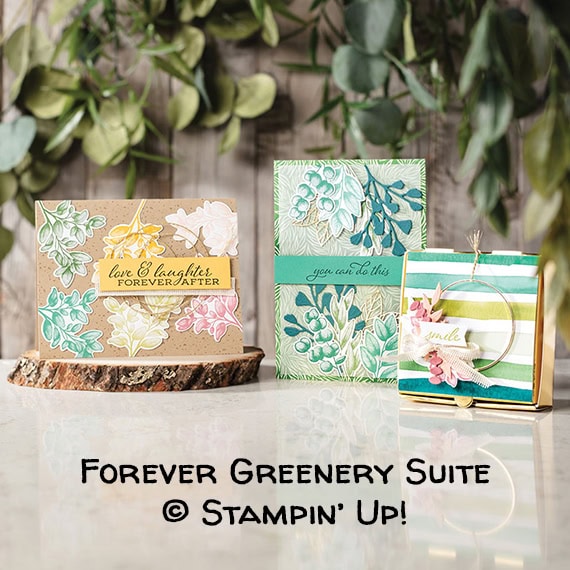
Forever Greenery Suite:
The Forever Greenery Suite Collection by Stampin’ Up! features watercolor patterns and images in a glorious array of green hues. This suite collection is also available in French, German, and Dutch. The Forever Greenery Suite Collection includes * Forever Fern Cling Stamp Set (10% off) * Forever Greenery Designer Series Paper * Forever Gold Laser-cut Specialty Paper * Gold Hoops Embellishments * Forever Greenery Trim Combo Pack * Greenery Embossing Folders * Forever Flourishing Dies (10% off)
S
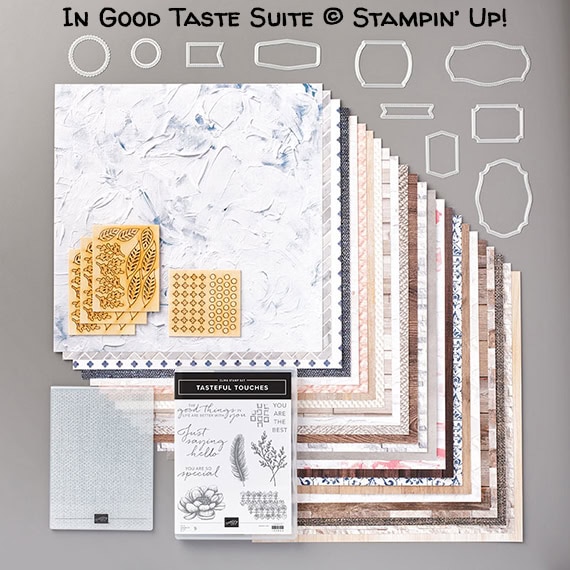
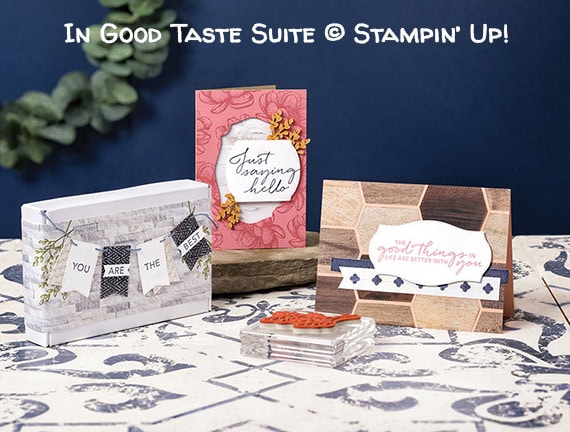
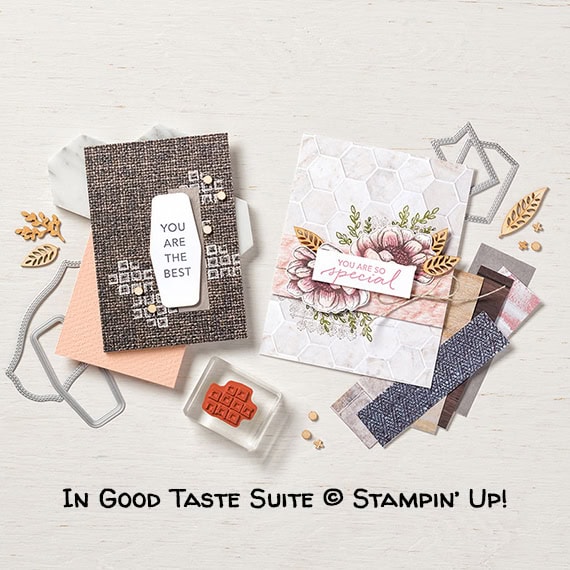
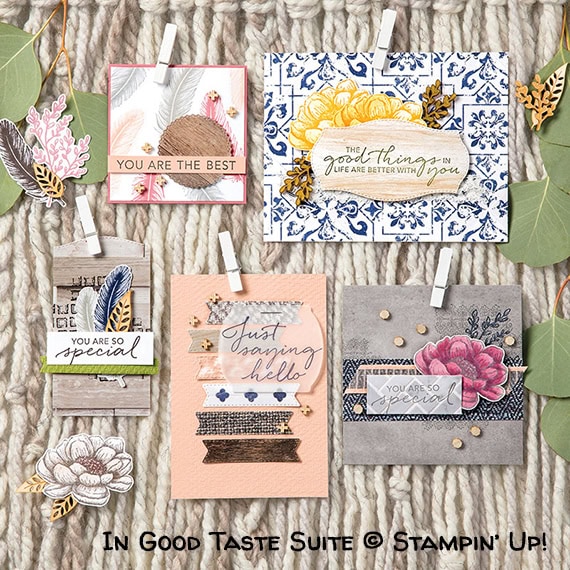
In Good Taste Suite:
The In Good Taste Suite Collection includes * Tasteful Touches Cling Stamp Set (10% off) * In Good Taste Designer Series Paper * In Good Taste Elements * Tasteful Textile 3D Embossing Folder * Tasteful Labels Dies (10% off) S
If you are reading this post in email, the images may be blurry or may not show up at all. Please click hereto see the post on my blog.
Gift Certificates are available in any U.S. dollar amount from me. Contact mefor details.
Have you shopped from me within the past year? Join my private VIP Facebook groupfor exclusive project tutorials and more!
Join my team and enjoy a 20% discount (or more) on all your purchases! You choose $125 in products and pay only $99, and get free shipping! No obligation! No selling required!
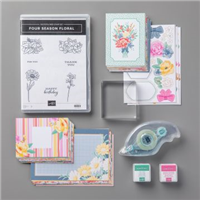
Have you seen the new Beginner Brochure from Stampin’ Up!? Even seasoned stampers will love these new products – some are in the Annual Catalog and some are exclusive to the Beginner Brochure. Today I used the items on page 5 of the brochure to create 10 cards with envelopes. Click here to see Stampin’ Up!’s video on this amazing kit. Talk about #simplestamping! They’re just stamps, ink, and paper. Of course, you can add items to them to make them even more spectacular, like embellishments, ribbons, Stampin’ Dimensionals, other ink colors, etc.
You can get everything I used (except the Bone Folder) using Item # 155422, or you can purchase them separately. You can see all the product options near the bottom of this post.
Click here to download the 2020-2021 Beginner Brochure pdf file, or click here to request that a copy be mailed to you. Click here to see Stampin’ Up!’s video on this amazing kit.
If you are reading this in email, some photos may appear blurry, or may not appear at all. Please click here to see the post on my blog.
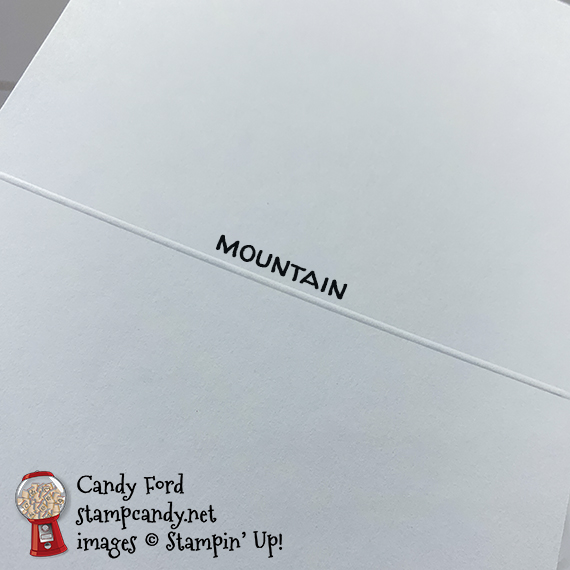
When a piece of card stock is scored, on one side there is a valley (where the paper in indented) and on the other side there is a mountain (where the paper sticks up.) For best results, fold the card so the valley is on the outside and the mountain is on the inside. Burnish the fold with a Bone Folder for a nice crisp fold. When you open the card, you will see a bead down the fold on the inside. This may seem counterintuitive, but you will get way fewer “paper hairs” and rips if you do it this way.
S
Here’s what I did:
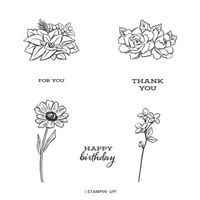
Stamped with the Four Season Floral stamp set:
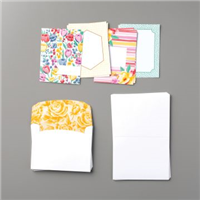
various sentiments and flowers in Magenta Madness and Just Jade inks onto the layer cards included in the Flowers for Every Season Cards & More
various flowers in Magenta Madness and Just Jade inks onto the fronts or the back flaps of the envelopes
Assembled the card:
burnished the folds in the card bases with a Bone Folder
stamped layer cards glued onto the fronts of the card bases
That’s it!
S
Here are the colors in the cards:
You can click on each one to see all the products that come in that color!
Click on these images for more details and to purchase. If you are reading this post in email, the product images may not show up. Please click hereto see the post on my blog.
Gift Certificates are available in any U.S. dollar amount from me. Contact mefor details.
Have you shopped from me within the past year? Join my private VIP Facebook groupfor exclusive project tutorials and more!
Join my team and enjoy a 20% discount (or more) on all your purchases! You choose $125 in products and pay only $99, and get free shipping! No obligation! No selling required!