Dec 16, 2015 | Catalogs, Classes, Club, Deals, Events, Kits, New Products, Occasions, Open House, Paper Pumpkin, Parties, Sale-A-Bration, Sales |

There are so many great things coming up, and I want to make sure you don’t miss any of them. Here is a summary of some current and upcoming events. They are all explained in more detail below. So grab your calendar and plan to take some time for yourself!
Now to Jan 4 – Stampin’ Up’s Year End Sale
Jan 3 – Occasions and Sale-a-bration Open House – RSVP Jan 1
Jan 3 – Paper Pumpkin Party (for December kit) – RSVP Jan 1
Jan 4 – Stamp Club – RSVP Jan 1**
Jan 5 to May 31 – Occasions Catalog is live
Jan 5 to Mar 31 – Sale-a-bration
Jan 17 – Team Meeting – RSVP Jan 14**
Jan 18 – Card Class – RSVP Jan 15**
Jan 24 – Retired BOGO SALE
Jan 26 – Bloomin’ Love Bundle Class – RSVP Jan 12**
Jan 28 – Paper Pumpkin Party (for January kit) – RSVP Jan 26**
Jan 30 – Perpetual Calendar Kit Class – RSVP Jan 16**
Feb 1 – Stamp Club – RSVP Jan 29**
** These are recurring monthly events. Occasionally the date may need to be changed due to scheduling conflicts, holidays, etc.
Stamp Club – 1st Wednesday 6:30-9:00 PM (1st Monday in Jan & Feb)
Team Meeting – 3rd Sunday 2-5 PM
Card Class – 3rd Monday 6:30-9:00 PM
Bundle Class – 4th Tuesday 6:30-9:00 PM
Paper Pumpkin Party – last Thursday 6:30-9:00 PM
Kit Class – 2nd Saturday 1-3 PM


Click here to see the low prices!
Stampin’ Up! is having their big year end sale right now.
Details:
- Promotion Dates: Now through January 4, 2016.
- No minimum purchase required.
- No refunds or exchanges on Year-End Sale items.
- Items offered during the Year-End Sale are while supplies last.
- Year-End Sale orders are eligible for Stampin’ Rewards with qualifying orders ($150+.)
- Following the Year-End Sale, some remaining items may stay in the Clearance Rack. Other items may be removed from the Clearance Rack to be added at another undetermined time.
- Deadline for Online orders in US according to time zone:
- Pacific Time – January 4, 2016 at 10:50PM
- Mountain Time – January 4, 2016 at 11:50 PM
- Central Time – January 5, 2016 at 12:50 AM
- Eastern Time – January 5, 2016 at 1:50 AM
Click here to see the low prices!

Occasions Catalog
January 5 – May 31, 2016
The brand new Occasions Catalog goes live January 5, 2016! There are 51 pages of new Spring products!

Sale-a-bration
January 5 – March 31
One of the biggest events of the year! There are three ways to get free product:
- Shop – for every $50 you spend, you get one item from the Sale-a-bration catalog FREE!
- Join – when you buy the starter kit for $99 you get an extra $30 in product. That’s $155 in the products of your choice for just $99, plus free shipping!
- Host – host a qualifying party and get $25 extra in Stampin’ Rewards!
On pages 16-19 are some limited time Sale-a-bration products which are available only through February 15. But watch for more limited items coming-out on February 16!
Let me know if you need the new catalogs. (If you already have a demonstrator, please get your catalog from them.)
Location and parking
All the events below will be held at 1621 Executive Park Lane NE, Atlanta, GA. Parking is limited and mostly reserved, so please park along the street (Woodcliff) behind the building and walk around to the front. Thank you!

Featuring products from the brand new
Stampin’ Up! 2016
Occasions and Sale-a-bration Catalogs
Sunday, January 3, 2016, Noon until 4:00 pm
1621 Executive Park Lane NE, Atlanta, GA 30329
RSVP: candy@stampcandy.net, subject line “Open House”
Please respond by January 1 so I will know how many projects to prepare.
There is no fee to attend!
Pick up your new 2016 Occasions and Sale-a-bration Catalogs! (If you already have a Demonstrator, please get your catalog from them.)
See and use the new products, and place your order before anyone else!
Make & Take – whether you’re crafty or not, you’ll enjoy playing with the products!
Prize drawings!
Bring a friend (new to me) and receive a free gift!
Light refreshments provided.
Learn about:
- card making
- memory keeping
- creating custom home and party decor
- Project Life by Stampin’ Up!
- Paper Pumpkin kit subscription
- monthly Stamp Club
- classes
- private parties
- how to receive free products
- how to get the starter kit for maximum savings

Paper Pumpkin Party!
Sunday, January 3, 2016, 5-7 PM
1621 Executive Park Lane NE, Atlanta, GA 30329
RSVP: candy@stampcandy.net, subject line “PPP”
Please respond by January 1 so I’ll know how many people to set up for.
After the Open House on the 3rd, we’ll take a break, then have our monthly Paper Pumpkin party, where we’ll assemble our kits together.
You can see a completed kit, as well as some alternative projects using the kit.
Bring your December Paper Pumpkin kit, scissors, adhesive, and the acrylic block that came in your first kit. (I have adhesive you can buy if you need it.)
If you are one of my subscribers or one of my team members, it’s free! Otherwise, there is just a $5 fee to attend.
Light refreshments provided.
Pumpkin what?
Are you wondering just what the heck Paper Pumpkin is? Well, it’s a little box of crafting goodness that comes to you in the mail each month. Each kit includes everything you need to complete that month’s project, except scissors and adhesive – often they even include adhesive! In your first kit, you get a clear acrylic block to use with all future kits. Everything is cut and measured for you so all you have to do is stamp and assemble it.
The stamp sets that come with the kits are exclusive to Paper Pumpkin. You’ll never see them again. And did I mention that subscribers, and only subscribers, may purchase past kits and kit refills? There are so many perks to subscribing!
If you’re not yet a Paper Pumpkin subscriber, and would like to see what all the fuss is about, come to the party and you can play with mine for just $5! Subscribe at the party and get a free gift, and your party fee refunded for that night!
How do you get it?
Subscribing is very easy.
Prepaid
1) Add a prepaid subscription to any online order here. It applies toward your host rewards!
2) You’ll receive a confirmation email with a redemption code.
3) Go to the Paper Pumpkin web site here, click Join and enter the code. Then you will enter your mailing address, etc.
4) To receive the current month’s kit, you must join by the 10th of the month.
Month to Month
1) Go to the Paper Pumpkin web site here and join. You will enter your mailing address, credit card number, etc.
2) Your credit card will be billed $19.95 each month – this includes shipping.
3) To receive the current month’s kit, you must join by the 10th of the month.

Stamp Club
*Monday, January 4, 2016, 6:30-9:00 PM
1621 Executive Park Lane NE, Atlanta, GA 30329
RSVP: candy@stampcandy.net, subject line “Stamp Club”
Please respond by January 1 so I’ll know how many projects to prepare.
To attend as a guest, just to try it out, there is a $10 fee, which is refunded if you join and place your first order that night.
- meet once a month (*on the first Wednesday, unless there is a scheduling conflict)
- make at least 2 projects each month, sometimes more
- learn new techniques
- laugh and have fun
- have light refreshments
- get new catalogs and see new products as I receive them (before they come out)
- place an order of $25 or more each month (before tax & shipping)
- members take turns receiving Stampin’ Rewards
- 6 month commitment so all members will get their benefits
- bring your basic stamping kit (scissors, bone folder, adhesive) and I supply the rest. I have adhesives on hand you can buy.

Candy Hearts Team Meeting
Sunday, January 17, 2016, 2-5 PM
1621 Executive Park Lane NE, Atlanta, GA 30329
RSVP: candy@stampcandy.net, subject line “Team Meeting”
Please respond by January 14 so I’ll know how many projects to prepare.
Want to see how much fun it is to be a Stampin’ Up! Demo? Whether you just want a big discount on your own stamping supplies, or you want to share your love of stamping with your friends, come to our meeting and see what it’s all about.
Make & Takes, snacks, prizes, and more. $5 fee at the door. Your first meeting as a guest or new demonstrator is free!
Bring your basic stamping kit (scissors, bone folder, adhesive) and I supply the rest. I have adhesives on hand you can buy.
Free gift if you join at the meeting.
Monthly Card Class
Monday, January 18, 2016, 6:30-9:00 PM
1621 Executive Park Lane NE, Atlanta, GA 30329
RSVP: candy@stampcandy.net, subject line “Card Class”
Please respond by January 15 so I’ll know how many projects to prepare.
We’ll be using some of the brand new products, as well as some tried and true favorites.
Make 6 cards for $15. You may make as many as you want in the time allotted at $2.50 each after the first 6. There will be multiple designs to choose from. You can choose which ones to make and how many of each design.
Bring your basic stamping kit (scissors, bone folder, adhesive) and I supply the rest. I have adhesives on hand you can buy.
The $15 fee will be refunded with any order of $25 or more placed at the class.

RETIRED BOGO SALE
Sunday, January 24, 2016, 1-4 PM
1621 Executive Park Lane NE, Atlanta, GA 30329
Please park along the street (Woodcliff) behind our building.
I have so many retired products that need new homes! Stamps, paper, kits, embellishments, etc. Many are brand new, never opened.
BOGO! For every dollar you spend on retired items, you get a dollar toward an order of new products! For example, if you spend $50 on retired products, you get $50 toward a new order! You just add tax and shipping. So while you’re shopping the retired items, remember that for everything you buy, you’re actually getting twice that amount in merchandise! Now that’s a sweet deal!
Put together your wish list before you come, to make your order go more smoothly!
Do you have retired Stampin’ Up! products that you’d like to sell so you can order new products? Bring them to me by January 22 to add to the sale. Every dollar you sell goes toward an order of new products! All products must be marked with price and your ID – I recommend using the same washi tape for each item so we’ll know which items are yours when people are checking out. Feel free to contact me for more info: candy@stampcandy.net or 404-661-5222.
Don’t miss it!

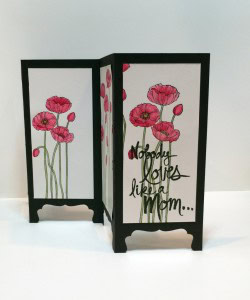
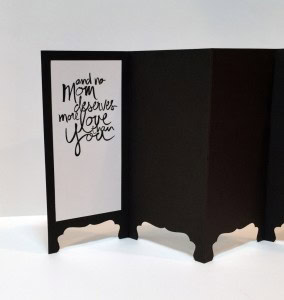
Bloomin’ Love Bundle Class
Tuesday, January 26, 2016, 6:30-9:00 PM
1621 Executive Park Lane NE, Atlanta, GA 30329
RSVP: candy@stampcandy.net, subject line “Bundle Class”
Please respond by January 12 so I’ll have time to order the bundles.
We’ll use the new Bloomin’ Love Bundle to create some beautiful projects for anyone you love. Just $45 and you get to keep the stamp set and the die!
Bring your basic stamping kit (scissors, bone folder, adhesive) and I supply the rest. I have adhesives on hand you can buy.
Paper Pumpkin Party!
Thursday, January 28,2016, 6:30-9:00 PM
1621 Executive Park Lane NE, Atlanta, GA 30329
RSVP: candy@stampcandy.net, subject line “PPP”
Please respond by January 26 so I’ll know how many people to set up for.
This is our monthly Paper Pumpkin party, where we assemble our kits together.
You can see a completed kit, as well as some alternative projects using the kit.
Bring your January Paper Pumpkin kit, scissors, adhesive, and the acrylic block that came in your first kit. (I have adhesive you can buy if you need it.)
If you are one of my subscribers or one of my team members, it’s free! Otherwise, there is just a $5 fee to attend.
Light refreshments provided.
Pumpkin what?
Are you wondering just what the heck Paper Pumpkin is? Well, it’s a little box of crafting goodness that comes to you in the mail each month. Each kit includes everything you need to complete that month’s project, except scissors and adhesive – often they even include adhesive! In your first kit, you get a clear acrylic block to use with all future kits. Everything is cut and measured for you so all you have to do is stamp and assemble it.
The stamp sets that come with the kits are exclusive to Paper Pumpkin. You’ll never see them again. And did I mention that subscribers, and only subscribers, may purchase past kits and kit refills? So many perks to subscribing!
If you’re not yet a Paper Pumpkin subscriber, and would like to see what all the fuss is about, come to the party and you can play with mine! Subscribe at the party and get a free gift and your party fee refunded for that night!
How do you get it?
Subscribing is very easy.
Prepaid
1) Add a prepaid subscription to any online order here. It applies toward your host rewards!
2) You’ll receive a confirmation email with a redemption code.
3) Go to the Paper Pumpkin web site here, click Join and enter the code. Then you will enter your mailing address, etc.
4) To receive the current month’s kit, you must join by the 10th of the month.
Month to Month
1) Go to the Paper Pumpkin web site here and join. You will enter your mailing address, credit card number, etc.
2) Your credit card will be billed $19.95 each month – this includes shipping.
3) To receive the current month’s kit, you must join by the 10th of the month.

Perpetual Calendar Kit Class
Saturday, January 30, 2016, 1-3 PM
1621 Executive Park Lane NE, Atlanta, GA 30329
RSVP: candy@stampcandy.net, subject line “Kit Class”
Please respond by January 16 so I’ll have time to order the kits.
The easiest way to keep track of birthdays, anniversaries, and other yearly events is with a perpetual calendar. And what’s better than one you’ve created yourself? You can use this calendar year after year, adding new events to it as needed. They also make wonderful gifts!
We’ll use the Perpetual Birthday Calendar Project Kit and the coordinating Perpetual Birthday Calendar stamp set. Just $50 and you get to keep the stamp set!
Bring your basic stamping kit (scissors, bone folder, adhesive) and I supply the rest. I have adhesives on hand you can buy.
Stamp Club
*Monday, February 1, 2016, 6:30-9:00 PM
1621 Executive Park Lane NE, Atlanta, GA 30329
RSVP: candy@stampcandy.net, subject line “Stamp Club”
Please respond by January 29 so I’ll know how many projects to prepare.
To attend as a guest, just to try it out, there is a $10 fee, which is refunded if you join and place your first order that night.
- meet once a month (*on the first Wednesday, unless there is a scheduling conflict)
- make at least 2 projects each month, sometimes more
- learn new techniques
- laugh and have fun
- have light refreshments
- get new catalogs and see new products as I receive them (before they come out)
- place an order of $25 or more each month (before tax & shipping)
- members take turns receiving Stampin’ Rewards
- 6 month commitment so all members will get their benefits
- bring your basic stamping kit (scissors, bone folder, adhesive) and I supply the rest. I have adhesives on hand you can buy.
Please don’t hesitate to ask me any questions! Email candy@stampcandy.net, call/text 404-661-5222, or leave a question/comment below.
Thanks for stopping by today, and Sweet Stamping!


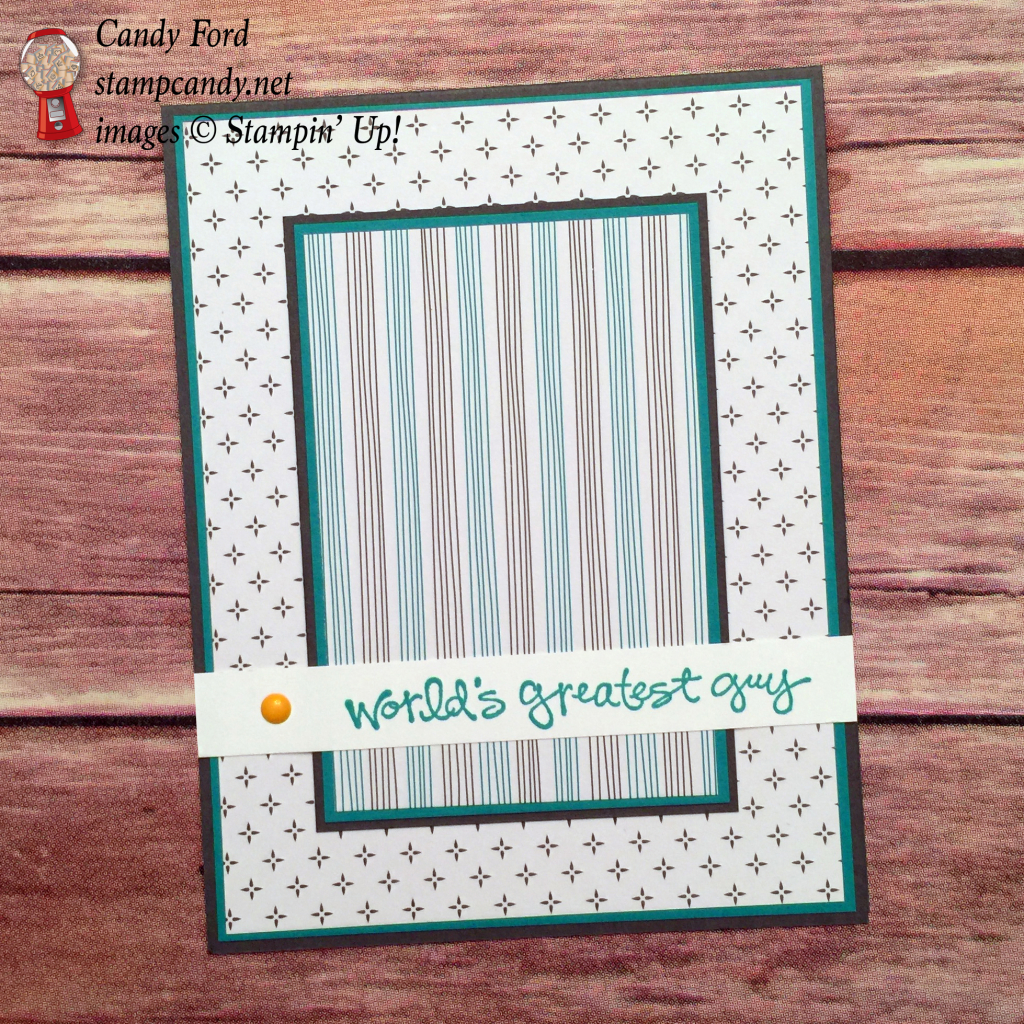
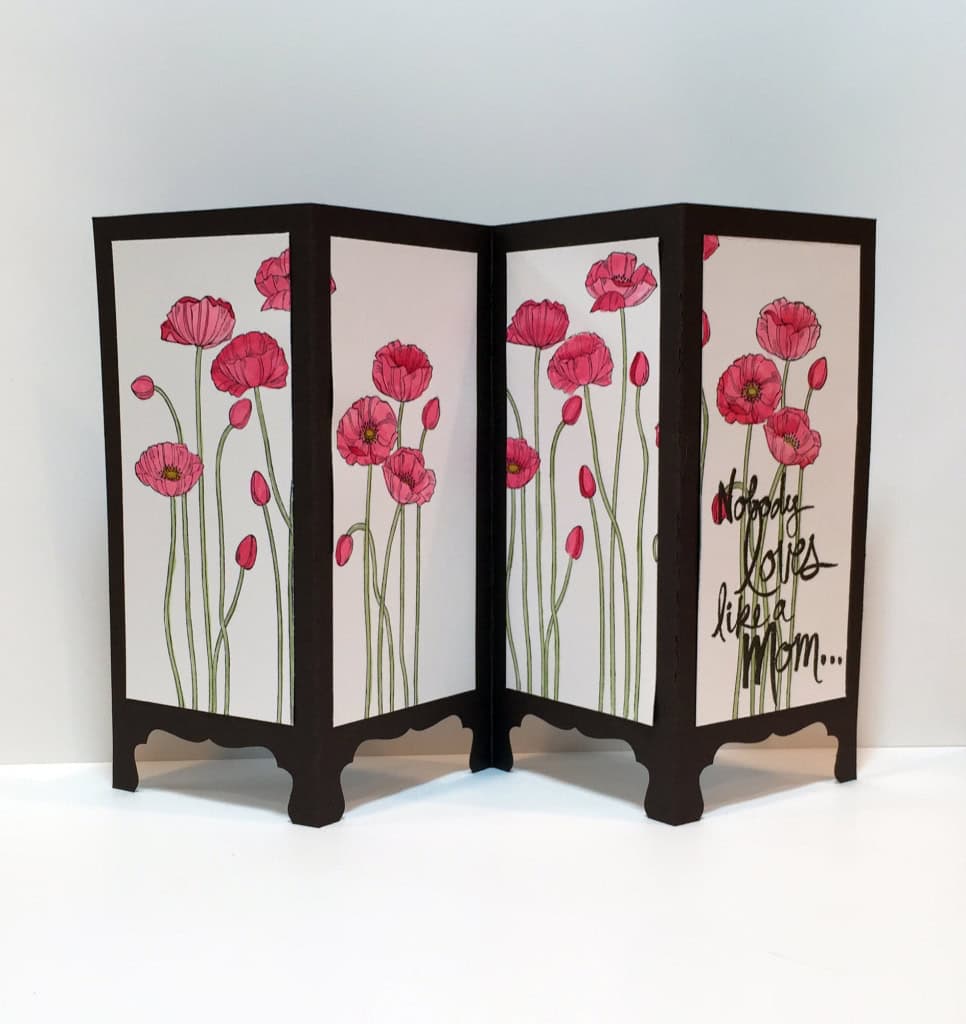
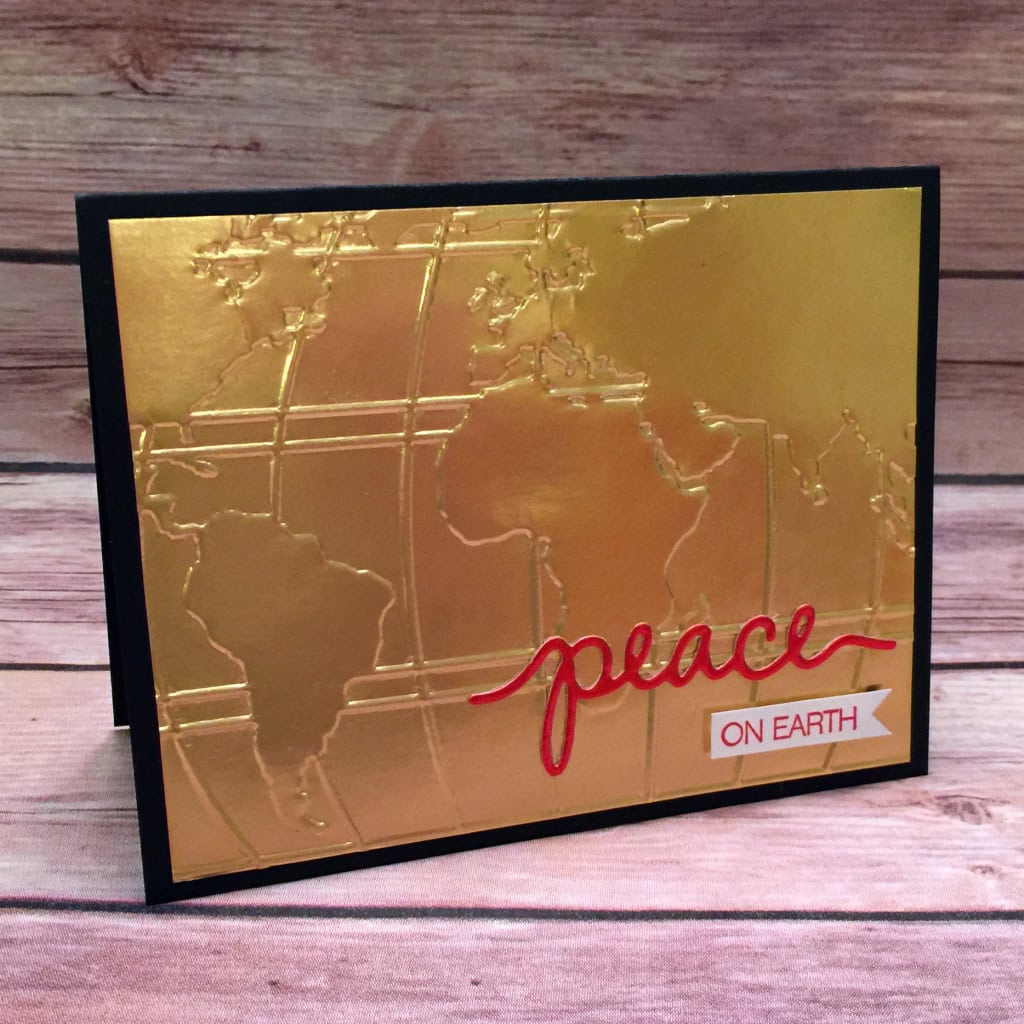 Here’s what we used for the card: