Dec 23, 2020 | Cards, Christmas, Club, Gallery, Holiday, Retiring Products, Techniques |
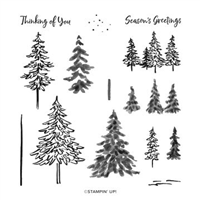
Today I’m sharing an envelope shaker card that we made at my December Stamp Club meeting. We used the In the Pines stamp set, Pine Woods Dies, In Good Taste Designer Series Paper, Sequins for Everything, and a Clear Medium Envelope. You won’t believe how quick and easy it is!
If you are reading this in email, some photos may appear blurry, or may not appear at all. Please click here to see the post on my blog.
S envelope shaker envelope shaker envelope shaker envelope shaker
Here’s what I made:
It looks like a bunch of pine trees growing up against a huge stone wall.

S
Here’s what I did:
Cut and scored with my paper trimmer:
- Shaded Spruce card stock (CS) cut to 4-1/4″ x 11″, then scored in half at 5-1/2″
- In Good Taste Designer Series Paper (DSP) layer cut to4″ x 5-1/4″
- Whisper White CS cut to 4″ x 5-1/4″ for the inside of the card base (Oops! I forgot to photograph the inside.)
Stamped with the In the Pines stamp set:
- trees in Shaded Spruce ink onto the DSP layer
- sentiment in Shaded Spruce ink onto the Whisper White CS
Cut using the Pine Woods Dies:
- 3 trees from a scrap of Shaded Spruce CS
Created the envelope shaker:
- put the DSP layer in a clear medium envelope, making sure it was snugly down in one corner
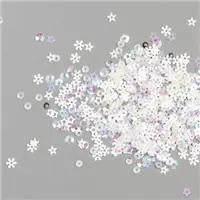
- put some Sequins for Everything in the envelope in front of the DSP layer
- closed the envelope flap, folding down the envelope to the edge of the DSP layer
- folded over the extra envelope to the back and secured with Tear & Tape (Stampin’ Seal or Seal + would work well, too.)
Assembled the card:
- burnished the fold in the card base with a Bone Folder
- envelope shaker adhered onto the front of the card base using Tear & Tape
- 3 die cut trees glued together, then adhered onto the front of the envelope using Stampin’ Seal+ (I pulled off the little strips and placed them on the back of the trees where they wouldn’t show
- Whisper White CS glued onto the inside of the card base
S
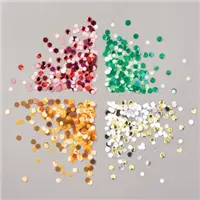
Here are today’s main colors:
You can click on each one to see all the products that come in that color!
S
Here’s what I used:
The In the Pines stamp set and Pines Woods Dies are retiring. The dies have already sold out, but the stamp set is still available. Click on the images below for more details and to purchase. If you are reading this post in email, the product images may not show up. Please click here to see the post on my blog.
Supply List. <— Click for a clickable and printable list of the products!
S
Here’s some news: Whisper White is going away
The facility that manufactures Whisper White paper is closing due to COVID-19. But don’t fret. The new Basic White products are in the works! No other colors are affected. The following items are now available while supplies last with an order limit of 2 per item per order.
- Cardstock, Whisper White 12″ x 12″ (124302)
- Cards & Envelopes, Assorted Memories & More (149710)
- Cards & Envelopes, Whisper White Note (131527)
- Envelopes, Whisper White 3″ x 3″ (145829)
- Cardstock, Whisper White 8-1/2″ x 11″ (100730)
- Cardstock, Whisper White 8-1/2″ x 11″ Thick (140272)
- Envelopes, Whisper White Medium (107301)
S
Here’s the Year-End Closeout
All retiring items will be available through 4 January 2021, or while supplies last. Click on the image to shop now!

S
Here’s the Curvy Celebrations offering:
Click the image to see it in my online store. The Curvy Christmas stamp set and Classic Christmas Designer Series Paper are available only through January 4, or while supplies last!

S
Here’s the new catalog:
Click the image below to request your January-June 2021 Mini Catalog AND Sale-a-bration Brochure:


S
Here are some helpful links:
S
Thanks for stopping by today, and Sweet Stamping!

Dec 22, 2020 | Cards, Christmas, Gallery, Holiday, Techniques |
Today I’m sharing another card we made at my Stamp Club’s December virtual gathering. It could be a Christmas holiday card, or just a wintery thinking of you card. We used the In the Pines stamp set, Snow Globe Scenes Dies, Snow Globe Shaker Domes, and Snowflake Sequins to make this lovely shaker dome card.
If you are reading this in email, some photos may appear blurry, or may not appear at all. Please click here to see the post on my blog.
S Snow Globe Snow Globe Snow Globe Snow Globe
Here’s what I made:


S
Here’s what I did:
Cut and scored with my paper trimmer:
- Whisper White Thick card stock (CS) cut to 5-1/2″ x 8-1/2″, then scored in half at 4-1/4″
- Whisper White Thick CS layer cut to 5-1/4″ x 4″
Cut using the Snow Globe Scenes Dies:
- globe shaped hole in the white layer
- globe base from a scrap of a Silver Foil Sheet
Stamped with the In the Pines stamp set:
- First I laid the die cut layer on the card base where it would later be adhered, and used a pencil to lightly trace the shape of the die cut hole, so I would know where to stamp on the front of the card base.
- small tree outlines in Pretty Peacock ink
- small tree fills in Shaded Spruce ink
- sentiment in Shaded Spruce ink onto the white layer
Assembled the card:
- burnished the fold in the card base with a Bone Folder
- adhesive backing removed from the front of the shaker dome, then the white layer places over the dome and pressed to adhere the dome onto the back of the layer
- snowflake sequins (about 1/2 teaspoon or so) placed on the card base, making sore to keep them well within the pencil line
- adhesive backing removed from the back of the dome, and glue applied to the rest of the back of the layer
- white layer pressed in place over the sequins
- dome base glued onto the layer, under the dome
S
Here are today’s colors:
You can click on each one to see all the products that come in that color!
S
Here’s what I used:
Click on these images for more details and to purchase. If you are reading this post in email, the product images may not show up. Please click here to see the post on my blog.
Supply List. <— Click for a clickable and printable list of the products!
S
Here’s some news: Whisper White is going away
The facility that manufactures Whisper White paper is closing due to COVID-19. But don’t fret. The new Basic White products are in the works! No other colors are affected. The following items are now available while supplies last with an order limit of 2 per item per order.
- Cards & Envelopes, Assorted Memories & More (149710)
- Envelopes, Whisper White 3″ x 3″ (145829)
- Cardstock, Whisper White 8-1/2″ x 11″ (100730)
- Envelopes, Whisper White Medium (107301)
- Cardstock, Whisper White 12″ x 12″ (124302) <—SOLD OUT
- Cards & Envelopes, Whisper White Note (131527) <—SOLD OUT
- Cardstock, Whisper White 8-1/2″ x 11″ Thick (140272) <—SOLD OUT
S
Here’s the Year-End Closeout
All retiring items will be available through 4 January 2021, or while supplies last. Click on the image to shop now!
S
Here’s the Curvy Celebrations offering:
Click the image to see it in my online store. The Curvy Christmas stamp set and Classic Christmas Designer Series Paper are available only through January 4, or while supplies last!
S
Here’s the new catalog:
Click the image below to request your January-June 2021 Mini Catalog AND Sale-a-bration Brochure:
S
Here are some helpful links:
S
Thanks for stopping by today, and Sweet Stamping!
Dec 21, 2020 | Cards, Christmas, Gallery, Holiday, Retiring Products, Techniques |
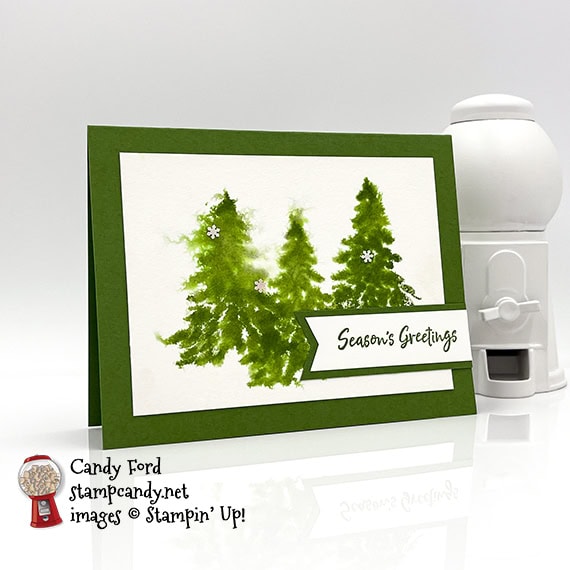
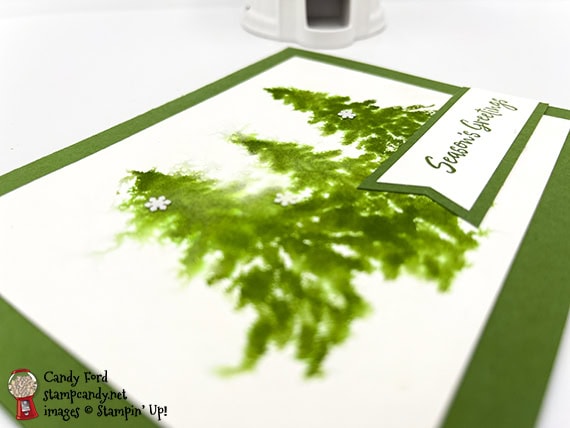
Today I’m sharing one of the cards we made at my Stamp Club’s December virtual gathering. We used the In the Pines stamp set, the Banners Pick a Punch, Watercolor Paper, and a Stampin’ Spritzer to create this simple holiday card.
If you are reading this in email, some photos may appear blurry, or may not appear at all. Please click here to see the post on my blog.
S Pines Pines Pines Pines
Here’s what I made:
S
Here’s what I did:
Cut and scored with my paper trimmer:
- Garden Green card stock (CS) cut to 5-1/2″ x 8-1/2″, then scored in half at 4-1/4″
- Fluid 100 Watercolor Paper layer cut to 4-1/2″ x 3-1/4″
- Garden Green CS strip cut to 4″ x 1″
- Whisper White CS strip cut to 4″ x 3/4″
- Whisper White CS cut to 5-1/4″ x 4″ for the inside of the card base
Stamped with the In the Pines stamp set:
- sentiment in Garden Green ink onto the Whisper White CS strip
- spritzed the watercolor paper layer with water, then stamped the tree in Garden Green ink three times onto the wet layer, then set aside and allowed to dry completely
Cut using the Banners Pick a Punch:
- the left end of the two CS strips
Assembled the card:
- burnished the fold in the card base with a Bone Folder
- fully dry watercolor layer adhered onto the front of the card base using Stampin’ Seal+
- sentiment strip glued onto the Garden Green CS strip
- Garden Green CS strip glued onto the front of the card, then any excess trimmed away using Paper Snips
- 3 Adhesive-Backed Snowflake Sequins applied onto the watercolor layer using my Take Your Pick tool
- Whisper White CS glued onto the inside of the card base
S
Here are today’s colors:
You can click on each one to see all the products that come in that color!
S
Here’s what I used:
Click on these images for more details and to purchase. If you are reading this post in email, the product images may not show up. Please click here to see the post on my blog.
Supply List. <— Click for a clickable and printable list of the products!
S
Here’s some news: Whisper White is going away
The facility that manufactures Whisper White paper is closing due to COVID-19. But don’t fret. The new Basic White products are in the works! No other colors are affected. The following items are now available while supplies last with an order limit of 2 per item per order.
- Cardstock, Whisper White 12″ x 12″ (124302)
- Cards & Envelopes, Assorted Memories & More (149710)
- Cards & Envelopes, Whisper White Note (131527)
- Envelopes, Whisper White 3″ x 3″ (145829)
- Cardstock, Whisper White 8-1/2″ x 11″ (100730)
- Cardstock, Whisper White 8-1/2″ x 11″ Thick (140272)
- Envelopes, Whisper White Medium (107301)
S
Here’s the Year-End Closeout
All retiring items will be available through 4 January 2021, or while supplies last. Click on the image to shop now!
S
Here’s the Curvy Celebrations offering:
Click the image to see it in my online store. The Curvy Christmas stamp set and Classic Christmas Designer Series Paper are available only through January 4, or while supplies last!
S
Here’s the new catalog:
Click the image below to request your January-June 2021 Mini Catalog AND Sale-a-bration Brochure:
S
Here are some helpful links:
S
Thanks for stopping by today, and Sweet Stamping!
Nov 3, 2020 | Cards, Gallery, New Products, Techniques |
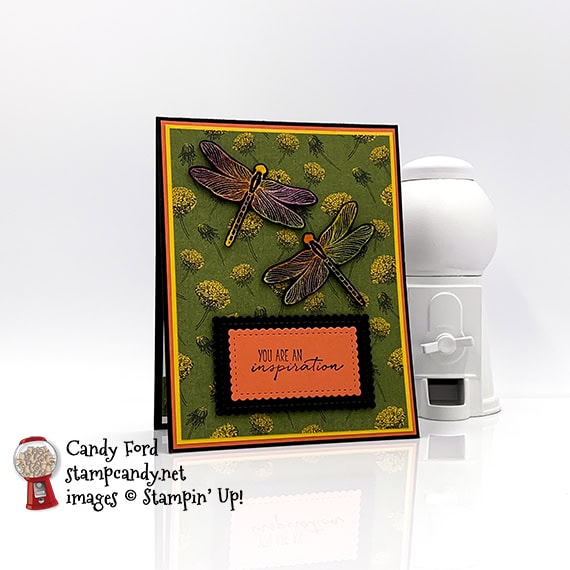
Today I’m giving you a sneak peek of the new Dragonfly Garden stamp set and Dandy Garden Designer Series Paper. As a Stampin’ Up! Demonstrator, I got to order the Dandy Garden Collection this month, instead of having to wait until January! It’s one of the many perks of being a Demo.
If you are reading this in email, some photos may appear blurry, or may not appear at all. Please click here to see the post on my blog.
S dragonfly dragonfly dragonfly dragonfly
Here’s what I made:
S
Here’s what I did:
Cut and scored with my paper trimmer:
- Basic Black card stock (CS) cut to 4-1/4″ x 11″, then scored in half at 5-1/2″
- Calypso Coral CS layer cut to 4-1/8″ x 5-3/8″
- Bumblebee CS layer cut to 4″ x 5-1/4″
- Dandy Garden Designer Series Paper (DSP) layer cut to 3-7/8″ x 5-1/8″
- DSP strip cut to 4″ x 3/4″
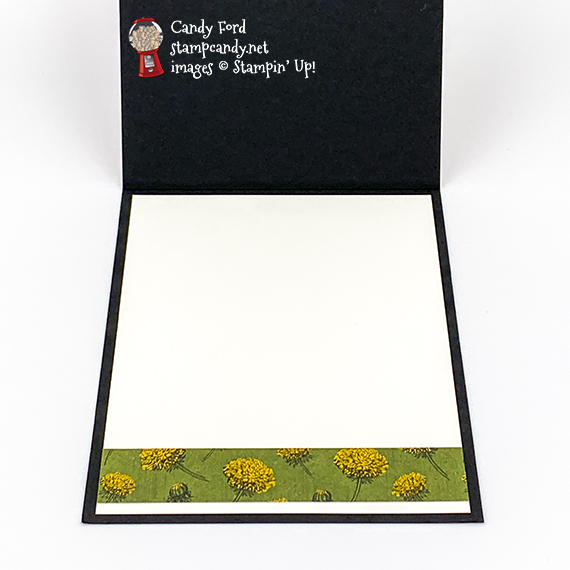
- Whisper White CS cut to 4″ x 5-1/4″ for the inside of the card base
Colored using Stampin’ Sponges:
- a scrap of Whisper White Thick CS in splotches of Calypso Coral, Bumblebee, Blackberry Bliss, and Mossy Meadow inks
Stamped with the Dragonfly Garden stamp set:
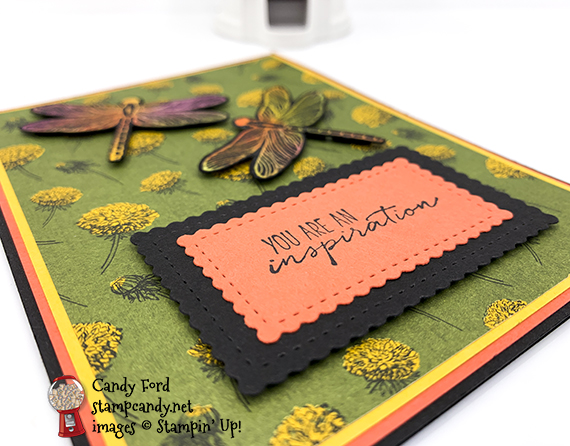
- sentiment in Memento black ink onto a scrap of Calypso Coral CS
- 2 dragonflies in Versamark ink onto the sponged CS, then heat embossed in Clear
Cut using the Stitched So Sweetly Dies:
- sentiment
- a scrap of Basic Black CS with the next size larger die
Cut using the Dragonfly Punch:
Colored using a Stampin’ Write Marker:
- dragonflies in Basic Black, then wiped ink away from embossed areas with a paper towel
Assembled the card:
- burnished the fold in the card base with a Bone Folder
- Calypso Coral CS layer glued onto the front of the card base
- Bumblebee CS layer glued onto the Calypso Coral CS layer
- DSP layer glued onto the Bumblebee CS layer
- sentiment glued onto the Basic Black CS die cut
- Basic Black CS die cut adhered onto the DSP layer using Black Stampin’ Dimensionals
- dragonflies adhered onto the DSP layer using Black Stampin’ Dimensionals
- Whisper White CS glued onto the inside of the card base
- DSP strip glued onto the Whisper White CS
S
Here are today’s colors:
You can click on each one to see all the products that come in that color!
S
Here’s what I used:
The Dandy Garden Collection will be available to purchase beginning in January 2021.
Click on these images for more details and to purchase. If you are reading this post in email, the product images may not show up. Please click here to see the post on my blog.
Supply List. <— Click for a clickable and printable list of the products!
S
S
Here are some helpful links:
S
Thanks for stopping by today, and Sweet Stamping!
Nov 2, 2020 | Cards, Gallery, Origami, Techniques |
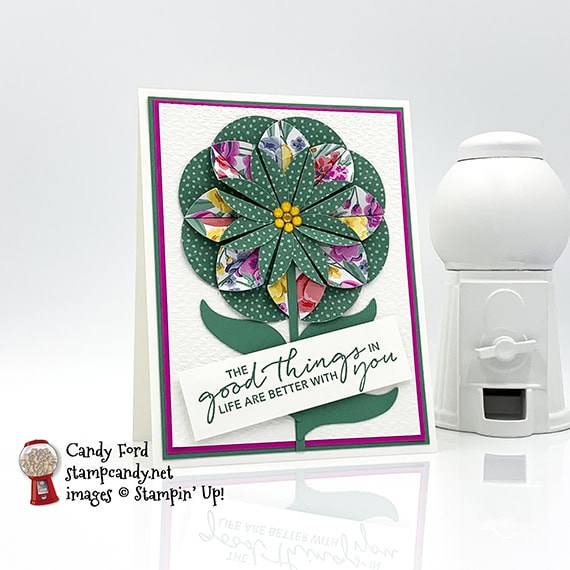
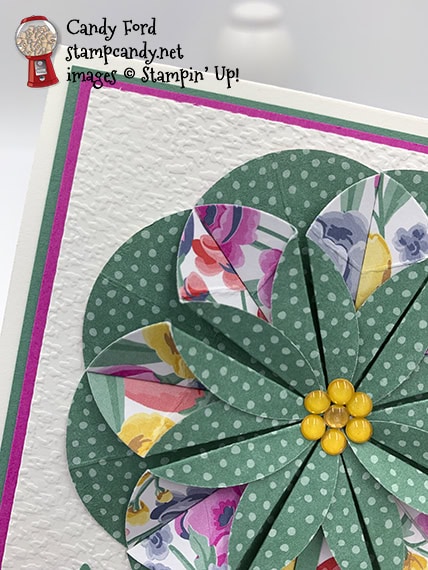
I made this Origami flower card using the Tasteful Touches stamp set, Tasteful Textile 3D Embossing Folder, Tulip Builder Punch, and Flowers for Every Season Designer Series Paper. Last week I hosted another Mystery Stamping Party on Facebook, and this is was my example. I enjoy these parties. I post clues that folks follow to create the mystery project, then everyone posts a photo of their project. It’s wonderful to see all the creative ways people interpret the clues. You can go ahead and join the Facebook group now to see what we do. Then you can participate in the next party on Wednesday, December 2 at 8:00 PM (ET.)
If you are reading this in email, some photos may appear blurry, or may not appear at all. Please click here to see the post on my blog.
S Tasteful Touches Tasteful Touches Tasteful Touches Tasteful Touches
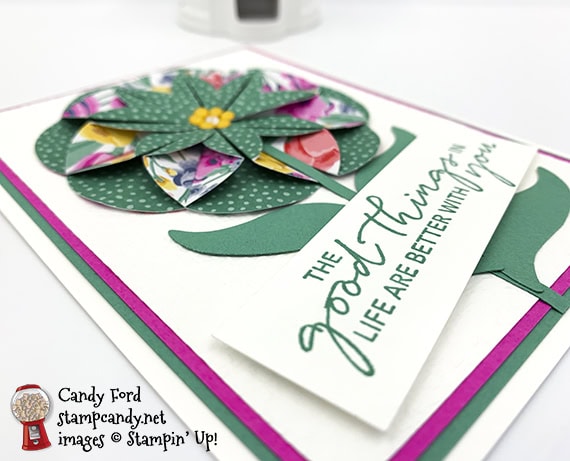
Here’s what I made:
 S
S
Here’s what I did:
Cut and scored with my paper trimmer:
- Whisper White Thick card stock (CS) cut to 4-1/4″ x 11″, then scored in half at 5-1/2″
- Just Jade CS layer cut to 4″ x 5-1/4″
- Magenta Madness CS layer cut to 3-7/8″ x 5-1/8″
- Whisper White Thick CS layer cut to 3-3/4″ x 5″
- Just Jade CS cut to 1/8″ x 4″
- Whisper White Thick CS cut to 3-1/2″ x 1″ for the sentiment
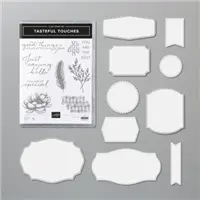
Stamped with the Tasteful Touches stamp set:
- sentiment in Just Jade ink onto the 3-1/2″ x 1″ Whisper White Thick CS
Cut using the Layering Circle Dies:
- 8 circles (appr. 1-5/8″ diameter) from a piece of Flowers for Every Season Designer Series Paper (DSP)
- 1 circle from a scrap of Whisper White CS
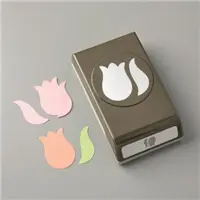
Cut using the Tulip Builder Punch:
- 3 leaves from a scrap of Just Jade CS
Embossed using the Tasteful Textile 3D Embossing Folder:
- the Whisper White Thick CS layer
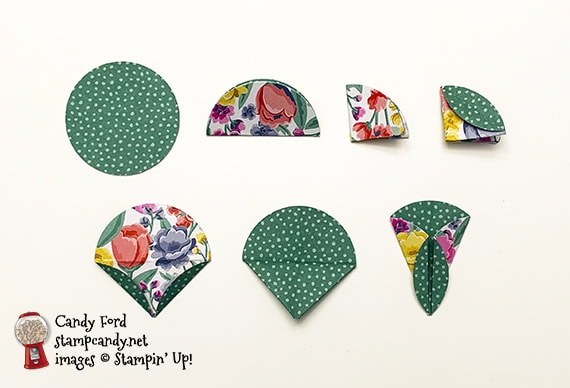
Folded the flower petals:
- folded the 8 DSP circles in half, then in half again, to make quarter circles
- on each side, folded down one curved edge (one layer only)
- unfolded except for the small curved folds
- flipped over so the curved folds were face down
- folded both straight edges to the center
- burnished using a Bone Folder
Assembled the card:
- burnished the fold in the card base with a Bone Folder
- Just Jade CS layer glued onto the front of the card base
- Magenta Madness CS layer glued onto the Just Jade CS layer
- Whisper White CS layer glued onto the Magenta Madness CS layer
- tips of DSP petals glued onto the Whisper White CS circle, side by side, with the points touching in the center, to create the flower
- back of flower glued onto the Whisper White CS layer, near the top
- 1/8″ Just Jade CS strip glued onto the Whisper White CS layer, with the end tucked under the edge of the flower (I’m not sure why I glued mine on top of the flower. Just a brain cramp, I guess.)
- leaves glued onto the Whisper White CS layer with the tips touching the 1/8″ strip
- sentiment adhered over the leaves/stem using Stampin’ Dimensionals
- 7 Bumblebee enamel dots applied onto the center of the flower using my Take Your Pick tool
S
Here are today’s colors:
You can click on each one to see all the products that come in that color!
S
Here’s what I used:
Click on these images for more details and to purchase. If you are reading this post in email, the product images may not show up. Please click here to see the post on my blog.
Supply List. <— Click for a clickable and printable list of the products!
S
S
Here are some helpful links:
S
Thanks for stopping by today, and Sweet Stamping!
Sep 10, 2020 | Blog Hop, Boxes, Cards, Gallery, Techniques |

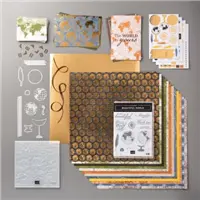
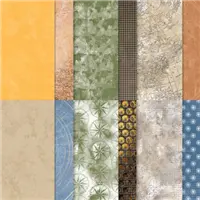
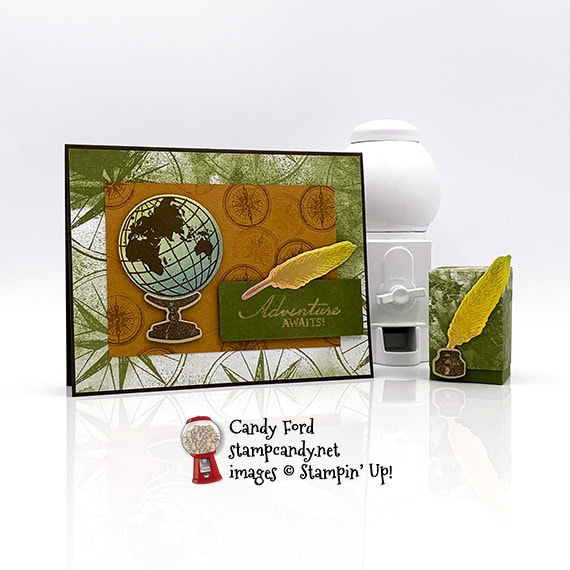
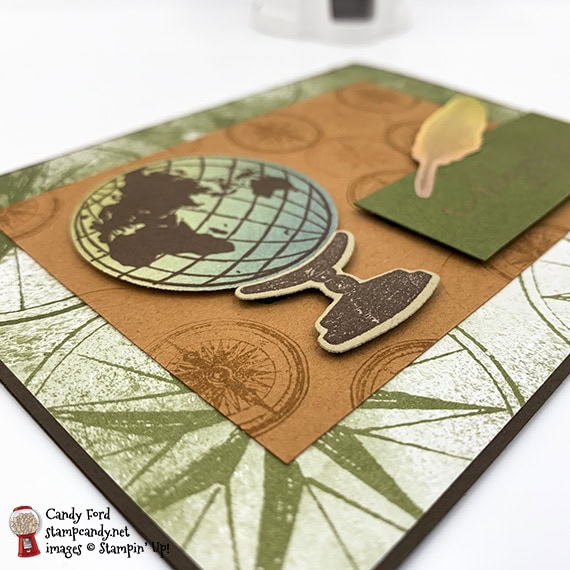
Welcome to the September 2020 OSAT Blog Hop! This month’s theme is You’ve Got This, so we’re featuring projects celebrating empowerment and encouragement for a new job, new school year, or any other new challenge. I used products from the World of Good Suite Collection for my projects today: a card and a small treat box. I also used a makeup brush blending technique that my Candy Hearts team member Lisa Graham demonstrated at our last team meeting.
Be sure to hop around to all the stops, to see all the great projects this group has in store for you today!
If you are reading this in email, some photos may appear blurry, or may not appear at all. Please click here to see the post on my blog.
S September 2020 OSAT September 2020 OSAT September 2020 OSAT
Here’s what I made:

S
Here’s what I did:
Cut and scored with my paper trimmer:
- Early Espresso card stock (CS) cut to 5-1/2″ x 8-1/2″, then scored in half at 4-1/4″
- World of Good Designer Series Paper (DSP) layer cut to 5-3/8″ x 4-1/8″
- Cinnamon Cider CS layer cut to 4-1/4″ x 3″
- Mossy Meadow CS layer cut to 2-3/4″ x 1″
- Whisper White CS cut to 5-1/4″ x 4″ for the inside of the card base
- Mossy Meadow CS cut to 5-1/4″ x 3-1/4″, scored along the long side at 1-1/4″, 2-1/2″, 3-3/4″, 5″, and scored along the short side at 1-1/4″ for the box
- DSP cut to 4-13/16″ x 4-13/16″ and scored 1-3/4″ from all four edges for the lid
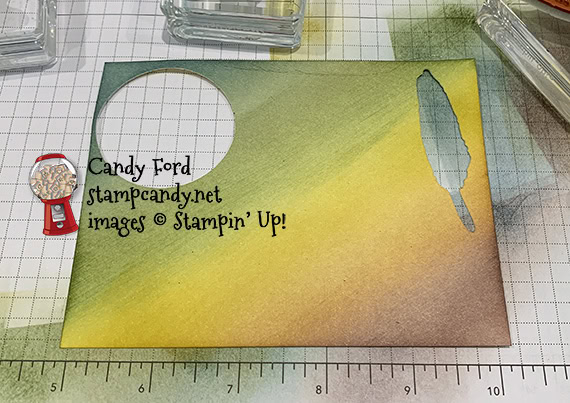
Colored/blended using a makeup brush:
- a scrap of Whisper White Thick CS in Early Espresso, Cinnamon Cider, Bumblebee, Mossy Meadow, and Misty Moonlight inks
- CLICK HERE to see the makeup brush I used. There are many others that I’m sure would be just as good. I wanted a big one, so I got the 2X-Large size.
- I forgot to take a photo until after I had cut out a couple pieces. My blending skills aren’t as good as Lisa’s, but I think you can get the idea.
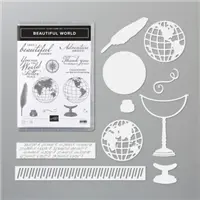
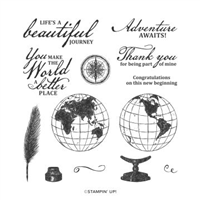
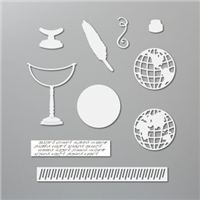
Stamped with the Beautiful World stamp set:
- globe in Early Espresso ink onto the blue/green area of the blended CS (I wanted to make sure I got good ink coverage on the globe, so I used my Stamparatus to stamp it 2 or 3 times times.)
- 2 feathers in Crumb Cake ink onto the yellow/brown area of the blended CS
- globe stand and ink well in Early Espresso ink onto a scrap of Crumb Cake CS
- sentiment in Versamark ink onto the small Mossy Meadow CS layer, then heat embossed in gold
- small globe in Cinnamon Cider ink all over the Cinnamon Cider CS layer
Cut using the World Map Dies:
- globe, globe stand, inkwell, and 2 feathers
Assembled the card:
- burnished the fold in the Early Espresso card base with a Bone Folder
- DSP layer glued onto the front of the card base
- Cinnamon Cider CS layer glued onto the the DSP layer
- globe and stand adhered onto the Cinnamon Cider CS layer using Black Stampin’ Dimensionals
- end of a feather glued onto the sentiment, then both adhered onto the card front using Black Stampin’ Dimensionals
- Whisper White CS glued onto the inside of the card base
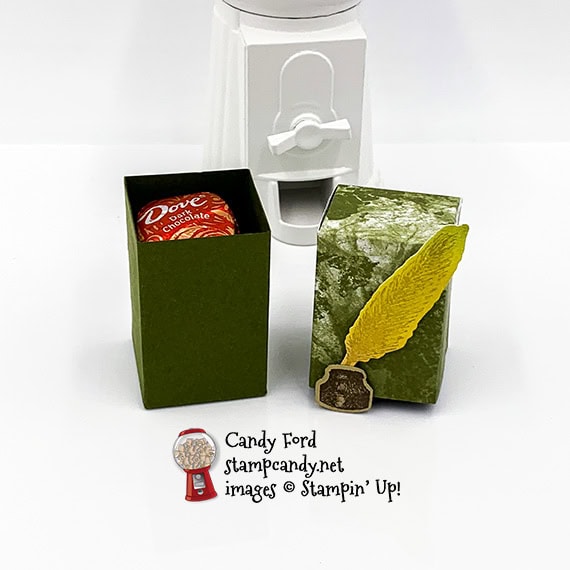
Assembled the box:
- burnished the folds in the box and lid with a Bone Folder, and cut according to the diagram using Paper Snips
- tab on box glued onto the inside of the opposite end
- 1 bottom tab folded up, then the other 3 tabs glued in place
- The box is 1-1/4″ square by 2″ high, and fits 4 stacked Dove promises perfectly
- side tabs of DSP lid folded in and glued together, then the skinny tab folded down and glued onto the top one – did this on both sides
- NOTE: I put the lid on the box before gluing the sides, to make sure it wasn’t too snug.
- The lid is 1-5/16″ square by 1-3/4″ high.
- tip of second feather glued onto the back of the inkwell, then both adhered onto the front of the box lid using Black Stampin’ Dimensionals
S
Here’s the September 2020 OSAT Blog Hop:
Here are today’s colors:
You can click on each one to see all the products that come in that color!
S
Here’s what I used:
Click on these images for more details and to purchase. If you are reading this post in email, the product images may not show up. Please click here to see the post on my blog.
Supply List. <— Click for a clickable and printable list of the products!
S
Here are some helpful links:
S
Thanks for stopping by today, and Sweet Stamping!