Jul 23, 2020 | Cards, Gallery, Techniques |
Today I’m sharing a peekaboo card I made with products from the Whale of a Time Suite. When the card is closed, you see a whale peeking through a round window. When you open it, the whale disappears and the sentiment is in the window. I was surprised at how easy this was to put together. To me, the hardest part about a peekaboo card is getting the round holes to line up just right. I used the Whale Done Bundle (Whale Done stamp set and Whale Builder Punch) and Whale of a Time Designer Series Paper.
If you are reading this in email, some photos may appear blurry, or may not appear at all. Please click here to see the post on my blog.
S peekaboo card peekaboo card peekaboo card peekaboo card
Here’s what I made:
When the card is folded flat, no Calypso Coral will show through the window. I propped it up for the photo, so it completely flat.
The sentiment is starting to show as the card is opened and the sentiment panel slides to the right.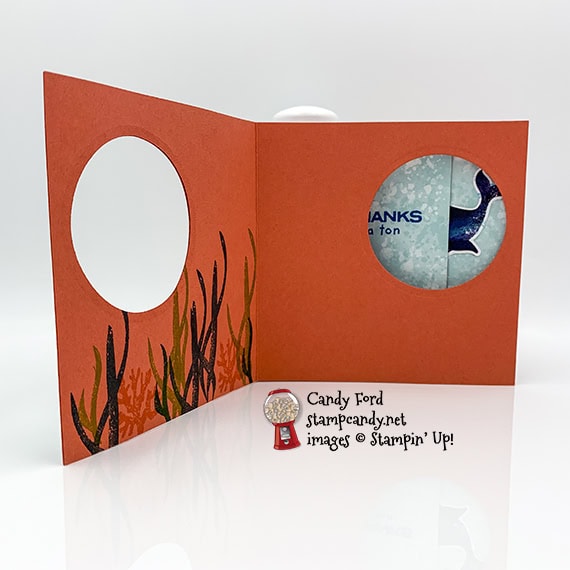
Fully open, the whale is covered by the sentiment.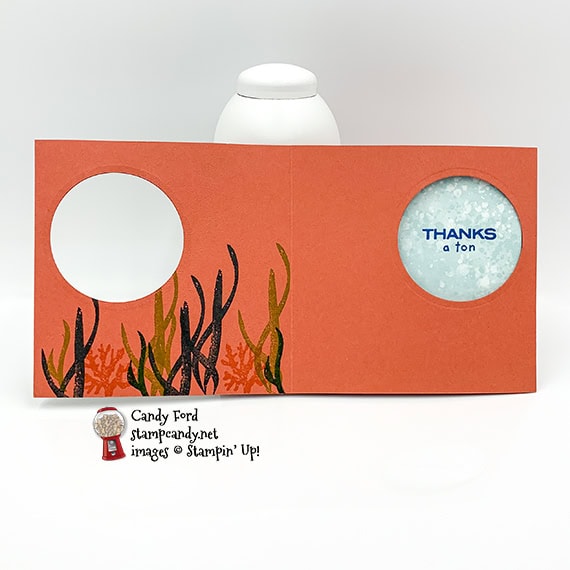
front, laid out flat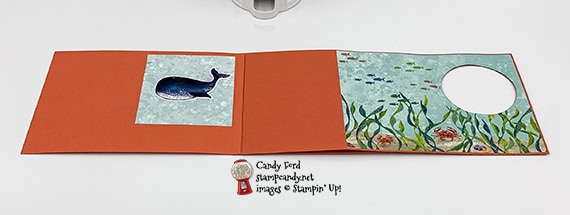
back, laid out flat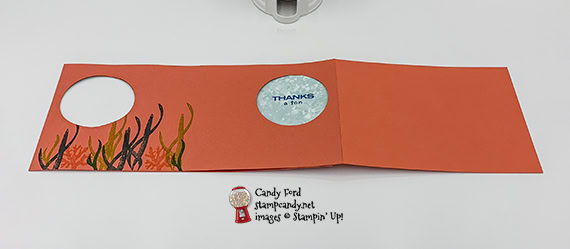 S
S
Here’s what I did:
Cut and scored with my paper trimmer:
- first piece of Calypso Coral card stock (CS) cut to 8-1/2″ x 4-1/4″, then scored in half at 4-1/4″
- second piece of Calypso Coral CS cut to 8-1/4″ x 4-1/4″, then scored at 5-1/2″
- third piece of Calypso Coral CS cut to 5-3/4″ x 4-1/4″, then scored at 5-1/2″
- Whale of a Time Designer Series Paper (DSP) layer cut to 5-3/8″ x 4-1/8″ for front of card
- 2 pieces of DSP cut to about 3″ x 3″ (light blue water)
Stamped with the Whale Done stamp set:
- sentiment in Pacific Point ink onto one of the 3″ DSP pieces
- tiny fish in Calypso Coral, Pacific Point, Granny Apple Green, and Shaded Spruce inks onto the large DSP layer
- coral and seaweed in Calypso Coral, Granny Apple Green, and Shaded Spruce inks onto the inside of the card front
Cut using the Layering Circle Dies:
- using the 4th largest plain circle die, cut the large DSP layer, larger part of the 8-1/4″ Calypso Coral CS, and both halves of the 8-1/2″ Calypso Coral CS, making sure they all line up with each other
Cut using the Whale Builder Punch:
- whale from a piece of DSP
Assembled the peekaboo card:
- burnished the folds in the three Calypso Coral CS pieces with a Bone Folder
- large DSP layer glued onto the larger side of the 8-1/4″ Calypso Coral CS, lining up the die cut holes
- one half of the 8-1/2″ Calypso Coral CS glued onto the back of the 8-1/4″ Calypso Coral CS, lining up the die cut holes
- 1/4″ flap of the 5-3/4″ Calypso Coral CS glued onto the back of the loose end (opposite the end glued onto the 8-1/2″ piece)
- small DSP layer with sentiment glued onto the smaller side of the 8-1/4″ Calypso Coral CS, so it will show through the holes when the card is closed
- other small DSP layer glued onto the 5-3/4″ Calypso Coral CS so it will show through the holes
- whale glued onto the small DSP layer so it shows through the holes
- fold as shown in the photos
This gives you an idea of how the pieces are put together. See the diagram below.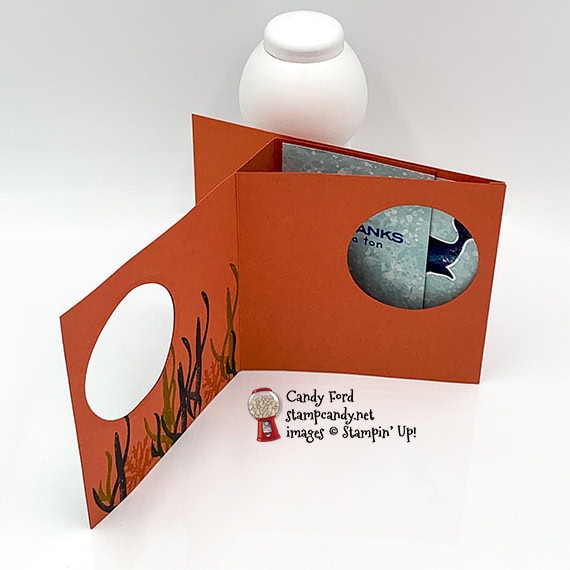

S
Only 10 days left to earn Bonus Days coupons!
For each $50 you spend on an order now through Monday, August 3, 2020, you will receive a $5 coupon code to use in August! Click the image below to shop now!

S
Here are today’s colors:
You can click on each one to see all the products that come in that color!
S
Here’s what I used:
Click on these images for more details and to purchase. If you are reading this post in email, the product images may not show up. Please click here to see the post on my blog. <— Click for a clickable and printable list of the products!
S
Here are some helpful links:
S
Thanks for stopping by today, and Sweet Stamping!
Jun 24, 2020 | Cards, Gallery, Techniques |
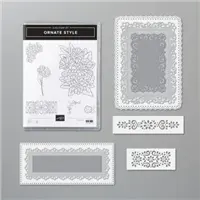
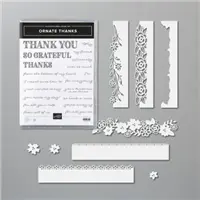
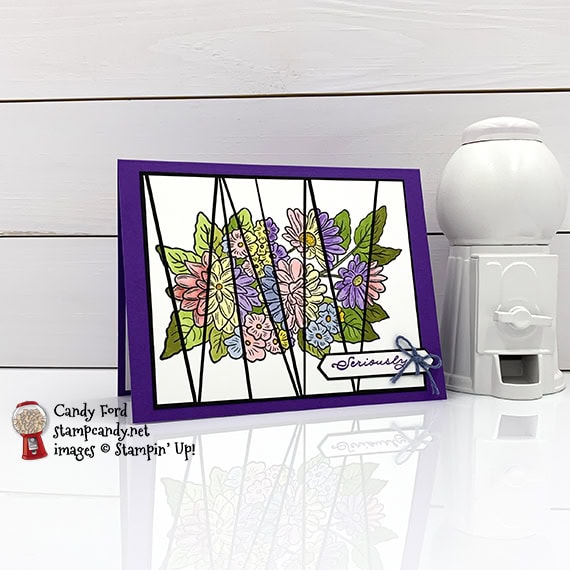
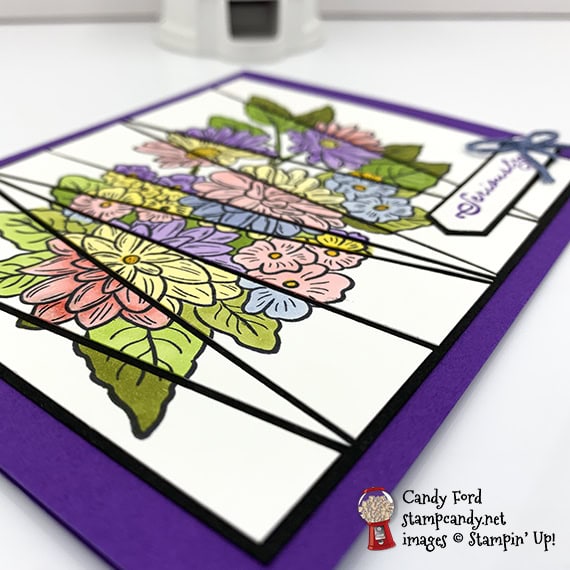
Today’s card doesn’t use the PPPST! Can you believe it? Instead I’m using another popular technique. This is my first try at the Scrappy Strip Technique. I used the Ornate Thanks and Ornate Style stamp sets. I colored in the image using Stampin’ Blends Markers, then cut it into strips. And I cut the sentiment using the Classic Label Punch.
PPPST = Paper Piecing Press n Seal Technique
If you are reading this in email, some photos may appear blurry, or may not appear at all. Please click here to see the post on my blog.
S scrappy scrappy scrappy scrappy scrappy
Here’s what I made:
S
Here’s what I did:
Cut and scored with my paper trimmer:
- Gorgeous Grape card stock (CS) cut to 5-1/2″ x 8-1/2″, then scored in half at 4-1/4″
- Basic Black CS layer cut to 4-3/4″ x 3-7/8″
- Whisper White CS layer cut to 4-1/4″ x 3-3/4″ (*after floral image was stamped, I cut the layer into strips as shown)
- Basic Black CS cut to 2-1/2″ x 7/16″
- Whisper White CS cut to 5-1/4″ x 4″ for the inside of the card base
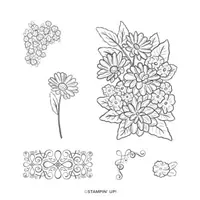
Stamped with the Ornate Style stamp set:
- floral image in tuxedo Black Memento ink onto the Whisper White CS layer*
Stamped with the Ornate Thanks stamp set:
- front sentiment in Gorgeous Grape ink onto a scrap of Whisper White CS
- inner sentiment in Seaside Spray ink onto the Whisper White CS for the inside of the card base
Cut using the Classic Label Punch:
Cut using Paper Snips:
- both ends of the Basic Black CS strip, to mat the front sentiment
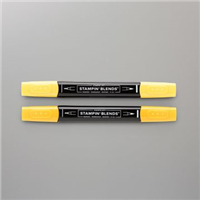
Colored using Stampin’ Blends Markers:
- floral image in Flirty Flamingo, Granny Apple Green, Highland Heather, Mango Melody, Old Olive, Seaside Spray, and So Saffron
- Note: I used different colors in each strip.
Assembled the card:
- burnished the fold in the card base with a Bone Folder
- colored strips glued onto the Basic Black CS layer, about 1/16″ apart
- Basic Black CS layer glued onto the front of the card base
- front sentiment glued onto the Basic Black CS strip
- blue twine pulled out of a piece of blue/white/silver twine, then tied around the sentiment and tied in a bow
- front sentiment glued onto the strips
- Whisper White CS glued onto the inside of the card base
S
Here’s what I would do differently:
I’m not sure why I thought I needed to cut all the strips into triangles with sharp points. When I look at other Scrappy Strip cards I’ve seen lately, I realize their strips have four edges instead of 3. I think that would make it much easier to line up the pieces.
S
Here are today’s colors:
You can click on each one to see all the products that come in that color!
S
Here’s what I used:
Click on these images for more details and to purchase. If you are reading this post in email, the product images may not show up. Please click here to see the post on my blog.
Supply List <— Click for a clickable and printable list of the products!
SS
Here are some helpful links:
S
Thanks for stopping by today, and Sweet Stamping!
Jun 23, 2020 | Cards, Gallery, Techniques |
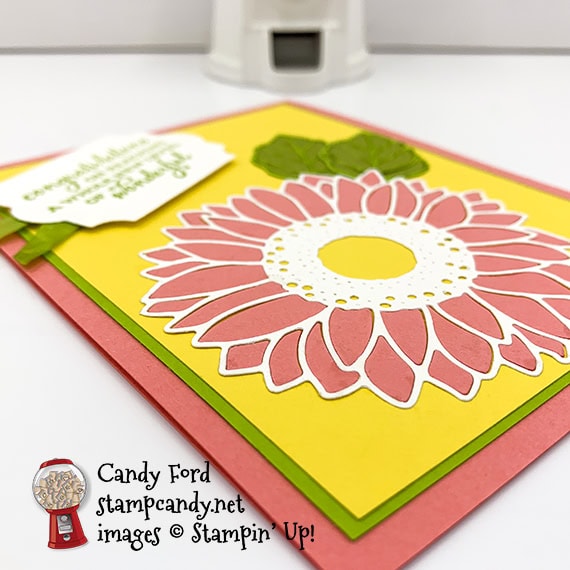
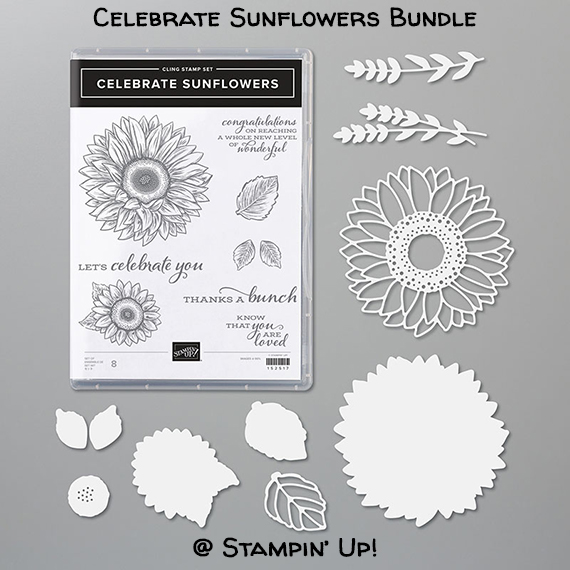
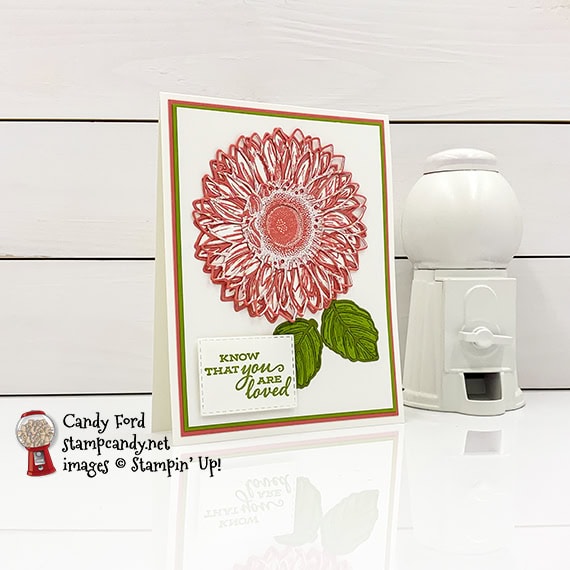
Today I’m sharing a card I used with some of the leftovers from yesterdays card, which you can see here. It’s another PPPST card made with the Celebrate Sunflowers Bundle (Celebrate Sunflowers stamp set and Sunflowers Dies.) I cut today’s sentiment using the Everyday Label Punch, and colored some Whisper White Crinkled Seam Binding Ribbon with a Stampin’ Blends Marker.
If you are reading this in email, some photos may appear blurry, or may not appear at all. Please click here to see the post on my blog.
S PPPST PPPST PPPST PPPST PPPST PPPST
Here’s what I made: 
S
Here’s what I did:
Cut and scored with my paper trimmer:
- Flirty Flamingo card stock (CS) cut to 4-1/4″ x 11″, then scored in half at 5-1/2″
- Granny Apple Green CS layer cut to 3-7/8″ x 5-1/8″
- Daffodil Delight CS layer cut to 3-3/4″ x 5″
- Whisper White CS cut to 4″ x 5-1/4″ for the inside of the card base
Stamped with the Celebrate Sunflowers stamp set:
- sentiment in Granny Apple Green ink onto a scrap of Whisper White Thick CS
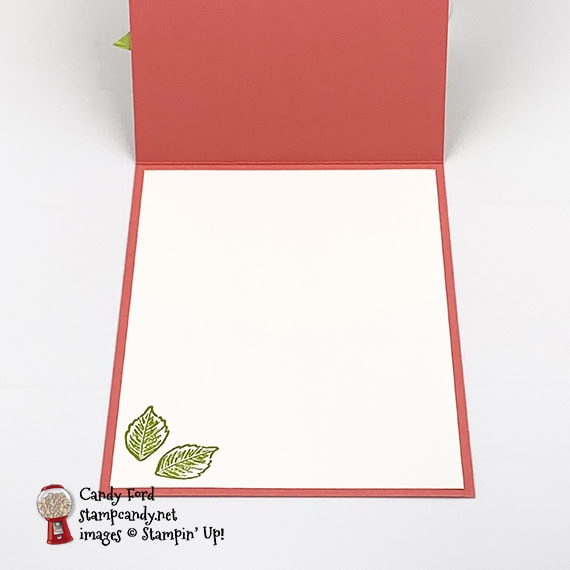
- 2 small leaves in Granny Apple Green ink onto the Whisper White CS for the inside of the card base
Cut using the Sunflowers Dies:
- large detailed sunflower cut from a scrap of Flirty Flamingo CS
- large detailed sunflower cut from a scrap of Whisper White Thick CS
- 2 detailed leaves cut from an scrap of Granny Apple Green CS
- 2 detailed leaves cut from an scrap of Old Olive CS
- NOTE: I pressed a piece of Press n Seal plastic wrap onto the tops of all the die cuts to keep the pieces in place
Cut using the Everyday Label Punch:
Colored with a Stampin’ Blends Marker:
- a piece of Whisper White Crinkled Seam Binding Ribbon in Granny Apple Green
Assembled the card:
- burnished the fold in the card base with a Bone Folder
- Granny Apple Green CS layer glued onto the front of the card base
- Daffodil Delight CS layer glued onto the Granny Apple Green CS layer
- outline piece of the Whisper White Thick CS die cut sunflower removed from Press n Seal and glued onto the Daffodil Delight CS layer
- outline piece of the 2 Granny Apple Green CS leaf die cuts removed from Press n Seal and glued onto the Daffodil Delight CS layer
- outline piece of the Flirty Flamingo die cut sunflower removed from Press n Seal and set aside
- using the Press n Seal to help with placement, glued the inner petals of the Flirty Flamingo sunflower inside the Whisper White outline
- outline piece of the Old Olive leaves removed from the Press n Seal and set aside
- using the Press n Seal to help with placement, glued the inner pieces of the Old Olive leaves inside the Grany Apple Green outlines
- ribbon folded in half and adhered onto the back of the sentiment using Tear & Tape or Stampin’ Seal
- sentiment adhered onto the Daffodil Delight CS layer using Stampin’ Dimensionals
- Whisper White CS glued onto the inside of the card base
S
Here are today’s colors:
You can click on each one to see all the products that come in that color!
S
Here’s what I used:
Click on these images for more details and to purchase. If you are reading this post in email, the product images may not show up. Please click here to see the post on my blog.
Supply List <— Click for a clickable and printable list of the products!
S
S
Here are some helpful links:
S
Thanks for stopping by today, and Sweet Stamping!
Jun 22, 2020 | Cards, Gallery, Techniques |
Today I’m sharing another card I made using the Celebrate Sunflowers Bundle (Celebrate Sunflowers stamp set and Sunflowers Dies) and the PPPST (Paper Piecing Press n Seal Technique.) A couple people have said the flower looks like it’s crocheted.
I think I’m sort of addicted to this technique. I mean I just can’t stop using it. Today’s card is similar to another one I made recently using the PPPST. You can see that card here.
Be sure to check back tomorrow to see the card I made using the leftovers from today’s card!
If you are reading this in email, some photos may appear blurry, or may not appear at all. Please click here to see the post on my blog.
S celebrate celebrate celebrate celebrate celebrate
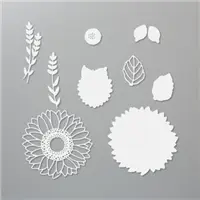
Here’s the bundle:
S
Here’s what I made:

S
Here’s what I did:
Cut and scored with my paper trimmer:
- Whisper White Thick card stock (CS) cut to 4-1/4″ x 11″, then scored in half at 5-1/2″
- Flirty Flamingo CS layer cut to 4″ x 5-1/4″
- Granny Apple Green CS layer cut ti 3-7/8″ x 4-7/8″
- Whisper White CS (regular or thick) layer cut to 3-3/4″ x 5″
Stamped with the Celebrate Sunflowers stamp set:
- sentiment in Granny Apple Green ink onto a scrap of Whisper White Thick CS
- large sunflower in Versamark ink onto a scrap of Flirty Flamingo CS, then heat embossed in white
- 2 leaves in Granny Apple Green ink onto a scrap of Granny Apple Green CS
Cut using the Sunflower Dies:
- stamped sunflower using the large detailed sunflower die
- scrap of Flirty Flamingo CS using the large detailed sunflower die
- stamped leaves using the detailed leaf die
- 2 leaves from a scrap of Old Olive CS using the detailed leaf die
- Note: I pressed a piece of Press n Seal plastic wrap over the die cuts to keep all the pieces in place
Cut using the Stitched Rectangles Dies:
Assembled the card:
- burnished the fold in the card base with a Bone Folder
- Flirty Flamingo CS layer glued onto the front of the card base
- Granny Apple Green CS layer glued onto the Flirty Flamingo CS layer
- Whisper White CS layer glued onto the Granny Apple Green CS layer
- outline pieces of the plain Flirty Flamingo sunflower and the Old Olive leaf die cuts removed from the Press n Seal, then glued onto the Whisper White CS layer
- outline of the stamped and embossed sunflower pulled away from the Press n Seal
- stamped and embossed sunflower petals (and center piece) glued onto the Whisper White CS layer, putting them inside the outline piece
- outline of the Granny Apple Green leaf die cuts removed from the Press n Seal
- inner pieces of the Granny Apple Green leaves glued inside the Old Olive outlines
- outline of the stamped and embossed sunflower glued onto the Flirty Flamingo outline piece, glueing only around the center and leaving the petal outlines loose
- sentiment adhered onto the Whisper White CS layer using Stampin’ Dimensionals
S
Here are today’s colors:
You can click on each one to see all the products that come in that color!
S
Here’s what I used:
Click on these images for more details and to purchase. If you are reading this post in email, the product images may not show up. Please click here to see the post on my blog.
Supply List. <— Click for a clickable and printable list of the products!
S
S
Here are some helpful links:
S
Thanks for stopping by today, and Sweet Stamping!
Mar 30, 2019 | Cards, Gallery, Sale-A-Bration, Techniques |
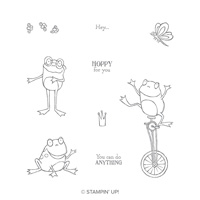
Sale-a-bration 2019 is almost over, but there’s still time! Place your order or join my team by tomorrow, March 31, which is the last day to earn free products when you shop or join. I used the So Hoppy Together stamp set, one of the many Sale-a-bration items you can get for free, to make today’s card. It can be a card of encouragement (if a frog can ride a unicycle, you can do anything!) or congratulations for a job well done. I used the Stamparatus mirror stamping technique. To see another card I made using this technique, check out yesterday’s post here.

Here’s what I made:

The Basic Gray and Real Red card stocks look darker in the photos than in person.

S
Here’s what I did:
Cut and scored with my Stampin’ Trimmer:
- Basic Gray card stock (CS) cut to 5-1/2″ x 8-1/2″, then scored in half at 4-1/4″
- Real Red CS layer cut to 4-7/8″ x 3-5/8″
- Whisper White CS layer cut to 4-3/4″ x 3-1/2″
- Whisper White CS cut to 5-1/4″ x 4″ for the inside of the card
Stamped with the So Hoppy Together stamp set and the Stamparatus:
- standing frog in Call Me Clover ink onto the right side of the Whisper White CS layer
- standing frog in Call Me Clover ink onto a Silicone Craft Sheet
- flipped the Whisper White CS layer horizontally and carefully placed in onto the craft sheet in the Stamparatus
- stamped the frog again onto the back of the paper (no need to ink up the stamp for this step – you’re just pressing the paper onto the craft sheet to soak up the ink stamped there.)
- frog on unicycle in Call Me Clover and Basic Black inks (colored the stamp using Stampin’ Write Markers)
- “you can do anything” sentiment in Memento black ink onto the Whisper White CS for the inside of the card (Oops, I forgot to photograph the inside.)
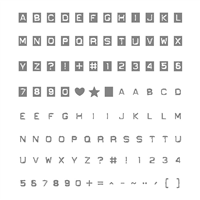
Stamped with the Labeler Alphabet stamp set:
- “TA DA” in Memento black ink into the Whisper White CS layer
Colored using Stampin’ Blends Markers:
- frogs in Granny Apple Green
- unicycle in Smoky Slate, Basic Black, and Real Red
Assembled the card:
- burnished the fold in the card base with a Bone Folder
- Real Red CS layer glued onto the front of the card base
- Whisper White CS layer glued onto the Real Red CS layer
- Whisper White CS glued onto the inside of the card base
S
Here are today’s colors:
You can click on each one to see all the products that come in that color!
S
Here’s what I used:
Click on these images for more details and to purchase.
Preorder the the Wonderful Moments Wedding Card Online Class by April 3!
Need some cards for all those weddings and showers that inevitably come up this time of year? This class is for you.
- Make 6 gorgeous cards at home in your PJs!
- 2 each of 3 designs
- perfect for weddings and showers
- I do all the cutting and embossing. You just stamp, color, and assemble!
- Limited spots available
Click on the image below for details and color options (Lovely Lipstick was used in the sneak peeks below, though it looks darker in the photos.)
 S
S
S
Here are some helpful links:
S
Thanks for stopping by today, and Sweet Stamping!

Mar 29, 2019 | Cards, Gallery, Occasions, Techniques |
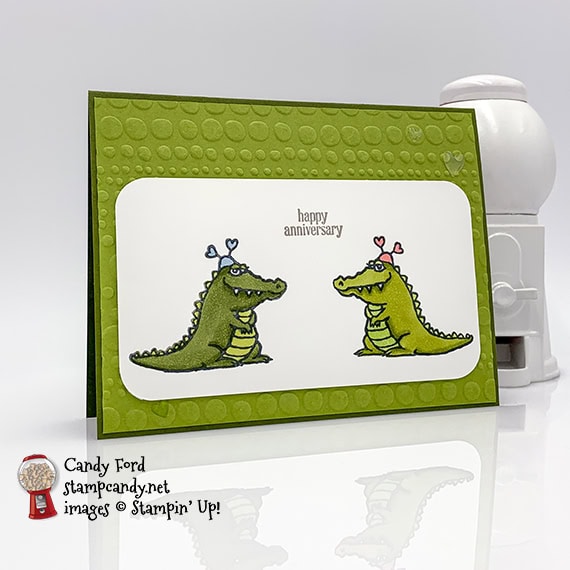
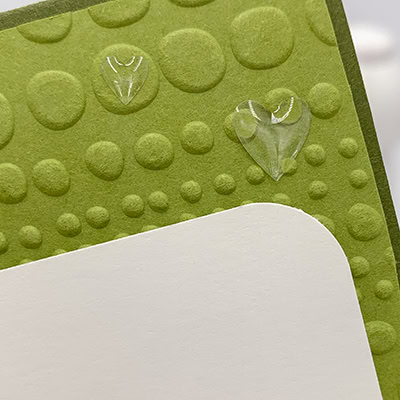
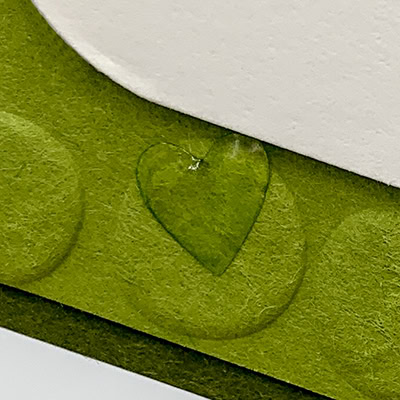
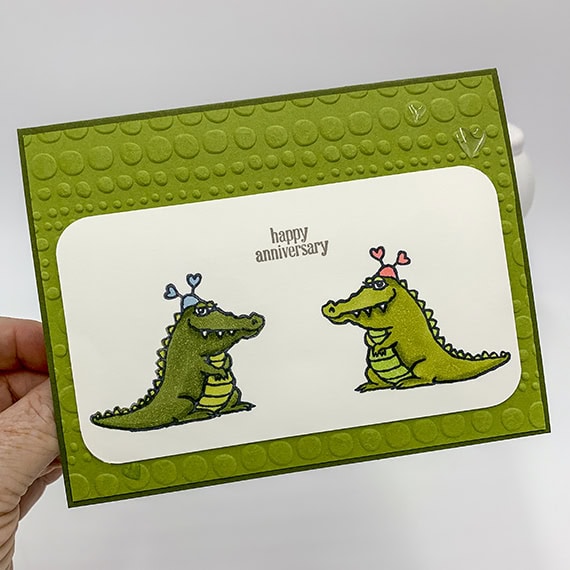
There are lots of ways to stamp an mirror image, but by far the easiest I’ve found is with the Stampatarus and a Silicone Craft Sheet. I used this technique on today’s Happy Anniversary card I made with the Hey Love stamp set, Dot to Dot embossing folder, and Detailed Trio Punch. the hearts on the inside of the card were cut using the multi-heart die in the Be Mine Stitched Framelits Dies, but I had them left over from previous projects – I actually have a little container full of them.
I’ve used the Dot to Dot embossing folder a lot lately. It’s so cute and whimsical and can represent so many things, like bubbles, stones, etc. I thought it lent a reptilian air to this card, appropriate for the cute little lovey-dovey crocodiles.
S
Here’s what I made:
S
Here’s what I did:
Cut and scored with my Stampin’ Trimmer:
- Mossy Meadow card stock (CS) cut to 5-1/2″ x 8-1/2″, then scored in half at 4-1/4″
- Old Olive CS layer cut to 5-3/8″ x 4-1/8″
- Whisper White CS layer cut to 5″ x 2-3/4″
- Whisper White CS cut to 5-1/4″ x 4″ for the inside of the card base
Stamped with the Hey Love stamp set and the Stamparatus:
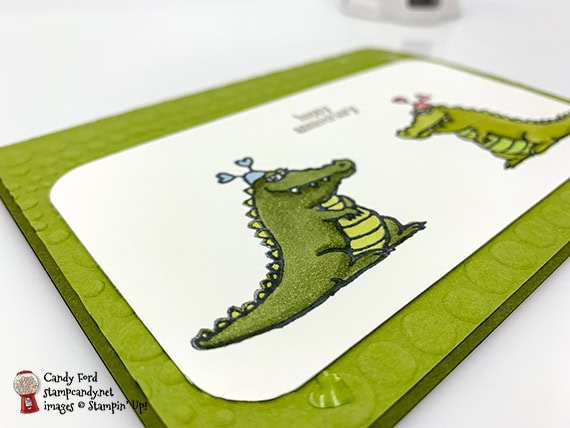
- crocodile in Memento black ink onto the Whisper White CS layer on the right side
- crocodile in Memento black ink onto the Silicone Craft Sheet ( I stamped it a couple times to make sure there was plenty of ink on the craft sheet.)
- flipped over the layer horizontally, laid it very carefully over the craft sheet, then stamped again. You don’t need to ink up the stamp for this one. This is to press the CS onto the image on the craft sheet and transfer the ink onto the underside of the paper.
- NOTE: When you line up the stamp for the first stamp, be sure it doesn’t cross the center of the layer, or the images may overlap.
- sentiment in Gray Granite ink between the two crocs
Cut using the Detailed Trio Punch:
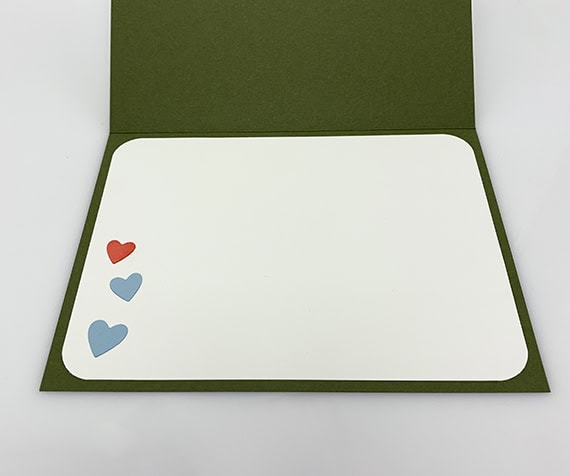
- rounded all four corners of the Whisper White CS layer and of the Whisper White CS for the inside of the card
Colored using Stampin’ Blends Markers:
- left crocodile in Mossy Meadow, Old Olive , and Balmy Blue
- right crocodile in Old Olive, Granny Apple Green, and Flirty Flamingo
Die cut using the Be Mine Stitched Framelits:
- tiny hearts, using the multi-heart die, from scraps of Flirty Flamingo and Balmy Blue CS
- NOTE: I had the hears left over from previous projects. The pink one was actually Petal Pink, so I colored it with the light Flirty Flamingo marker.
Ran through the Big Shot in the Dot to Dot embossing folder:
Assembled the card:
- burnished the fold in the card base with a Bone Folder
- Old Olive CS layer glued onto the front of the card base
- croc layer glued onto the Old Olive CS layer
- 3 Heart Epoxy Droplets applied onto the Old Olive CS layer
- 3 hearts glued onto the Whisper White CS for the inside
- Whisper White CS glued onto the inside of the card base
S
Here are today’s colors:
You can click on each one to see all the products that come in that color!
S
Here’s what I used:
Click on these images for more details and to purchase.
S
Preorder the Wonderful Moments Wedding Card Online Class by April 3!
Need some cards for all those weddings and showers that inevitably come up this time of year? This class is for you.
- Make 6 gorgeous cards at home in your PJs!
- 2 each of 3 designs
- perfect for weddings and showers
- I do all the cutting and embossing. You just stamp, color, and assemble!
- Limited spots available
Click on the image below for details and color options (Lovely Lipstick was used in the sneak peeks below, though it looks darker in the photos.)
S
Here are some helpful links:
S
Thanks for stopping by today, and Sweet Stamping!