Sep 12, 2022 | Autumn, Blog Hop, Cards, Gallery, Halloween |
 s
s
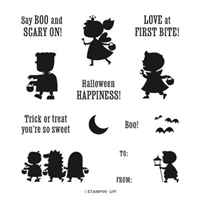
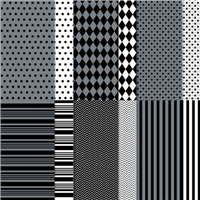
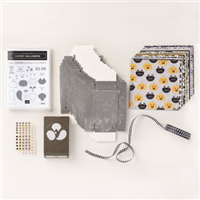
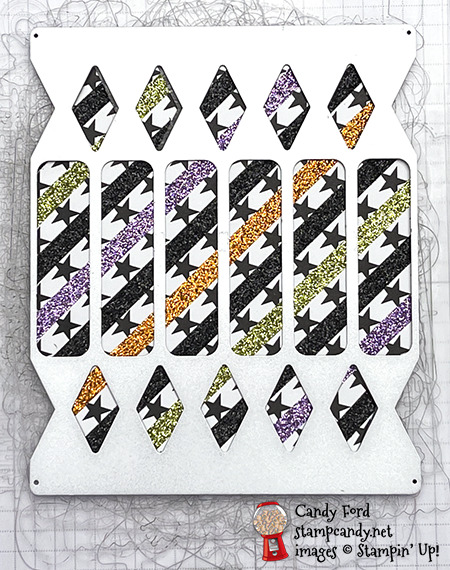
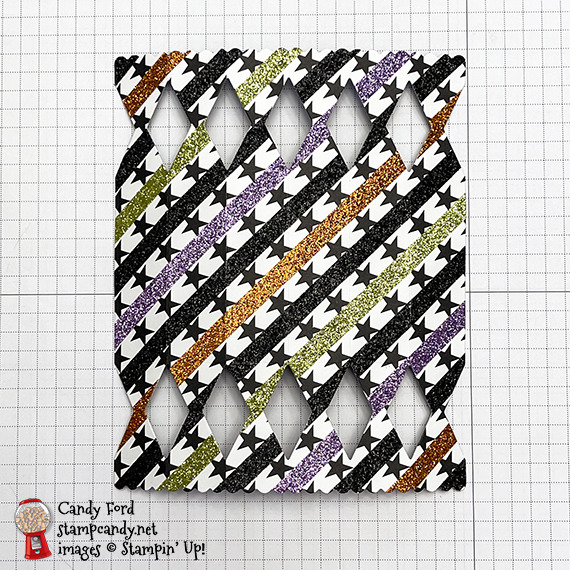
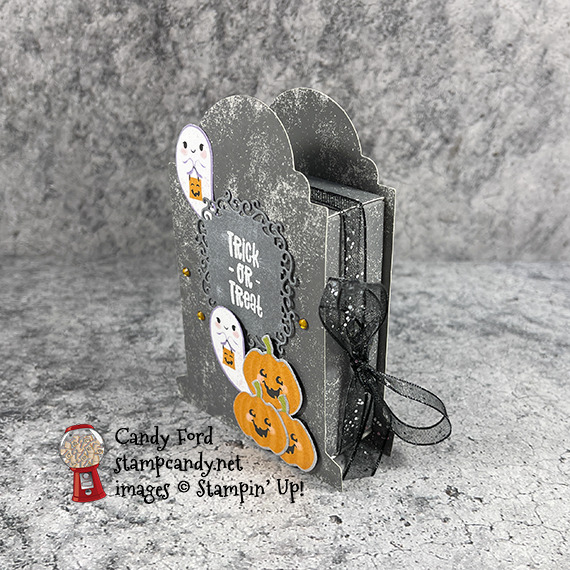
Welcome to the September 2022 Candy Hearts Blog Hop! It’s almost the time of year for all things spooky and fun. And Stampin’ Up! has all you need to make sure your treats are the cutest on the block. So today we’re sharing Halloween treat ideas. I used the Cracker & Treat Box Dies to create a cute little treat holder. I decorated some Designer Series Paper with washi tape, and added Metallic Mesh Ribbon which reminds me of silvery cobwebs. I used the Scary Cute stamp set for the sentiment – I inked only half of the sentiment at a time and stamped onto separate pieces of card stock.
After reading my post, I hope you will hop to the next person on the list below. Be sure to hop around to see ALL the great projects the Candy Hearts have created for you!
If you are reading this in email, some photos may appear blurry, or may not appear at all. Please click here to see the post on my blog.
S September 2022 Candy Hearts Blog Hop September 2022 Candy Hearts Blog Hop September 2022 Candy Hearts Blog Hop September 2022 Candy Hearts Blog Hop
Here’s what I made:

The front: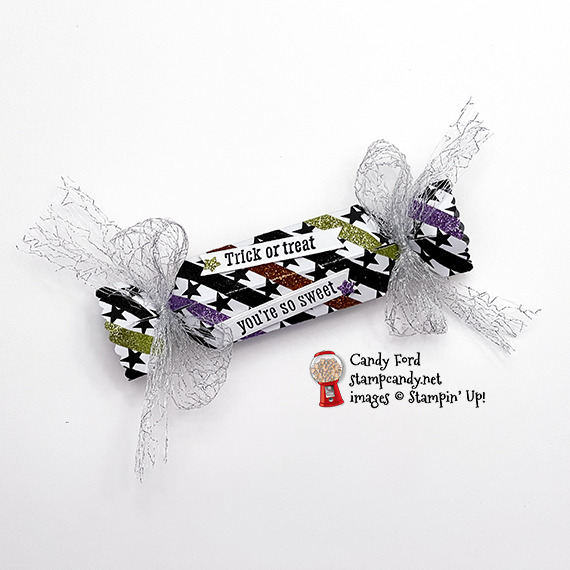
The back:

S
Here’s what I did:
Cut with my Paper Trimmer:
- Black & White Designs Designer Series Paper (DSP) cut to 6″ x 6″
- Basic White Thick CS cut to 2-1/2″ x 1″ (2 pieces)
Applied Glitter Washi Tape:
- onto the DSP between the rows of stars, alternating colors
Stamped with the Scary Cute stamp set:
- half of the sentiment in Tuxedo Black Memento ink onto each Basic White Thick CS piece
Die cut using the Cracker & Treat Box Dies:
- sentiments
- Washi Tape covered DSP
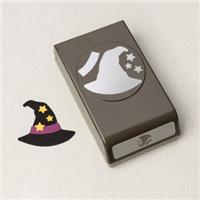
Cut using the Witch Hat Builder Punch:
- one small star from Old Olive Glitter Washi Tape
- one small star from Highland Heather Washi Tape
- TIP: When you press the punch, hold it closed until you can remove the star using a piercing tool. Then allow the punch to open, and tap gently on its side to release the scrap.
Cut using Paper Snips:
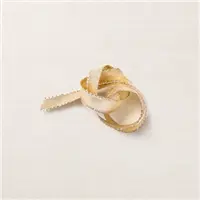
- 2 pieces of 1-1/2″ Metallic Mesh Ribbonx
Assembled the Treat Box:
- gently burnished the folds in the box with a Bone Folder
- adhered one end panel over the opposite end panel with Tear & Tape
- pinched together ends and tied ribbon around them and into a bow (Put in treats before closing the second end.)
- adhered sentiments onto two sides of the box, using Mini Stampin’ Dimensionals
- applied the washi tape stars onto the sentiments
S
Here’s the September 2022 Candy Hearts Blog Hop:
s
Here are today’s colors:
You can click on each one to see all the products that come in that color!
S
Here’s what I used:
Click on these images for more details and to purchase. If you are reading this post in email, the product images may not show up. Please click here to see the post on my blog.
Supply List. <— Click for a clickable and printable list of the products!
S
Here are some helpful links:
S
Thanks for stopping by today, and Sweet Stamping!
Mar 16, 2022 | Blog Hop, Cards, Gallery |
Welcome to the March 2022 InKing Royalty Blog Hop! As we prepare for Spring, flowers are always on our minds. We are sharing flower-themed projects with you today and hope you love them! After you read my post, I hope you’ll hop along to the next stop on the blog hop, Joanne Whittington at The Inky Dragon. There’s a lot of inspiration to be found in this group and you don’t want to miss it!I Thank you for stopping by today.
If you are reading this in email, some photos may appear blurry, or may not appear at all. Please click here to see the post on my blog.
S March 2022 InKing Royalty Blog Hop March 2022 InKing Royalty Blog Hop March 2022 InKing Royalty Blog Hop March 2022 InKing Royalty Blog Hop
Here’s what I made:

S
Here’s what I did:
Cut and scored with my paper trimmer:
- Polished Pink card stock (CS) cut to 4-1/4″ x 11″, then scored in half at 5-1/2″
- Granny Apple Green CS layer cut to 4″ x 5-1/4″
- Basic White CS cut to 4″ x 5-1/4″ for the inside of the card base
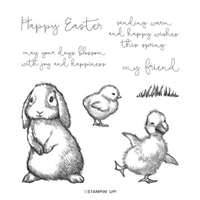
Stamped with the Easter Friends stamp set:
- sentiment in Granny Apple Green ink onto a scrap of Basic White Thick CS
Colored using the Butterflies & Flowers Layering Decorative Masks:
- vines onto the Granny Apple Green CS layer in Granny Apple Green ink using a Sponge Dauber
- flowers onto a scrap of Basic White Thick CS in Polished Pink and Melon Mambo inks using a Blending Brush
- leaves around the flowers in Granny Apple Green ink using a Sponge Dauber
Cut using the Everyday Label Punch:
Cut using Paper Snips Scissors:
- fussy cut the flowers & leaves
Assembled the card:
- burnished the fold in the card base with a Bone Folder
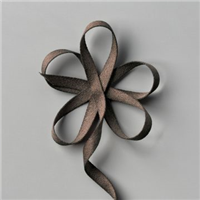
- white ribbon wrapped around the Granny Apple Green CS layer and adhered on the back with Tear & Tape
- Granny Apple Green CS layer glued onto the front of the card base
- sentiment adhered over the ribbon using Stampin’ Dimensionals
- flowers adhered using Stampin’ Dimensionals
- pearls applied onto two of the flower centers and onto the Granny Apple Green CS layer
- Basic White CS glued onto the inside of the card base
S
Here’s the March 2022 InKing Royalty Blog Hop:
Thank you for hopping along with us. If you get stuck during the Blog Hop, please use this line-up as a guide:
- Brian King at Stamp with Brian
- Marilyn Jones at Stamp with MJ
- Sue Jackson at Just Peachy Stamping
- Candy Ford at Stamp Candy <— YOU ARE HERE!
- Joanne Whittington at The Inky Dragon
- Jan Dufour at Stamp Me Silly
- Jackie Beers at Blue Line Stamping
- Lynn Kolcun at Avery’s Owlery
- Renae Novak at Blessed by Cards
- Sheryl Abernathy at Elegant Sentiments
- Pam Morris at Tap Tap Stamp
- Lisa Graham at Lisa’s Little Ink Spots
s
Here are today’s colors:
You can click on each one to see all the products that come in that color!
S
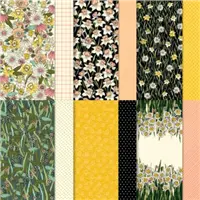
Here’s what I used:
Click on these images for more details and to purchase. If you are reading this post in email, the product images may not show up. Please click here to see the post on my blog.
Supply List. <— Click for a clickable and printable list of the products!
Here are some helpful links:
S
Thanks for stopping by today, and Sweet Stamping!
Jan 19, 2022 | Blog Hop, Cards, Gallery, Sale-A-Bration, Sympathy |

Welcome to the January 2022 InKing Royalty Blog Hop! We are having so much fun with our new Sale-a-Bration products and are excited to share some of that fun with you today. This month’s projects feature papers or stamp sets (or both!) from Stampin’ Up!’s January – February 2022 Sale-a-Bration brochure. We are excited to share our creations with you today! After you read my post, I hope you’ll hop over to the next person on the list at the base of this post.
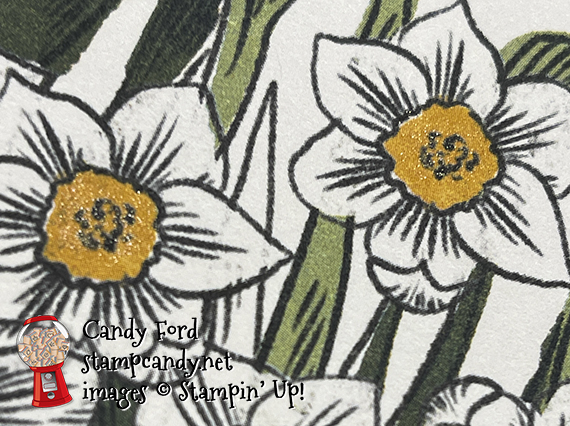
I used the gorgeous Daffodil Afternoon Designer Series Paper and the Special Moments stamp set from the SAB brochure to create today’s simple and lovely sympathy card.
If you are reading this in email, some photos may appear blurry, or may not appear at all. Please click here to see the post on my blog.
S January 2022 InKing Royalty January 2022 InKing Royalty
Here’s what I made:

S
Here’s what I did:
Cut and scored with my paper trimmer:
- Mossy Meadow card stock (CS) cut to 4-1/4″ x 11″, then scored in half at 5-1/2″
- Mossy Meadow CS layer cut to 3-7/8″ x 5-1/8″
- Daffodil Afternoon Designer Series Paper (DSP) layer cut to 4″ x 5-1/4″
Stamped with the Special Moments stamp set:
- sentiment in Crushed Curry ink onto the DSP layer
Colored using Clear Wink of Stella:
- flower centers
- It’s almost impossible to get Wink of Stella to show in a photo, but here’s what I got.
Assembled the card:
- burnished the fold in the card base with a Bone Folder
- Mossy Meadow CS layer glued onto the back of the DSP layer. This is to give the DSP layer more strength.
- ribbon wrapped around the DSP layer and adhered using Stampin’ Seal +
- another piece of ribbon tied in a bow and adhered over the first ribbon using Mini Glue Dots
- DSP layer adhered onto the card front using scraps of Foam Adhesive Sheets
- Basic White CS glued onto the inside of the card base
S
Here’s the January 2022 InKing Royalty Blog Hop:
Thank you for hopping along with us. If you get stuck during the Blog Hop, please use this line-up as a guide:
- Brian King at Stamp with Brian
- Jackie Beers at Blue Line Stamping
- Sue Jackson at Just Peachy Stamping
- Renae Novak at Blessed by Cards
- Candy Ford at Stamp Candy <——- YOU ARE HERE!
- Ann Murray at Murray Stamps Ink
- Robin Myren at Songbird Designs by Robin
- Joanne Whittington at The Inky Dragon
- Pam Morris at Tap Tap Stamp
- Jan Dufour at Stamp Me Silly
- Marilyn Jones at Stamp with MJ
- Sheryl Abernathy at Elegant Sentiments
- Lynn Kolcun at Avery’s Owlery
s
Here are today’s main colors:
You can click on each one to see all the products that come in that color!
S
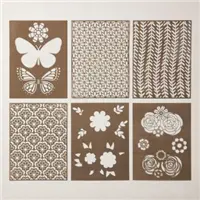
Here’s what I used:
Click on these images for more details and to purchase. If you are reading this post in email, the product images may not show up. Please click here to see the post on my blog.
Supply List. <— Click for a clickable and printable list of the products!
Here are some helpful links:
S
Thanks for stopping by today, and Sweet Stamping!
Nov 8, 2021 | Blog Hop, Cards, Christmas, Gallery, Holiday |

Welcome to the Candy Hearts Blog Hop for November! Today we are sharing Holiday projects. I used the Stockings Dies to make a hobby horse. I remember having one of these when I was very little. It had jingle bells on it. I usually played with it outside, because inside I had my rocking horse. It was on a metal stand with springs, so it didn’t rock so much as it bounced. I would get going so fast that it would scoot across the room. After reading my post, I hope you will hop to the next person on the list below. Be sure to hop around to see ALL the great projects the Candy Hearts have created for you!
If you are reading this in email, some photos may appear blurry, or may not appear at all. Please click here to see the post on my blog.
S November 2021 Candy Hearts Blog Hop November 2021 Candy Hearts Blog Hop November 2021 Candy Hearts Blog Hop November 2021 Candy Hearts Blog Hop
Here’s what I made:
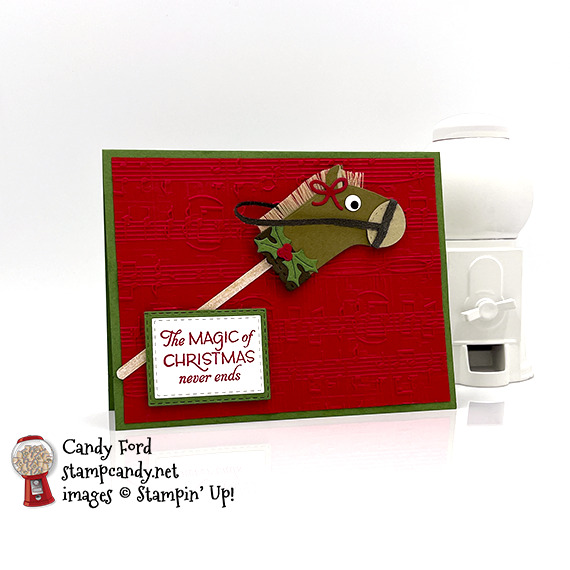
You can see the embossing better in this photo:

S
Here’s what I did:
Cut and scored with my paper trimmer:
- Garden Green card stock (CS) cut to 5-1/2″ x 8-1/2″, then scored in half at 4-1/4″
- Real Red CS layer cut to 5-1/4″ x 4″
- In Good Taste Designer Series Paper (DSP) cut to 1/8″ x 5″
- Basic White CS cut to 5-1/4″ x 4″ for the inside of the card base
- Note: All the other pieces of CS I used were left over scraps.
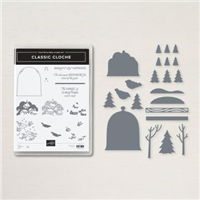
Stamped with the Classic Cloche stamp set:
- sentiment in Real Red ink onto Basic White Thick CS
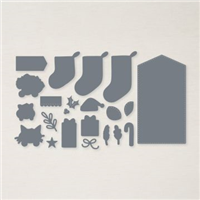
Cut using the Stockings Dies:
- stocking from Soft Suede CS
- toe from Crumb Cake CS
- topper from Early Espresso CS
- holly from Garden Green CS
- bow and berries from Real Red CSx
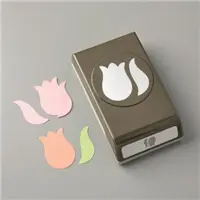
Cut using the Tulip Builder Punch:
- leaf cut from Soft Suede CS (2 pieces) and from Crumb Cake CS (1 piece)
Cut using the Stitched Rectangle Dies:
- sentiment
- Garden Green CS for the mat
Cut using circle punches:
- 1/4″ circle from a scrap of Basic White Thick CS
- 1/8″ circle from a scrap of Basic Black CS
- Note: The punches I used by Stampin’ Up! are retired, but you can find punches like them almost anywhere.
Embossed using the Merry Melody 3D Embossing Folder:
- the 5-1/4″ x 4″ Real Red CS layer
Mane:
- trimmed one edge from a piece of Gold 3/8″ Shimmer Ribbon using Paper Snips (I keep one pair just for ribbon)
- pulled out the long gold threads, leaving a fringe
Assembled the card:
- burnished the fold in the card base with a Bone Folder
- Real Red CS layer glued onto the front of the card base
- Basic White CS glued onto the inside of the card base
- topper glued onto the stocking
- fringe adhered onto the back of the stocking using Tear & Tape
- Crumb Cake leaf glued offset onto the front of a Soft Suede leaf, then trimmed using Paper Snips to create the ear shape
- second Soft Suede leaf trimmed using Paper Snips to create the ear shape
- 2-color ear glued onto the front of the horse head
- second ear glued onto the back of the head
- Basic Black circle glued onto the Basic White circle
- Basic White circle glued onto the head as the eye
- Early Espresso Faux Suede ribbon cut in half lengthwise using Paper Snips
- Faux Suede ribbon strip glued onto the stocking toe piece
- toe piece glued onto the head as the nose
- one end of another Faux Suede ribbon strip glued under the first strip
- the other end of the ribbon strip adhered onto the back of the head
- holly and berries glued onto the stocking topper
- bow glued onto the head in front of the ear
- DSP strip glued onto the Real Red CS layer
- head adhered over the DSP strip using Black Stampin’ Dimensionals
- sentiment glued onto the Garden Green CS mat
- Garden Green CS mat adhered onto the Real Red CS layer using Black Stampin’ Dimensionals
S
Here’s the November 2021 Candy Hearts Blog Hop:
Thank you for hopping with the Candy Hearts today! Be sure to hop around to all the stops. You do not want to miss any of the creativity in this talented group of stampers!
s
Here are today’s colors:
You can click on each one to see all the products that come in that color!
S
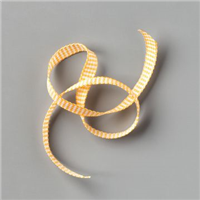
Here’s what I used:
Click on these images for more details and to purchase. If you are reading this post in email, the product images may not show up. Please click here to see the post on my blog.
Supply List. <— Click for a clickable and printable list of the products!
Here are some helpful links:
S
Thanks for stopping by today, and Sweet Stamping!
Oct 12, 2021 | Blog Hop, Boxes, Gallery, Gift Wrap, Gifts, Halloween, Holiday, Treat Holders |

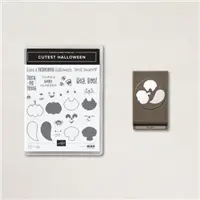
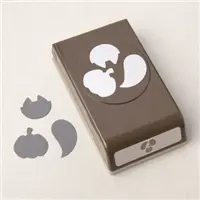
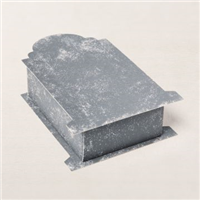
Welcome to the October 2021 ICS Blog Hop! This month we are featuring our favorite punches. Of course, it’s impossible for me to choose one punch as my favorite. I like them all! But I finally decided to use the Halloween Punch because, you know, it’s October and all. The punch can be purchased alone or in a bundle with the Cutest Halloween stamp set (save 10% when you buy the bundle!)

If you are reading this in email, some photos may appear blurry, or may not appear at all. Please click here to see the post on my blog.
S October 2021 ICS October 2021 ICS October 2021 ICS October 2021 ICS
Here’s what I made:

S
Here’s what I did:
Stamped with the Cutest Halloween stamp set:
- sentiment in Versamark ink onto a scrap of Basic Gray cardstock (CS), then heat embossed it in white
Cut using the Ornate Frames Dies:
Cut using the Halloween Punch:
- 3 pumpkins and 2 ghosts from the Cute Halloween Designer Series Paper (DSP)
Inked using a Sponge Dauber:
- sentiment die cut in White Craft Ink, then dried the ink using the lower setting of my Heat Tool
Assembled the project:
- burnished the folds in the box and lid with a Bone Folder, then assembled the box
- sentiment and one ghost glued onto the lid of the box (Note: the ghost extends past the top of the box, I was careful only to to apply glue where it would be adhered onto the box.)
- 3 pumpkins glued together in a cluster, then adhered onto the box lid using Black Stampin’ Dimensionals
- second ghost adhered onto the box lid, as if coming out from behind the pumpkins, using Black Stampin’ Dimensionals
- 3 Pumpkin Pie rhinestones applied onto the box lid using my Take Your Pick Tool
- ribbon wrapped around the lid, adhering in onto the top, bottom, and left side with Tear & Tape, then tied in a bow on the right side

redS
Here’s the October 2021 ICS Blog Hop:
Click the Next button to hop to the next blog:

Here are today’s main colors:
You can click on each one to see all the products that come in that color!
S
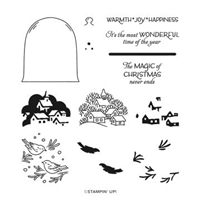
Here’s what I used:
Click on these images for more details and to purchase. If you are reading this post in email, the product images may not show up. Please click here to see the post on my blog.
Supply List. <— Click for a clickable and printable list of the products!
Here are some helpful links:
S
Thanks for stopping by today, and Sweet Stamping!