Feb 20, 2019 | Blog Hop, Cards, Gallery |

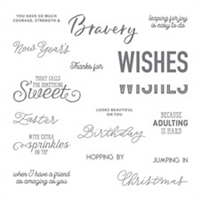
Welcome to InKing Royalty’s February Blog Hop! This year’s Blog Hop themes are inspired by a single word, and this month our projects are centered around BIRTHDAY. I used the upcoming More Than Words stamp set along with the Layering Squares Framelits Dies and Broadway Bound Designer Series Paper. The Stamparatus makes the two tone stamping super easy!
It’s always special to celebrate the birthday of someone you love, so handmade birthday cards are always fun to share. We are excited to share our creations with you today! After you read my post, I hope you’ll hop over to the next person on the list at the base of this post, the wonderful Jackie Beers of Blue Line Stamping.
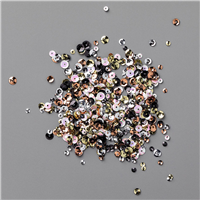
When I use small embellishments like sequins or pearls, I always try to use odd numbers, usually 3. Today I used 7, which I would normally feel is too many. But I think they kind of blend in on this card, so they don’t seem like too much. What do you think?
S
Here’s what I made:
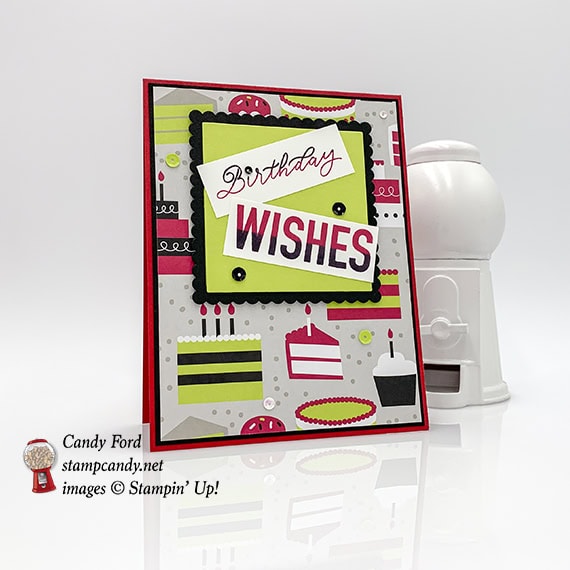
I originally cut the sentiment using one of the square dies, so it fit perfectly on the other die cut squares. But that just didn’t seem very fun. So I opted to cut the words apart and glue them onto the squares in a more whimsical fashion.
 S
S
Here’s what I did:
Cut and scored with my Stampin’ Trimmer:
- Lovely Lipstick card stock (CS) cut to 4-1/4″ x 11″, then scored in half at 5-1/2″
- Basic Black CS cut to 4-1/8″ x 5-3/8″
- Broadway Bound Designer Series Paper (DSP) cut to 4″ x 5-1/4″
- Whisper White CS cut to 4″ x 5-1/4″ for the inside of the card
- trimmed around sentiments after stamping
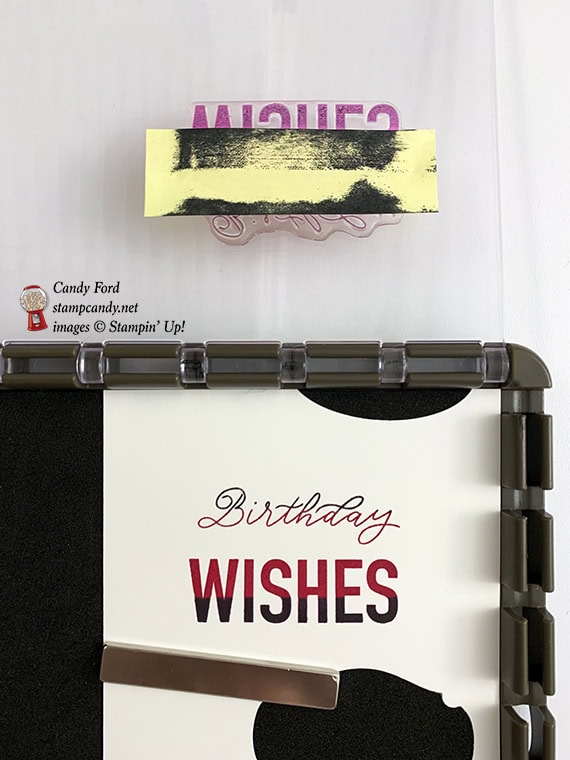
Stamped with the More Than Words stamp set:
- sentiment in Lovely Lipstick ink onto a scrap of Whisper White CS
- part of sentiment in black Memento ink over the Lovely Lipstick ink
- To accomplish this two tone effect, I used the Stamparatus: 1) stamped the sentiment first in Lovely Lipstick ink 2) used a Shammy to clean the stamps. 3) cut a sticky note to about 7/8″ wide and placed it over the part of the sentiment I wanted to remain Lovely Lipstick. 4) inked up the stamps in black ink, then removed the sticky note strip before stamping over the original image.
- You can see in the photo that I really do use “scraps” of card stock.
Die cut using the Layering Squares Framelits:
- a square from a scrap of Lemon Lime Twist CS
- a scalloped square from a scrap of Basic Black CS
Assembled the card:
- burnished the fold in the card base with a Bone Folder
- Basic Black CS layer glued onto the front of the card base
- DSP layer glued onto the Basic Black CS layer
- Lemon Lime Twist CS square glued onto the Basic Black CS scalloped square
- Basic Black CS scalloped square adhered onto the DSP layer using Stampin’ Dimensionals
- sentiment pieces glued onto the Lemon Lime Twist CS square
- 2 black sequins glued onto the Lemon Lime Twist square
- 1 small black sequin glued onto the sentiment, dotting the “i”
- 2 Lemon Lime Twist adhesive backed sequins applied onto the DSP layer
- 2 iridescent sequins glued onto the DSP layer
- Whisper White CS glued onto the inside of the card base
S
Here’s the Birthday hop:
Thank you for hopping along with us. After you read my post, I hope you’ll hop on over to the next stop, Jackie Beers at Blue Line Stamping. If you get stuck during the Blog Hop, please use this line-up as a guide:
- Brian King at Stamp with Brian
- Lynn Kolcun at Avery’s Owlery
- Nina King at InkPaperSequins
- Julie DiMatteo at The Paper Pixie
- Sue Jackson at Just Peachy Stamping
- Candy Ford at Stamp Candy <– YOU ARE HERE
- Jackie Beers at Blue Line Stamping
- Mary Fish at Stampin’ Pretty
- Jennifer Spiller at Westside Paper Creations
- Deb Cozzone at Grand Central Stamping
- Robbye Hamilton at Miss Hammie’s Crafts
- Robin Myren at Songbird Designs by Robin
- Katie Ferguson at Cottage Paper
- Shawn de Oliveira at Shawn Stamps
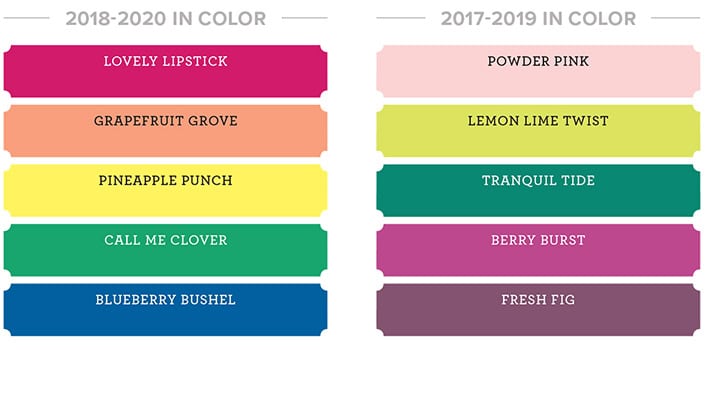
Here are today’s colors:
You can click on each one to see all the products that come in that color!
S
Here’s what I used:
Click on these images for more details and to purchase.
S
Today is the LAST DAY to preorder the Happiness Blooms Online Class!
- make 26 colorful cards at home in your PJs!
- 2 each of 10 designs, plus 6 individual card designs
- full detailed instructions
- Preorder February 14-20
- limited spots available
Click on the image below for details:

S
Here are some helpful links to check out:

S
Thanks for stopping by today, and Sweet Stamping!

Feb 9, 2019 | Cards, Gallery, Sale-A-Bration |
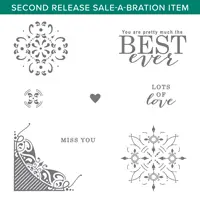
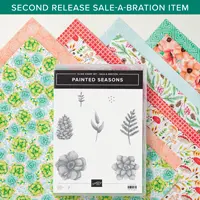
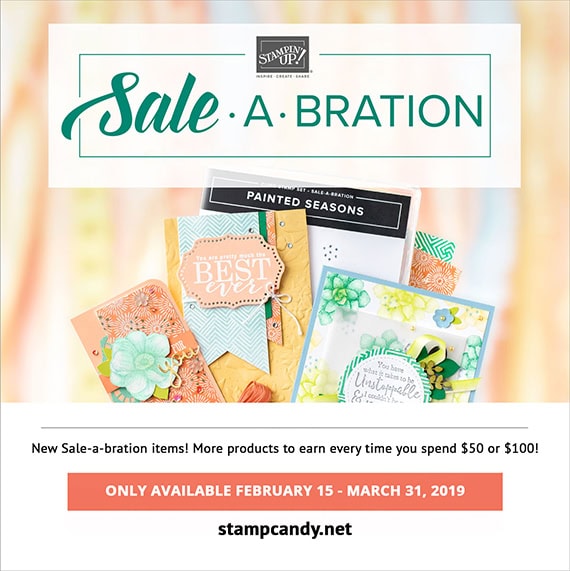
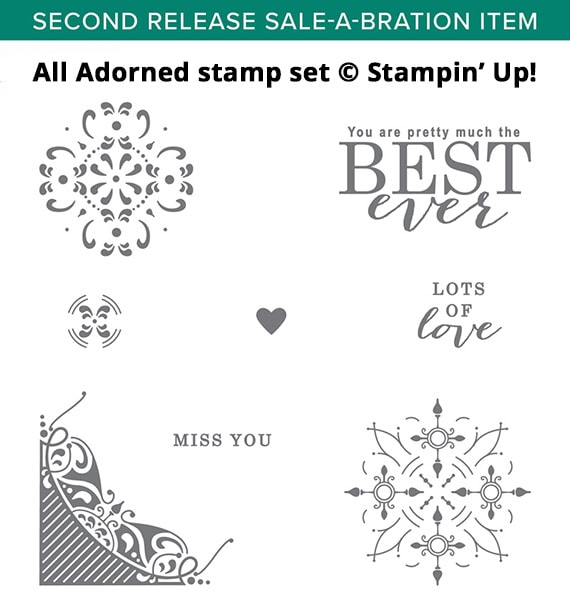
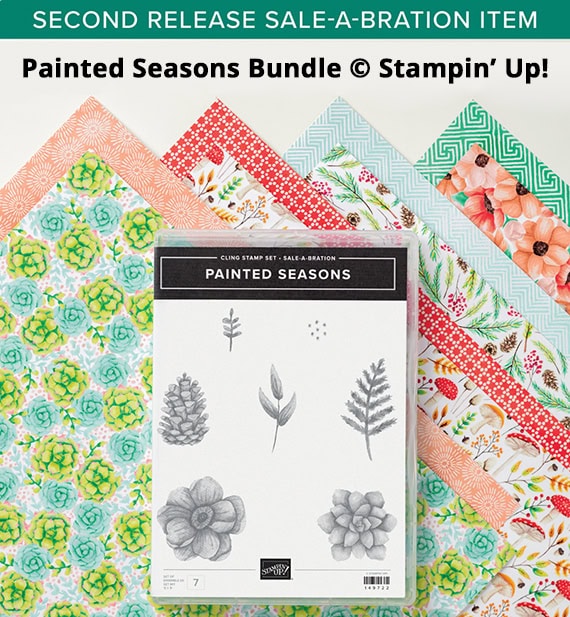
Today I’m sharing another project I made using brand new 2nd Release Sale-a-bration items! They will be available February 15 – March 31, 2019, and they’ll be free with a qualifying order! For today’s card I used two of the new items: the All Adorned stamp set and the Painted Seasons Designer Series Paper.
The Painted Seasons Designer Series Paper is part of a Sale-a-bration bundle! It comes with the Painted Seasons stamp set.
S
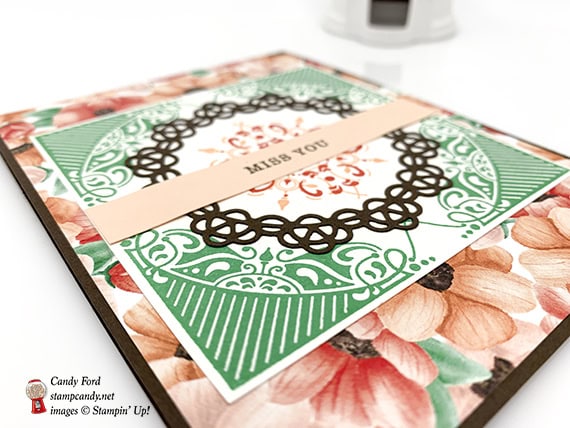
Here’s what I made:

S
Here’s what I did:
Cut and scored with my Stampin’ Trimmer:
- Early Espresso card stock (CS) cut to 4-1/4″ x 11″, then scored in half at 5-1/2″
- Painted Seasons Designer Series Paper (DSP) cut to 4-1/8″ x 5-3/8″
- Whisper White CS cut to 3-3/4″ x 3-3/4″
- Petal Pink CS cut to 3-3/4″ x 1/2″
- Whisper White CS cut to 4″ x 5-1/4″ for the inside of the card base
Stamped with the All Adorned stamp set:
- sentiment in Early Espresso ink onto the Petal Pink CS strip
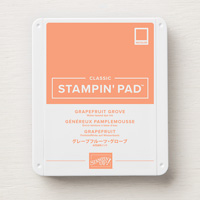
- 2 medallions in the center of the 3-3/4″ square Whisper White CS layer, one in Grapefruit Grove ink and the other in Poppy Parade ink
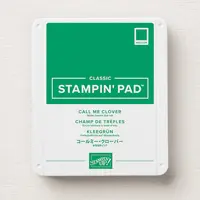
- 4 corners of the square layer in Call Me Clover ink. I lined up the corner stamp on one corner of the square CS layer, then used the Stamparatus to stamp on all four corners, turning the paper 1/4 turn between each stamp.
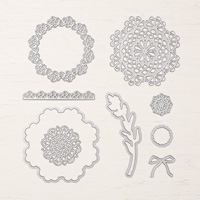
Die cut using the Doily Builder Thinlits:
- decorative ring from a scrap of Early Espresso CS
Assembled the card:
- burnished the fold in the card base with a Bone Folder
- DSP layer glued onto the front of the card base
- square layer glued onto the DSP layer
- die cut ring glued onto the square layer
- sentiment strip glued over the die cut ring and the square layer
- Whisper White CS glued onto the inside of the card base
S
Here are today’s colors:
You can click on each one to see all the products that come in that color!
Here’s what I used:
Click on these images for more details and to purchase.
The first two items items (with Price: $0.00) are new Sale-a-bration items that will be available February 15 – March 31, 2019.
S
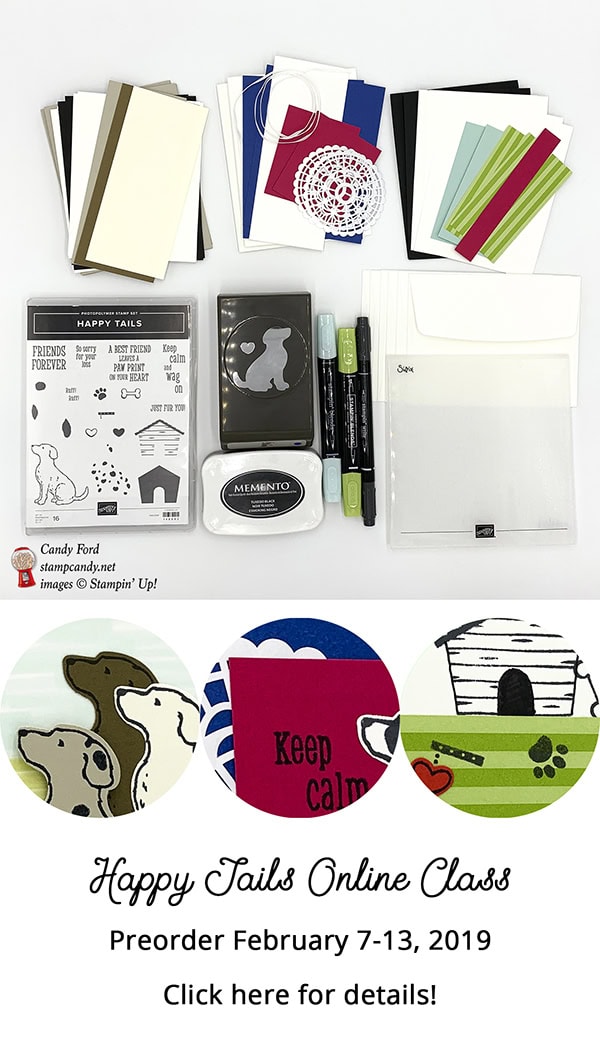
Here is this week’s online class!
If you or someone you know loves dogs, this class is for you! Click on the image below for details and to order.
Here are some helpful links to check out:
Thanks for stopping by today, and Sweet Stamping!
Feb 6, 2019 | Blog Hop, Food, Gallery, Gift Wrap, Gifts |

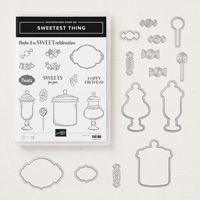
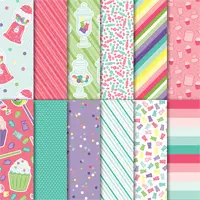
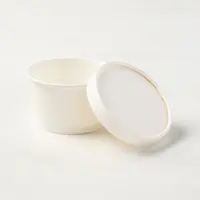
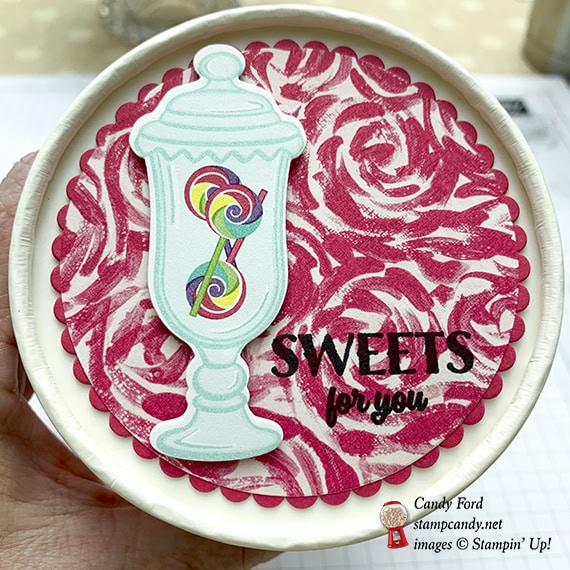
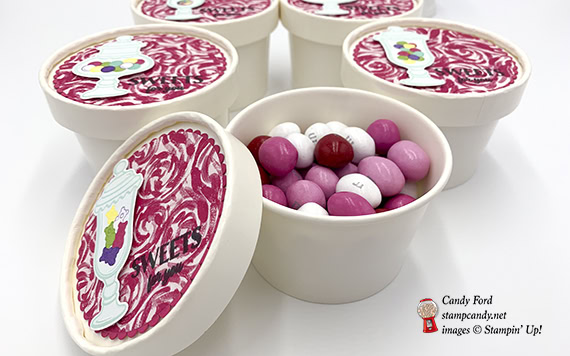
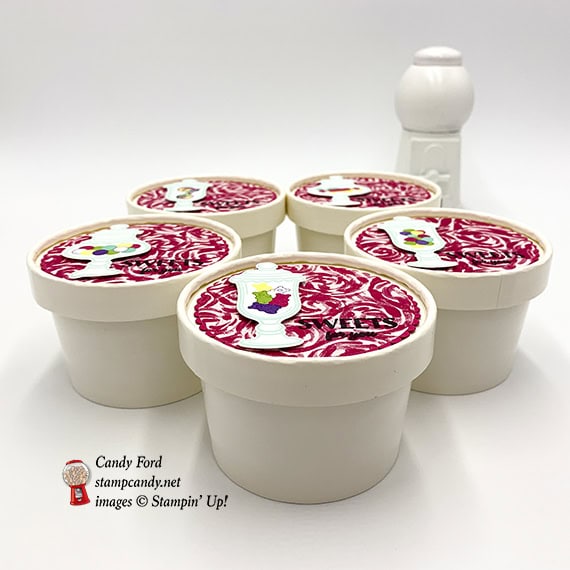
Today for the ICS Love Thing Blog Hop we are sharing projects for wedding, anniversary or Valentines Day. I’m sharing the little gifts I made for some friends of mine for Valentine’s Day. I filled Sweet Cups with Valentine themed peanut M&Ms, and decorated the lids with the Sweetest Thing bundle, How Sweet It Is and Garden Impressions Designer Series Papers, and the Layering Circles Framelits Dies. I used the Stamparatus to stamp the sentiment so it would be in exactly the same place on each one – read on to see how I did that. Super quick and easy!
Here’s what I made:

Here’s what I did:
Die cut using the Layering Circles Framelits:
- largest scalloped circle from Melon Mambo card stock (CS)
- largest plain circle from Garden Impressions Designer Series Paper (DSP)
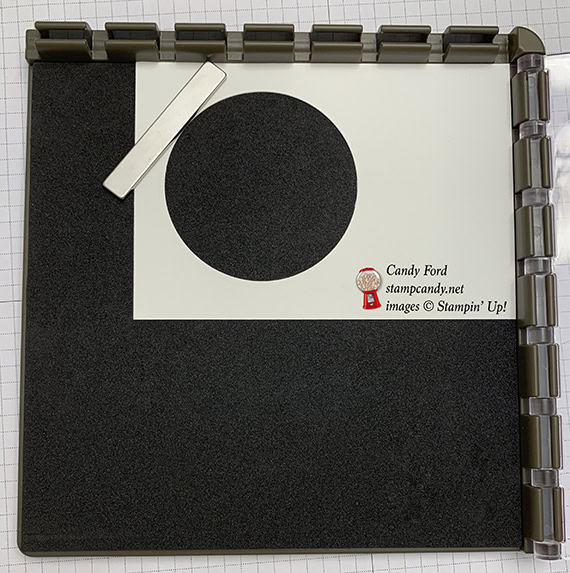
- largest plain circle from a scrap of CS (any color) for a Stamparatus template (see below)
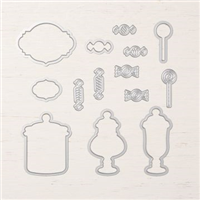
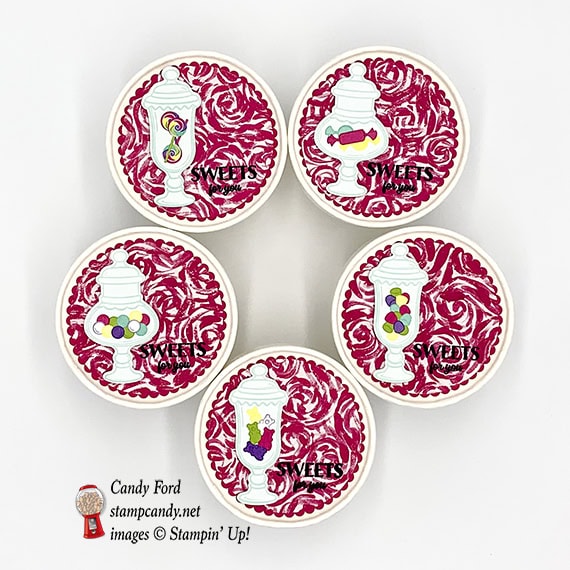
Die cut using the Jar of Sweets Framelits:
- candy jars from a piece of How Sweet It Is DSP
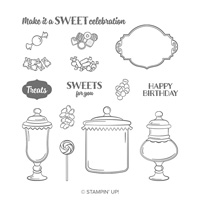
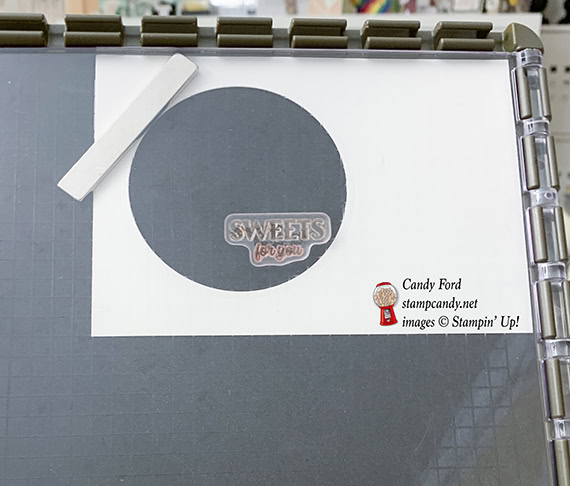
Stamped with the Sweetest Thing stamp set:
- sentiment in black ink onto the DSP circle
- I placed the die cut template on the Stamparatus and placed the stamp where I wanted it on all the circles. Then I placed each DSP circle in the template and stamped. This is great for stamping multiples of the same thing, or for stamping in the same place more than once if you didn’t get a good stamp the first time.
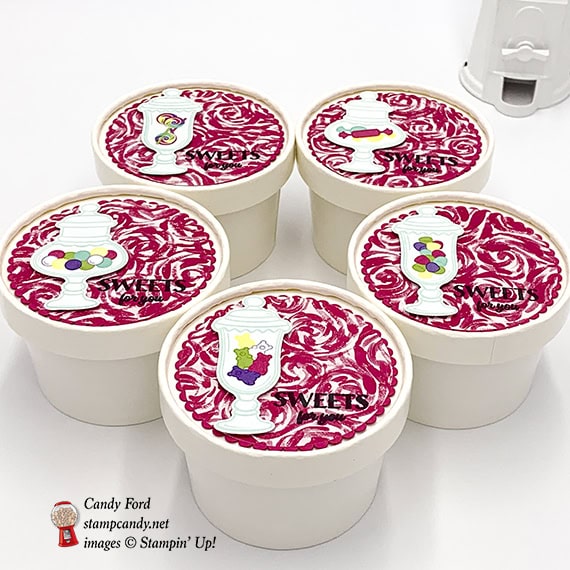
Assembled the sweet cups:
- DSP circle glued onto the Melon Mambo CS circle
- die cut candy jar adhered onto the DSP circle using Stampin’ Dimensionals
- Melon Mambo CS circle adhered onto the lid of the sweet cup using Tear & Tape
Here’s the It’s A Love Thing blog hop:

Here are today’s main colors:
You can click on each one to see all the products that come in that color!
Here’s what I used:
Click on these images for more details and to purchase.
Here are some helpful links to check out:
Thanks for stopping by today, and Sweet Stamping!
Dec 12, 2018 | New Products, Paper Pumpkin, Promotions, Sales |
There are so many things going on in Stampin’ Up! right now! I just want to make sure you know about all of them.

The Year-End Closeout is Stampin’ Up!’s chance to do a little inventory cleaning—and your opportunity to take advantage of special year-end deals on retiring and surplus items. During this promotion, you will be able to save on a selection of retiring and surplus items—while supplies last. Definitely place your orders sooner rather than later, because supplies are limited and the Year-End Closeout ends on January 2. After that, some of your favorite retiring items may be gone for good! It’s your last chance to show 2018 some love! Through January 2 or while supplies last. CLICK HERE to see all the Year-End Closeout items.

The Holiday Catalog order period is coming to an end January 2. Many of the products are retiring. Some are already gone. CLICK HERE to shop now while you can!

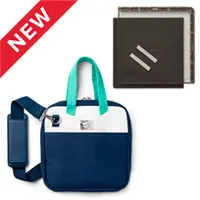
This tote is amazing! It’s very well made and sturdy. It holds a lot. There are dividers inside that are removable. It looks great. But only Demos can purchase this tote, and only this month. Join my team so you can buy it now!

You can purchase Stampin’ Up!’s theme songs from the past 30 years, but they’re only available through December 31, 2018
You have two options:
- Complete Collection of Stampin’ Up! Theme Songs $15.00 USD
- Single Love, Live & Share It Today – 30-year anniversary song $5.00 USD
Stampin’ Up! will donate 100 percent of the funds raised to the following Autism organizations: Autism Speaks; Autism Speaks Canada; The National Autistic Society; Autism Europe; Autism New Zealand; Autism Spectrum (ASPECT); Japan Autism Society
BUY NOW AND MAKE A DIFFERENCE


Would you like to see and order the new products from the 2019 Occasions catalog now, instead of having to wait until January? Would you like to earn the new Sale-a-bration items now, too? Only Demos can participate in the Occasions catalog preorder and the Sale-a-bration pre-earn. So…
- Become a Candy Heart!
- Join my team and you can order the new products right now, instead of having to wait another month!
- No selling required! I welcome Hobby Demos! (Hobby Demos join to get the discount for themselves.)
- CLICK HERE for the details!
Get your FREE copy of the new catalogs
Just click on the Free Catalog button below to order the new catalogs. I will include a list of the bundles, the Designer Series Paper coordinating colors, and a handmade card! All FREE!

The Stamparatus Accessories are not in a catalog. To see and purchase them, CLICK HERE.

Don’t you love it when you have just the right thing to hold your supplies? I sure do. The new Stamparatus Bag is exactly that. It hold the Stamparatus and all the accessories with room to spare. CLICK HERE to purchase it.

January’s Paper Pumpkin Kit and Animal Expedition are going wild for Valentine’s Day! Next month’s Be Mine, Valentine kit combines everything you love about Paper Pumpkin-style treat packaging with adorable critter coordination in the popular Animal Expedition Kit! CLICK HERE to purchase a prepaid subscription, or CLICK HERE to subscribe month to month. Subscribe by January 10 to get this kit!

With the seasonal catalogs coming out every few months, it’s easy to forget about the Annual Catalog. But don’t! It’s full of amazing products, including the basics like card stock and ink pads, and stamp sets for all occasions. SHOP HERE

Right now you have 3 stamp types to choose from: wood mount, clear mount, and photopolymer. In future catalogs, beginning with the 2019 Occasions Catalog, there will be *2 options: cling and photopolymer. Cling stamps are essentially the same as the clear mount stamps we have now with one big difference: the individual stamp labels are very, very clingy. There will be no chance of these stamps falling off the block. If you want to try them out now, join my team and get Occasions catalog products in your Starter Kit!
*In North America, the large background stamps will still be available in wood mount.
Here’s more cool stuff you should check out:
Thanks for stopping by today, and Sweet Stamping!
Aug 17, 2018 | Cards, Gallery, Techniques |
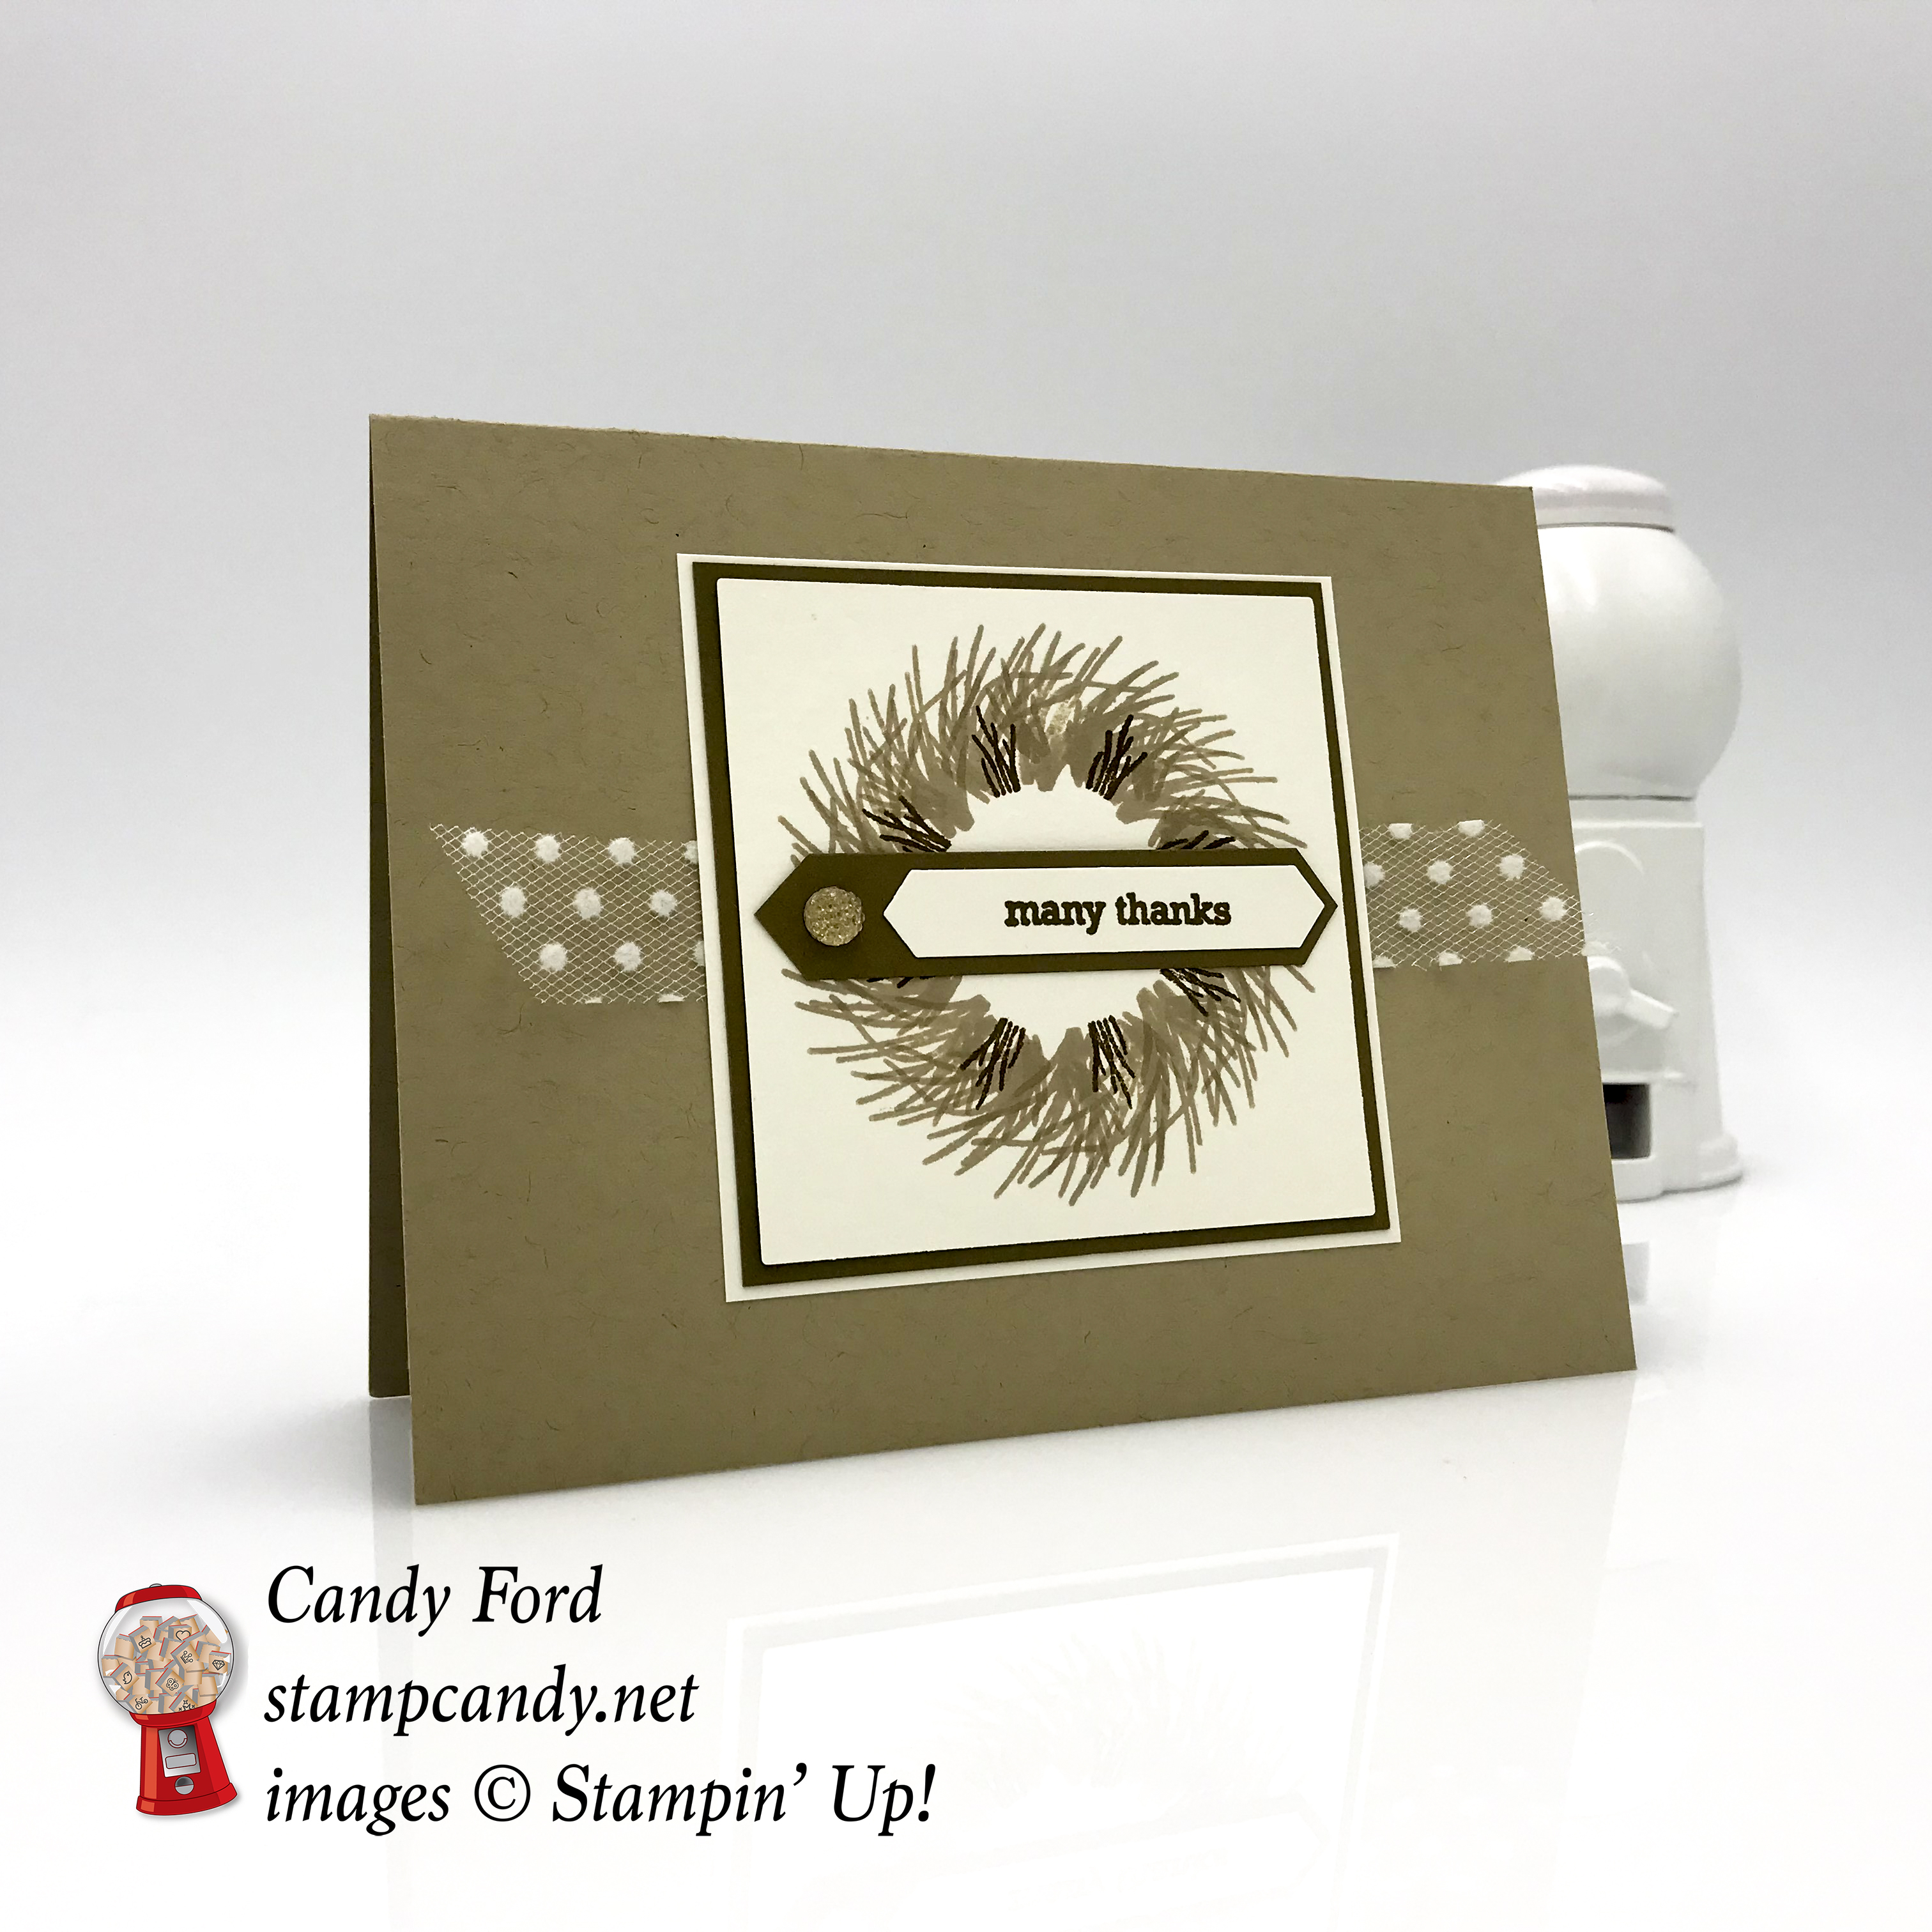
Today’s card is another example of what you can do with a Stamparatus stamped wreath. The layout is the same as a few of the others (you can see them here, here, and here) but the different stamp set and colors make it look very different. I used the High Tide stamp set for the wreath, and the colors are Soft Suede, Crumb Cake, and Very Vanilla.
Here’s what I made:

Here’s what I did:
Cut and scored with my Stampin’ Trimmer:
- Crumb Cake card stock (CS) cut to 5-1/2″ x 8-1/2″, then scored in half at 4-1/4″
- Very Vanilla CS cut to 3-1/8″ x 3-1/8″
- Soft Suede CS cut to 3″ x 3″
- Soft Suede CS cut to 2-3/4″ x 1/2″
- scraps of Very Vanilla CS for punching and die cutting*
- Very Vanilla CS cut to 5-1/4″ x 4″ for the inside of the card
Stamped with the Itty Bitty Greetings stamp set:
- *sentiment in Soft Suede ink onto the scrap of Very Vanilla CS
Cut using the Classic Label Punch:
Cut using Paper Snips:
- ends of the Soft Suede CS strip to match the punched sentiment
Die cut using the Layering Squares Framelits:
- *scrap of Very Vanilla CS with the largest plain square die
Stamped using the High Tide stamp set:
- the wreath in Crumb Cake and Soft Suede inks onto the die cut Very Vanilla CS square
- See my post here for instructions on how to stamp the wreath using a Stamparatus
- I stamped the larger image in Crumb Cake twice around – once the standard 8 times, then another 8 between the first ones.
Assembled the card:
- burnished the fold in the card base with a Bone Folder
- a piece of Very Vanilla Polka Dot Tulle Ribbon adhered to the front of the card base using Tear & Tape
- 3-1/8″ Very Vanilla CS square glued onto the front of the card base, over the ribbon
- 3″ Soft Suede CS square glued onto the 3-1/8″ Very Vanilla CS square
- wreath stamped layer glued onto the 3″ Soft Suede CS
- sentiment glued onto the Soft Suede CS strip
- a large Gold Faceted Gem applied to the Soft Suede CS strip
- Soft Suede CS strip adhered onto the wreath stamped layer using Stampin’ Dimensionals
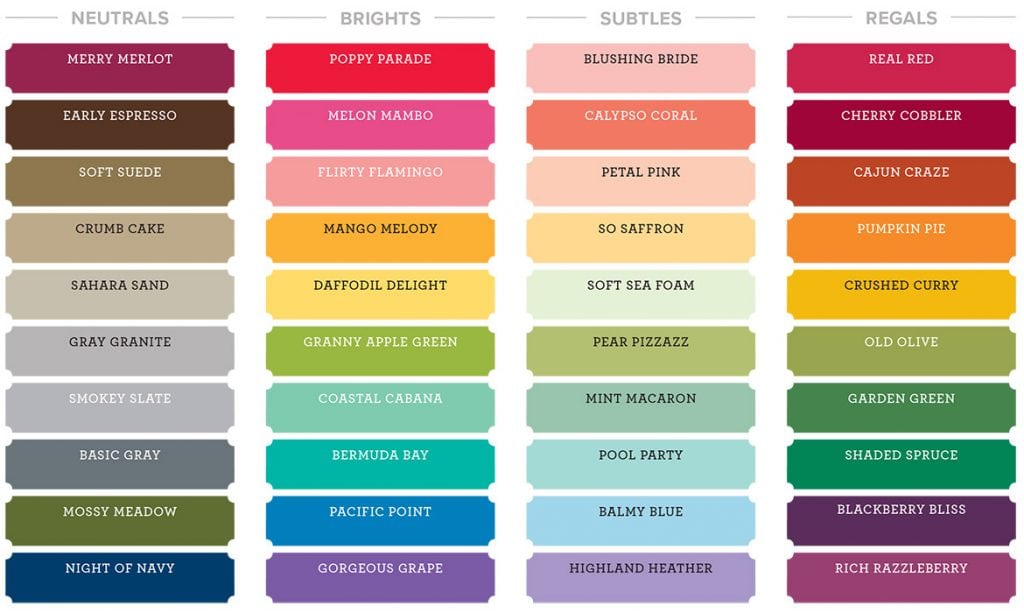
Here are today’s colors:
You can click on each one to see all the products that come in that color!
Here’s what I used:
Click on these images for more details and to purchase.
Here are 3 amazing limited time offers – August only!:
1) Color Your Seasons Special, August 1-31, 2018, While Supplies Last!
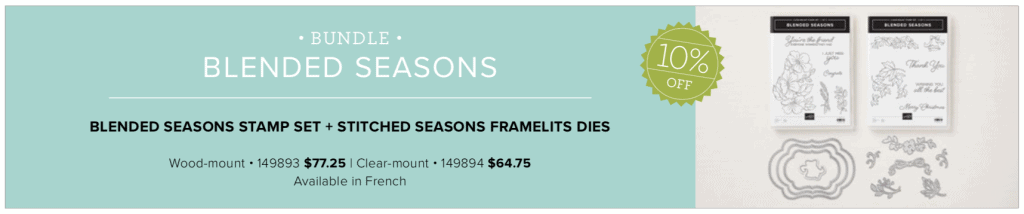
Stampin’ Up!’s® Blended Seasons Stamp Set, coordinating Framelits™ Dies, and Watercolor Pencils are perfect for every season of creating! Plus, save 10% when you buy the stamp set and Framelits in a bundle! But don’t wait—these exclusive products are only available until August 31 while supplies last. So get in the mood to create something full of colors and seasons!
Introducing the all-new, limited-time Color Your Season products:
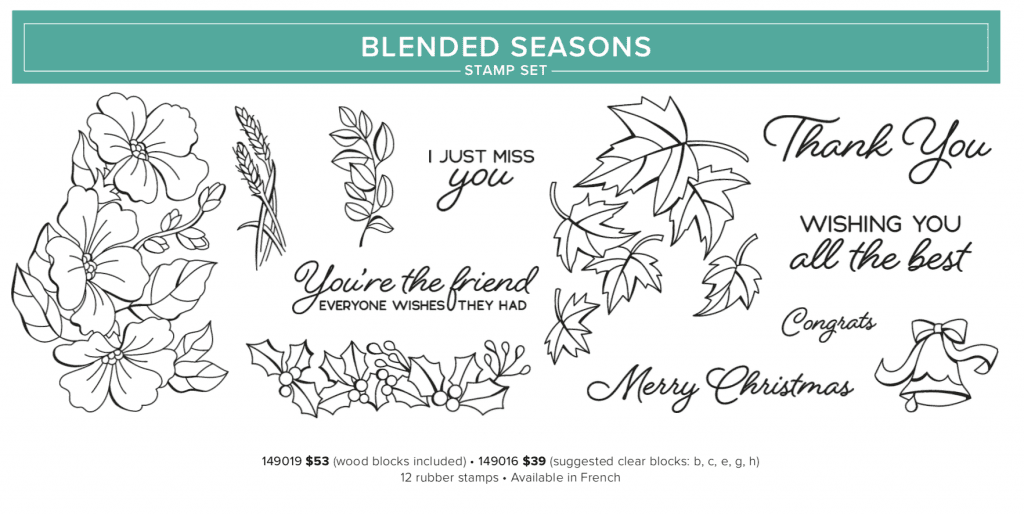
- Blended Seasons Stamp Set, an exclusive 12-piece wood- or clear-mount stamp set with images for every season – #149019 @ $53 (wood blocks included); #149016 @ $39 (suggested clear blocks: b, c, e, g, h)
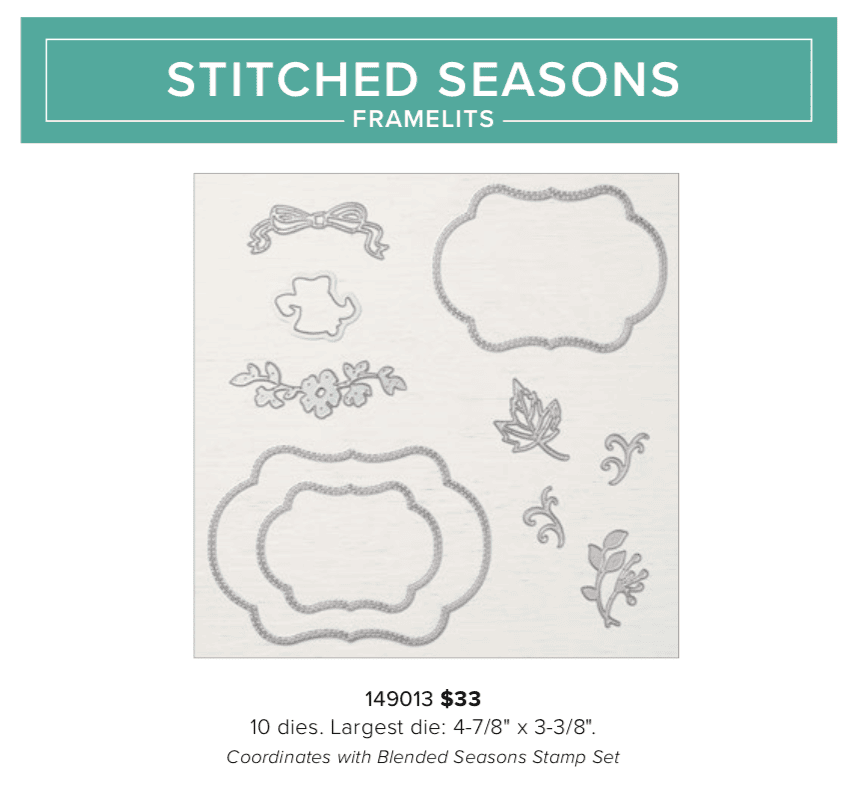
- Stitched Season Framelits Dies, a coordinating stitched die that includes stitching on both the positive and negative images! #149013 @ $33. Has10 dies. Largest die: 4-7/8″ x 3-3/8″.
- Save 10%! Blended Seasons BUNDLE – BLENDED SEASONS STAMP SET + STITCHED SEASONS FRAMELITS DIES – Wood-mount #149893 @ $77.25, Clear-mount #149894 @ $64.75
- Watercolor Pencils in 10 new colors! #149014 @ $12.50. Acid free, lignin free.10 pencils in Stampin’ Up! colors: Balmy Blue, Cajun Craze, Cherry Cobbler, Coastal Cabana, Crushed Curry, Flirty Flamingo, Garden Green, Gorgeous Grape, Granny Apple Green, Night of Navy
- Products available while supplies last until August 31, 2018 – while supplies last
- Items may be included as part of a new demonstrator’s Starter Kit.

2) Bonus Days are back!
- For every $50 you spend on an order in August, you will receive a $5 coupon to use in September!
- There is no limit to the number of coupons you may earn.
- An email address is required to participate; Bonus Days coupon codes can be delivered only via email.
- Bonus Days coupon codes may be redeemed for any product (excluding Starter Kits, demonstrator supply items, and Paper Pumpkin subscriptions.) Although new prepaid Paper Pumpkin codes may be discounted with Bonus Days coupon codes.

3) Buy 10 Stampin’ Ink pads in August and get one FREE!!
- Buy any 10 ink pads from me in August, I will give you another one FREE!
- Contact me to place your order, so I can add your FREE ink pad!
Here’s some more cool stuff you should check out:
Thanks for stopping by today, and Sweet Stamping!