Sep 11, 2020 | Autumn, Cards, Fun Folds, Gallery |
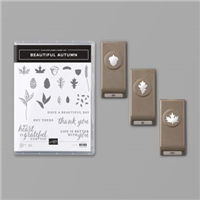
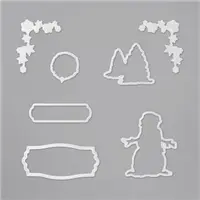
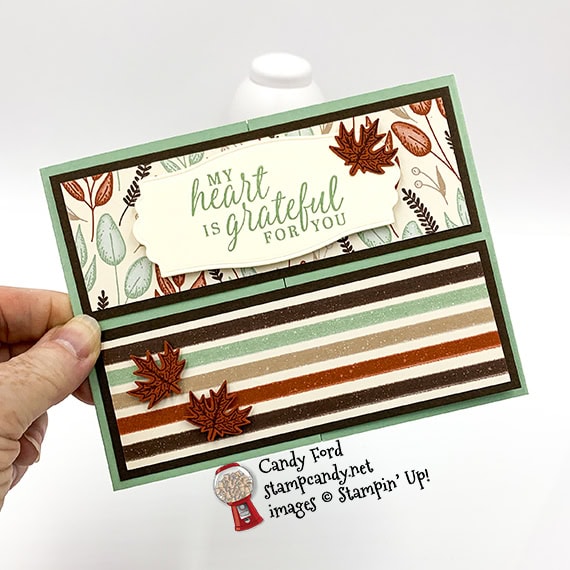
For today’s gate fold card, I used the Beautiful Autumn Bundle (Beautiful Autumn stamp set and Autumn Punch Pack,) Snow Time Dies, and Gilded Autumn Designer Series Paper. It’s a simple fun fold, or fancy fold, that packs a lot of punch for little effort.
If you are reading this in email, some photos may appear blurry, or may not appear at all. Please click here to see the post on my blog.
S beautiful beautiful beautiful beautiful
Here’s what I made:
S
Here’s what I did:
Cut and scored with my paper trimmer:
- Mint Macaron card stock (CS) cut to 11″ x 4-1/4″, then scored at 2-3/4″ and 8-1/4″
- 2 Early Espresso CS layers cut to 5-1/4″ x 1-7/8″
- 2 Gilded Autumn Designer Series Paper (DSP) layers cut to 5″ x 1-5/8″
- Very Vanilla CS cut to 5-1/4″ x 4″ for the inside of the card base
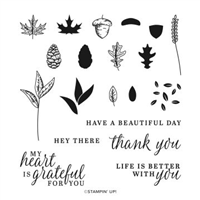
Stamped with the Beautiful Autumn stamp set:
- sentiment in Mint Macaron ink onto a scrap of Very Vanilla Thick CS
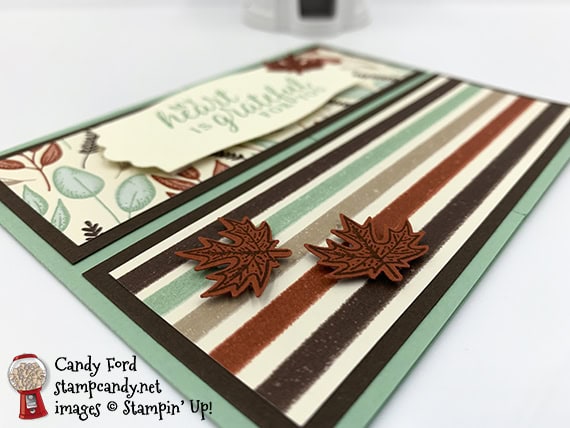
- 3 leaves in Early Espresso ink onto a scrap of Cajun Craze CS
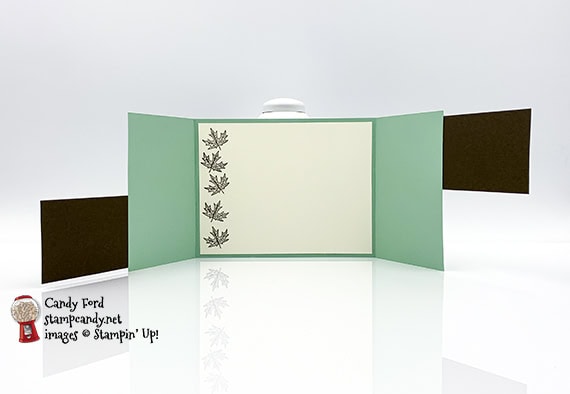
- 5 leaves in Early Espresso ink onto the Very Vanilla CS for the inside
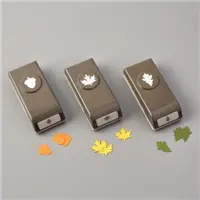
Cut using the Autumn Punch Pack:
- the 3 stamped leaves on Cajun Craze CS
Cut using the Snow Time Dies:
Assembled the card:
- burnished the folds in the card base with a Bone Folder
- the 2 Early Espresso CS layer lined up on the front of the closed card, then the right end of the top one glued only on the right, and the left end of the bottom glued only on the left
- DSP layers glued onto the Early Espresso CS layers
- die cut sentiment adhered onto the top DSP layer using Stampin’ Dimensionals
- one punched leaf glued onto the sentiment
- 2 punched leaves adhered onto the bottom DSP layer using Mini Stampin’ Dimensionals
- Very Vanilla CS glued onto the inside of the card base
S
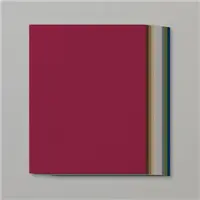
Here are today’s colors:
You can click on each one to see all the products that come in that color!
S
Here’s what I used:
Click on these images for more details and to purchase. I appreciate your business! If you are reading this post in email, the product images may not show up. Please click here to see the post on my blog.
Supply List. <— Click for a clickable and printable list of the products!
S
Two ways to save in September!
Buy the Starter Kit and receive even more! It’s already the best deal: $99 for $125 in product of your choice plus Free shipping! In September you will also receive the Queen Anne’s Lace stamp set, the So Much Love stamp set, Rhinestone Basic Jewels, and 16 precut card kits! Wow! This is the perfect time to work on your wish list of Stampin’ Up! products! CLICK HERE for more details.

Buy the new Stampin’ Cut & Emboss Machine (standard size) from me by September 30 and I will give you a Magnetic Cutting Plate FREE! You’ll save almost $30! CLICK HERE for more details and to order.

S
Here are some helpful links:
S
Thanks for stopping by today, and Sweet Stamping!

Aug 19, 2020 | Autumn, Blog Hop, Cards, Gallery |
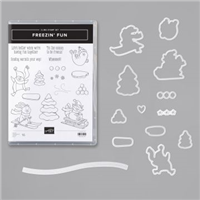
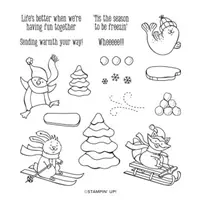
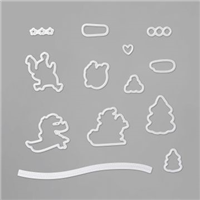
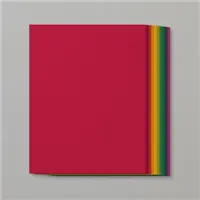
Welcome to the August 2020 InKing Royalty Blog Hop! This month’s theme is Autumn Weather. To make my card, I used the Freezin’ Fun Bundle (Freezin’ Fun and Freezin’ Friends Dies,) Snow Time Dies, Autumn Punch Pack, Plaid Tidings Designer Series Paper, and lots of colors of card stock.
To set the scene, imagine, this cute little bunny just minding his own business, hanging out in a big pile of leaves. And then all of a sudden, a big gust of wind threatens to move the pile right out from under him. Poor little guy. He doesn’t seem to mind though. As a matter of fact, he seems to be enjoying having his ears flapping in the wind.
Since I wanted the leaves to look like they’re blowing off the card, I made the card base 5-1/4″ x 4″ (just a tad smaller than the usual 5-1/2″ x 4-1/4″.)
If you are reading this in email, some photos may appear blurry, or may not appear at all. Please click here to see the post on my blog.
S August 2020 InKing Royalty August 2020 InKing Royalty August 2020 InKing Royalty August 2020 InKing Royalty
Here’s the bundle:

S
Here’s what I made:


S
Here’s what I did:
Cut and scored with my paper trimmer:
- Crumb Cake card stock (CS) cut to 5-1/4″ x 8″, then scored in half at 4″
- Plaid Tidings Designer Series Paper (DSP) layer cut to 5-1/8″ x 3-7/8″ (Crumb Cake pattern)
- Whisper White CS cut to 5″ x 3-3/4″ for the inside of the card base
Stamped with the Freezin’ Fun stamp set:
- skiing bunny in Early Espresso ink onto a scrap of Whisper White Thick CS
- skiing bunny in Early Espresso ink onto a scrap of the DSP (Pretty Peacock pattern)
- sentiment in Pretty Peacock ink onto a scrap of Whisper White Thick CS
- “wind” in Early Espresso ink onto the DSP layer, on the right
Cut using the Freezin’ Friends Dies:
Cut using the Snow Time Dies:
- sentiment (then cut off the right end straight)
Cut using the Autumn Punch Pack:
- both leaf shapes from scraps of various colors of card stock: Crushed Curry, Pumpkin Pie, Cajun Craze, Real Red, Cherry Cobbler, Rich Razzleberry, Cinnamon Cider, Soft Suede, Pear Pizzazz, Old Olive, and Mossy Meadow
- I didn’t count the leaves, but I started out with at least four of each color (2 of each shape,) then punched more to add in here and there. I would guess I used about 50 or so.
Cut using Paper Snips:
- scarf from the DSP bunny
- excess skis from the Whisper White CS bunny (although I could have gotten away without doing this because I used enough leaves to cover them)

Colored using a Stampin’ Blends Marker:
- bunny nose in Light Flirty Flamingo
Assembled the card:
- burnished the fold in the card base with a Bone Folder
- DSP layer glued onto the front of the card base
- DSP scarf glued over the Whisper White bunny’s scarf
- bunny glued onto the DSP layer using Stampin’ Dimensionals
- adhered leaves on and around the bunny using Mini Stampin’ Dimensionals and glue, to create a 3D pile of leaves
- more leaves glued onto the DSP layer to look blown over to the left
- sentiment adhered over the leaves at the far right of the card using Stampin’ Dimensionals
- Whisper White CS glued onto the inside of the card base

S
Here’s the August 2020 InKing Royalty Blog Hop:
Thank you for hopping along with us. If you get stuck during the Blog Hop, please use this line-up as a guide:
- Brian King at Stamp with Brian
- Sheryl Sharp at Sharp Notes by Sheryl
- Sue Jackson at Just Peachy Stamping
- Jennifer Spiller at Westside Paper Creations
- Jackie Beers at Blue Line Stamping
- Shawn de Oliveira at Shawn Stamps
- Rachel Brumley at Artistic Designs by Rachel
- Robbye Hamilton at Miss Hammie’s Crafts
- Candy Ford at Stamp Candy <——— YOU ARE HERE!!!
- Lynn Kolcun at Avery’s Owlery
- Joanne Brown at Stamping with JoJo
- Sheryl Abernathy at Elegant Sentiments
- Robin Myren at Songbird Designs by Robin
- Linda Krueger at The Stamp Coach
- Pam Morris at Tap Tap Stamp
- Julie DiMatteo at The Paper Pixie
- Ann Murray at Murray Stamps Ink
S
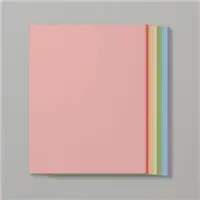
Here are today’s colors:
You can click on each one to see all the products that come in that color!
S
Here’s what I used:
Click on these images for more details and to purchase. If you are reading this post in email, the product images may not show up. Please click here to see the post on my blog.
There are a lot of card stock colors on this card. I’ve included the individual card stock packs, as well at the color family packs which contain 2 sheets of each color.
Supply List. <— Click for a clickable and printable list of the products!
S
Use your Bonus Days coupons by August 31!
Click the image below to shop now and use your Bonus Days coupons!

S
Here are some helpful links:
S
Thanks for stopping by today, and Sweet Stamping!
Aug 11, 2020 | Autumn, Blog Hop, Cards, Gallery |

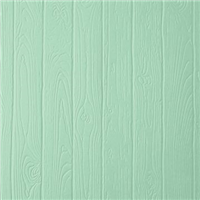
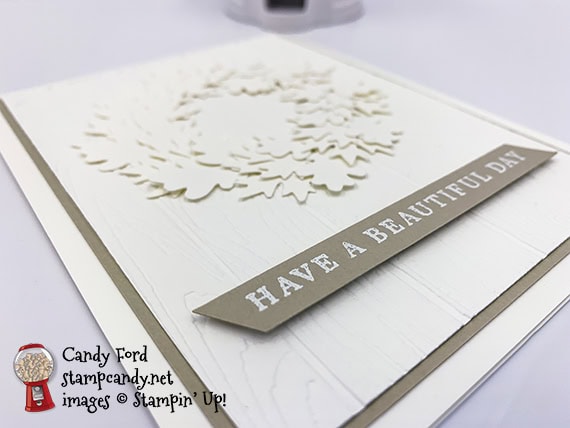
Welcome to the August 2020 ICS Blog Hop! This month’s theme is Punch Me Out, and we’re featuring Stampin’ Up!’s amazing punches. I used the Autumn Punch Pack and coordinating Beautiful Autumn stamp set for my project today, as well as the Pinewood Plank 3D Embossing Folder. The embossing folder creates the background for the wreath, which is one color (white) but made of two different leaf types. To make sure the wreath turned out round, I drew a circle on the background layer by tracing a Gold Hoop Embellishment with a pencil, and glued the leaves around that.
Be sure to hop around to all the stops to see all the projects from this great group of stampers!
If you are reading this in email, some photos may appear blurry, or may not appear at all. Please click here to see the post on my blog.
S August 2020 ICS Blog Hop August 2020 ICS Blog Hop August 2020 ICS Blog Hop August 2020 ICS Blog Hop
Here’s what I made:

S
Here’s what I did:
Cut and scored with my paper trimmer:
- Whisper White Thick card stock (CS) cut to 4-1/4″ x 11″, then scored in half at 5-1/2″
- Sahara Sand CS layer cut to 3-7/8″ x 5-1/8″
- Whisper White Thick CS layer cut to 3-3/4″ x 5″
- Sahara Sand CS cut to 3/8″ x 3-1/2″ for the sentiment
Stamped with the Beautiful Autumn stamp set:
- sentiment in Versamark ink onto the Sahara Sand CS strip, then heat embossed in white
Cut using the Autumn Punch Pack:
- 16 each of the 2 leaves from a scrap of Whisper White Thick CS
Cut using Paper Snips:
- both ends of the sentiment strip
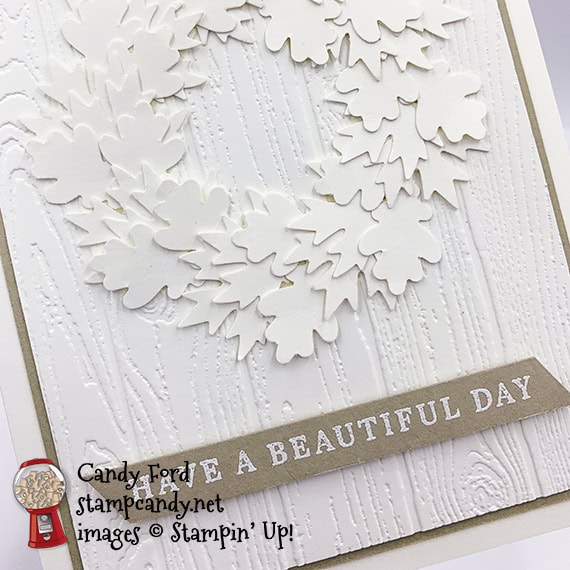
Embossed using the Pinewood Planks 3D Embossing Folder:
- Whisper White Thick CS layer
Assembled the card:
- burnished the fold in the card base with a Bone Folder
- Sahara Sand CS layer glued onto the front of the card base
- embossed Whisper White Thick CS layer glued onto the Sahara Sand CS layer
- circle drawn onto the Whisper White CS layer using a pencil and a Gold Hoop Embellishment, as a guide for the wreath
- leaves glued onto the White White CS layer around the circle
- sentiment strip adhered onto the Whisper White CS layer using Mini Stampin’ Dimensionals
S
Here’s the August 2020 ICS Blog Hop:
Click the next button to hop to the next stop, Sandra Roberts of Sandra’s Stamp & Craft Studio in the UK.

SS
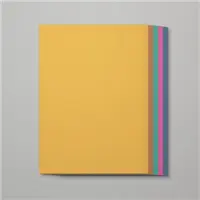
Here are today’s colors:
You can click on each one to see all the products that come in that color!
S
Here’s what I used:
Click on these images for more details and to purchase. If you are reading this post in email, the product images may not show up. Please click here to see the post on my blog.
Supply List. <— Click for a clickable and printable list of the products!
S
Use your Bonus Days coupons by August 31!
Click the image below to shop now and use your Bonus Days coupons!
S
Here are some helpful links:
S
Thanks for stopping by today, and Sweet Stamping!
Nov 23, 2019 | Autumn, Cards, Gallery |
I used the Beauty & Joy stamp set and sponge daubers to create the image on today’s So Thankful card. I also used The Stitched Nested Labels Dies, Classic Label Punch, and Basket Weave 3D embossing folder. This is one of the cards we made at my October Stamp Club gathering.
Here’s what I made:


S
Here’s what I did:
Cut and scored with my paper trimmer:
- Early Espresso card stock (CS) cut to 4-1/4″ x 11″, then scored in half at 5-1/2″
- Cajun Craze CS layer cut to 4″ x 5-1/4″
- Very Vanilla CS cut to 4″ x 5-1/4″ for the inside of the card base
- also used scraps of Very Vanilla Thick CS, Early Espresso CS, and Mosaic Mood Specialty Designer Series Paper (DSP)
Stamped with the Beauty & Joy stamp set:
- basket in Soft Suede ink onto a scrap of Very Vanilla Thick CS
- stem/trunk in Early Espresso ink
- leaves in Crushed Curry, Pumpkin Pie, and Cajun Craze inks (inks applied onto stamp using sponge daubers)
- sentiment in Versamark ink onto a scrap of Early Espresso ink, then heat embossed in white
Cut using the Stitched Nested Labels Dies:
- stamped tree
- a scrap of DSx
Cut using the Classic Label Punch:
Colored using Stampin’ Blends Marker:
- embossed sentiment in Cajun Craze
Embossed using the Basket Weave 3D embossing folder:
Assembled the card:
- burnished the fold in the card base with a Bone Folder
- embossed Cajun Craze CS layer glued onto the front of the card base
- DSP glued onto the Cajun Craze CS layer
- tree adhered onto the card front using Stampin’ Dimensionals
- sentiment glued at one end onto the tree piece and adhered onto the DSP using Stampin’ Dimensionals
- Very Vanilla CS glued onto the inside of the card base
S
Here are today’s colors:
You can click on each one to see all the products that come in that color!
S
Here’s what I used:
Click on these images for more details and to purchase.
<– Click here for a clickable and printable list!
S
S
Here are some helpful links:
S
Thanks for stopping by today, and Sweet Stamping!
Nov 20, 2019 | Autumn, Cards, Gallery |
I used the Holiday Haul host stamp set and the Gather Together stamp set to make today’s card. I also used the Layered Leaves 3D Embossing Folder and the Stitched Rectangles Dies. The background colors are from the See a Silhouette Designer Series Paper.
S
Here’s what I made:


S
Here’s what I did:
Cut and scored with my paper trimmer:
- Early Espresso card stock (CS) cut to 5-1/2″ x 8-1/2″, then scored in half at 4-1/4″
- Crumb Cake CS layer cut to 5-1/4″ x 4″
- See a Silhouette Designer Series Paper (DSP) layer cut to 5″ x 3-3/4″
- Very Vanilla CS cut to 5-1/4″ x 4″ for the inside of the card base
Stamped with the Holiday Haul stamp set:
- sentiment in Crumb Cake ink onto a scrap of Very Vanilla CS
- truck in Bermuda Bay ink, wagon in Cajun Craze ink, and leaves and chain in Crumb Cake ink onto a scrap of Very Vanilla CS
Cut using the Stitched Rectangles Dies:
- sentiment and stamped scene
- mats from scraps of Early Espresso CS
Embossed using the Layered Leaves 3D embossing folder:
Assembled the card:
- burnished the fold in the card base with a Bone Folder
- Crumb Cake CS layer glued onto the front of the card base
- DSP layer glued onto the Crumb Cake CS layer
- stamped pieces glued onto the Early Espresso CS mats
- Early Espresso CS mats glued onto the DSP layer
- 2 Leaves Trinkets adhered onto the DSP layer using Mini Glue Dots
- Very Vanilla CS glued onto the inside of the card base
S
Here are today’s colors:
You can click on each one to see all the products that come in that color!
S
Here’s what I used:
Click on these images for more details and to purchase.
<– Click here for a clickable and printable list!
S
Here are some helpful links:
S
Thanks for stopping by today, and Sweet Stamping!
Sep 18, 2019 | Autumn, Bags, Blog Hop, Gallery, Gift Wrap, Gifts, New Products, Paper Pumpkin, Tags |

It’s time for the Inking Royalty Blog Hop for September! This month’s theme in Autumn. And what could be more Autumnal than beautifully colored leaves? For my project, I used products from the Come to Gather Suite to decorate a gift bag from last month’s Paper Pumpkin kit. (You can see another project I made using these bags here.) From the suite, I used the Gather Together bundle (Gather Together stamp set and Gathered Leaves Dies) and Come to Gather Designer Series Paper.
I was going to use the Come To Gather Ribbon Combo Pack as well, but I got so carried away with the leaves, I didn’t think it needed it. I used each embossed leaf die (3 in the set) to cut two each of four colors – and I used 18 of the 24 leaves I cut! Guess I just couldn’t stop until I had a big leaf pile! Doesn’t it make you want to jump in and scatter them?
Be sure to hop all the way around to all the stops. You don’t want to miss any of the great projects from this talented group!
S
Here’s what I made:


S
Here’s what I did:
Cut and scored with my paper trimmer:
- Come To Gather Designer Series Paper (DSP) cut to 2″ x 5-1/4″
- DSP cut to 1-1/2″ x 5″
- Copper Foil Sheet cut to 1-1/2″ x 4-3/4″
Stamped with the Gather Together stamp set:
- large leaf in Pretty Peacock ink onto a scrap of Pretty Peacock CS
- sentiment in Versamark ink on the leaf, then heat embossed in copper
Cut using the Gathered Leaves Dies:
- stamped leaf
- assortment of embossed leaves from scraps of Merry Merlot, Cajun Craze, and Pretty Peacock CS and Copper Foil Sheet
Cut using the Banner Triple Punch:
- one end of each of the 3 paper strips
Assembled the project:
- adhered the 3 tags together using Snail
- adhered the assorted leaves onto the tags and each other using Snail
- large stamped leaf adhered onto the leaf “pile” using Black Stampin’ Dimensionals
- tag assembly glued onto the front of the bag
- 3 Pretty Peacock Faceted Dots applied onto the bag, at bottom right
S
Here’s the hop:
Thank you for hopping along with us. If you get stuck during the Blog Hop, please use this line-up as a guide:
- Brian King at Stamp with Brian
- Linda Krueger at The Stamp Coach
- Lynn Kolcun at Avery’s Owlery
- Robbye Hamilton at Miss Hammie’s Crafts
- Jackie Beers at Blue Line Stamping
- Sue Jackson at Just Peachy Stamping
- Shawn de Oliveira at Shawn Stamps
- Jennifer Spiller at Westside Paper Creations
- Candy Ford at Stamp Candy <– YOU ARE HERE!!!
- Sheryl Sharp at Sharp Notes by Sheryl
- Julie DiMatteo at The Paper Pixie
Here are today’s colors:
You can click on each one to see all the products that come in that color!
S
Here’s what I used:
Click on these images for more details and to purchase.
<– Click here for a clickable and printable list!
S
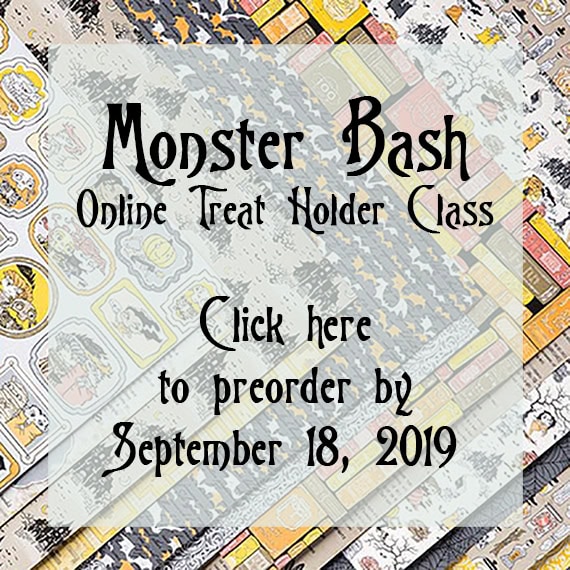
Preorder the Monster Bash Online Treat Holder Class:
- Extended for one more week! Order by September 25!
- Make 6 adorable treat holders in the comfort of your own home!
- 2 each of 3 designs
- Features the Monster Bash Suite on pages 52-54 of the 2019 Holiday Catalog
- I’ve done the trimming and scoring for you!
- You’ll receive the stamp set, dies, pre-cut kits, and Black Stampin’ Dimensionals.
- Full detailed instructions
- Limited spots available
Click on the image below for details and class options, or copy and paste this link into your browser: https://stampcandy.net/online-classes/monster-bash-treat-holder-class-preorder/
S
Here are some helpful links:
S
Thanks for stopping by today, and Sweet Stamping!