May 25, 2018 | Bags, Gallery, Gift Wrap, Gifts, Retiring Products, Wedding |
Order your Swatch Books and Product Shares now!
And now for today’s project. This would be perfect for a small gift or favor for a bridal shower or wedding. And it’s SO easy! I used a pre-made bag, doily, ribbon, and clip – I made only the heart with sentiment embossed in gold.
Here’s what I made:


Here’s what I did:
Cut and scored with my Stampin’ Trimmer:
- scored the top of a striped gift bag 1″ from the top
Stamped with the Born to Be Loved stamp set:
- sentiment in Versamark ink onto a scrap of Powder Pink card stock, then heat embossed it in gold
Die cut using the Sweet & Sassy Framelits:
Cut using Paper Snips:
- about 12″ each of three ribbons: Powder Pink Finely Woven Ribbon, Gold Metallic Edge Ribbon, and Gold 1/8″ Ribbon
Assembled the project:
- folded the ribbons in half and adhered the tops to the center of a Gold Metallic Doily using Tear & Tape
- adhered the die cut heart to the doily using Stampin’ Dimensionals
- put goodies in the bag
- folded over the top of the bag and clipped the decoration on with a Gold Binder Clip
Here are today’s colors:
Here’s what I used:
Click here to order your Swatch Books and Product Shares now!
Here’s some information you should check out:
Thanks for stopping by today, and Sweet Stamping!
May 3, 2018 | Bags, Blog Hop, Boxes, Cards, Gallery, Gift Wrap, Gifts, Paper Pumpkin |

It’s time for the A Paper Pumpkin Thing Blog Hop for the April kit, You Are My Anchor. This is such a fun kit! The colors are great; the images are great; really everything about it is awesome. I’ve had a lot of fun playing with it. I hope you enjoy the alternative projects I’ve made with it. After reading my post, be sure to check out the rest of the stops on the hop. I can’t wait to see what everyone else has made.

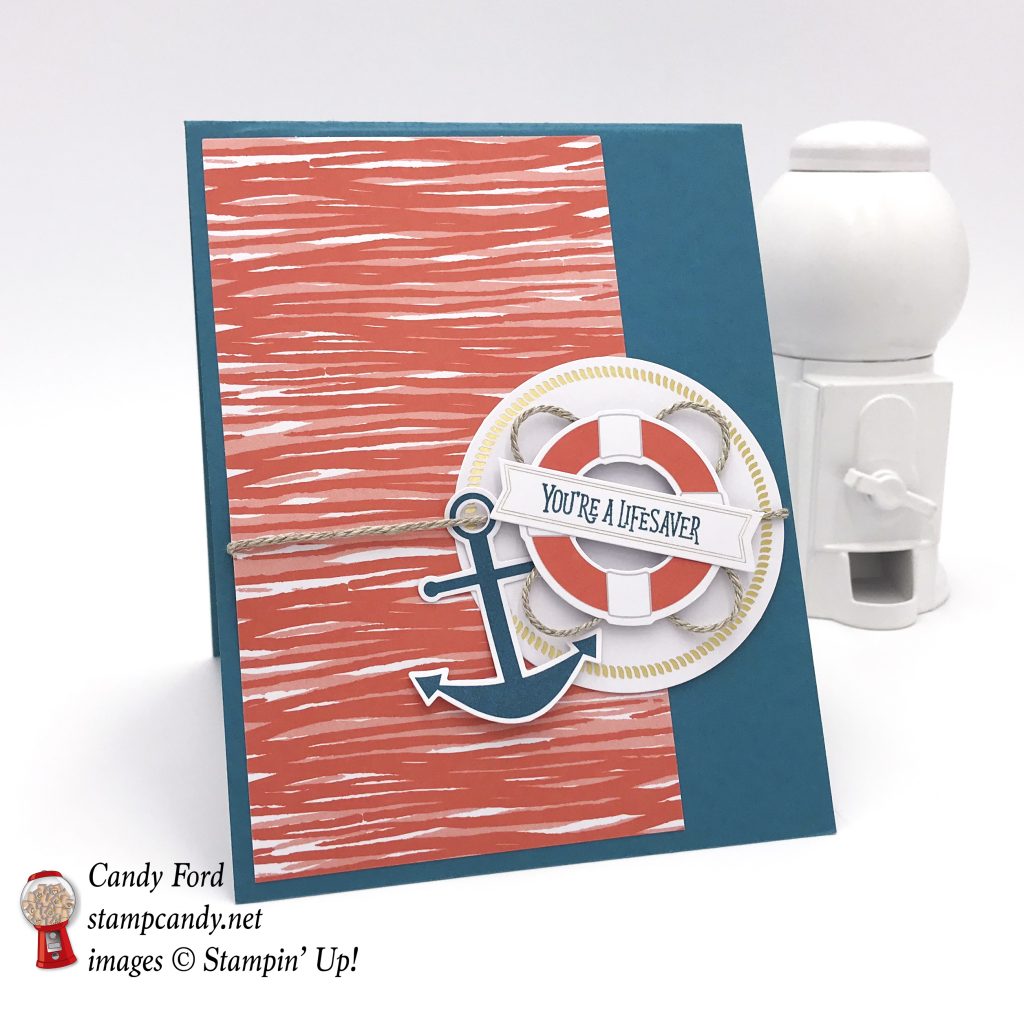
Here’s what I made:
Three different items: a bag, a pop up card, and a treat box.

I used one of the matchbox covers from the kit to create this pop-up card.


I made this box from some of the note cards in the kit.

Aren’t candies with sea salt appropriate for the theme?
When I saw the gold and white note cards in the kit, I knew I had to pair it with one of Stampin’ Up!’s Striped Treat Bags.


Here’s what I did:
Cut and scored with my Stampin’ Trimmer:
- Island Indigo card stock (CS) cut to 4-1/4″ x 11″, then scored in half at 5-1/2″, for the card base
- 2 Island Indigo striped note cards scored 1/2″ from each end, and 1/4″ from the bottom edge
- 1 Island Indigo striped note card cut to 2-7/8″ x 2-7/8″
- 1 Island Indigo anchor note card cut to 3″ x 3″, then scored 1/4″ from all four edges
- a Calypso Coral note card cut to 3″ x 5-1/4″
- 1 wave note card cut in half
- 1 note card cut in half (doesn’t matter which design because I used the solid white side)
Stamped with the You Are My Anchor stamp set:
- anchor, starfish, and “For You” in Island Indigo ink onto one of the small die cut round tags
- “You’re a lifesaver” in Island Indigo ink onto one of the small die cut banners
- birds in Island Indigo ink onto the inside top of the Island Indigo CS card base
- birds and boats in Island Indigo ink onto one of the wave not card halves
- “Thanks” in Island Indigo ink onto the other wave note card halves
- “Adventure awaits” in Island Indigo ink onto one of the small die cut banners
- anchor, wheel, boat, and starfish in Island Indigo ink onto the white stripes of the treat bag – I lined up the four stamps on one acrylic block and stamped them as one long stamp
Colored using an Island Indigo Stampin’ Write Marker:
- 8″ piece of Whisper White 1/8″ Sheer Ribbon – color on both sides
Assembled the card, front:
- fold in the Island Indigo CS card base burnished with a Bone Folder
- a large round die cut glued onto the side of the 3″ x 5-1/4″ Calypso Coral note card piece
- rope twine run through an Island Indigo anchor die cut, then wrapped around the front of the Calypso Coral note card piece and large round die cut, securing ends on the back using Glue Dots
- NOTE: I covered the score line in the note card piece with the rope twine
- Calypso Coral note card piece and large round die cut glued to the front of the Island Indigo CS card base
- rope twine adhered to the back of a lifesaver die cut using Glue Dots, then the lifesaver adhered to the large round die cut using Stampin’ Dimensionals
- “You’re a lifesaver” sentiment glued onto the front of the lifesaver die cut
Assembled the card, inside:
- wave note card half with boats glued onto the back side of a matchbox cover
- wave note card half with “Thanks” glued onto the top of the matchbox cover
- 3″ x 3″ note card piece glued to the inside of the Island Indigo CS card base, 1/8″ from the bottom edge, with the solid white side showing
- bottom of matchbox cover and back of wave note card half glued onto the inside of the card base, as shown in photos
- lighthouse die cut glued to the inside top of the card base
Assembled the box:
- the two Island Indigo striped note cards glued together at the ends – at both intersections, one flap will be on the outside of the adjacent side, and the other flap will be on the inside of its adjacent side
- using Paper Snips, cut along the score lines up the four corners only up to the horizontal score line
- folded all four flaps toward the inside and glued them to the inside of the 2-7/8″ x 2-7/8″ piece, which will form the bottom of the box
- cut along one score line at each corner of the 3″ x 3″ Island Indigo anchor note card piece
- glued the resulting flaps to the inside of the adjacent sides
- filled the box with goodies and put on the lid
- 2 small die cut banners glued to the back of the small round die cut tag as shown
- tied a piece of the rope twine around the box, through the tag, and tied in a box
Assembled the treat bag:
- “Adventure awaits” banner and an Island Indigo die cut anchor glued to the front of a gold and white note card
- top of treat bag folded over
- note card, Island Indigo colored ribbon, and some rope twine clipped to the top of the treat bag using a Gold Library Clip
Note: I used glue on these projects, but you can certainly use the Glue Dots that come with the kit. I just really like the glue.
Here’s the hop:
Use this list in case you get lost, or click on the Next button to go to Sara Levin of

Here are today’s colors:
You can click on each one to see all the products that come in that color!
Here’s what I used other than what came in the kit:
Click on these images for more details and to purchase.
Here’s some stuff you should know:
Thanks for stopping by today, and Sweet Stamping!

Mar 29, 2018 | Bags, Blog Hop, Boxes, Cards, Gallery, Gift Wrap, Gifts, Paper Pumpkin |
Hurray, it’s time for the March 2018 APPT blog hop! This month’s kit is called May Good Things Grow, and it is just lovely. Of course, we can’t leave well enough alone, so we used the kit to create alternate projects, just to give you some ideas. Be sure to check out all the stops on the hop!
The kit makes cards that go is adorable envelopes that look like seed packs. I used the seed packs to make a card and a sour cream container. No, there isn’t sour cream in it, but it’s the shape of the little take out containers that sour cream comes in. It’s one of the easiest containers to make, and it’s even easier with a premade envelope.
The card base is Fresh Fig card stock, but I used one of the kit card bases to cut a piece for the inside of the card. I used Fresh Fig ink, but the Early Espresso ink that comes in the kit would match equally as well.
Brads! There are brads in this kit! I’ve always liked using brads in my paper crafting – there are lots of things you can do with them.
At the bottom of this post, there’s a list of the products I used other than what’s in the kit. There aren’t many. This kit has so much in it, I can think of all sorts of things to make with it. I listed glue and Tear & Tape, because I prefer them, but the kit comes with glue dots – and a whole lot of Stampin’ Dimensionals!
Here’s what I made:


It’s so difficult to get Wink of Stella to show in a photo! The small amount you can see in this one just looks like tiny white specks:


Here’s what I did:
Cut and scored with my Stampin’ Trimmer:
- Fresh Fig card stock (CS) cut to 4-1/4″ x 11″, then scored in half at 5-1/2″
- front of one of the seed packs cut off and trimmed around the design
- the flap off another seed packet cut off
- cut a 3-3/4″ x 5″ piece from a Crumb Cake card base
Stamped with the May Good Things Grow stamp set:
- birthday sentiment in Fresh Fig ink onto one of the precut labels
- friendship sentiment in Fresh Fig ink onto a larger precut label
- scroll design in the four corners of the trimmed Crumb Cake card base
“Colored” using Clear Wink of Stella Pen:
- all the color die cut flowers and leaves (not the monotone ones that are part of the large floral die cut)
Assembled the card:
- seed pack front glued onto the front of the card base
- large floral die cut adhered to the seed pack layer using Stampin’ Dimensionals
- single die cut pink and yellow flowers and one die cut leaf adhered over the large floral die cut using Stampin’ Dimensionals
- 2 brads attached to the larger label, then the label adhered to the large floral die cut using Stampin’ Dimensionals
Assembled the sour cream container:
- pinched the top of the bag perpendicular to the bottom, so the two side score lines touch (I also used snips to cut the edges straight)
- put some goodies inside, then sealed the top shut with Tear & Tape
- punched a hole through the top with the 1/8″ Circle Punch
- put the Fresh Fig ribbon through the hole and tied a bow
- glued a die cut flower and some die cut leaves to the front
- glued on the birthday label

Here’s the hop:
Click the NEXT button to go to the next stop on the hop, Melissa Thomas as Sea to Sea Stampin’. If you get lost, during the hop, use the list below to find your way.
Here are the colors in the kit:
You can click on each one to see all the products that come in that color!
Here’s what I used other than the Paper Pumpkin kit:
Click on these images for more details and to purchase.
Here’s some stuff you should check out:
Thanks for stopping by today, and Sweet Stamping!
Nov 26, 2017 | Bags, Christmas, Food, Gallery, Gift Wrap, Gifts, Holiday, Sales, Tags |
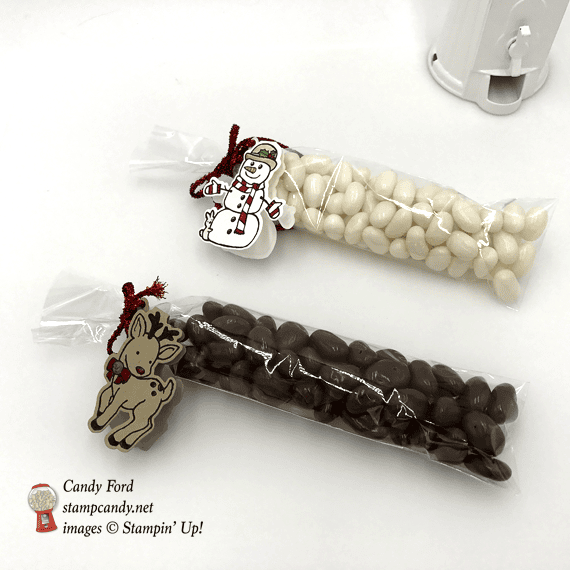
Today’s little gifts are so easy to make and they are adorable! I filled these bags with candy, but you could fill them with anything small. The tags, made with the Seasonal Chums Bundle, fold in half for a front side and a back side to the image, with space inside for To and From.

Seasonal Chums Bundle © Stampin’ Up!
In these examples from Stampin’ Up!, you can see how the stamp and die create the whole tag. You can also trim away the little hanger and add the image to a card, like the reindeer here: 
Here’s what I made:


Here’s what I did:
Stamped with the Seasonal Chums stamp set:
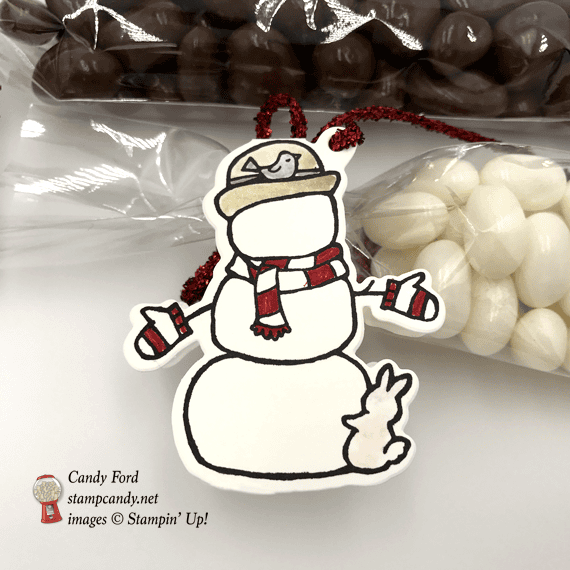
- snowman in Basic Black ink onto a scrap of Whisper White Thick card stock (CS)
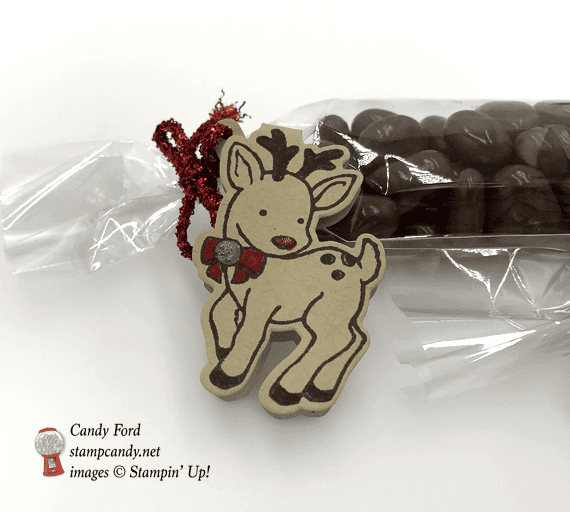
- reindeer in Basic Black ink onto a scrap of Crumb Cake CS
Die cut using the Seasonal Tags:
- snowman tag and reindeer tag
Colored using Stampin’ Write Markers:
- snowman tag in Real Red, Crumb Cake, Pumpkin Pie, Garden Green, Smoky Slate, Pink Pirouette, and Soft Sky
- NOTE: I colored the bunny Pink Pirouette, but I let it white on the rest of these I made later. I prefer the white bunny, but you make him any color you want!
- reindeer in Early Espresso, Real Red, and Smoky Slate, then added Clear Wink of Stella to the bell
Assembled the gifts:
- filled a 2″ x 8″ Cellophane Bag with white (coconut) jelly beans
- filled another 2″ x 8″ Cellophane Bag with chocolate covered raisins
- used Red Tinsel Trim to attach the tags and tie both bags closed
Here are today’s main colors:
You can click on each one to see all the products that come in that color!
Here’s what I used:
Click on the images for more details and to purchase.
Here are some key points to remember:- Online Extravaganza ends today! Click HERE to shop these amazing deals!
- FREE SHIPPING tomorrow only! Any order you place on November 27 will receive free regular shipping! These are the times of the offer by Time Zone: 2am Nov 27 – 2am Nov 28 Eastern; 1am Nov 27 – 1am Nov 28 Central; 12am Nov 27 – 12 am Nov 28 Mountain; 11pm Nov 26 – 11pm Nov 27 Pacific. SHOP HERE
- Sale-a-bration Stamp Fest coming January 20. Details and register HERE
- Check out my events calendar HERE
- Stampin’ Blends alcohol markers are now available! Click HERE for more info.
- Hostess Code for the month of November (JBHB42YT) Find out more about HOW, WHEN and WHY to use the code HERE.
- November’s FREE gift: Stitched Felt Embellishments Find out more HERE.
- Gumball Rewards for all orders over $50. Find out more HERE
- This is a great time to join my team! In addition to the great sale prices in the Online Extravaganza, you’ll also get the demonstrator discount of 20%. CLICK HERE for more information. Contact me with any questions: email candy@stampcandy.net or call/text 404-661-5222
Thanks for stopping by today, and Sweet Stamping!
Oct 8, 2017 | Bags, Food, Gallery, Gift Wrap, Gifts, Halloween, Holiday, Tags |
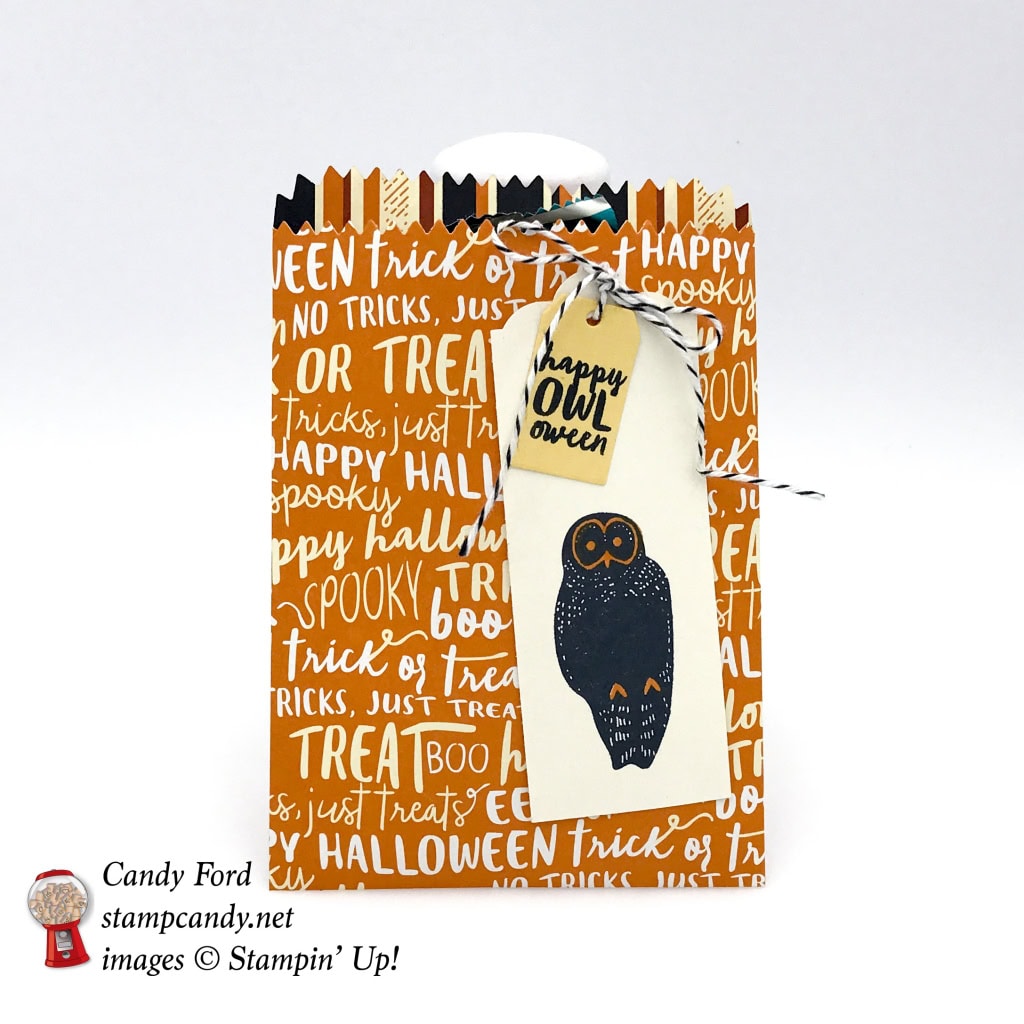
I am so enjoying the Spooky Night Suite of products in the 2017 Holiday Catalog. It’s cute, scary, pretty, and creepy – whatever you need it to be! Today I’ve used it to make a treat bag so you can give some yummy little treats or gifts to your Trick-or-Treaters this Halloween. The owl image and the sentiment are from the Spooky Cat stamp set. The Mini Treat Bag Thinlits Dies make it super quick and easy to make treat bags out of any of Stampin’ Up!’s amazing paper, including the Spooky Night Designer Series Paper (DSP) I’ve used here today.
Here’s the Spooky Night Suite:
Here’s what I made:
Wouldn’t you love to receive some little goodies in this?

Here’s what I did:
Cut and scored with my Stampin’ Trimmer:
- Very Vanilla card stock (CS) cut to 2″ x 6″
- Spooky Night Designer Series Paper (DSP) cut to 6″ x 12″ (6″ so it will fit through the Big Shot)
Stamped with the Spooky Cat stamp set:
- owl in Basic Black ink* onto the Very Vanilla CS strip, close to the bottom end
- owl features in Pumpkin Pie ink
- sentiment in Basic Black ink* onto a scrap of So Saffron CS
- *NOTE: you can use Archival Black ink or Memento Black ink
Cut using the Scalloped Tag Topper Punch:
- top end of the Very Vanilla CS strip
Die cut using the Mini Treat Bag Thinlits:
- both pieces of the bag from the Spooky Night DSP
Die cut using the Ornamental Christmas Framelits:
- sentiment with the tag die
Assembled the bag:
- glued two pieces of the bag together, up the side, up the back, and across the bottom
- tied sentiment tag onto owl tag with Basic Black Baker’s Twine
- adhered tags, at an angle, to the front of the bag with Tear & Tape
Here are today’s colors:
You can click on each one to see all the products that come in that color!
Here’s what I used:
Click on the images for more details and to purchase.
Here are some key points to remember:
- Hostess Code for the month of October (HGB2HGXK)
Find out more about HOW, WHEN and WHY to use that HERE. - October’s FREE gift
Mini Pizza Boxes
Find out more HERE. - New Merry Patterns Hostess Stamp Set – added to your Host Rewards
There’s a brand new stamp set that isn’t in any catalog. You can’t buy it, but you can get if for free with a qualifying order! You can host a party, or place your own order, or join under me and get a 20% discount on your demonstrator order. Find out more HERE. - Gumball Rewards for all orders over $50
Find out more HERE.
Thanks for stopping by today, and Sweet Stamping!
Sep 28, 2017 | Bags, Cards, Christmas, Gallery, Guest Stamper, Halloween, Holiday, Swaps |
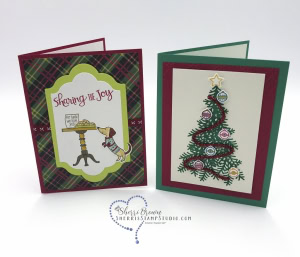
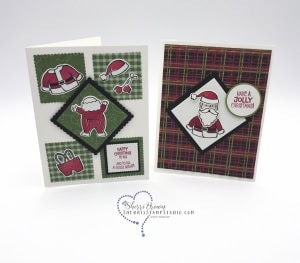
My first year as a Stampin’ Up! Demonstrator, I earned the Rising Star award along with five very talented stampers. We’ve become great friends in the two years since then – we even keep in touch with our own private Facebook group! Five of us had a card swap for the new Holiday Catalog, and today’s post is about those cards. Be sure to click through to everyone’s blog to see just how talented they are!
Here are the Rising Star swap cards:

Ready For Christmas Bundle © Stampin’ Up!

Santa’s Suit Bundle © Stampin’ Up!

Season Like Christmas Stamp Set © Stampin’ Up!

Snowflakes Sentiments Bundle © Stampin’ Up!

Every Good Wish Stamp Set © Stampin’ Up!


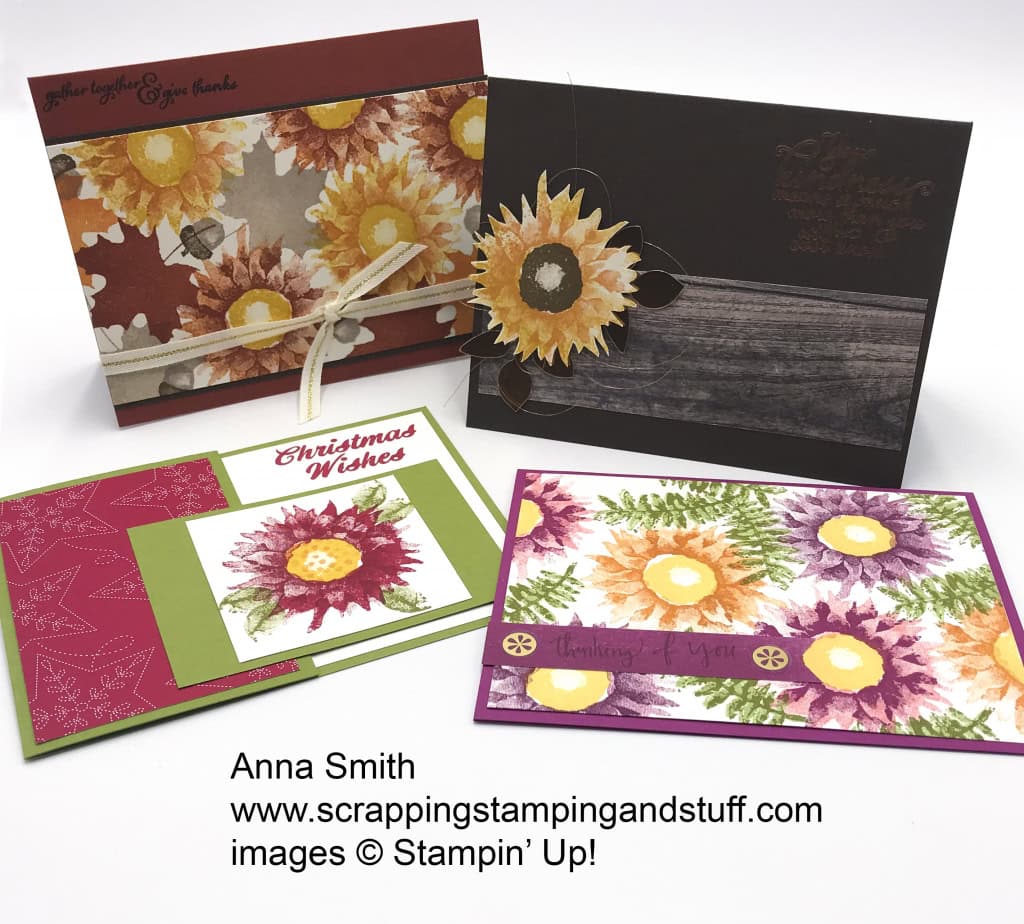
Painted Harvest Bundle © Stampin’ Up!

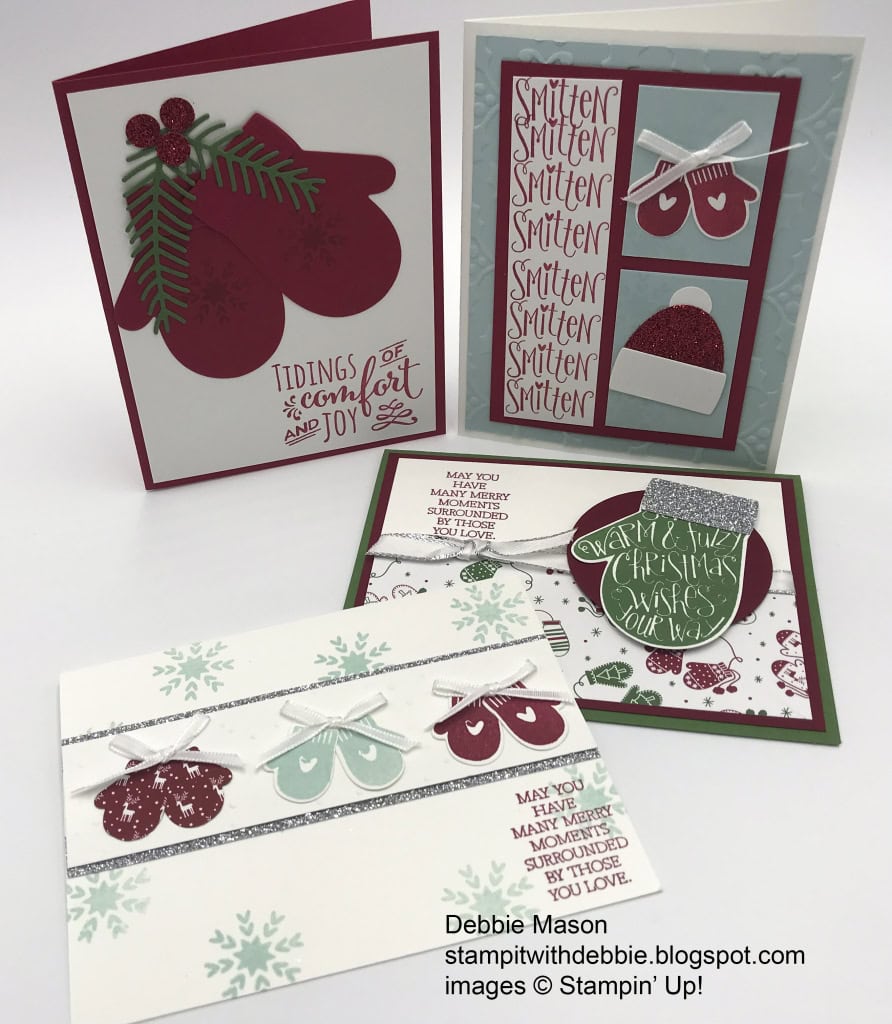
Smitten Mittens Bundle © Stampin’ Up!

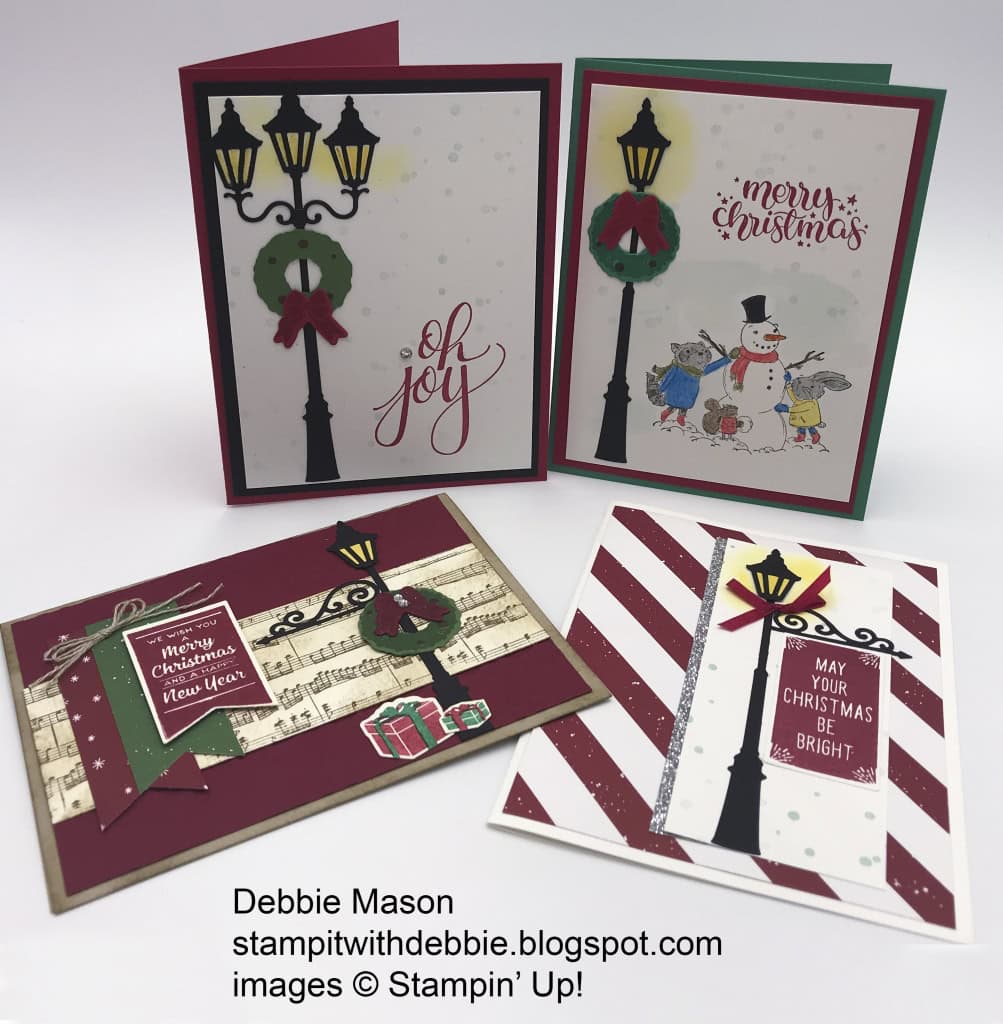
Brightly Lit Christmas Bundle © Stampin’ Up!

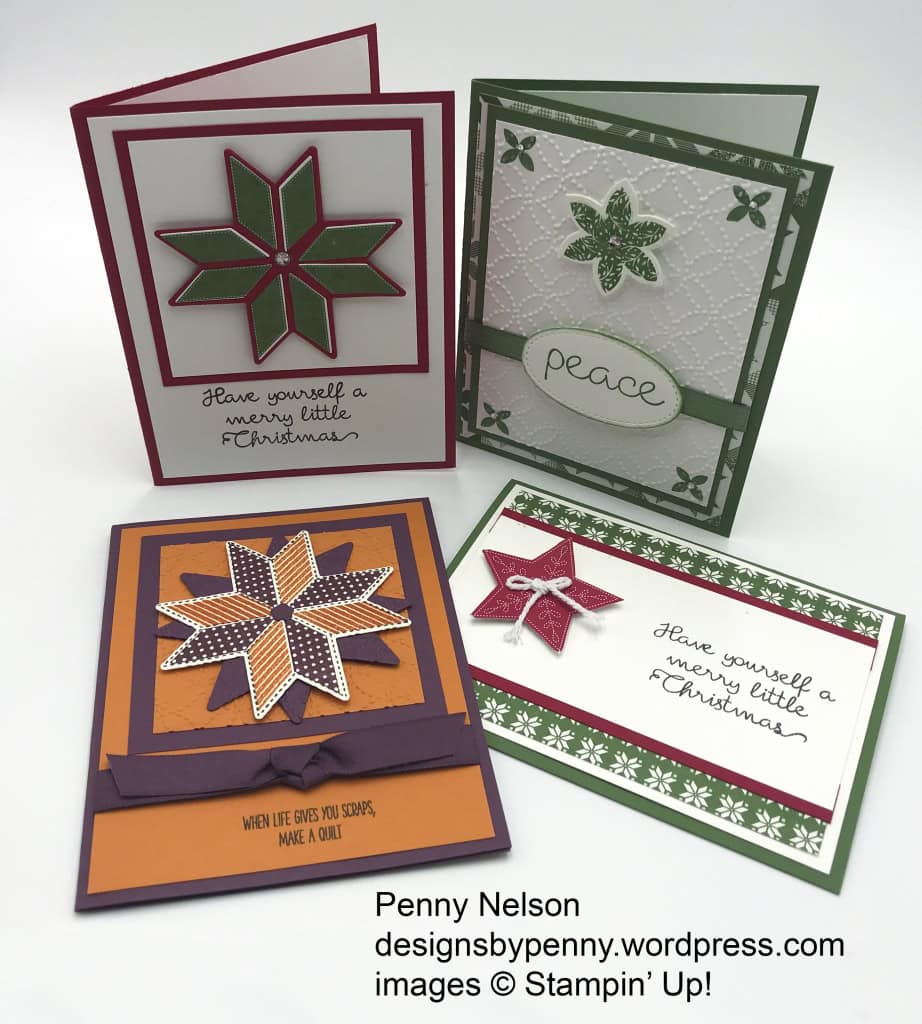
Christmas Quilt Bundle © Stampin’ Up!

Count My Blessings Stamp Set © Stampin’ Up!
Here are my swap cards:
I’ve already posted these made with the Spooky Cat Bundle, so you can click on each photo to see the post about that card:

Spooky Cat Bundle © Stampin’ Up!

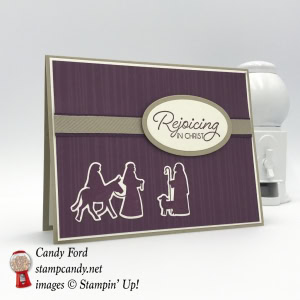
I have not yet posted these made with the Night of Bethlehem Bundle, so stay tuned for more details:

Night of Bethlehem Bundle © Stampin’ Up!

Here are the stamp sets and bundles we used:
Click on each item for more details and to purchase.
Here are some key points to remember:
- World Card Making Day Sale October 1-10, 15% off select card making essentials. See details HERE.
- Designer Series Paper Sale October 1-31, Buy 3 Get 1 FREE! See details HERE.
- Gumball Rewards for all orders over $50
Find out more HERE. - Hostess Code for the month of September (N4ZFHXK9)
Find out more about HOW, WHEN and WHY to use that HERE. - September’s FREE gift
Quilt Top Textured Impressions Embossing Folder
Find out more HERE. - Help those affected by Hurricanes Harvey and Irma
I will donate 20% of my September sales (matched by Stampin’ Up! corporate) to the American Red Cross for Hurricane Harvey & Irma Relief. Please help make a difference. Click HERE for more details. CLICK HERE to shop now. - New Merry Patterns Hostess Stamp Set – added to your Host Rewards
There’s a brand new stamp set that isn’t in any catalog. You can’t buy it, but you can get if for free with a qualifying order! You can host a party, or place your own order, or join under me and get a 20% discount on your demonstrator order. Find out more HERE.
Thanks for stopping by today, and Sweet Stamping!