Sep 22, 2020 | Autumn, Blog Hop, Decor, Gallery |

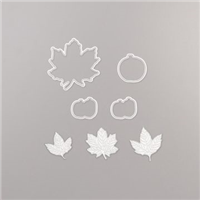
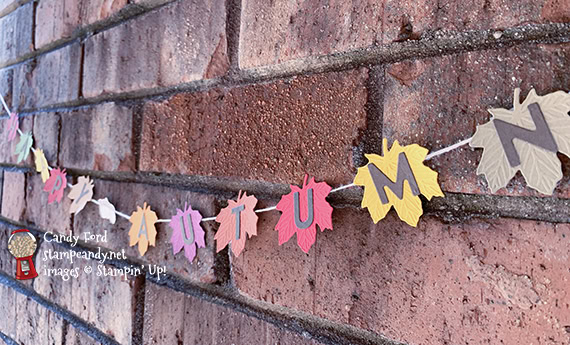
Welcome to the September 2020 Home Decor Stampin’ Up! Style Blog Hop! We are sharing ideas for seasonal home decor. Today is the first day of Autumn here in the United States. As we say here in the South, Happy Fall, Y’all! I made a little banner out of a bunch of scraps of card stock in Autumnal colors. I used the Gathered Leaves Dies to cut AND emboss the leaves, and the Playful Alphabet Dies for the lettering. And it’s strung on Linen Thread. The acorns in the middle are punched from a scrap of Gilded Autumn Designer Series Paper using the Autumn Punch Pack. This is a no-stamping project. Easy Peasy!
If you are reading this in email, some photos may appear blurry, or may not appear at all. Please click here to see the post on my blog.
S September 2020 Home Decor September 2020 Home Decor September 2020 Home Decor September 2020 Home Decor
Here’s what I made:


S
Here’s what I did:
Cut using the Gathered Leaves Dies:
- one leaf in each color card stock: Rich Razzleberry, Merry Merlot, Cherry Cobbler, Real Red, Cajun Craze, Pumpkin Pies, Mango Melody, Crushed Curry, Mossy Meadow, Soft Suede, and Cinnamon Cider
Cut using the Playful Alphabet Dies:
- H A P P Y A U T U M N from a scrap of Early Espresso card stock
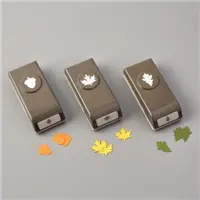
Cut using the Autumn Punch Pack:
- 3 acorns from a scrap of Gilded Autumn Designer Series Paper
Assembled the banner:
- each letter glued onto a leaf
- 3 acorns glued together
- leaves and acorns attached to a length of Linen Thread using tape about every 2″ (I had Scotch Tape at hand, so that’s what I used.
S
Here’s the September 2020 Home Decor Stampin’ Up! Style Blog Hop:
Thank you for hopping with us today! Be sure to check out all the great projects along the hop:
S
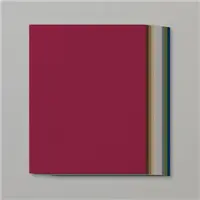
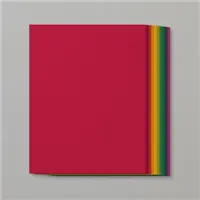
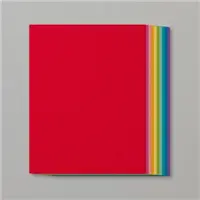
Here are today’s colors:
You can click on each one to see all the products that come in that color!
S
Here’s what I used:
Click on these images for more details and to purchase. If you are reading this post in email, the product images may not show up. Please click here to see the post on my blog.
Supply List. <— Click for a clickable and printable list of the products!
S
3 THINGS FOR TODAY ONLY!!!
Flash Sale

24 hours only! Midnight to midnight MT / 2am to 2am ET / 1am to 1am CT / 11pm to 11pm PT
CLICK HERE to down load the list of stamp sets on sale. CLICK HERE to shop.
S
Mystery Stamping Party is today!

Go ahead and click the image above to join the Facebook group now. A few days before the party I will post what you will need to complete the mystery card. On September 23 at 8:00pm ET, I will begin posting clues you can follow to create the card. We’ll also have games and prizes! And it’s all FREE!
S
World Card Making Day 2020 – Register TODAY:

- Join me for an afternoon of Bingo, cardmaking, prizes, and fun!
- October 3 at 2:00 pm ET
- See details and register HERE by September 25
- $25 (extra Bingo cards available for $5 each)
- Tell your friends! The more people who register, the bigger the prizes!
S
TWO WAYS TO SAVE IN SEPTEMBER – THEY BOTH END ON THE 30TH!
Buy the Starter Kit and receive even more! It’s already the best deal: $99 for $125 in product of your choice plus Free shipping! In September you will also receive the Queen Anne’s Lace stamp set, the So Much Love stamp set, Rhinestone Basic Jewels, and 16 precut card kits! Wow! This is the perfect time to work on your wish list of Stampin’ Up! products! CLICK HERE for more details.

Buy the new Stampin’ Cut & Emboss Machine (standard size) from me by September 30 and I will give you a Magnetic Cutting Plate FREE! You’ll save almost $30! CLICK HERE for more details and to order.

Here are some helpful links:
S
Thanks for stopping by today, and Sweet Stamping!

Sep 16, 2020 | Autumn, Bags, Blog Hop, Food, Gallery, Gift Wrap, Gifts, Halloween, Holiday, Tags |

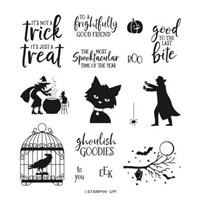
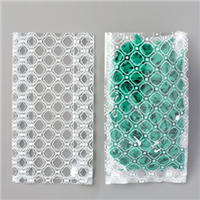
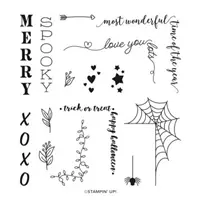
Welcome to the September 2020 Inking Royalty Blog Hop! During this year’s blog hops, we are enjoying a year of celebrations. This month’s projects are all about Halloween. I used the Ghoulish Goodies stamp set, Essential Tag Punch, and Fancy Label Punch to create tags for this cute and scary little treat bag. The candies inside are Bloody Bones Sweet Tarts Candy. Ooooooo spooky! You can buy them here.
Prepare yourself for a wonderful mix of spooky, scary and sweet. We are excited to share our creations with you today! After you read my post, I hope you’ll hop over to the next person, Ann Murray at Murray Stamps Ink, on the list you can see when you scroll down. Be sure to hop around to ALL the stops, because you definitely want to see all the projects this group has created for you!
If you are reading this in email, some photos may appear blurry, or may not appear at all. Please click here to see the post on my blog.
S september 2020 inking royalty september 2020 inking royalty september 2020 inking royalty september 2020 inking royalty
Here’s what I made:

S
Here’s what I did:
Stamped with the Ghoulish Goodies stamp set:
- raven in cage in Memento Tuxedo Black ink onto a scrap of Whisper White Thick CS
- sentiment in Memento Tuxedo Black ink onto a scrap of Real Red CS
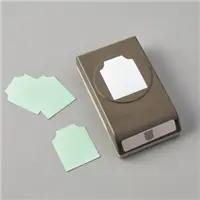
Cut using the Essential Tag Punch:
- stamped image and sentiment
Cut using the Label Me Fancy Punch:
- a hole in the top of each tag
- NOTE: I found it a little difficult to line up the punch exactly where I wanted it, so I drew a tiny dot on the tags where I wanted to punch, then positioned each tag so I could see the dot through the hole in the punch. Easy Peasy!

Put it all together:
- put candies in a Mpsaic Gusseted Cellophane Bag and tied the top with a piece of Black Glittered Organdy Ribbon
- black and white twine run through the 2 tags and tied around the top of the bag, tying a small bow in the back
- For the photo, I glued the tags together so you could see both at the same time. You can leave them loose if you prefer.

S
Here’s the September 2020 Inking Royalty Blog Hop:
Thank you for hopping along with us. If you get stuck during the Blog Hop, please use this line-up as a guide:
- Brian King at Stamp with Brian
- Candy Ford at Stamp Candy <— YOU ARE HERE!
- Ann Murray at Murray Stamps Ink
- Sue Jackson at Just Peachy Stamping
- Jackie Beers at Blue Line Stamping
- Rachel Brumley at Artistic Designs by Rachel
- Sheryl Sharp at Sharp Notes by Sheryl
- Shawn de Oliveira at Shawn Stamps
- Julie DiMatteo at The Paper Pixie
- Pam Morris at Tap Tap Stamp
- Lynn Kolcun at Avery’s Owlery
- Sheryl Abernathy at Elegant Sentiments
- Linda Krueger at The Stamp Coach
- Joanne Brown at The Inky Dragon
S
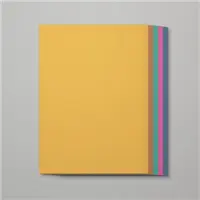
Here are today’s colors:
You can click on each one to see all the products that come in that color!
My husband and I have a Halloween party every year, and this year’s theme was going to be “What’s black and white and red all over?” Unfortunately we had to cancel it this year. But I just realized as I was typing this post that those are the colors of my project today. I’m sure that fact was floating around in the back of my brain somewhere as I made the tags.
S
Here’s what I used:
Click on these images for more details and to purchase. If you are reading this post in email, the product images may not show up. Please click here to see the post on my blog.
Supply List. <— Click for a clickable and printable list of the products!
S
Two ways to save in September!
Buy the Starter Kit and receive even more! It’s already the best deal: $99 for $125 in product of your choice plus Free shipping! In September you will also receive the Queen Anne’s Lace stamp set, the So Much Love stamp set, Rhinestone Basic Jewels, and 16 precut card kits! Wow! This is the perfect time to work on your wish list of Stampin’ Up! products! CLICK HERE for more details.
Buy the new Stampin’ Cut & Emboss Machine (standard size) from me by September 30 and I will give you a Magnetic Cutting Plate FREE! You’ll save almost $30! CLICK HERE for more details and to order.
S
Mystery Stamping Party!
Go ahead and click the image above to join the Facebook group now. A few days before the party I will post what you will need to complete the mystery card. On September 23 at 8:00pm ET, I will begin posting clues you can follow to create the card. We’ll also have games and prizes! And it’s all FREE!
S
World Card Making Day 2020:
- Join me for an afternoon of Bingo, cardmaking, prizes, and fun!
- October 3 at 2:00 pm ET
- See details and register HERE by September 25
- $25 (extra Bingo cards available for $5 each)
- Tell your friends! The more people who register, the bigger the prizes!
S
Here are some helpful links:
S
Thanks for stopping by today, and Sweet Stamping!
Sep 14, 2020 | Blog Hop, Cards, Fun Folds, Gallery, Halloween, Holiday |

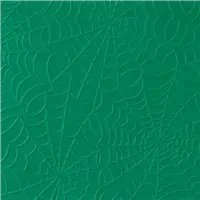
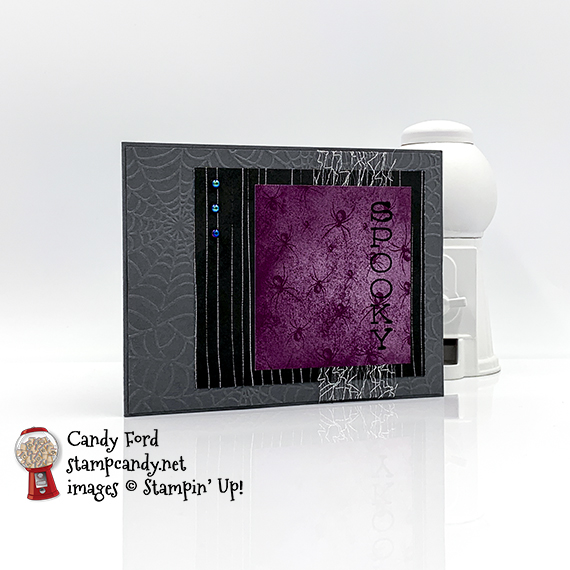
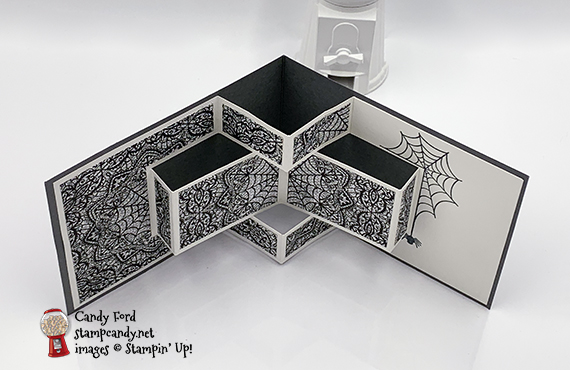
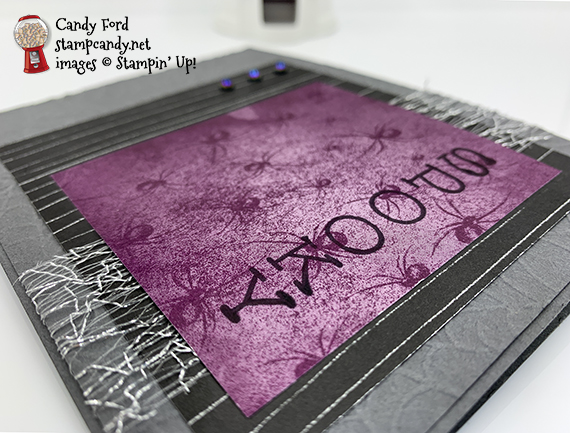
Welcome to the September 2020 Candy Hearts Blog Hop! This month’s theme is Halloween. I used the Festive Corners stamp set, Cobwebs 3D Embossing Folder, and Magic in this Night Designer Series Paper to create a spooky fun 3D Pop Up card.
We have two special guests hopping with us today. One is the amazing and talented Mikaela Titheridge of The Crafty Oink Pen, and I can’t wait to see what she has in store for us. Mikaela has been a member of the prestigious Stampin’ Up! Artisan Design Team, and her projects are always spectacular. She’s also cute as a button! Next, Pam Morris of Tap Tap Stamp, is joining us on a regular basis, and I know she’ll have a super fun project for us. She is one of my Stampin’ Up! uplines, and she’s an absolute hoot and a half!
Be sure to hop around to all the stops, be cause you definitely don’t want to miss any of the projects from this group of terrific stampers!
If you are reading this in email, some photos may appear blurry, or may not appear at all. Please click here to see the post on my blog.
S September 2020 Candy Hearts September 2020 Candy Hearts September 2020 Candy Hearts September 2020 Candy Hearts
Here’s what I made:

S
Here’s what I did:
Cut and scored with my paper trimmer:
- Basic Gray card stock (CS) cut to 11″ x 4-1/4″, then scored in half at 5-1/2″
- Basic Gray CS layer cut to 5-3/8″ x 4-1/8″
- Magic in this Night Designer Series Paper (DSP) layer cut to 4″ x 3-1/2″ (stripes)
- DSP layer cut to 2-3/4″ x 3″ (spiders)
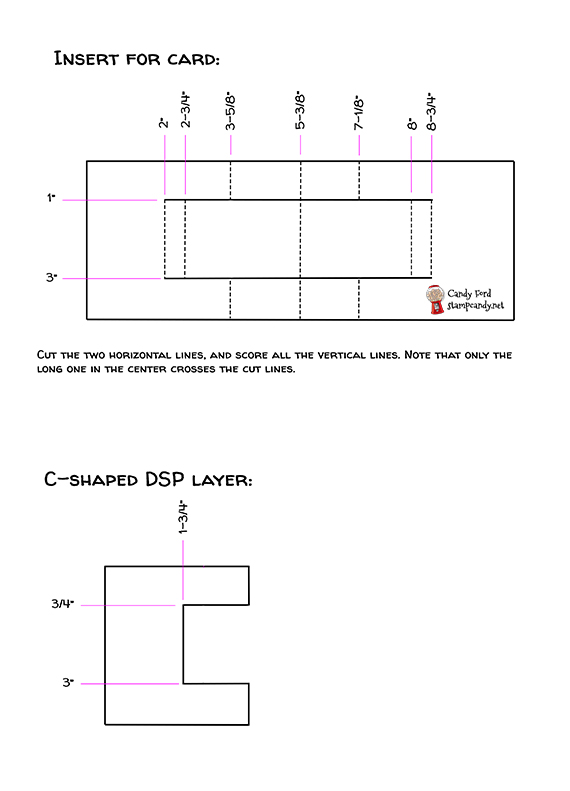
- Whisper White Thick CS cut to 5-1/2″ x 8-1/2″, then cut and scored according to the diagram below
- DSP (cobwebs) cut to 2-3/8″ x 1-3/4″ (2 pieces), to 1-1/2″ x 3/4″ (4 pieces), and to 1/2″ x 1-3/4″ (2 pieces)
- DSP (cobwebs) cut to 3-3/8″ x 3-3/4″ (1 piece) then cut into a C shape according to the diagram below
Stamped with the Festive Corners stamp set:
- sentiment in Memento Tuxedo Black ink onto the spider DSP layer (I used my Stamparatus to stamp it a couple of times so it would be nice and dark.)
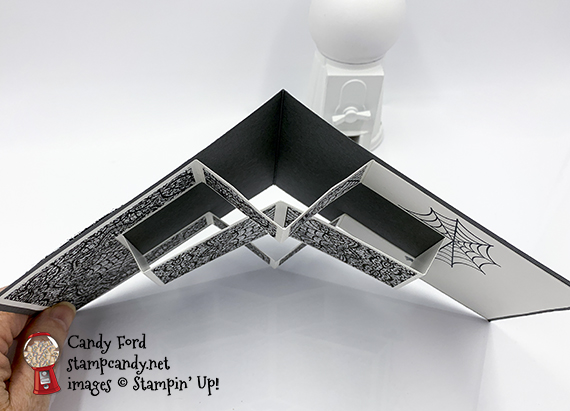
- cobweb in Memento Tuxedo Black ink onto the Whisper White Thick CS around the farthest right cut/score line
- spider in Memento Tuxedo Black ink hanging from the cobweb
Embossed using the Cobwebs 3D Embossing Folder:
Assembled the card:
- burnished the fold in the card base, and all the folds in the Whisper White Thick CS, with a Bone Folder
- striped DSP layer glued onto the embossed Basic Gray CS layer
- Metallic Mesh ribbon wrapped around both layers and adhered onto the back using Stampin’ Seal +
- Basic Gray CS layer glued onto the front of the card base
- spider DSP layer glued onto the striped DSP layer over the ribbon
- 3 Iridescent pearls applied onto the striped DSP layer (I like to use the pointy end of the Take Your Pick tool.)
- center score line of the Whisper White Thick CS lined up with the score line in the card base, then the C-shaped areas at both ends glued onto the inside of the card base
- cobwebs DSP pieces glued onto their corresponding scored areas of the Whisper White Thick CS
S
Here’s the September 2020 Candy Hearts Blog Hop:
Thank you for hopping with the Hearts today! Be sure to hop around to all the stops. You do not want to miss any of the creativity in this talented group of stampers!
S
Here are today’s colors:
You can click on each one to see all the products that come in that color!
S
Here’s what I used:
Click on these images for more details and to purchase. If you are reading this post in email, the product images may not show up. Please click here to see the post on my blog.
Supply List. <— Click for a clickable and printable list of the products!
S
Two ways to save in September!
Buy the Starter Kit and receive even more! It’s already the best deal: $99 for $125 in product of your choice plus Free shipping! In September you will also receive the Queen Anne’s Lace stamp set, the So Much Love stamp set, Rhinestone Basic Jewels, and 16 precut card kits! Wow! This is the perfect time to work on your wish list of Stampin’ Up! products! CLICK HERE for more details.
Buy the new Stampin’ Cut & Emboss Machine (standard size) from me by September 30 and I will give you a Magnetic Cutting Plate FREE! You’ll save almost $30! CLICK HERE for more details and to order.
S
Here are some helpful links:
S
Thanks for stopping by today, and Sweet Stamping!
Sep 10, 2020 | Blog Hop, Boxes, Cards, Gallery, Techniques |

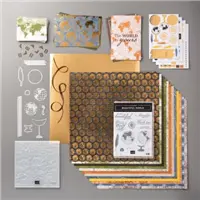
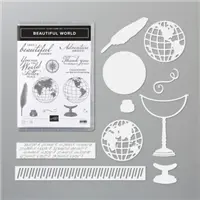
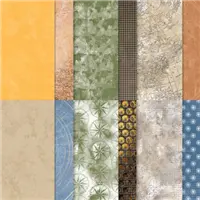
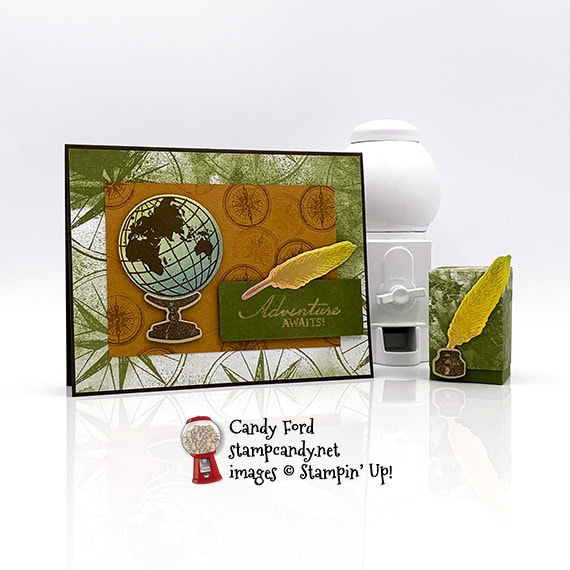
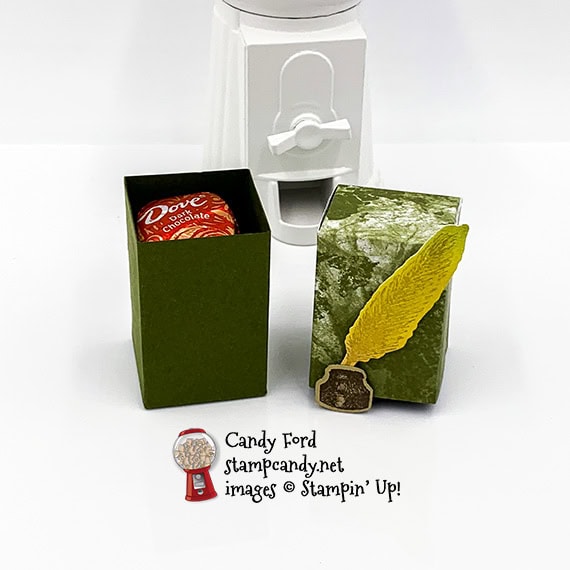
Welcome to the September 2020 OSAT Blog Hop! This month’s theme is You’ve Got This, so we’re featuring projects celebrating empowerment and encouragement for a new job, new school year, or any other new challenge. I used products from the World of Good Suite Collection for my projects today: a card and a small treat box. I also used a makeup brush blending technique that my Candy Hearts team member Lisa Graham demonstrated at our last team meeting.
Be sure to hop around to all the stops, to see all the great projects this group has in store for you today!
If you are reading this in email, some photos may appear blurry, or may not appear at all. Please click here to see the post on my blog.
S September 2020 OSAT September 2020 OSAT September 2020 OSAT
Here’s what I made:

S
Here’s what I did:
Cut and scored with my paper trimmer:
- Early Espresso card stock (CS) cut to 5-1/2″ x 8-1/2″, then scored in half at 4-1/4″
- World of Good Designer Series Paper (DSP) layer cut to 5-3/8″ x 4-1/8″
- Cinnamon Cider CS layer cut to 4-1/4″ x 3″
- Mossy Meadow CS layer cut to 2-3/4″ x 1″
- Whisper White CS cut to 5-1/4″ x 4″ for the inside of the card base
- Mossy Meadow CS cut to 5-1/4″ x 3-1/4″, scored along the long side at 1-1/4″, 2-1/2″, 3-3/4″, 5″, and scored along the short side at 1-1/4″ for the box
- DSP cut to 4-13/16″ x 4-13/16″ and scored 1-3/4″ from all four edges for the lid
Colored/blended using a makeup brush:
- a scrap of Whisper White Thick CS in Early Espresso, Cinnamon Cider, Bumblebee, Mossy Meadow, and Misty Moonlight inks
- CLICK HERE to see the makeup brush I used. There are many others that I’m sure would be just as good. I wanted a big one, so I got the 2X-Large size.
- I forgot to take a photo until after I had cut out a couple pieces. My blending skills aren’t as good as Lisa’s, but I think you can get the idea.
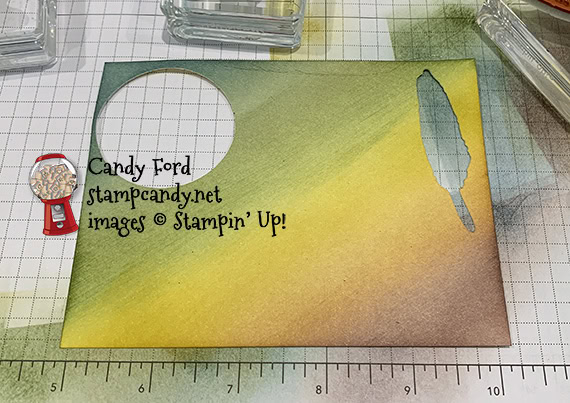
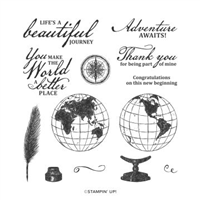
Stamped with the Beautiful World stamp set:
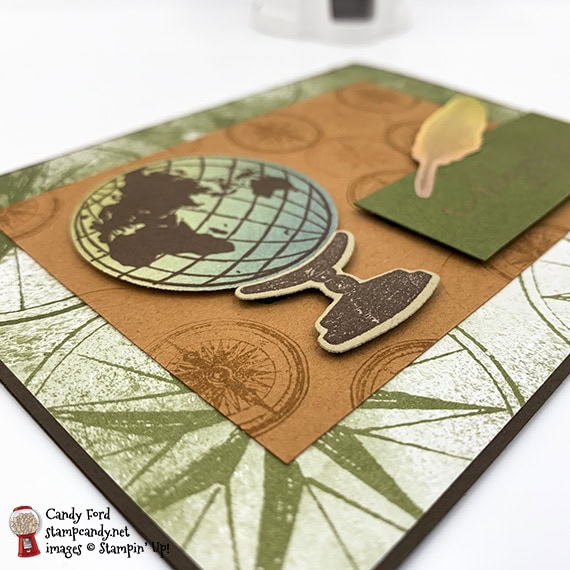
- globe in Early Espresso ink onto the blue/green area of the blended CS (I wanted to make sure I got good ink coverage on the globe, so I used my Stamparatus to stamp it 2 or 3 times times.)
- 2 feathers in Crumb Cake ink onto the yellow/brown area of the blended CS
- globe stand and ink well in Early Espresso ink onto a scrap of Crumb Cake CS
- sentiment in Versamark ink onto the small Mossy Meadow CS layer, then heat embossed in gold
- small globe in Cinnamon Cider ink all over the Cinnamon Cider CS layer
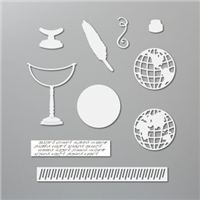
Cut using the World Map Dies:
- globe, globe stand, inkwell, and 2 feathers
Assembled the card:
- burnished the fold in the Early Espresso card base with a Bone Folder
- DSP layer glued onto the front of the card base
- Cinnamon Cider CS layer glued onto the the DSP layer
- globe and stand adhered onto the Cinnamon Cider CS layer using Black Stampin’ Dimensionals
- end of a feather glued onto the sentiment, then both adhered onto the card front using Black Stampin’ Dimensionals
- Whisper White CS glued onto the inside of the card base
Assembled the box:
- burnished the folds in the box and lid with a Bone Folder, and cut according to the diagram using Paper Snips
- tab on box glued onto the inside of the opposite end
- 1 bottom tab folded up, then the other 3 tabs glued in place
- The box is 1-1/4″ square by 2″ high, and fits 4 stacked Dove promises perfectly
- side tabs of DSP lid folded in and glued together, then the skinny tab folded down and glued onto the top one – did this on both sides
- NOTE: I put the lid on the box before gluing the sides, to make sure it wasn’t too snug.
- The lid is 1-5/16″ square by 1-3/4″ high.
- tip of second feather glued onto the back of the inkwell, then both adhered onto the front of the box lid using Black Stampin’ Dimensionals
S
Here’s the September 2020 OSAT Blog Hop:
Here are today’s colors:
You can click on each one to see all the products that come in that color!
S
Here’s what I used:
Click on these images for more details and to purchase. If you are reading this post in email, the product images may not show up. Please click here to see the post on my blog.
Supply List. <— Click for a clickable and printable list of the products!
S
Here are some helpful links:
S
Thanks for stopping by today, and Sweet Stamping!
Sep 8, 2020 | Blog Hop, Cards, Fun Folds, Gallery, Techniques |

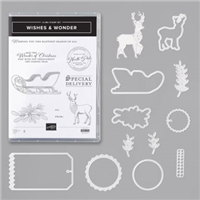
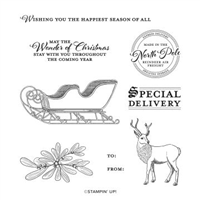
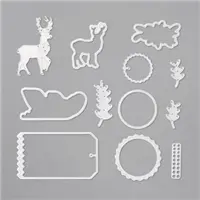
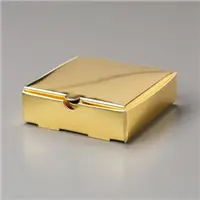
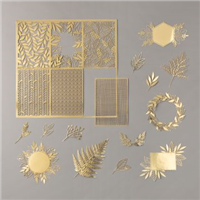
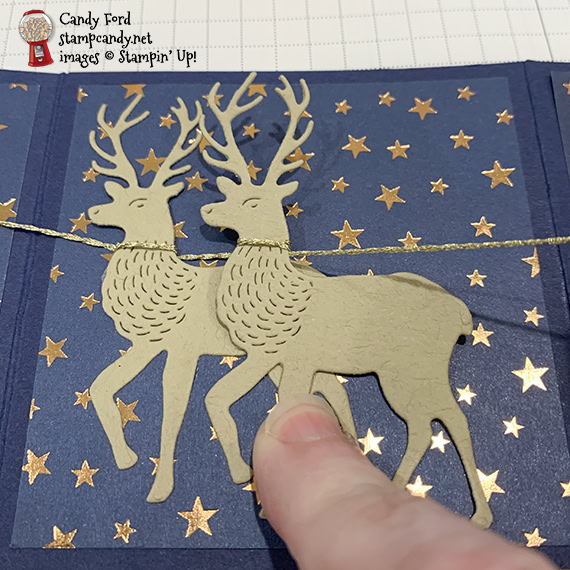
Welcome to the September 2020 ICS Blog Hop! This month’s theme is Mini Catalog Fun Folds. I made an accordion fold card that fits into a Mini Pizza Box. I used the Wishes & Wonder Bundle (Wishes & Wonder stamp set and North Pole Wonder Dies,) along with the Stitched Rectangle Dies, Stitched Shapes Dies, Brightly Gleaming Designer Series Paper, and Forever Gold Laser-Cut Specialty Paper, to create a long skinny card with Santa’s sleigh and eight tiny reindeer, plus Rudolph who has a Red Rhinestone for his nose.
Be sure to hop all the way around to all the stops because you don’t want to miss any of the great fun fold projects this group has for you today.
If you are reading this in email, some photos may appear blurry, or may not appear at all. Please click here to see the post on my blog.
S September 2020 ICS September 2020 ICS September 2020 ICS September 2020 ICS https://bit.ly/34ibSpX. https://stampcandy.net/blog-hop/september-2020-ics-blog-hop-fun-folds/
Here’s what I made:
The box: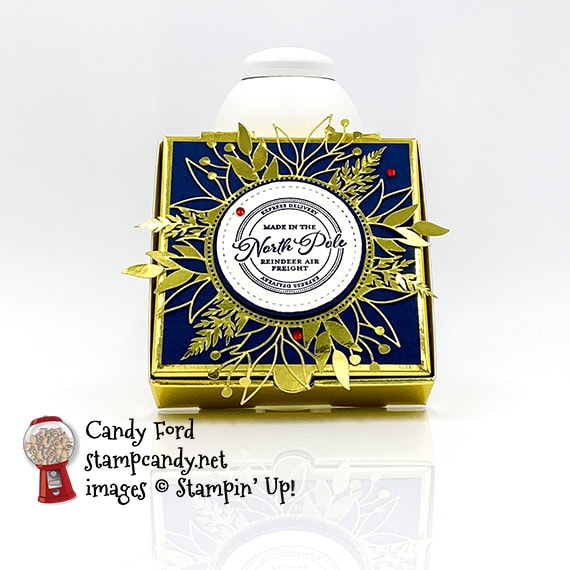
The card front: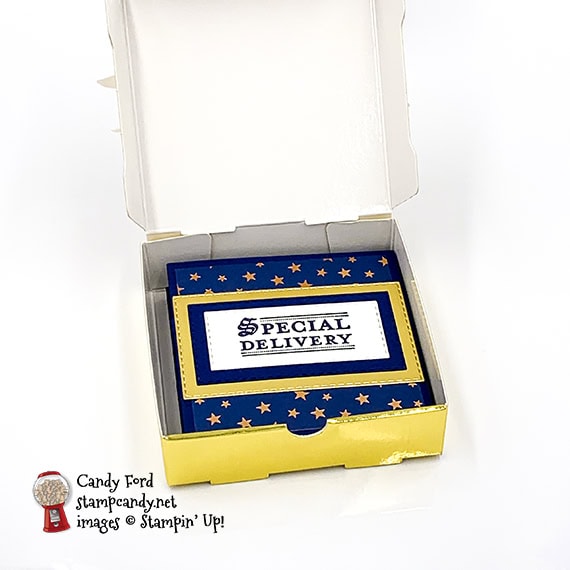
Pulling the card out of the box:
Inside the card: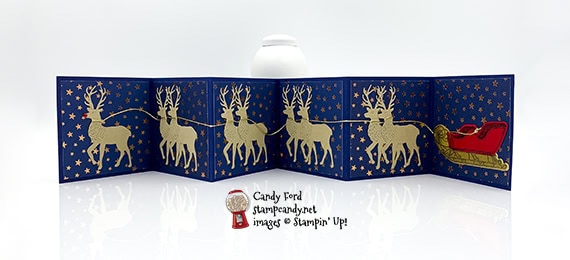
Rudolph leads the way: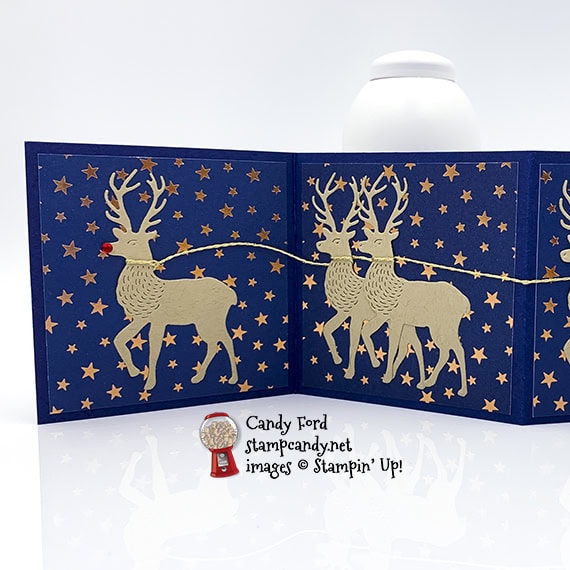
Sleigh ready for Santa and his toy sack:
Back of card: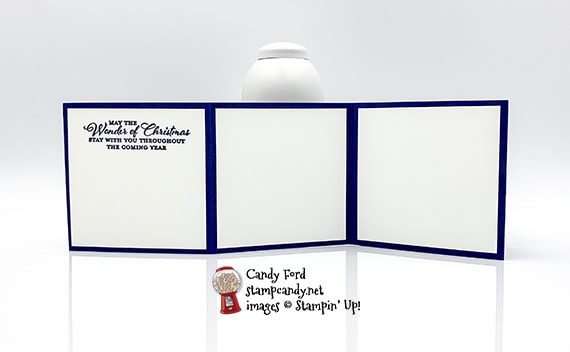 S
S
Here’s what I did:
Cut and scored with my paper trimmer:
- Night of Navy card stock (CS) cut to 11″ x 3-1/4″, then scored at 3-1/4″, 6-1/2″, and 9-3/4″
- Night of Navy card stock (CS) cut to 9-3/4″ x 3-1/4″, then scored at 3-1/4″ and 6-1/2″
- Brightly Gleaming Designer Series Paper (DSP) layers cut to 3″ x 3″ (7 pieces)
- Whisper White CS layers cut to 3″ x 3″ (3 pieces)
- Night of Navy CS cut to 3-1/4″ x 3-1/4″ for the top of the box
Stamped with the Wishes & Wonder stamp set:
- card front sentiment in Night of Navy ink onto a scrap of Whisper White Thick CS
- card back sentiment in Night of Navy ink onto one of the Whisper White CS layers
- box top sentiment in Night of Navy ink onto a scrap of Whisper White Thick CS
- sleigh in Jet Black Stazon ink onto a scrap of Gold Foil Sheet
- sleigh in Jet Black Stazon ink onto a scrap of Real Red CS
Cut using the North Pole Wonder Dies:
- the two stamped sleighs
- 9 reindeer from scraps of Crumb Cake CS
Cut using the Stitched Rectangle Dies:
- sentiment for the card front
- scrap of Night of Navy CS larger than the sentiment
- scrap of Gold Foil Sheet larger than the Night of Navy piece
Cut using the Stitched Shapes Dies:
- sentiment for the box top
Cut using the 2″ Circle Punch:
- scrap of Night of Navy CS
Cut using Paper Snips:
- cut away the rails from the Real Red CS sleigh
Assembled the card:
- burnished the folds in the two long Night of Navy CS pieces with a Bone Folder
- smallest section of the 11″ piece glued onto one end of the 9-3/4″ piece, to create a 19-1/2″ x 3-1/4″ accordion card base, with 6 3-1/4″ square sections
- 6 DSP layers glued onto the 6 sections on one side of the card base
- remaining DSP layer glued onto the front of the card base
- 3 Whisper White CS layers glued onto the back of the card base
- Stampin Seal+ applied onto the back of the first reindeer’s neck
- Gold Twine tied around the reindeer’s neck, then the reindeer glued onto the first DSP layer
- Stampin Seal+ applied onto the back of the next reindeer’s neck, the twine looped around the neck, then the reindeer glued onto the second DSP layer
- continued adding reindeer, looping the twine around each neck and gluing them onto the DSP layers
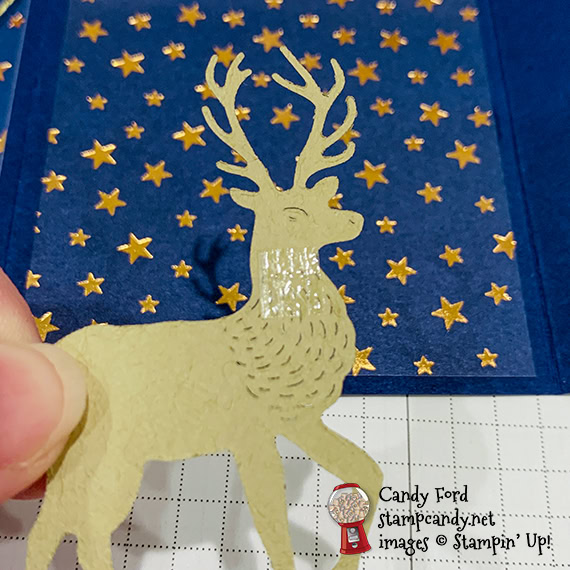
- NOTE: Don’t pull the twine too tight between the reindeer. Lay the reindeer where it needs to go, then loop the twine around its neck and stick it to the Stampin’ Seal+ on the back (see photo below.) Then carefully turn over the reindeer to apply glue onto the back. Make sure to glue down all the points of the antlers so they don’t get tangled with the others when the card is closed.
- red sleigh pieces adhered onto the gold sleigh using Stampin’ Seal+
- sleigh adhered onto the last DSP layer using Stampn’ Seal+, with the twine under the front rail
- knot tied in the end of the twine to keep it from raveling
- twine adhered onto the sleigh using one tiny strip of Stampn’ Seal+ (I used my Take Your Pick tool to remove just one strip from the adhesive and place it on the sleigh.)
- Red Rhinestone applied onto the first reindeer’s nose
- sentiment for card front glued onto the Night of Navy CS die cut rectangle
- Night of Navy CS die cut rectangle adhered onto the gold foil die cut rectangle using Stampin’ Seal+
- gold rectangle adhered onto the DSP layer on the card front using Stampin’ Seal+
Assembled the box:
- burnished the folds in the box and folded it to assemble
- adhered the 2 back tabs to the back of the box using Stampin’ Seal+
- 3-1/4″ Night of Navy CS square layer adhered onto the top of the box using Stampin’ Seal+
- gold accent adhered onto the Night of Navy CS layer using Stampin’ Seal+
- box sentiment glued onto the punched Night of Navy CS circle
- Night of Navy CS circle adhered onto the center of the gold accent using Black Stampin’ Dimensionals
- 3 Red Rhinestones applied randomly onto the box top
S
Here’s the September 2020 ICS Blog Hop:
Click on the next button below to hop to the next stop, Charmane Hopkins of Renee’s Paper Treasures:
.

S
Here are today’s colors:
You can click on each one to see all the products that come in that color!
S
Here’s what I used:
Click on these images for more details and to purchase. If you are reading this post in email, the product images may not show up. Please click here to see the post on my blog.
Supply List. <— Click for a clickable and printable list of the products!
S
Here are some helpful links:
S
Thanks for stopping by today, and Sweet Stamping!
Aug 27, 2020 | Blog Hop, Boxes, Cards, Gallery, Paper Pumpkin |

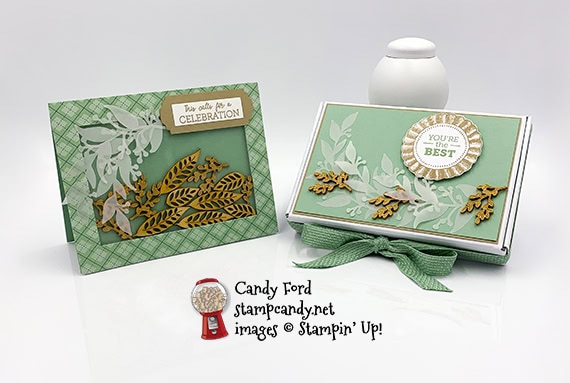
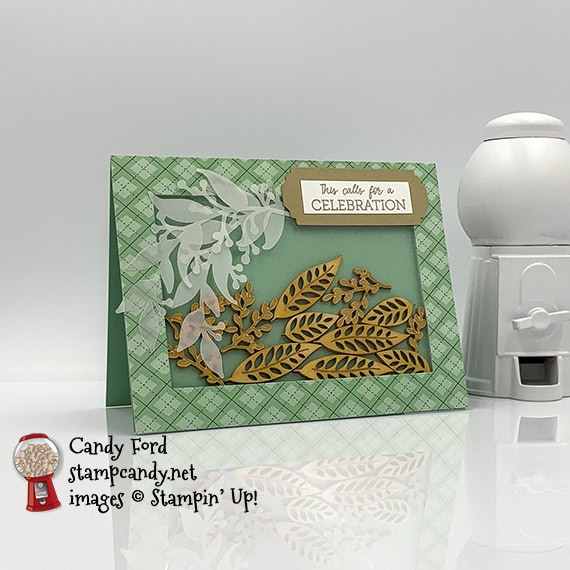
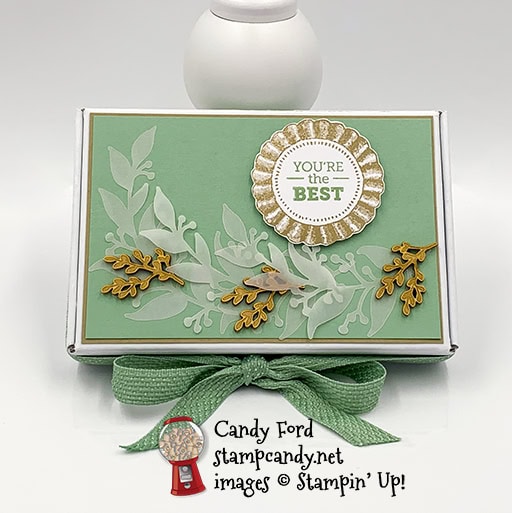
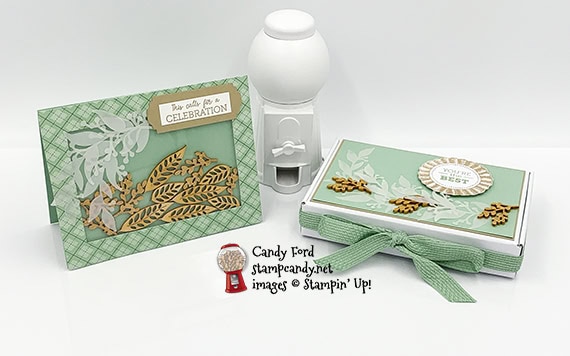
Welcome to the August 2020 APPT Blog Hop! This month we’re sharing alternate projects to make with the World’s Greatest kit. I used a Mini Paper Pumpkin Box, Mint Macaron ribbon, and In Good Taste Elements along with the kit to create a shaker card and gift box. The box is the perfect size for note cards. The colors in the kit are pretty bold and bright, and I wanted to make something calmer, so I used the Mint Macaron and white from the kit and added Crumb Cake. And I used glue and Stampin’ Seal+ in addition to the glue dots and dimensionals from the kit, but you don’t have to.
Be sure to hop around to all the stops to see all the great alternate projects shared by this talented group of stampers!
If you are reading this in email, some photos may appear blurry, or may not appear at all. Please click here to see the post on my blog.
S August 2020 APPT August 2020 APPT August 2020 APPT August 2020 APPT
Here’s what I made:
S
Here’s what I did:
Cut and scored with my paper trimmer:
- Mint Macaron card stock (CS) cut to 5-1/2″ x 8-1/2″, then scored in half at 4-1/4″, to create the card base
- Crumb Cake CS layer cut to 5-3/8″ x 3-5/8″
- Mint Macaron CS layer cut to 5-1/4″ x 3-1/2″
- Crumb Cake CS strip cut to 1″ x 3″
- Whisper White CS cut to 5-1/4″ x 4″ for the inside of the card base
Stamped with the World’s Greatest stamp set:
- card sentiment in Crumb Cake ink onto a scrap of Whisper White CS, then trimmed it down using my paper trimmer (It’s about 2″ x 9/16″.)
- round ribbon in Crumb Cake ink onto one of the larger white die cut circles from the kit
- box sentiment in Mint Macaron ink in the center of the Crumb Cake round ribbon
Cut using the Lovely Labels Pick a Punch:
- both ends of the Crumb Cake CS strip
Cut using Paper Snips:
- fussy cut around the Crumb Cake round ribbon
- trimmed the ends of the ribbon after tying the bow on the box
Assembled the card:
- burnished the fold in the card base with a Bone Folder
- a clear piece from the kit adhered onto one side of a foam rectangle, also from the kit
- a plaid frame from the kit adhered over the clear piece
- assorted pieces from the In Good Taste Elements laid onto the front of the card base, in one layer but clustered in the center
- stuck the other side of the foam rectangle onto the card front
- sentiment glued onto the punched Crumb Cake CS piece
- Crumb Cake piece adhered onto the card front using Stampin’ Seal+
- 2 vellum pieces from the kit adhered onto the card front using glue dots and glue
- Note: I used only a couple of glue dots where they wouldn’t show. I applied a small amount of glue to a few of the leaves and spread it with my finger, so it wouldn’t show through.
- Whisper White CS glued onto the inside of the card base (I had not done this yet when I took the photos.)
Assembled the box:
- burnished the folds in the box with a Bone Folder and folded to assemble
- Crumb Cake CS layer glued onto the top of the box
- Mint Macaron CS layer glued onto the Crumb Cake CS layer
- 3 vellum pieces glued onto the Mint Macaron CS layer, using small amounts of glue spread onto just a few of leaves
- 3 wooden elements tucked into the vellum pieces and adhered using glue dots
- round ribbon/sentiment adhered onto the Mint Macaron CS layer using Stampin’ Dimensionals
- Mint Macaron ribbon (about a yard or so) adhered onto the back and two sides of the box using Stampin’ Seal + (centering it on the back) then tied in a bow in the front
- Note: Untie the bow to open the box. The ribbon will stay attached to the box around 3 sides.
S
Here’s the August 2020 APPT Blog Hop:
S
Here are today’s colors:
You can click on each one to see all the products that come in that color!
S
Here’s what I used:
Click on these images for more details and to purchase. If you are reading this post in email, the product images may not show up. Please click here to see the post on my blog.
Supply List. <— Click for a clickable and printable list of the products!
S
Here’s how to get a prepaid Paper Pumpkin subscription:
Just click on the items below to order!
S
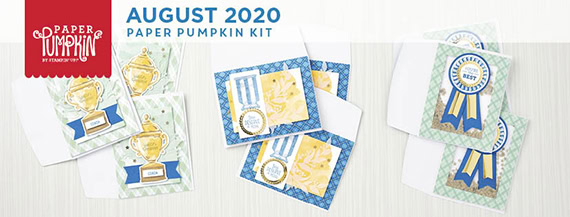
Here’s the World’s Greatest kit:
What it makes:
What you get: 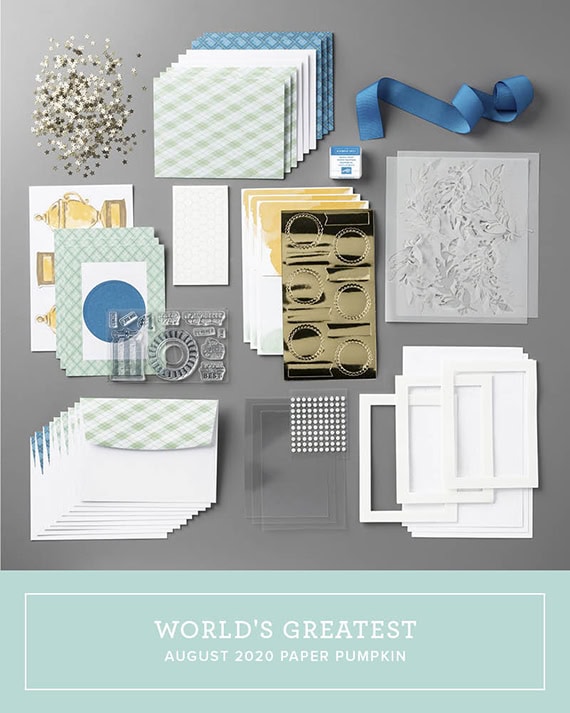
The stamp set: 
CLICK HERE to download a printable stamp case insert to store the stamp set and any left over pieces of the kit.
Use your Bonus Days coupons by August 31!
Click the image below to shop now and use your Bonus Days coupons!

S
Here are some helpful links:
S
Thanks for stopping by today, and Sweet Stamping!