It’s time for the May 2019 APPT Blog Hop. This month’s kit was designed by Stampin’ Up! Co-founder and Board Chair, Shelli Gardner. It’s called Hugs From Shelli. Be sure to hop all the way around to all the blogs to see all the different ways to send hugs in the mail. You’ll see the list farther down in this post.
S
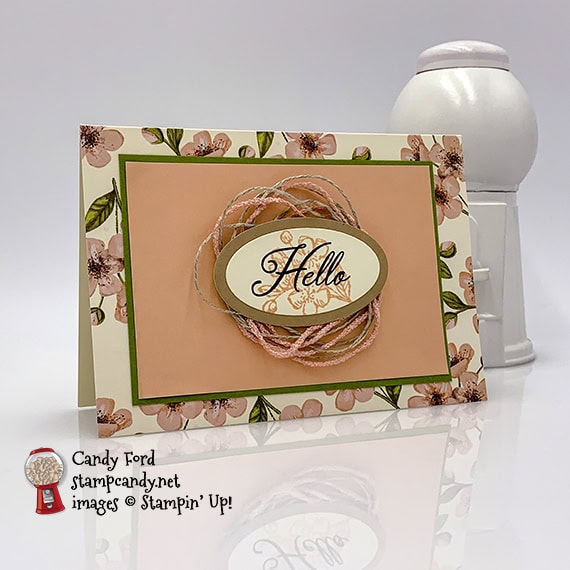
Here’s what I made:
S
Here’s what I did:
Cut and scored with my Stampin’ Trimmer:
Old Olive card stock (CS) cut to 4-3/8″ x 3-1/8″
envelope cut to 4-1/4″ x 3″ (solid pink)
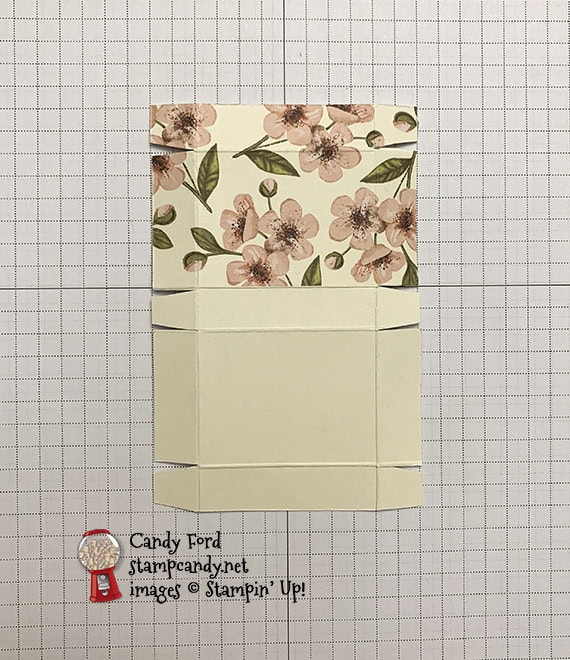
card base cut to 3″ x 4-1/2″, with the original score line at 2″, then score 1/2″ from all sides, and cut according to the diagram below (dotted lines are scored, solid lines are cut)
also score across at 2-1/2″
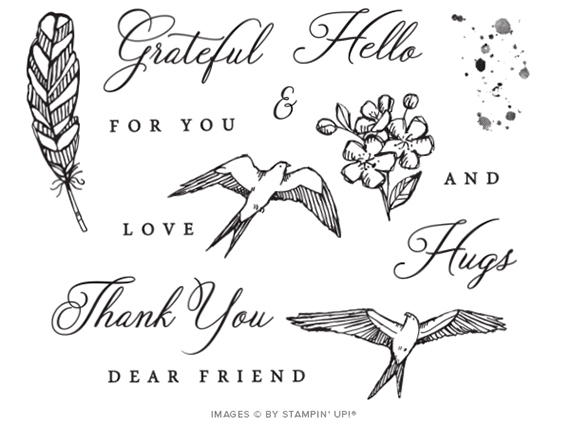
Stamped with the Hugs From Shelli stamp set:
sentiment in Early Espresso ink onto a piece of a Very Vanilla card base
flowers in Petal Pink ink over the sentiment
Cut using the Layering Ovals Dies:
sentiment
a slightly larger oval from a scrap of Crumb Cake CS
Assembled the card:
burnished the fold in the card base with a Bone Folder
Old Olive CS layer glued onto the front of the card base
solid pick layer glued onto the Old Olive CS layer
24″ of each twine from the kit wrapped around my fingers, then adhered onto the solid pink layer using Tear & Tape
sentiment glued onto the Crumb Cake CS oval
Crumb Cake CS oval adhered over the twine using Stampin’ Dimensionals
Assembled the box:
burnished the folds in the box with a Bone Folder
glued tabs to inside of adjacent sides to form box and lid
pattie inserted into box and the lid closed
a piece of each twine wrapped around the box and tied in a bow
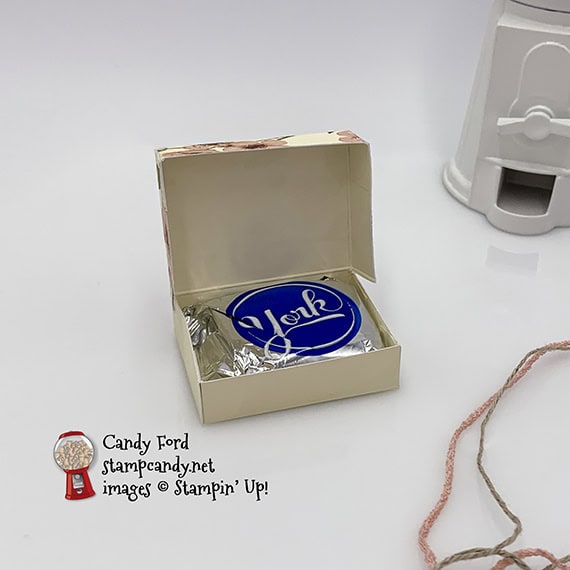
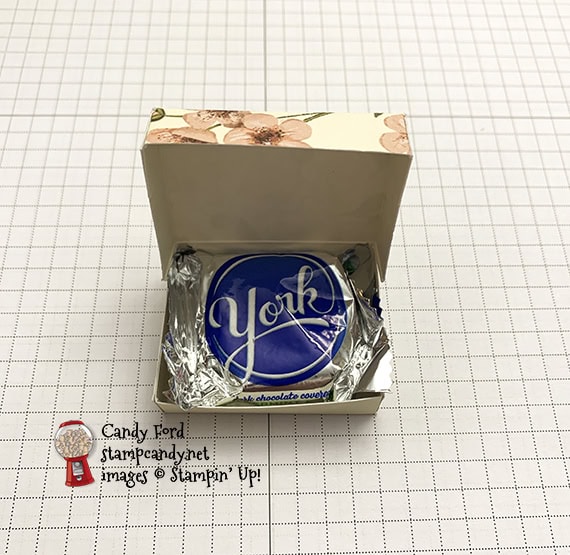
I just dropped this pattie in the box for the photo, but I find it fit, and looks, better if you tuck the side pieces of the wrapper underneath it:
S
Here’s the Hugs From Shelli blog hop:
S
Here are today’s colors:
You can click on each one to see all the products that come in that color!
Order your Swatch Books and Product Shares by June 3!
S
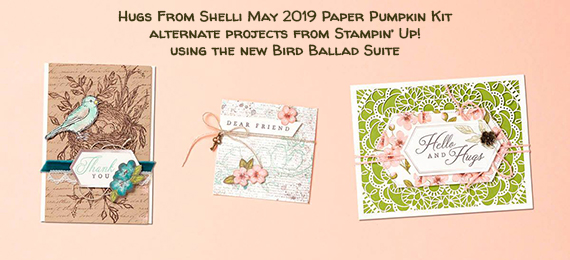
Here are some alternate projects from Stampin’ Up!:
All three of our alternate projects feature products from the stunningly beautiful Bird Ballad Suite, available for purchase beginning June 4.
Hello and Hugs Card
Just tuck a piece of cardstock behind the Bird Ballad Laser-Cut Card front to make the lacy details pop.
Free as a Bird Stamp Set; Old Olive Cardstock; ; Mossy Meadow Classic Stampin’ Pad; Bird Ballad Laser-Cut Cards & Tin; Bird Ballad Trinkets; Blender Pen; Stitched Nested Labels Dies
Thank You Card
Stamp the adorable bird from the Free as a Bird Stamp Set, watercolor (our ink colors are just a suggestion!), and fussy cut. Then, pop him up on your card front with a Stampin’ Dimensional and he will capture the heart of your recipient.
Free as a Bird Stamp Set; Shimmery White and Very Vanilla Cardstock; Coastal Cabana and Crushed Curry Classic Stampin’ Pads; 3/8″ Scalloped Lace Trim; Aqua Painter
Dear Friend Card
This card becomes an instant classic with the addition of a Bird Ballad Trinket. Just tie it to the card with linen thread (included).
Free as a Bird Stamp Set; Shimmery White and Very Vanilla Cardstock; Pool Party Classic Stampin’ Pad; Bird Ballad Trinkets
S
Here’s what comes in the Hugs from Shelli kit:
This kit’s coordinating colors are Crumb Cake, Old Olive, Petal Pink, Pretty Peacock, Soft Suede, Pool Party, and Very Vanilla.
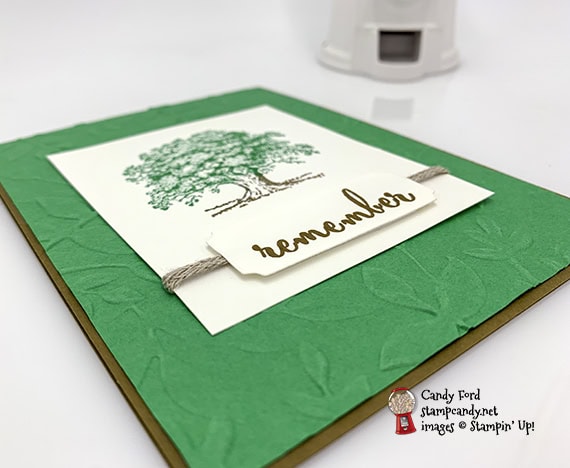
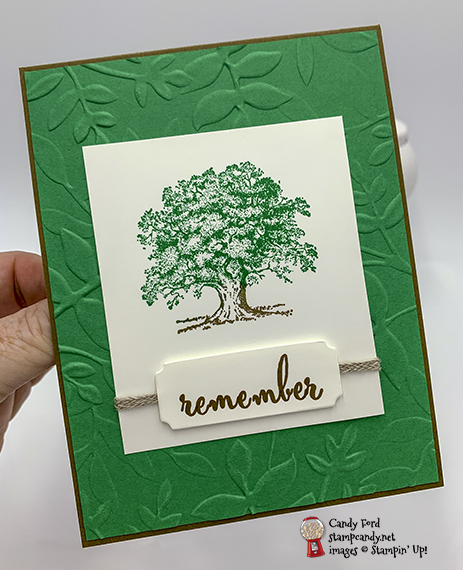
Welcome to InKing Royalty’s May Blog Hop! This year’s Blog Hop themes are inspired by a single word – and this month our projects are centered around REMEMBER. This word can mean different things to different people – fond memories, respectful tributes, special occasions that we’ll never forget. We are excited to share our creations with you today! After you read my post, I hope you’ll hop over to the next person on the list at the base of this post. There’s a lot of inspiration and you don’t want to miss any of it!
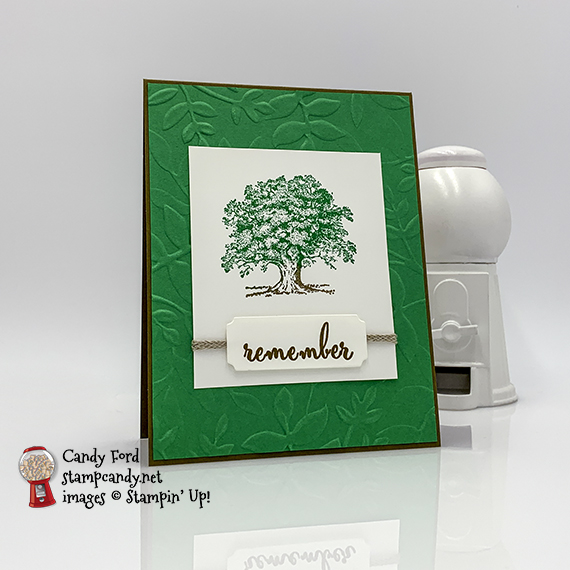
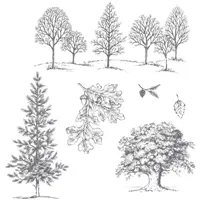
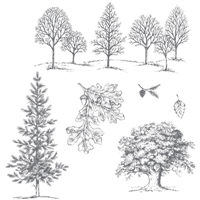
Remember when we thought Lovely as a Tree would be around forever? Well, this beloved stamp set is finally retiring, so I thought it would be the perfect thing to use for this Remember themed blog hop. The sentiment is from the Make a Difference stamp set, which is carrying over to the new catalog.
S
Here’s what I made:
S
Here’s what I did:
Cut and scored with my Stampin’ Trimmer:
Soft Suede card stock (CS) cut to 4-1/4″ x 11″, then scored in half at 5-1/2″
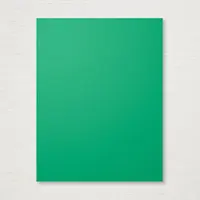
Call Me Clover CS cut to 4-1/8″ x 5-3/8″
Whisper White CS cut to 3″ x 3-1/2″
Whisper White CS cut to 4″ x 5-1/4″ for the inside of the card base
Stamped with the Lovely As a Tree stamp set:
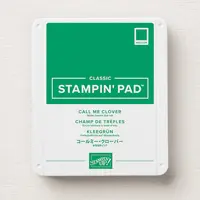
tree in Call Me Clover and Soft Suede inks onto the Whisper White CS layer
NOTE: I inked the stamp in Call Me Clover, then wiped away some of the ink from the tree trunk and colored it using a Soft Suede Stampin’ Write Marker
Stamped with the Make a Difference stamp set:
sentiment in Soft Suede ink onto a scrap of Whisper White CS
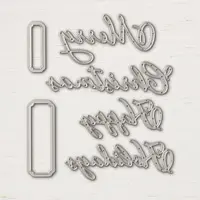
Die cut using the Merry Christmas Thinlits:
sentiment
Embossed using the Layered Leaved Dynamic embossing folder:
Call Me Clover CS layer
Assembled the card:
burnished the fold in the card base with a Bone Folder
Call Me Clover CS layer glued onto the front of the card base
Braided Linen Trim wrapped around the stamped layer and adhered onto the back using Tear & Tape
sentiment adhered over the trim using Stampin’ Dimensionals (I cut two skinny strips from the edge of a sheet of dimensionals and put them along the top and bottom of the sentiment piece to accommodate the trim.)
stamped layer glued onto the embossed layer
Whisper White CS glued onto the inside of the card base
S
Here’s the Inking Royalty Remember blog hop:
Thank you for hopping along with us. If you get stuck during the Blog Hop, please use this line-up as a guide:
Remember to order yours by June 3! Choose from Designer Series Paper Swatch Books (a wonderful tool!) a paper share, a ribbon share, an embellishment share, or save and get it all! Get the details HERE.
S
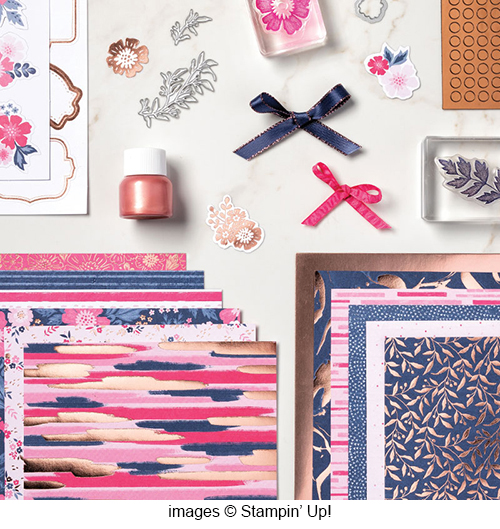
Everything is Rosy Product Medley
Available only through May 31, or while supplies last!
Item number 150059
The Everything Is Rosy Product Medley includes these exclusive products:
Everything Is Rosy Photopolymer Stamp Set—18 stamps; suggested blocks: a, b, c,
Everything Is Rosy Dies—10 dies; largest die 2-7/8″ x 1″ (7.3 x 2.5 cm)
6″ x 6″ (15.2 x 15.2 CM) Designer Series Paper Stack—48 sheets; 8 each of 6 double-sided designs
6″ x 6″ (15.2 x 15.2 CM) rose gold foil paper—8 sheets
Printed die cuts—2 sheets
Rose gold die cuts—4 sheets; 2 each of 2 designs
Rose gold adhesive backed mirror embellishments—60 embellishments; 1/4″ (6.4 mm)
Melon Mambo 1/4″ (6.4 mm) Ruched Ribbon—10 yards (9.1 m)
Night of Navy/Rose Gold 3/8″ (1 cm) Metallic –Edge Ribbon—10 yards (9.1 m)
Rose Gold Shimmer Paint—1/2 oz. (15 ml)
All that for only $80!
S
Here are today’s colors:
You can click on each one to see all the products that come in that color!
Supply List <– Click here for a clickable and printable list!
S
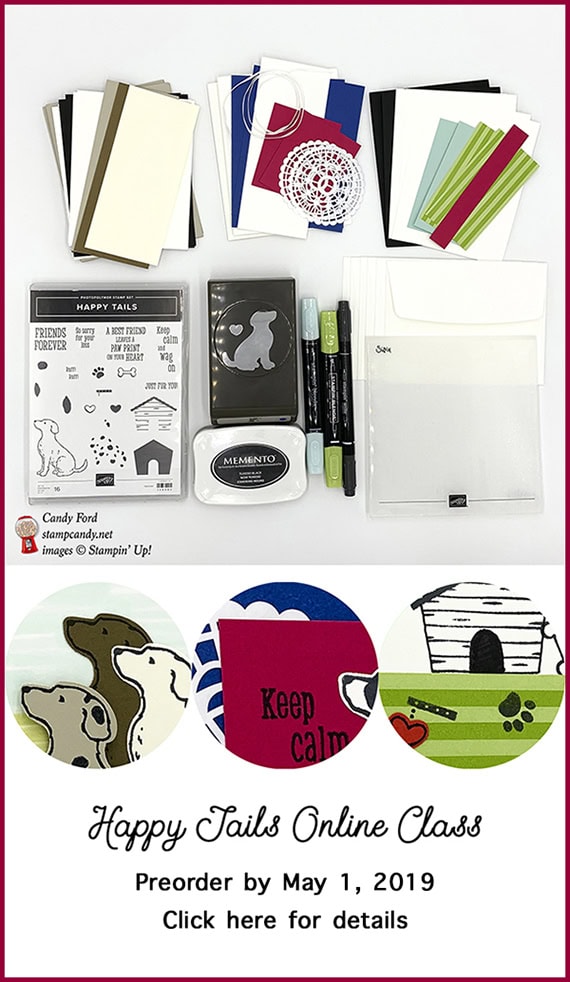
Preorder the Vibrant Vases Online Class by May 29:
Make 6 cards at home in your PJs!
2 each of 3 designs
I’ve done the trimming, scoring, and embossing for you!
You’ll receive all you need to make the cards, including the stamp set, punch, ink pads, precut/prescored/pre-embossed card kits, and 6 Whisper White envelopes.
Full detailed instructions
Limited spots available
Click on the image below for details and class options, or copy and paste this link into your browser: https://stampcandy.net/online-classes/vibrant-vases-card-class-preorder-2/
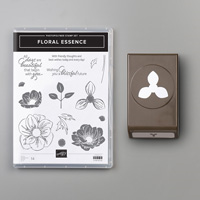
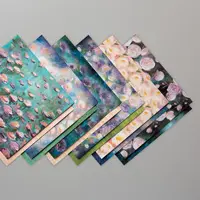
Welcome to the OSAT 05-2019 Blog Hop! This month is all about fabulous florals. For my projects, I used the brand new Perennial Essence Suite of products, which will be available to purchase on June 4! I used the Floral Essence stamp set, Perennial Flower Punch, Perennial Essence Designer Series Paper, Perennial Essence 12″ x 12″ Vellum cardstock, 5/8″ Petal Pink Organdy Striped Ribbon (which is so yummy!) and Perennial Essence Floral Centers.
Be sure to hop all the way around the hop to see all the great fabulous floral projects from this talented group!
S
Here’s what I made:
A card and coordinating mini pizza box.
S
Here’s what I did:
Cut and scored with my Stampin’ Trimmer:
For the card:
Calypso Coral card stock (CS) cut to 5-1/2″ x 8-1/2″, then scored in half at 4-1/4″
Whisper White CS layer cut to 4-5/8″ x 3-3/8″
Perennial Essence Designer Series Paper (DSP) layer cut to 4-1/2″ x 3-1/4″
Whisper White CS layer cut to 3″ x 1/2″
Whisper White CS cut to 4″ x 5-1/4″ for the inside of the card base
For the box:
Calypso Coral CS cut to 3-3/8″ x 3-3/8″
Whisper White CS layer cut to 2-3/4″ x 2-3/4″
DSP layer cut to 2-5/8″ x 2-5/8″x
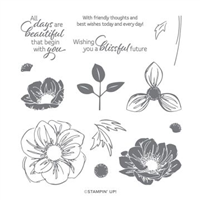
Stamped with the Floral Essence stamp set:
4 flowers in Versamark ink onto a piece of Petal Pink Vellum CS, then heat embossed in white
sentiment in Crushed Curry ink onto the 1/2″ strip of Whisper White CS
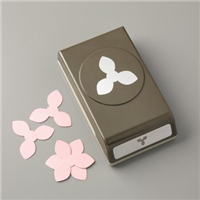
Cut using the Perennial Flower Punch:
the 4 vellum flowers
Cut using the Leaf Punch:
6 leaves from a piece of Old Olive Vellum CS
Cut using the Detailed Trio Punch:
all four corners of the Whisper White CS for the inside of the card
Cut using Paper Snips:
notch in one end of the sentiment strip
Assembled the card:
burnished the fold in the card base with a Bone Folder
DSP layer glued onto the Whisper White CS layer
Whisper White CS layer glued onto the front of the card base
2 flowers adhered together in the center using a Mini Glue Dot
3 leaves adhered onto the back of the flower using Snail
a Perennial Essence Floral Center applied onto the center of the flower
7″ piece of ribbon folded in half, and the ends cut at an angle
ribbon adhered onto the DSP layer using Snail
flower/leaves adhered over the ribbon using Snail
sentiment adhered over the ribbon using Snail
Whisper White CS glued onto the inside of the card base
Assembled the box:
burnished all the folds in the box with a Bone Folder, then folded it together
DSP layer glued onto the Whisper White CS layer
Whisper White CS layer glued onto the Calypso Coral CS layer
Calypso Coral CS layer glued onto the top of the box
flower and leaves put together the same way as for the card above, then adhered onto the DSP layer using Snail
ribbon tied around the box and into a bow (obviously, put your treat into the box before tying the ribbon around it)
S
Here’s the OSAT 05-2019 Fabulous Florals Blog Hop:
Be sure to check out every stop to see all the great Spring Fling projects!
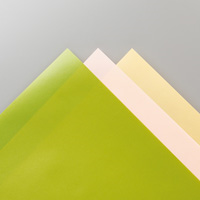
Here are today’s main colors:
You can click on each one to see all the products that come in that color!
Supply List <– Click here for a clickable and printable list!
S
Get the limited time Everything is Rosy Product Medley!
Available only through May 31, or while supplies last!
Item number 150059
The Everything Is Rosy Product Medley includes these exclusive products:
Everything Is Rosy Photopolymer Stamp Set—18 stamps; suggested blocks: a, b, c,
Everything Is Rosy Dies—10 dies; largest die 2-7/8″ x 1″ (7.3 x 2.5 cm)
6″ x 6″ (15.2 x 15.2 CM) Designer Series Paper Stack—48 sheets; 8 each of 6 double-sided designs
6″ x 6″ (15.2 x 15.2 CM) rose gold foil paper—8 sheets
Printed die cuts—2 sheets
Rose gold die cuts—4 sheets; 2 each of 2 designs
Rose gold adhesive backed mirror embellishments—60 embellishments; 1/4″ (6.4 mm)
Melon Mambo 1/4″ (6.4 mm) Ruched Ribbon—10 yards (9.1 m)
Night of Navy/Rose Gold 3/8″ (1 cm) Metallic –Edge Ribbon—10 yards (9.1 m)
Rose Gold Shimmer Paint—1/2 oz. (15 ml)
Only $80 for all that!!!
S
Preorder the Wonderful Moments Online Card Class by May 15:
Make 6 cards at home in your PJs!
2 each of 3 designs
perfect for all those weddings and showers that happen this time of year
I’ve done the trimming, scoring, and embossing for you!
You’ll receive all you need to make the cards, including the stamp set, ink pads, Stampin’ Blends Markers, the precut/prescored/pre-embossed card kits, and 6 Whisper White envelopes.
Limited spots available
Click on the image below for details and class options, or copy and paste this link into your browser: https://stampcandy.net/online-classes/wonderful-moments-wedding-card-class-preorder-2
It’s time for the APPT April 2019 Blog Hop! This month’s kit is called Sentimental Rose, and includes all you need to make 9 beautiful cards AND a box to put them in. Be sure to hop around to all the stops. You don’t want to miss any of the great alternative projects you can make with this month’s kit.
S
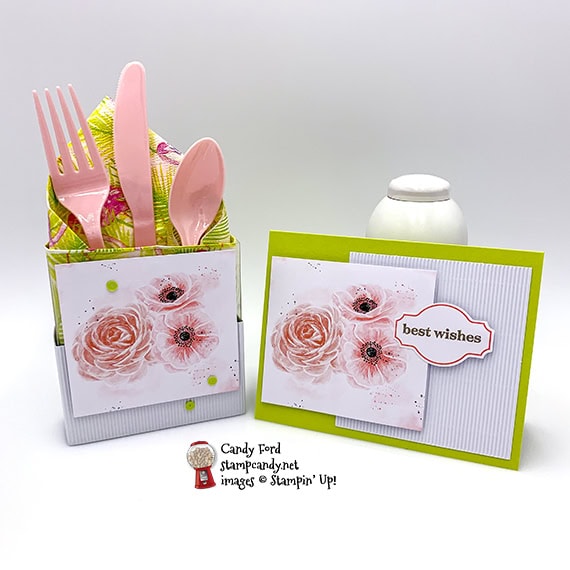
Here’s what I made:
A flatware/napkin holder and a card for a wedding shower. Since these were the only napkins I had with pink in them, I took the color (Lemon Lime Twist) from them for the projects. The Lemon Lime Twist card base and the Gingham Gala Adhesive Backed sequins are the only things you see that didn’t come in the kit. (I put the sequins on the box, but forgot to put them on the card before I took the photo. Oops!)
S
Here’s what I did:
Cut and scored with my Stampin’ Trimmer:
Lemon Lime Twist card stock (CS) cut to 5-12″ x 8-1/2″, then scored in half at 4-1/4″
acrylic box from the kit cut down from 5-1/4″ long to 4″ long – just cut off one end of the box
Stamped with the Sentimental Rose stamp set:
sentiment in Gray Granite ink onto a die cut tag from the kit
Assembled the card:
burnished the fold in the card base with a Bone Folder
corrugated piece glued onto the front of the card base
printed piece from the kit adhered over the corrugated piece using Stampin’ Dimensionals
left half of sentiment glued onto the printed piece, and the right half adhered onto the corrugated piece using Stampin’ Dimensionals
3 Lemon Lime Twist sequins applied onto the card front (Oops! I forgot to put these on the card before I took the photos.)
Assembled the flatware holder:
burnished the folds in the cut down acrylic box with a Bone Folder
folded in the flaps on the bottom end to form the holder
long corrugated piece wrapped around the bottom of the holder and adhered the ends together with the attached peel and stick adhesive (This helps the holder stand up.) If you feel the need, you can put a couple of glue dots under the back of the corrugated piece to hold it to the acrylic box.
adhered a printed piece onto the corrugated piece and the acrylic holder using Stampin’ Dimensionals
3 Lemon Lime Twist sequins applied onto the front of the holder
napkin and flatware inserted into holder
S
Here’s the APPT April 2019 hop:
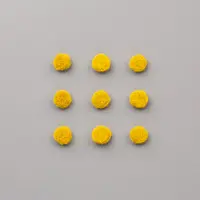
Here are today’s colors:
You can click on each one to see all the products that come in that color!
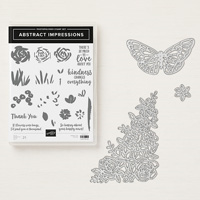
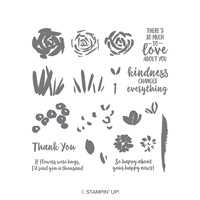
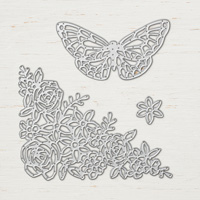
It’s time for InKing Royalty’s April 2019 Blog Hop! This year’s Blog Hop themes are inspired by a single word – and this month our projects are centered around SPRING. I used the Abstract Impressions bundle (Abstract Impressions stamp set and Springtime Impressions Thinlits Dies) along with one of my favorite patterns from the Garden Impressions Designer Series Paper. Now if that isn’t Springy, I don’t know what is! By the way, the stamp set and dies are carrying over to the new annual catalog, but they won’t be available as a bundle to save 10% – so if you want it, I recommend getting it before June 3, so you can save!
Be sure to hop all the way around to all the stops. This is a very talented group of stampers and you don’t want to miss any of their Spring themed projects.
S
Here’s what I made:
S
Here’s what I did:
Cut and scored with my Stampin’ Trimmer:
Night of Navy card stock (CS) cut to 8-1/2″ x 5-1/2″, then scored at 2-1/8″ and 6-3/8″, to form a gate fold card base
Mango Melon CS layers cut to 4″ x 2-1/4″ (2 pieces)
Garden Impressions Designer Series Paper (DSP) layers cut to 3-3/4″ x 2″ (2 pieces)
So Saffron CS cut to 2-3/4″ x 1″” for the sentiment
So Saffron CS cut to 4″ x 5-1/4″ for the inside of the card basex
Stamped with the Abstract Impressions stamp set:
outside sentiment in Night of Navy ink onto the small So Saffron CS
inside sentiment in Night of Navy ink onto the large So Saffron CS
Die cut using the Springtime Impressions Thinlits:
a butterfly from a scrap of So Saffron CS
Assembled the card:
burnished the folds in the card base with a Bone Folder
DSP layers glued onto the Mango Melody CS layers
left half of a Mango Melody CS layer glued onto the left side of the front of the card base
right have of the other Mango Melody CS layer glued onto the right side of the front of the card base
butterfly body glued onto the upper DSP layer (left the wings loose and bent them up a bit for a 3D effect)
sentiment adhered onto the lower DSP layer using Stampin’ Dimensionals
larger So Saffron CS glued onto the inside of the card basex
S
Here’s the Spring Blog Hop:
After reading my post, please hop on to Lynn Kolcun at Avery’s Owlery. If you get lost during the hop, use this line up as a guide:
Thank you for hopping along with us. If you get stuck during the Blog Hop, please use this line-up as a guide:
Supply List <– Click here to download a clickable and printable supply list!
S
Today is the last day!
Preorder the Sweetest Thing Online Card Class by Wednesday, April 24!
Make 6 cards at home in your PJs!
2 each of 3 designs
Features the Sweetest Thing Bundle and the How Sweet It Is Designer Series Paper
Featured colors: Melon Mambo, Coastal Cabana, Gorgeous Grape, Pineapple Punch, Whisper White
I’ve done the cutting, scoring, and embossing for you!
You’ll receive all you need to make the cards, including the stamp set, dies, ink pad, the precut/prescored/pre-embossed card kits, and 6 Whisper White envelopes.
Limited spots available
Click on the image below for details and class options, or copy and paste this link into your browser: https://stampcandy.net/online-classes/sweetest-thing-card-class-preorder/
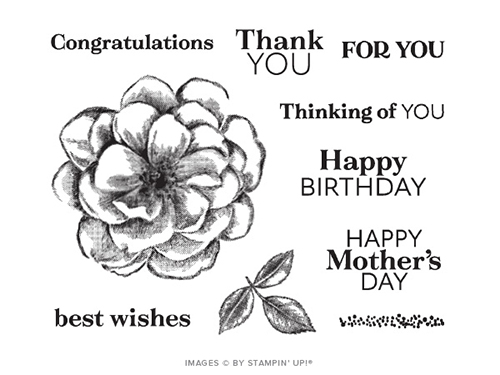
It’s time for the April 2019 Paper Pumpkin Possibilities Blog Hop! This month’s kit is called Sentimental Rose, and it is sooooo pretty. It contains all you need to make 9 cards (3 each of 3 designs) AND a box to put them in. I can’t wait to see all the alternative projects the other folks on the hop come up with. Be sure to hop all the way around to see them all!
CLICK HERE to download the printable stamp case insert to store your stamp set and andy leftover pieces.
S
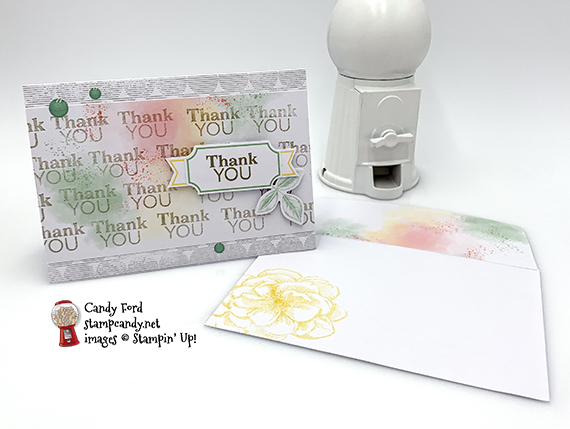
Here’s what I made:
For my card and envelope, I used only pieces from the kit, plus glue and snips for the envelope flap. The box and ribbon are new products from the upcoming 2019-2020 Annual Catalog, but everything on the box is from the kit.
S
Here’s what I did:
Stamped with the Sentimental Rose stamp set:
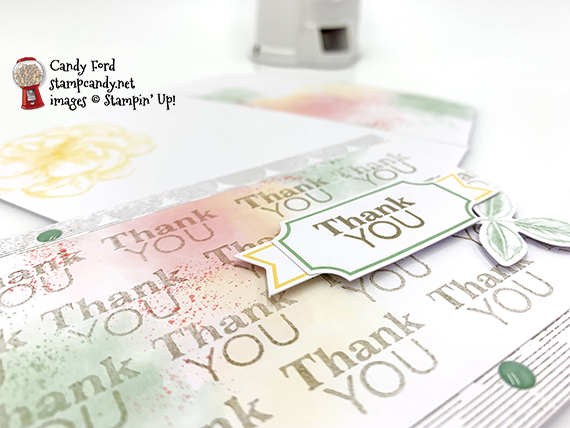
“Thank You” in Gray Granite ink (stamped off once) all over a multicolor layer from the kit
“Thank You” in Gray Granice ink onto a die cut label from the kit
“For You” in Gray Granite ink onto a tag from the kit
large rose stamped in So Saffron ink (stamped off once) onto the front of the envelope
Assembled the card:
burnished the fold in the card base with a Bone Folder
stamped multicolor layer glued onto the front of the card base
stamped label glued onto a yellow rimmed label
leaf glued onto the back of the labels
labels and leaf adhered onto the multicolor label using Stampin’ Dimensionals
enamel dots applied onto the card front
plain multicolor layer glued onto the flap of the envelope, and the excess trimmed from around the edges using Paper Snips
Assembled the box:
burnished the folds in the box with a Bone Folder, then folded in flaps to assemble the box
NOTE: I glued the top flaps closed and left the bottom unglued to insert a gift.
NOTE: I used glue for my projects, but you can use the glue dots that come in the kit. I do recommend glue for the envelope flap cover if you plan to mail it, but you can use glue dots if you hand deliver it.
large rose and leaf die cuts glued onto the front of the box
enamel dots applied onto the front of the box
Mint Macaron ribbon tied around the box and tied in a bow
tag tied onto the ribbon using twine from the kit
S
Here’s the Sentimental Rose Paper Pumpkin Possibilities Blog Hop:
Click the button to go to the next stop on the hop, Terri Takashige of Territerbear’s Stamp & Scrap Spot.
Here’s the Sentimental Rose video from Stampin’ Up!
Here are today’s colors:
You can click on each one to see all the products that come in that color!
Here’s what I used, other that what came in the kit:
Click on these images for more details and to purchase.
The Mini Shipping Boxes (149492) and the Mint Macaron 1/4″ Textile Ribbon (149480) are from the 2019-2020 Annual Catalog and will be available to purchase June 4, 2019.
Preorder the Sweetest Thing Online Card Class by Wednesday, April 24!
Make 6 cards at home in your PJs!
2 each of 3 designs
Features the Sweetest Thing Bundle and the How Sweet It Is Designer Series Paper
Featured colors: Melon Mambo, Coastal Cabana, Gorgeous Grape, Pineapple Punch, Whisper White
I’ve done the cutting, scoring, and embossing for you!
You’ll receive all you need to make the cards, including the stamp set, dies, ink pad, the precut/prescored/pre-embossed card kits, and 6 Whisper White envelopes.
Limited spots available
Click on the image below for details and class options, or copy and paste this link into your browser: https://stampcandy.net/online-classes/sweetest-thing-card-class-preorder/
 It’s time for the May 2019 APPT Blog Hop. This month’s kit was designed by Stampin’ Up! Co-founder and Board Chair, Shelli Gardner. It’s called Hugs From Shelli. Be sure to hop all the way around to all the blogs to see all the different ways to send hugs in the mail. You’ll see the list farther down in this post.


 S
S