Nov 16, 2022 | Autumn, Blog Hop, Cards, Fun Folds, Gallery, Thanks, Thanksgiving |
 s
s
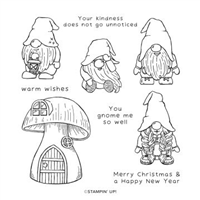
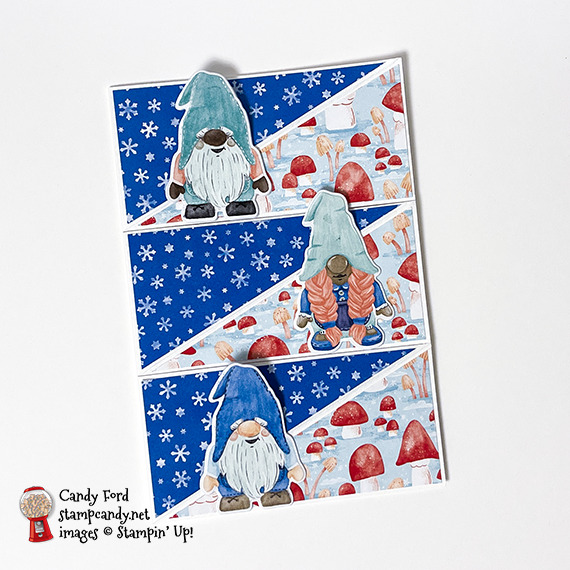
Welcome to the November 2022 Inking Royalty Blog Hop! This month’s blog hop is dedicated to showing Thanks. I used products from the Storybook Gnomes Suite Collection to create Tri-Panel Twisted Easel Card. I CASEd a card made by Marciene Ingram, but I changed the measurements and a few other things about it. We both used products from the Storybook Gnomes Suite Collection, just different ones. And I love that this Designer Series Paper (DSP) is so inclusive with black, brown, and white gnomes.
I am a paper gal. I love stamping, but I’m really all about the paper. The sentiment is the only stamped element of this card. It’s all DSP and cardstock.
We are excited to share our creations and hope you love them! After reading my post, I hope you will hop to the next person on the list below. Be sure to hop around to see ALL the great projects the Royals have created for you!
If you are reading this in email, some photos may appear blurry, or may not appear at all. Please click here to see the post on my blog.
S November 2022 Inking Royalty Blog Hop November 2022 Inking Royalty Blog Hop November 2022 Inking Royalty Blog Hop November 2022 Inking Royalty Blog Hop
Here’s what I made:


S
Here’s what I did:
Cut with my Paper Trimmer:
- Storybook Gnomes Designer Series Paper (DSP) (2 pieces snowflake pattern) cut to 4″ x 1-7/8″ then cut in half diagonally from top right corner to bottom left corner (should have 4 triangular pieces)*
- DSP (3 pieces mushroom pattern) cut to 4″ x 1-7/8″ then cut in half diagonally from top right corner to bottom left corner (should have 6 triangular pieces)*
- 4-1/4″ x 6-1/4″ Basic White Memories & More Card cut to 6-3/16″ tall
- front of the card base cut horizontally at 2-1/16″ and 4-1/8″ to create 3 flaps
- each flap scored diagonally from top right corner to bottom left corner
* I needed 3 pieces of each DSP pattern. I cut 4 of the snowflake pattern triangles because I could rotate one and have only one left over. I cut 6 of the mushroom pattern because it is directional, so I used all three bottom triangles and have the three others left over.
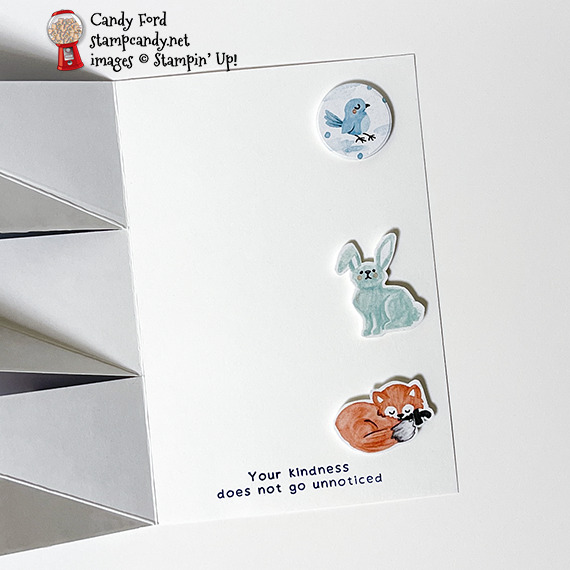
Stamped with the Kindest Gnomes stamp set:
- sentiment in Pacific Point ink onto the inside of the card base, at the bottom
Cut using Paper Snips:
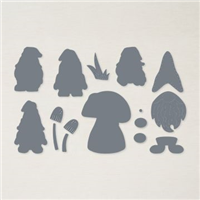
- 3 gnomes, a bird, a bunny, and a fox from DSP – roughly cut with extra around the edges
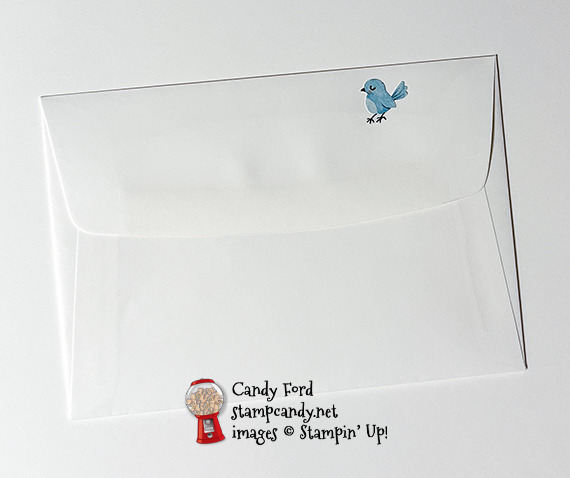
- fussy cut a second bird for the envelope
- the bird, bunny, and fox, after they were glued onto Basic White Thick CS
Glued:
- 3 gnomes, bird, bunny, and fox to scraps of Basic White Thick CS – layered to make them stronger
Cut using the Gnomes Dies:
Cut using the Beautiful Shapes:
- the layered bird with the smallest circle die (the bird was just too small to fussy cut and pop up with Dimensionals)
Assembled the card:
- burnished the folds in the card base with a Bone Folder
- 3 snowflake DSP layers glued onto the top left triangular section of each card flap
- 3 mushroom DSP layers glued onto the bottom right triangular section of each card flap
- bottom parts of gnomes glued onto the mushroom DSP, being careful not to have any exposed glue above the bottom right triangular section of each card flap
- layered bird, bunny, and fox adhered onto the inside of the card base with various foam adhesives, so they would keep the flaps propped open
- fussy cut bird glued onto the flap of the Memories & More envelope
S
Here’s the November 2022 Inking Royalty Blog Hop:
Thank you for hopping along with us. If you get stuck during the Blog Hop, please use this line-up as a guide:
- Brian King at Stamp with Brian
- Jackie Beers at Blue Line Stamping
- Jan Dufour at Stamp Me Silly
- Candy Ford at Stamp Candy <—– YOU ARE HERE!
- Lynn Kolcun at Avery’s Owlery
- Marilyn Jones at Stamp with MJ
- Sue Jackson at Just Peachy Stamping
- Renae Novak at Blessed by Cards
- Sheryl Sharp at Sharp Notes by Sheryl
- Robin Myren at Songbird Designs by Robin
ss
Here are today’s main colors:
You can click on each one to see all the products that come in that color!
S
Here’s what I used:
Click on these images for more details and to purchase. If you are reading this post in email, the product images may not show up. Please click here to see the post on my blog.
Sale: $23.20
Price: $29.00
Supply List. <— Click for a clickable and printable list of the products!
S
Here are some helpful links:
S
Thanks for stopping by today, and Sweet Stamping!
Apr 18, 2022 | Blog Hop, Cards, Fun Folds, Gallery |
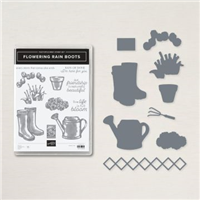
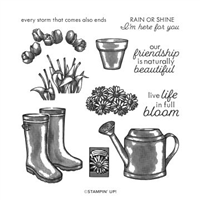
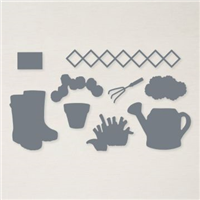
Welcome to the April 2022 Candy Hearts Blog Hop! This month we are featuring Fancy Folds, or Fun Folds. I used the Flowering Rain Boots Bundle and Flowering Fields Designer Series Paper to create an easel card. After you read my post, I hope you’ll hop around to all the stops on the hop. You don’t want to miss any of the great projects this talented group has created for you today.
If you are reading this in email, some photos may appear blurry, or may not appear at all. Please click here to see the post on my blog.
S April 2022 Candy Hearts Blog Hop April 2022 Candy Hearts Blog Hop April 2022 Candy Hearts Blog Hop April 2022 Candy Hearts Blog Ho
Here’s what I made:

S
Here’s what I did:
Cut and scored with my paper trimmer:
- Pool Party card stock (CS) cut to 4-1/4″ x 11″, then scored at 2-3/4″ and 5-1/2″
- Pool Party CS cut to 4-1/4″ x 5-1/2″
- Blushing Bride CS layer cut to 3-3/4” x 5”
- Flowering Fields Designer Series Paper (DSP) layer cut to 3-5/8” x 4-7/8”
- Pool Party CS layer cut to 2-5/8” x 3-3/4”
- Basic White CS layer cut to 2-1/2” x 3-5/8”
- Blushing Bride CS cut to 3-3/4” x 1-3/4”
- DSP layer cut to 3-5/8” x 1-5/8”
- Basic White CS cut to 4″ x 5-1/4″ for the inside of the card base
Stamped with the Flowering Rain Boots stamp set:
- sentiment and flowers in Flirty Flamingo ink onto a scrap of Basic White Thick CS
- watering can in Pool Party ink onto a scrap of Basic White Thick CS
Cut using the Rain Boots Dies:
- watering can and flowers
- tool from a scrap of Smoky Slate CS and from a scrap of Pool Party CS
Cut using Stitched Rectangle Dies:
Cut using Stitched So Sweetly Dies:
- a piece of Blushing Bride CS
Embossed with the Brick & Mortar 3D Embossing Folder:
- 2-1/2” x 3-5/8” Basic White CS layer
Assembled the card:
- burnished the folds in the card base with a Bone Folder, so that the one at 5-1/2″ is a mountain fold, and the one at 2-3/4″ is a valley fold
- glued the top half of the 4-1/4″ x 5-1/2″ Pool Party CS onto the top half of the card front (which is really the bottom of the card front that has been flipped up)
- 3-3/4” x 5” Blushing Bride CS glued onto the 4-1/4″ x 5-1/2″ Pool Party CS
- 3-5/8” x 4-7/8” DSP glued onto the 3-3/4” x 5” Blushing Bride CS
- the die cut Blushing Bride CS glued onto the 3-5/8” x 4-7/8” DSP
- 2-5/8” x 3-3/4” Pool Party CS glued onto the die cut Blushing Bride CS
- 2-1/2” x 3-5/8” Basic White CS glued onto the 2-5/8” x 3-3/4” Pool Party CS
- watering can and flowers glued onto the 2-1/2” x 3-5/8” Basic White CS
- cut the handle from the Pool Party tool using scissors, and glue it onto the handle of the Smoky Slate tool
- tool glued over watering can
- 3 Artistry Blooms Sequins applied onto the 2-1/2” x 3-5/8” Basic White CS layer, using a Take Your Pick tool
- 3-5/8” x 1-5/8” DSP glued onto the 3-3/4” x 1-3/4” Blushing Bride CS
- sentiment glued onto the 3-5/8” x 1-5/8” DSP
- 4″ x 5-1/4″ Basic White CS glued onto the inside of the card base
- sentiment stack adhered onto the bottom of the 4″ x 5-1/4″ Basic White CS using a piece of Foam Adhesive Sheet, making sure to leave an even border around the bottom and two sides
- prop the card front behind the raised sentiment stack
S
Here’s the April 2022 Candy Hearts Blog Hop:
Thank you for hopping with the Candy Hearts today! Be sure to hop around to all the stops. You do not want to miss any of the creativity in this talented group of stampers! If you get lost, use the list below.
s
Here are today’s colors:
You can click on each one to see all the products that come in that color!
S
Here’s what I used:
Click on these images for more details and to purchase. If you are reading this post in email, the product images may not show up. Please click here to see the post on my blog.
Supply List. <— Click for a clickable and printable list of the products!
Reserve Your Swatch Books and Product Shares Now!
I will be selling Designer Series Paper Swatch Books as well as Paper Shares, Ribbon Shares, and Embellishment Shares from the new 2022-2023 Annual Catalog. You must order by 2 May 2022. Click here for all the details!
Here are some helpful links:
S
Thanks for stopping by today, and Sweet Stamping!

Jan 10, 2022 | Blog Hop, Cards, Fun Folds, Gallery, Sale-A-Bration |

Welcome to the January 2022 Candy Hearts Blog Hop! Today we are sharing projects made with new Sale-a-bration items. After reading my post, I hope you will hop to the next person on the list below. Be sure to hop around to see ALL the great projects the Candy Hearts have created for you!
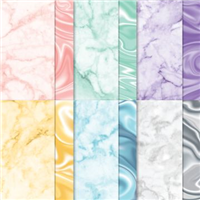
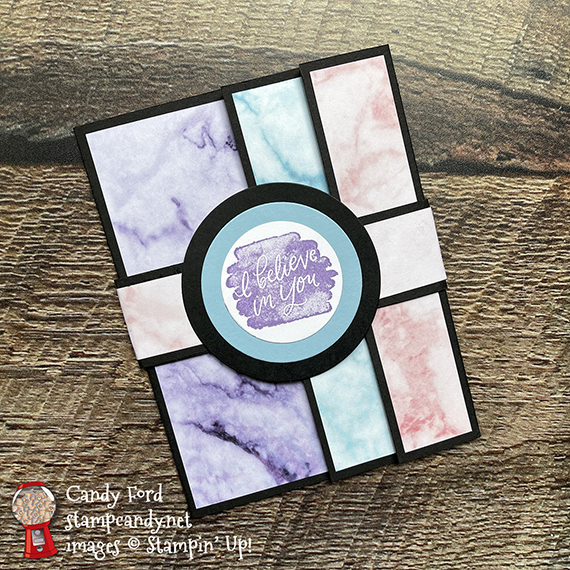
The Sale-a-bration item I used on my card today is the Simply Marbleous Designer Series Paper, which I used along with the Lucky You stamp set and Layering Circles Dies. I made a Triple Fold fun fold card, and used a few colors of the marble pattern paper for the different layers. I didn’t add any embellishments because I wanted the gorgeous paper to take center stage.
If you are reading this in email, some photos may appear blurry, or may not appear at all. Please click here to see the post on my blog.
S January 2022 Candy Hearts Blog Hop January 2022 Candy Hearts Blog Hop January 2022 Candy Hearts Blog Hop January 2022 Candy Hearts Blog Hop
Here’s what I made:

Inside: I used a different color of the DSP on the back side of the purple section, because I had pulled out only one sheet of each color, and I didn’t want to get up to get another piece of the purple. Can you say “lazy stamper?”
Back: If you want, you can add another piece of Basic White CS to the empty panel for more writing space.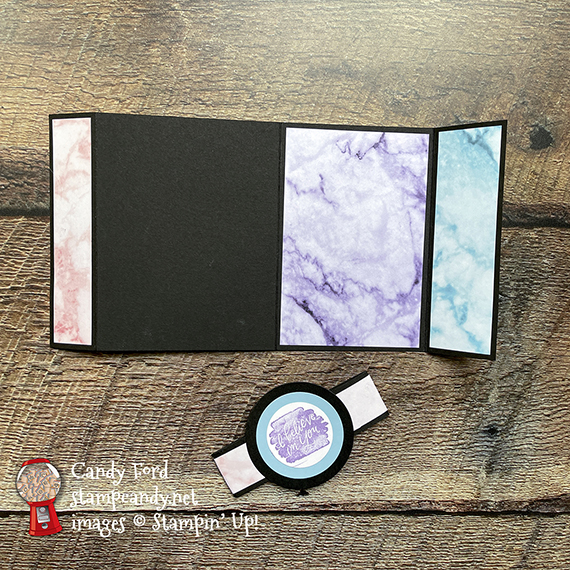
Here’s what I did:
Cut and scored with my paper trimmer:
- Basic Black card stock (CS) cut to 11″ x 5-1/2″, then scored at 1-3/4″, 5-1/2″, & 9-3/4″
- Simply Marbleous Designer Series Paper (DSP) layers (purple) cut to 3-1/2″ x 5-1/4″ (2 pieces) Actually, for this particular card, I cut one purple layer and one green layer, instead of 2 purples.
- blue DSP layers cut to 1-1/2″ x 5-1/4″ (2 pieces)
- pink DSP layers cut to 1″ x 5-1/4″ (2 pieces)
- Basic Black CS cut to 11″ x 1-1/4″
- pink DSP strip cut to 6″ x 1″ (2 pieces)
- Basic White CS cut to 4″ x 5-1/4″ for the inside of the card base
Stamped with the Lucky You stamp set:
- sentiment in Highland Heather ink onto a scrap of Basic White CS
Cut using the Layering Circles Dies:
- sentiment
- larger circle from a scrap of Balmy Blue CS
- even larger circle from a scrap of Basic Black CS
Assembled the card:
- burnished the folds in the card base with a Bone Folder, so the first one at 1-3/4″ is a mountain fold, and the other two are valley folds
- card base closed with the two smaller flaps on the right
- 3-1/2″ x 5-1/4″ DSP glued onto the largest section of the front. The right edge of this DSP layer will be hidden under one of the flaps when the card is closed.
- 1-1/2″ x 5-1/2″ DSP glued onto the middle section
- 1″ x 5-1/4″ DSP glued onto the smallest section
- three corresponding DSP pieces glued onto the backs of those same sections
- 4″ x 5-1/4″ Basic White CS glued onto the inside of the card base
- burnished the 11″ strip of Basic Black CS with a Bone Folder, only a few times to soften the fibers
- wrapped the 11″ strip of Basic Black CS around the card so the ends overlapped in front, making sure it was snug enough so it wouldn’t fall off and loose enough so it could be removed easily
- the two 6″ DSP strips glued together to make an 11″ strip, then glued onto the Basic Black CS belly band
- sentiment glued onto the Balmy Blue CS circle, then that glued onto the Basic Black CS circle
- Basic Black CS circle glued onto the front of the belly band
S
Here’s the January 2022 Candy Hearts Blog Hop:
Thank you for hopping with the Candy Hearts today! Be sure to hop around to all the stops. You do not want to miss any of the creativity in this talented group of stampers! If you get lost, use the list below.
s
Here are today’s colors:
You can click on each one to see all the products that come in that color!
S
Here’s what I used:
Click on these images for more details and to purchase. If you are reading this post in email, the product images may not show up. Please click here to see the post on my blog.
Supply List. <— Click for a clickable and printable list of the products!
Here are some helpful links:
S
Thanks for stopping by today, and Sweet Stamping!
Mar 29, 2021 | Cards, Fun Folds, Gallery |
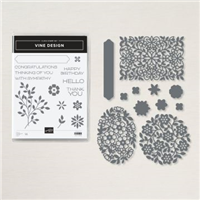
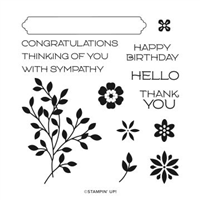
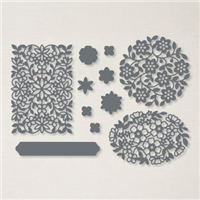
Today I’m sharing the card I made for my March Mystery Stamping Party on Facebook. I used the Vine Design Bundle (Vine Design stamps set and Flowering Vine Dies) along with the Artistry Blooms Designer Series Paper to make this Dutch Door fold card. I CASEd Sharon Armstrong’s card which you can see here.

Join me for my next Mystery Stamping Party! it’s free. I will post what you need to have on hand. Then during the party I will give you clues to complete the mystery project. Post a photo of your project for a change to win a prize drawing. Join the Mystery Stamping Party Facebook group HERE. Be sure to answer the questions to be admitted to the group.
If you are reading this in email, some photos may appear blurry, or may not appear at all. Please click here to see the post on my blog.
S Vine Design Vine Design Vine Design Vine Design
Here’s what I made:


S
Here’s what I did:
Cut and scored with my paper trimmer:
- Old Olive card stock (CS) cut to 4-1/4″ x 9″, then scored at 5-1/2″
- Old Olive CS cut to 8-1/2″ x 2″, then scored at 2-1/8″ and 6-3/8″
- Basic White CS layer cut to 4″ x 3-1/4″
- Basic White CS layers cut to 1-7/8″ x 1-3/4″ (2 pieces)
- Artistry Blooms Designer Series Paper (DSP) layer cut to 3-3/4″ x 3″
- DSP layers cut to 1-5/8″ x 1-1/2″ (2 pieces)
- Basic White CS cut to 1-3/4″ x 1/2″ for the sentiment
- Old Olive CS cut to 2″ x 3/4″
- Basic White CS cut to 4″ x 5-1/4″ for the inside of the card base
Stamped with the Vine Design stamp set:
- sentiment in Magenta madness ink onto the small piece of Basic White CS
- inside sentiment in Old Olive ink onto the 4″ x 5-1/4″ Basic White CS
- leaves in Old Olive ink, stamped off, onto the 4″ x 5-1/4″ Basic White CS
- flowers in Daffodil Delight ink onto the 4″ x 5-1/4″ Basic White CS
Cut using the Flowering Vine Dies:
- scrap of Basic White Thick CS using the oval die
Cut using the Layering Ovals Dies:
scrap of Basic White Thick CS using the largest scalloped oval die
Colored using Stampin Blends Markers:
- vine die cut in Old Olive, Magenta Madness, and Daffodil Delight
- larger pearls in Magenta Madness
- smaller pearls in Daffodil Delight
Assembled the card:
- burnished the folds in both card base pieces with a Bone Folder
- 2″ Old Olive CS base piece glued onto the back of the other base piece, so the 2 ends wrap around to the front
- 4″ x 3-1/4″ Basic White CS layer glued onto the top flap of the card front
- 3-3/4″ x 3″ DSP layer glued onto the Basic White CS layer
- 2 smallest Basic White CS layers glued onto the two side flaps
- 2 smallest DSP layers glued onto the 2 Basic White CS layers
- colored wine die cut glued onto the scalloped oval die cut
- oval centered on the card, then glued only onto the top flap
- sentiment glued onto the smallest Old Olive CS piece
- the Old Olive CS piece adhered onto the card front (oval and top flap) using Stampin’ Dimensionals
- colored pearls applied onto the flowers using my Take Your Pick tool
- 4″ x 5-1/4″ Basic White CS glued onto the inside of the card base

S
Here are today’s main colors:
You can click on each one to see all the products that come in that color!
S
Here’s what I used:
Click on these images for more details and to purchase. If you are reading this post in email, the product images may not show up. Please click here to see the post on my blog.
Supply List. <— Click for a clickable and printable list of the products!
S
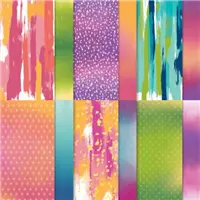
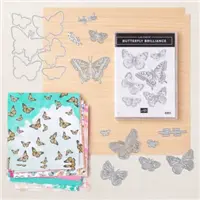
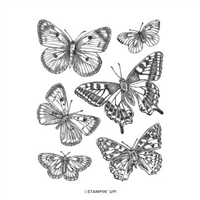
Butterfly Brilliance is here early! Natural Touch for a limited time!
These new products are out of this world gorgeous. The papers are only available through 3 May, or while supplies last, so definitely get them as soon as you can! Click on the images below to see them in my online store. Or CLICK HERE to see the whole collection.
Update: The Butterfly Bijou Designer Series Paper is already sold out. Get the Natural Touch Specialty Paper while you still can!
s
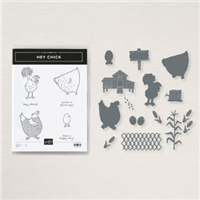
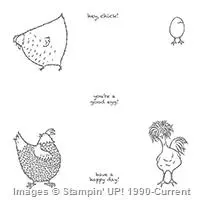
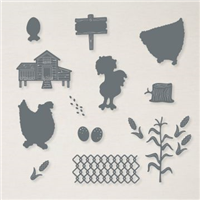
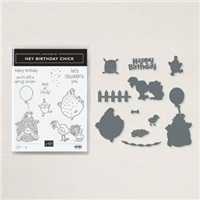
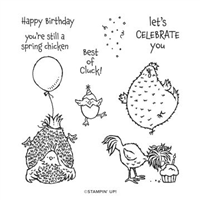
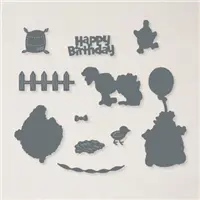
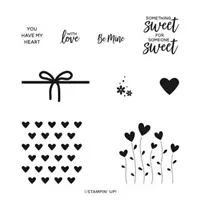
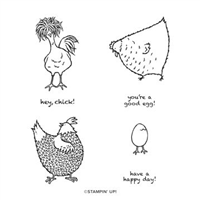
Hey Chick & Hey Birthday Chick!
The Hey Chick stamp set from 2017 Sale-a-bration was so popular, Stampin’ Up! has brought it back. But that’s not all! Now there are coordinating dies. AND there’s a second stamp set, Hey Birthday Chick, that also has coordinating dies. One thing though – they’re available for a limited time, so get them while you can! Click on the images below to see them in my online store. Or CLICK HERE to see them all.
S
Here are some helpful links:
S
Thanks for stopping by today, and Sweet Stamping!
Mar 17, 2021 | Blog Hop, Cards, Fun Folds, Gallery |

Welcome to the March 2021 IRBH – InKing Royalty Blog Hop! This month’s theme is Flowers & Fauna. For my project, I used the new Butterfly Brilliance collection for the fauna (butterflies) and the Ornate Floral 3D Embossing Folder for the Flowers, to make a W-fold card. After reading my post, be sure to hop to the next stop, Rachel Brumley at Artistic Designs by Rachel. Scroll down to see the full hop list if you get lost.
If you are reading this in email, some photos may appear blurry, or may not appear at all. Please click here to see the post on my blog.
S March 2021 IRBH March 2021 IRBH March 2021 IRBH March 2021 IRBH
Here’s what I made:
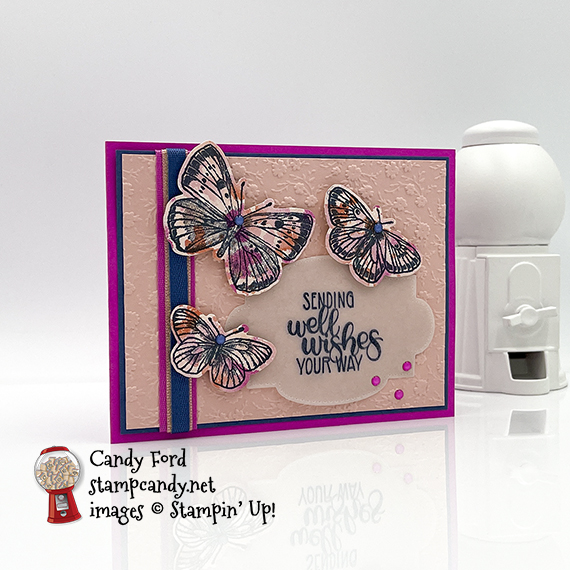

The butterflies are adhered with Stampin’ Dimensionals so they look like they’re flying right off the card.
The embossing shows up better in this photo.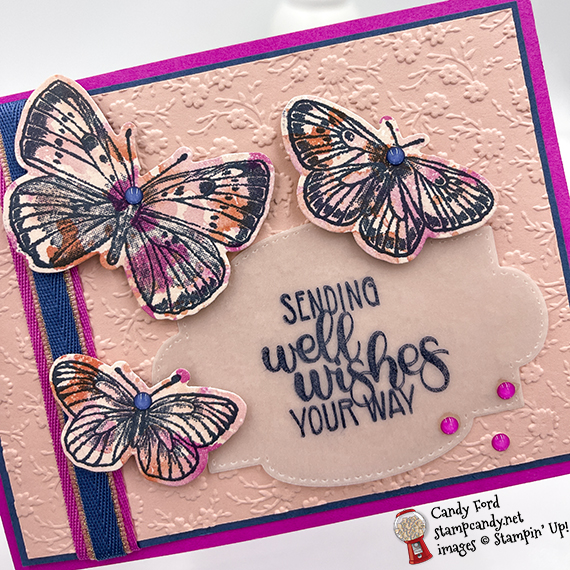
S
Here’s what I did:
Cut and scored with my paper trimmer:
- Magenta Madness card stock (CS) cut to 11″ x 4-1/4″ , then scored in half at 5-1/2″
- Magenta Madness CS cut to 11″ x 1-1/2″, and scored at 2-3/4″, 5-1/2″, and 8-1/4″
- Misty Moonlight CS layer cut to 5-1/4″ x 4″
- Blushing Bride CS layer cut to 5-1/8″ x 3-7/8″
- Basic White CS cut to 5-1/4″ x 4″ for the inside of the card base
Stamped with the Butterfly Brilliance stamp set:
- butterflies in Misty Moonlight ink onto a piece of the Butterfly Bijou Designer Series Paper (DSP)
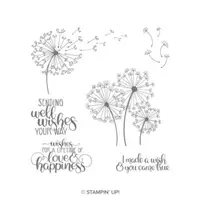
Stamped with the Dandelion Wishes stamp set:
- sentiment in Night of Navy ink onto a scrap of Vellum
- NOTE: I used the Stamparatus so the stamp wouldn’t slide around on the Vellum. I allowed the ink to dry completely before handling any more.
Cut using the Brilliant Wings Dies:
- the butterflies using the largest die that cuts out all 6 at once
Cut using the Stitched So Sweetly Dies:
Embossed using the Ornate Floral 3D Embossing Folder:
Assembled the card:
- burnished the fold in the card base, and the folds in the long CS strip, with a Bone Folder
- Blushing Bride CS layer glued onto the Misty Moonlight CS layer
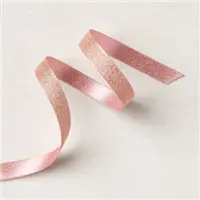
- 2 pieces of Magenta Madness ribbon adhered side by side onto the top of the Blushing Bride CS layer, and wrapped around to the back of the Misty Moonlight CS layer, using Tear & Tape
- Blushing Bride ribbon adhered over the Magenta Madness ribbon using Tear & Tape
- Misty Moonlight ribbon adhered over the Blushing Bride ribbon using Tear & Tape
- Misty Moonlight CS layer glued onto the front of the card base
- sentiment laid in place on the Blushing Bride CS layer
- 3 smallest butterflies adhered onto the Blushing Bride CS layer using Stampin’ Dimensionals, overlapping the edges of the sentiment to hold it in place
- 3 Magenta Madness enamel dots applied onto the lower right of the sentiment using my Take Your Pick tool
- Mini Glue Dots placed on the underside of the vellum, under the enamel dots so they won’t show
- 1 Misty Moonlight enamel dot applied onto each butterfly head, using my Take Your Pick tool
- Basic White CS glued onto the inside of the card base
- the 2 end sections of the Magenta Madness CS strip glued onto the inside of the card base, just a hair away from the edges, as shown below
- 3 largest butterflies glued onto the CS strip at varying heights

S
Here’s the March 2021 IRBH:
Thank you for hopping along with us. If you get stuck during the Blog Hop, please use this line-up as a guide:
- Brian King at Stamp with Brian
- Candy Ford at Stamp Candy <——- YOU ARE HERE!
- Rachel Brumley at Artistic Designs by Rachel
- Sheryl Sharp at Sharp Notes by Sheryl
- Jackie Beers at Blue Line Stamping
- Renae Novak at Blessed by Cards
- Joanne Brown at The Inky Dragon
- Julie DiMatteo at The Paper Pixie
- Sue Jackson at Just Peachy Stamping
- Lynn Kolcun at Avery’s Owlery
- Pam Morris at Tap Tap Stamp
- Linda Krueger at The Stamp Coach
s
Here are today’s main colors:
You can click on each one to see all the products that come in that color!
S
Here’s what I used:
Click on these images for more details and to purchase. If you are reading this post in email, the product images may not show up. Please click here to see the post on my blog.
Supply List. <— Click for a clickable and printable list of the products!
S
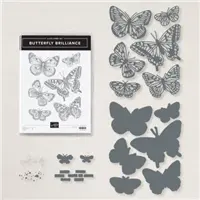
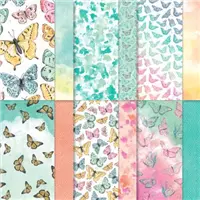
Butterfly Brilliance is here for a limited time!
These new products are out of this world gorgeous. And they’re only available for a couple months, so definitely get them as soon as you can in case they sell out! Click on the images below to see them in my online store. Or CLICK HERE to see them all.
s
Hey Chick & Hey Birthday Chick!
The Hey Chick stamp set from 2017 Sale-a-bration was so popular, Stampin’ Up! has brought it back. But that’s not all! Now there are coordinating dies. AND there’s a second stamp set, Hey Birthday Chick, that also has coordinating dies. One thing though – they’re available for a limited time, so get them while you can! Click on the images below to see them in my online store. Or CLICK HERE to see them all.
S
Here are some helpful links:
S
Thanks for stopping by today, and Sweet Stamping!
Feb 9, 2021 | Blog Hop, Cards, Fun Folds, Gallery, Sale-A-Bration |

Welcome to the February 2021 ICS Blog Hop! This month we are featuring projects made with products from the Sale-a-bration brochure. I used the Oh So Ombre Designer Series Paper, which you can get free with a $50 order, but only through 28 February!
Click the NEXT button farther down this post to hop to the next stop. Be sure to hop all the way around to see all the great projects from this group!
If you are reading this in email, some photos may appear blurry, or may not appear at all. Please click here to see the post on my blog.
S February 2021 ICS Blog Hop February 2021 ICS Blog Hop February 2021 ICS Blog Hop February 2021 ICS Blog Hop
Here’s what I made:


S
Here’s what I did:
Cut and scored with my paper trimmer:
- Misty Moonlight card stock (CS) cut to 5-1/2″ x 8-1/2″, then scored in half at 4-1/4″
- Misty Moonlight CS layer cut to 5″ x 3-3/4″
- Oh So Ombre Designer Series Paper (DSP) layer cut to 1-1/4″ x 3-3/4″ (4 pieces)
- Misty Moonlight CS strip cut to 3″ x 1/2″
- Granny Apple Green strip cut to 2-3/4″ x 1/2″
- Basic White CS cut to 5″ x 3-3/4″ for the inside of the card base
Stamped with the Valentine Keepsake stamp set:
- sentiment in Misty Moonlight ink onto a scrap of Basic White CS
- heart flowers in Granny Apple Green ink onto the Basic White CS for the inside
- tiny hearts in Misty Moonlight ink onto the 4 DSP pieces
Cut using the Layering Circle Dies:
- sentiment
- one size larger circle from a scrap of Blackberry Bliss CS
Cut using Paper Snips:
- one end of each CS strip at an angle
Assembled the card:
- burnished the fold in the card base with a Bone Folder
- DSP pieces glued onto the Misty Moonlight CS layer (you can trim away any ugly edges)
- Misty Moonlight CS layer glued onto the front of the card base
- Misty Moonlight CS strip glued onto the DSP layer
- Granny Apple Green CS strip glued over the Misty Moonlight CS strip
- sentiment glued onto the Blackberry Bliss CS circle
- Blackberry Bliss circle glued over the ends of the CS strips
- Basic White CS glued onto the inside of the card baseS
S
Here’s the February 2021 ICS Blog Hop:
Click the Next button to hop to the next stop, Sharon Hashimoto Burkert of As the Ink Dries:

S
Here are today’s main colors:
You can click on each one to see all the products that come in that color!
S
Here’s what I used:
Click on these images for more details and to purchase. If you are reading this post in email, the product images may not show up. Please click here to see the post on my blog.
Supply List. <— Click for a clickable and printable list of the products!
S
Sale-a-bration ends 28 February
Don’t miss out on all these FREE products! See them all here. You can choose one free Level 1 item for every $50 on an order. You can choose one free Level 2 item for every $100 on an order. The Punch Party host stamp set is included free with any $300 order, in addition to the Level 1 & Level 2 items you earn.
When you join my team during Sale-a-bration, you will pay $99 (plus tax) and you will receive $125 in your choice of product, free shipping, AND 5 packs of Designer Series Paper that no one else can get until May! Get all the details here.
S
Hey Chick is here!
The Hey Chick stamp set from 2017 Sale-a-bration was so popular, Stampin’ Up! has brought it back. But that’s not all! Now there are coordinating dies. AND there’s a second stamp set, Hey Birthday Chick, that also has coordinating dies. CLICK HERE to see them all, or click on the images below to see them one at a time.
One thing though – they’re only available for a limited time, so get them while you can!
S
Basic White is here!
The facility that manufactures Whisper White paper is closed due to COVID-19. But don’t fret. The new Basic White products are here!
S
Here are some helpful links:
S
Thanks for stopping by today, and Sweet Stamping!